❌

Normal view

There are new articles available, click to refresh the page.
Before yesterdayMain stream

GAMEMAX Vista 2 AB Review – Stylish Airflow Focused Gaming Case

By: Bahleem
13 May 2026 at 10:40

GAMEMAX Vista 2 AB is the latest gaming case from GAMEMAX. The company has improved a lot over the years. One thing that makes this review special for me is that the GAMEMAX Vista COC was one of the first PC cases I ever reviewed. Since then, I have reviewed many GAMEMAX products, including cases, coolers, and power supplies. It has been nice to see the brand slowly improve its designs and overall quality with time.

The Vista 2 AB follows the modern fish-tank style design that many PC builders like today. It comes with large 270-degree tempered glass panels that give a clear view of the hardware inside. The case also includes three pre-installed ARGB PWM fans, which is good to see at this price range. GAMEMAX has also focused on airflow and cable management to make the Vista 2 case look cleaner and perform better.

On paper, the Vista 2 AB looks promising for gamers and PC builders who want both good looks and cooling support. In this review, I will take a closer look at its design, airflow, cooling support, and overall user experience.

Unboxing

The GAMEMAX Vista 2 AB comes inside a large brown cardboard box. Both the front and back sides of the box have a simple printed design showing the case along with the GAMEMAX branding and model name. The packaging looks clean and simple.

Inside the box, the Vista 2 case was packed safely between thick foam blocks from both sides. The case was also wrapped in a plastic cover to protect it during shipping. Even with the large tempered glass panels, the case arrived safely without any damage or cracks during delivery.

GAMEMAX VIista 2 AB 1
GAMEMAX VIista 2 AB 2
GAMEMAX VIista 2 AB 3

GAMEMAX also includes all the important accessories needed for installation. Inside the accessory pack, you get:

  • 15x motherboard screws
  • 6x PSU mounting screws
  • 8x 3.5-inch HDD mounting screws
  • 4x 2.5-inch SSD mounting screws
  • 4x SSD rubber pads
  • 2x motherboard standoffs
  • 12x fan screws
  • 5x cable ties
  • 1x ARGB remote controller
GAMEMAX VIista 2 AB 5

The included remote controller can be used to change RGB lighting effects, colours, and brightness easily. Overall, GAMEMAX provides enough accessories for a complete PC build experience right out of the box.

GAMEMAX Vista 2 specifications

SpecificationDetails
ModelGAMEMAX Vista 2 AB
Form FactorMidi Tower
Chassis MaterialSPCC 0.6mm
PSU SupportBottom Mounted / ATX
Motherboard SupportE-ATX, ATX, M-ATX, ITX
Front PanelTempered Glass + Mesh
Top PanelMetal Cover
Left Side PanelTempered Glass
Right Side PanelMetal Cover
External Drive Bays0x 5.25-inch, 0x 3.5-inch
Internal Drive Bays2x 3.5-inch HDD, 2x 2.5-inch SSD
Storage Configuration2x HDD + 1x SSD or 1x HDD + 2x SSD
ButtonsPower Button, LED Switch
USB 2.0 Ports0
USB 3.2 Type-A Ports2x USB 3.2 Gen1
USB Type-C Port1x USB 3.2 Gen2
Audio Port1x Combo Audio Jack
RGB ControllerV5.0 PWM ARGB HUB
Maximum Fan Support on ControllerUp to 6 Fans
Maximum LED Strip SupportUp to 6 LED Strips
Remote Controller1x Included
Top Fan Support3x120mm or 2x140mm
Rear Fan Support1x120mm Tornado T12 ARGB
Motherboard Side Fan Support2x120mm Tornado T12 ARGB-R
PSU Shroud Fan Support3x120mm
Top Radiator Support120mm / 140mm / 240mm / 280mm / 360mm
Rear Radiator Support120mm
Dust FiltersTop and Bottom Dust Mesh
Expansion Slots7
VGA ClearanceUp to 410mm
CPU Cooler ClearanceUp to 165mm
PSU Length SupportUp to 265mm
Cable Management Space25mm
Vertical GPU SupportNo
Chassis Dimensions415 Γ— 210 Γ— 470mm
Full Case Dimensions433 Γ— 210 Γ— 485mm
Carton Dimensions552 Γ— 282 Γ— 496mm
Net Weight7.0kg
Gross Weight8.3kg

A closer look – Exterior

The GAMEMAX Vista 2 AB is available in two colour options, including black and white. The model I received is the black version. The case follows the modern fish-tank style design with dual tempered glass panels that give it a clean and premium look.

In terms of size, the case measures 433 Γ— 210 Γ— 485mm with the full chassis. It weighs around 7kg, which feels reasonable for a tempered glass ATX case. The overall size is large enough to support high-end hardware while still keeping a clean layout.

Starting from the left side, the Vista 2 case comes with a removable tempered glass side panel. This gives a clear view of the hardware inside and helps showcase RGB lighting nicely. At the bottom section, GAMEMAX has added a large mesh area for airflow. The front I/O panel is also placed here, which is a bit different compared to many traditional cases.

GAMEMAX VIista 2 AB 9
GAMEMAX VIista 2 AB 10

For connectivity, the front I/O includes:

  • 1x USB 3.2 Gen 2 Type-C
  • 2x USB 3.2 Gen 1 Type-A ports
  • 1x Combo audio jack
  • LED switch button
  • Power button

The buttons feel decent during use, and having a Type-C port is a nice addition for modern devices.

GAMEMAX VIista 2 AB 13

Moving towards the front side, the Vista 2 case keeps the same clean design language. The large tempered glass panel continues here as well, giving the case its panoramic look. Unlike the side panel, the front glass panel is not removable. The lower section again uses a mesh design for airflow, while the GAMEMAX logo is placed neatly at the bottom-right corner. Overall, the front design looks simple, modern, and clean without unnecessary styling.

GAMEMAX VIista 2 AB 6
GAMEMAX VIista 2 AB 7

Moving to the top side, the GAMEMAX Vista 2 AB comes with a large mesh ventilation area. The design looks clean and simple. The mesh layout helps hot air escape easily from the case.

GAMEMAX has also added a magnetic dust filter on the top. The filter can be removed easily for cleaning. This is useful for reducing dust inside the system over time.

After removing the filter, you can see the large ventilation openings underneath. The top section supports up to 3x120mm fans or 2x140mm fans. Users can also install radiators up to 360mm here. This gives good cooling support for high-end air coolers and AIO liquid coolers.

GAMEMAX VIista 2 AB 12
GAMEMAX VIista 2 AB 14

On the right side, the GAMEMAX Vista 2 AB comes with a removable metal side panel. The panel has a clean and simple look with a matte black finish.

GAMEMAX has also added a large ventilation mesh grille on this side. This mesh area is placed exactly where the motherboard-side fans are mounted inside the case. It helps fresh air enter directly towards the fans for better airflow and cooling performance.

GAMEMAX VIista 2 AB 30

At the rear side, the GAMEMAX Vista 2 AB comes with a standard layout. A pre-installed 120mm ARGB fan is already mounted at the back for exhaust airflow. The case supports up to seven PCIe expansion slots for graphics cards and other expansion devices.

The power supply mounts at the bottom of the case. GAMEMAX has also added a ventilated PSU area with a mesh design to improve airflow for the power supply. The rear section overall looks clean and simple.

GAMEMAX VIista 2 AB 29
GAMEMAX VIista 2 AB 28

Moving to the bottom side, the Vista 2 case comes with four large plastic feet. These feet lift the case slightly above the surface to improve airflow from underneath. GAMEMAX has also included a removable dust filter at the bottom for the PSU intake area. The filter can be removed easily for cleaning.

GAMEMAX VIista 2 AB 15
GAMEMAX VIista 2 AB 16
GAMEMAX VIista 2 AB 17

There are also dedicated mounting points for storage drives at the bottom section.

Interior

The left side tempered glass panel can be removed easily. GAMEMAX uses two thumb screws at the rear side. After removing them, the panel simply slides towards the back and comes off easily. This makes installation and cleaning much easier.

Looking inside, the GAMEMAX Vista 2 AB has a modern dual-chamber style layout. The interior space feels quite good for a mid-tower case. There is enough room for large hardware and clean cable management.

GAMEMAX VIista 2 AB 19
GAMEMAX VIista 2 AB 20

Starting with the motherboard tray, the case supports E-ATX, ATX, M-ATX, and ITX motherboards. The layout feels open and clean. GAMEMAX has also added multiple cable cutouts around the motherboard tray, making cable routing easier during installation.

GAMEMAX VIista 2 AB 22

On the side of the motherboard tray, the case comes with two pre-installed reverse Tornado fans. These fans work as intake fans and pull fresh air directly inside the case. At the rear, there is one standard Tornado exhaust fan pre-installed for hot air exhaust. In total, GAMEMAX provides three fans out of the box.

GAMEMAX VIista 2 AB 21
GAMEMAX VIista 2 AB 23

For cooling support, the case offers:

Radiator Support

  • Top: 120mm / 140mm / 240mm / 280mm / 360mm
  • Rear: 120mm

Fan Support

  • Top: 3x120mm or 2x140mm
  • Rear: 1x120mm (pre-installed)
  • Motherboard Side: 2x120mm (pre-installed)
  • PSU Shroud: 3x120mm

The top section has plenty of room for large liquid coolers. Users planning high-end gaming builds will appreciate the cooling flexibility here.

GAMEMAX VIista 2 AB 25
GAMEMAX VIista 2 AB 26

The case also comes with seven PCIe expansion slots and supports graphics cards up to 410mm in length. CPU air coolers up to 165mm in height are also supported.

GAMEMAX VIista 2 AB 27

Moving to the right side, the metal panel opens the same way as the tempered glass panel. Two rear thumb screws hold the panel in place, and after removing them, the panel slides towards the back and comes off easily.

Behind the motherboard tray, GAMEMAX includes three cable straps with GAMEMAX branding and logo. These straps are very useful for cable management and help keep the build looking cleaner.

GAMEMAX VIista 2 AB 31
GAMEMAX VIista 2 AB 32
GAMEMAX VIista 2 AB 37

The Vista 2 case also includes the GAMEMAX ARGB and fan control hub. This is similar to the hub seen previously in the GAMEMAX Leader 2, although that model used a white version. The hub is useful for controlling fan speed and ARGB lighting without extra accessories.

GAMEMAX VIista 2 AB 33

For front I/O connectivity, the cables include:

  • USB 3.2 Gen 2 Type-C connector
  • USB 3.2 Gen 1 Type-A connector
  • HD Audio connector
  • Front panel connectors
GAMEMAX VIista 2 AB 39
GAMEMAX VIista 2 AB 40

For storage support, the case supports:

  • 2x 3.5-inch HDDs
  • 2x 2.5-inch SSDs

Users can also mount 2.5-inch SSDs behind the motherboard tray. This helps keep the main chamber cleaner and improves cable management.

GAMEMAX VIista 2 AB 35
GAMEMAX VIista 2 AB 36

For the power supply, the case supports ATX PSUs up to 265mm in length. The PSU chamber has enough space for cable routing and larger power supplies without feeling too cramped.

Test build

For the test build, I assembled my main PC inside the GAMEMAX Vista 2 AB. The overall building experience was smooth and mostly hassle free.

I used the MSI MPG Z790 Carbon Max WiFi motherboard, which is a full ATX board. For the processor, I installed the Intel Core i7-12700K. Even with a full ATX motherboard, the interior still felt spacious enough to work comfortably.

GAMEMAX VIista 2 AB 42

The bottom motherboard connections and cables remained easily accessible during the build process. I only faced a little difficulty while connecting the front USB 3.0 header because of its thick connector, but it was not a major issue.

For cooling, I installed a 360mm TCOMAS LX800 Pro liquid cooler at the top. Even after mounting the large radiator and fans, there was still enough clearance between the motherboard and the cooler. I was still able to route cables and access the top motherboard connectors without trouble. This is something many mid-tower cases struggle with, but the spacing here is handled quite well.

GAMEMAX VIista 2 AB 44

For graphics, I installed the Colorful RTX 5070 Battle AX variant. This is a triple-fan graphics card, and the case handled it easily without any clearance issues. There was still enough room left in front of the GPU, which is good for airflow as well.

The power supply used in this build was the GAMEMAX 850W Smart RGB Pro. Since the PSU shroud uses a large mesh design, the power supply remains partially visible from inside the Vista 2 case. This also gives a better idea of how open the bottom airflow section actually is.

GAMEMAX VIista 2 AB 45

At the time of building, I did not have black RAM available. These days it is honestly difficult to get matching RAM kits quickly, so the build could not be colour matched completely. Still, the overall look inside the case remained clean and modern.

Overall, the building experience was smooth and straightforward. The Vista 2 case offers good cable routing space, solid component clearance, and enough room for high-end hardware without making the installation process difficult. Below are the complete build pictures of the final setup inside the case.

GAMEMAX VIista 2 AB 48
GAMEMAX Vista 2 AB build look
GAMEMAX VIista 2 AB 53
GAMEMAX VIista 2 AB 54
GAMEMAX VIista 2 AB 55
GAMEMAX VIista 2 AB 57
GAMEMAX VIista 2 AB 58
GAMEMAX VIista 2 AB 67

GAMEMAX Vista 2 Final thoughts

So, after spending time building and testing inside the GAMEMAX Vista 2 AB, I can easily say this case delivers a very solid overall experience for a modern airflow-focused mid-tower chassis. The case combines a clean dual-chamber style layout with strong airflow support and a spacious interior design that feels practical during the actual building process.

The first thing that stands out is the overall appearance. The large tempered glass side panel gives the case a clean showcase look, while the mesh-focused design across the top, bottom, rear, and motherboard side helps maintain proper airflow throughout the chassis. The top panel comes with a removable magnetic dust filter, making cleaning simple and quick. Both the tempered glass panel and the right-side metal panel use a rear thumb screw and sliding mechanism, so removing the panels is easy and does not feel frustrating during installation.

Inside the case, the layout feels modern and well planned. The motherboard tray supports Mini-ITX, Micro-ATX, ATX, and E-ATX motherboards, while still leaving enough working room around the components. During the test build, the Vista 2 case handled a full ATX motherboard, 360mm liquid cooler, triple-fan RTX 5070 graphics card, and an 850W power supply without major clearance problems.

Cooling support is one of the strongest parts of this case. GAMEMAX already includes two reverse Tornado intake fans mounted beside the motherboard tray and one standard rear exhaust fan. The airflow direction inside the case feels properly balanced right out of the box. On top of that, the case supports up to a 360mm radiator at the top, additional fan mounting positions around the PSU chamber, and extra cooling support across multiple sections of the chassis.

The cable management experience is also surprisingly good for this price category. Multiple cable routing cutouts are placed around the motherboard tray, making cable passing much easier during installation. On the rear side, GAMEMAX provides labelled cable straps with branding, helping keep the wiring cleaner and more organised. The included ARGB and fan controller hub is another useful addition and reduces the need for extra splitters or external hubs during the build process.

Storage support is practical as well. Users can mount SSDs behind the motherboard tray, while additional drive support is available in the rear compartment. The PSU chamber also offers decent working space for cable handling and power supply installation.

Speaking about the actual building experience, it remained smooth overall. Even after installing a 360mm cooler at the top, there was still enough clearance left around the motherboard to access top connectors and pass cables comfortably. The only slightly tight area during installation was the USB 3.0 front panel connector, but it was not a serious issue.

Overall, the GAMEMAX Vista 2 AB feels like a well-balanced mid-tower case that focuses heavily on airflow, modern hardware compatibility, and user-friendly installation. It offers strong cooling support, clean aesthetics, spacious internals, and practical cable management features without making the building process difficult. For users planning a modern gaming setup with powerful hardware, this Vista 2 case does a very good job.

Because of its strong airflow design, spacious interior, included ARGB fans, and overall clean aesthetics, I would also like to give the GAMEMAX Vista 2 AB both the Value Award and Design Award.
EnosTech Value Award
Enos Tech Design Award

GAMEMAX GX PRO 1050G Fully Modular Power Supply Overview

By: Bahleem
7 May 2026 at 10:07

When building a PC, most people focus on the CPU and GPU. The power supply is often ignored. That is not the right approach. A PSU runs the whole system. If it is not stable, it can cause crashes or even damage other parts. You cannot just pick any unit and trust it with expensive hardware. It needs to deliver steady power and also protect the system.

The GX PRO 1050G is part of the GX Pro series. It comes with a 10-year warranty. This shows some confidence from the brand, but real performance matters more than promises.

On paper, the features are what you expect from a modern PSU. It has an 80 Plus Gold rating and is designed for good efficiency during normal use. It uses an APFC + LLC + DC-DC design for stable power. Inside, it has Japanese 105Β°C capacitors, which are made for longer life.

GX PRO 1050G also supports ATX 3.1 and PCIe 5.1. You get a native 12V-2Γ—6 cable for newer GPUs, so no need for adapters. Cooling is handled by a 135mm FDB fan that adjusts speed based on temperature. The design is fully modular, so you only connect the cables you need. It also includes multiple protection features for safety.

All of this looks fine on paper. The real question is how it performs in daily use, which is what matters in the end.

GAMEMAX GX PRO 1050G Unboxing

The GX PRO 1050G comes in a simple and clean box. The front shows the PSU image with key details like 1050W and 80 Plus Gold. You also see ATX 3.1 and PCIe 5.1 badges. The white and green colour mix is visible and looks neat.

The back side gives more details. It shows full specs, power table, and connector info. There are small diagrams for size and cable layout. Everything is easy to read and not confusing.

The box quality is decent. It feels strong enough for normal shipping. It is not very thick, but it does not feel cheap. It protects the PSU properly.

GX PRO 1050G
GX PRO 1050G

Opening the box is straightforward. You first see a clean inner cover with a simple print. It gives a nice first look. After removing it, the contents are neatly arranged.

The GX PRO 1050G PSU is placed inside thick foam. It also comes wrapped in plastic for extra safety. It feels secure and well protected. Nothing moves inside the box.

You also get a cable pouch. It holds all the modular cables in one place. This keeps things clean and easy to manage. Along with that, there is a user manual. It is simple and easy to understand.

Overall, the unboxing experience is clean and organised. You get the PSU, modular cables in a pouch, and the manual. Everything is packed properly and easy to take out.

GAMEMAX GX Pro 1050W PSU 10
GAMEMAX GX Pro 1050W PSU 11
GAMEMAX GX Pro 1050W PSU 13
GAMEMAX GX Pro 1050W PSU 12

GAMEMAX GX PRO 1050G Specifications

SpecificationDetails
ModelGAMEMAX GX PRO 1050G
Dimensions160mm x 85mm x 150mm
Input Voltage110–240 VAC
Input Current15–8A
Input Frequency50–60Hz
PFCActive PFC (>0.99)
Power Good Signal100–150 ms
Hold Up Time>10 ms
Efficiency>87% (up to 92%)
MTBF>100,000 hours
ProtectionOPP / OVP / UVP / OCP / SCP / OTP / NLP / SIP / OLP / NLO
Cooling135mm ultra silent fan
Noise<25 dBA
Operating Temperature0–40Β°C
SafetyCE / FCC / CB / ROHS / TUV / cTUVus
80 Plus Rating80 Plus Gold
Power Output1050W

A closer look

The GAMEMAX GX PRO 1050G is part of GameMax’s new GX PRO series. This lineup includes 750W, 850W, 1050W (this unit), 1250W, and 1600W models. You also get two colour options, black and white. So you can match it with your PC build easily.

GAMEMAX GX Pro 1050W PSU 32

Starting with the top, you get a large fan grill. The design is not basic. It has angled cutouts with a pattern that looks modern. The fan underneath is clearly visible. The centre has the GameMax logo, which keeps the look clean.

GAMEMAX GX Pro 1050W PSU 14 edited scaled

On the side, there is a printed design with a shiny effect. It reflects light and gives a slightly premium feel. One side has more design, while the other side is simpler. This helps depending on how you install it in your case.

GAMEMAX GX Pro 1050W PSU 15
GAMEMAX GX Pro 1050W PSU 16

The front side has the modular ports. Everything is clearly labelled. You get motherboard, CPU, PCIe, SATA, and the new 12V-2Γ—6 connector. It uses a fully modular design, so you only connect the cables you need. This helps keep the build clean. It also supports dual CPUs or multiple GPU connectors for high-end systems. The flat embossed cables further improve cable management and make the setup look neat. The layout is simple and easy to understand, and the ports feel tight and well made, not loose.

GAMEMAX GX Pro 1050W PSU 36

This side is very simple. Most of it is plain white with a smooth finish. There is no texture or design here. It looks clean but also basic. A large sticker is placed on one side. It has a green strip with the model name β€œGX PRO 1050G WH.” The rest of the label shows power details, certifications, and the 80 Plus Gold badge. The layout is clear, but the green colour stands out. In a white build, this may not match perfectly. If this side is visible, the sticker draws attention. If you flip it, you mostly see a clean white panel.

GAMEMAX GX Pro 1050W PSU 18
GAMEMAX GX Pro 1050W PSU 19

At the back, you get a full mesh grill. This helps with airflow. There is a power switch and standard power input. The honeycomb cutouts are common, but they do the job well.

GAMEMAX GX Pro 1050W PSU 37

Build quality feels solid. The metal body does not feel thin. Edges are clean, and paint finish is smooth. It does not feel like a cheap unit. The design is simple but modern, and the quality is good for this range.

Cables

GAMEMAX GX PRO 1050G comes with a fully modular cable setup. All cables are separate, so you only use what you need. During testing, this made the build cleaner and easier to manage.

  • 1 Γ— 24(20+4)-pin motherboard cable
  • 2 Γ— 8(4+4)-pin CPU cables
  • 4 Γ— PCIe 6+2-pin connectors
  • 1 Γ— 12V-2Γ—6 (16-pin) GPU cable (600W)
  • 10 Γ— SATA connectors (across 3 cables)
  • 3 Γ— Molex connectors
  • 1 Γ— FDD connector
GAMEMAX GX Pro 1050W PSU 38

The cable lengths are practical. The 24-pin and 12V-2Γ—6 cables are around 650mm, and they reached easily without pulling tight. CPU cables are longer at about 700mm, which helped when routing from the top of the case. PCIe cables are about 550mm, with a short split for dual connectors. SATA cables are around 500mm with good spacing between connectors, so connecting multiple drives was simple.

All cables are flat and embossed. They bend easily and stay in place, which helped during cable management. In use, they did not feel stiff or hard to route. The white colour is consistent across all cables and connectors, so the build looks clean. Connectors fit properly. No loose feeling when plugging in. Labels like β€œMB” and β€œ600W” are clear, which helps avoid mistakes.

GAMEMAX GX Pro 1050W PSU 41
GAMEMAX GX Pro 1050W PSU 40

These are not premium sleeved cables, but they are practical. They do the job without making cable routing difficult.

GAMEAX GX PRO 1050G Performance overview

GAMEMAX GX PRO 1050G comes with an 80 Plus Gold rating, and in actual use it behaves as expected. During daily work and gaming, the PSU did not run noticeably hot, even after long sessions. Power draw felt consistent, and there were no signs of instability under load.

The 135mm FDB fan is tuned more for balance than silence at all costs. At idle and light use, it stays very quiet. While gaming or stressing the system, the fan does ramp up, but the noise remains controlled and not distracting. It never reached a point where it stood out over other system components.

Protection features are extensive on paper, and in my case, they were actually tested. I experienced a few power outages while using this setup. The system shut down safely, and there were no issues when powering back on. No crashes, no hardware problems, and no unusual behaviour afterwards. That suggests the protection design is doing its job properly.

GAMEMAX GX PRO 1050G is ATX 3.1 ready and includes a native 12V-2Γ—6 connector. I used this with an RTX 5070, and the connection was straightforward. There was no need for adapters, and the cable stayed firmly in place. During gaming, even under heavy GPU load, there were no sudden drops or power-related issues.

Internally, it uses high-temperature rated Japanese capacitors. While this is not something you directly β€œsee” in use, the overall stability of the system, especially during long gaming sessions, reflects a solid internal design. I paired it with an i7-12700K, and the system remained stable throughout extended use.

GAMEMAX GX Pro 1050G PSU 2
GAMEMAX GX Pro 1050G PSU 1

From a practical standpoint, the flat white cables made installation easier. Routing them through the case required less effort compared to thick sleeved cables. Combined with RGB Strimer cables from GameMax, the final build looked clean and organised without extra work.

I regularly play for long hours, and across multiple sessions, there were no interruptions, no shutdowns, and no power-related concerns. The PSU stayed consistent in the background, which is exactly what you want.

In short, it delivers stable performance, handles real-world power conditions well, and avoids common issues seen in lower-quality units. It does not try to stand out with unnecessary features, but it covers the fundamentals properly and proves it during actual use.

Final thoughts

GAMEMAX GX PRO 1050G PSU is not trying to stand out. It just focuses on doing the basics right.

It has an 80 Plus Gold rating, and in use it performs as expected. During daily work and gaming, it stayed stable. I did not face random shutdowns or power drops. Heat was also under control, even after longer sessions.

The 135mm fan is quiet most of the time. At low load, you barely notice it. Under heavy use, it does spin faster, but the noise is still manageable. It does not stay silent, but it also does not become distracting.

Protection features were actually useful in my case. There were a few power cuts during testing. The system shut down safely, and everything powered back on without issues. No crashes or strange behaviour after that.

Support for newer hardware is there. The native 12V-2Γ—6 cable makes things easier. I used it with an RTX 5070, and it worked without any problem. The connection felt secure and stable during gaming.

Internally, it uses Japanese capacitors. You cannot directly see that, but the system remained stable during long sessions with an i7-12700K. No instability showed up during testing.

It comes with a 10-year warranty. That is good to have, especially for a PSU, but real long-term performance will only be clear after extended use.

I have used the Gamemax RGB Smart 850W before this. That unit was more basic. This one is clearly better in build and overall stability. Gamemax has improved, but that does not mean everything is perfect. It just means they are taking the product category more seriously now.

For now, this is still early use. I plan to build a new system with a Core Ultra 7 processor, and possibly an RTX 5080. That will push this PSU more. I will update this after using it in that setup.

Right now, the GX PRO 1050G does its job without issues. Nothing stands out in a big way, but nothing feels problematic either. That is exactly what a PSU should be.

EnosTech Recommended Award

GAMEMAX Sigma 620 WH review: Air cooler with LCD screen and strong cooling

By: Bahleem
6 April 2026 at 12:48

GAMEMAX SIGMA 620 WH is designed for users who want both strong cooling and a unique visual touch in their PC build. For a long time, I have personally preferred air cooling because it is simple, reliable, and requires very little maintenance. But in recent years, many liquid coolers have become more attractive because they include small displays that show system information or custom images. Now, GAMEMAX has brought this idea to air cooling with the SIGMA 620 WH, which makes it stand out from many traditional tower coolers.

What makes this cooler interesting is the 2.8-inch customizable LCD screen placed on the top. It can show real-time system information or even display custom images and videos, which adds personality to the setup. At the same time, it still focuses on strong cooling performance with six 6 mm heatpipes, dual 120 mm fans, and support for CPUs up to 245W TDP. This combination allows it to handle powerful processors while also improving the overall look of the PC build.

Unboxing

The SIGMA 620 comes in a clean white box with a simple design. On the front, there is a large image of the cooler. It shows the single tower heatsink, white fans, and the LCD screen on top. The GAMEMAX logo is on the left, while the product name SIGMA 620 is printed on the right. A few icons at the bottom highlight features like PWM support, LCD display, ARGB lighting, and 245W TDP support.

The back of the box shows the main features of the cooler. It explains the 2.8-inch customizable LCD screen, dual-fan single-tower design, and six heatpipes. Small images also show the cooler and its parts.

GAMEMAX SIGMA 620 CPU Air Cooler 1
GAMEMAX SIGMA 620 CPU Air Cooler 6 1

One side of the box lists the full specifications, including dimensions, fan speed, airflow, noise level, and CPU compatibility. The other side is simple and shows product information in multiple languages along with the official website.

GAMEMAX SIGMA 620 CPU Air Cooler 3 1
GAMEMAX SIGMA 620 CPU Air Cooler 5

After opening the box, the first thing you see is the user guide placed on top. Under it, the cooler and accessories are packed safely inside a thick foam container. The mounting accessories are stored in a separate small box.

GAMEMAX SIGMA 620 CPU Air Cooler 8
GAMEMAX SIGMA 620 CPU Air Cooler 9

Inside the installation kit, GAMEMAX provides all the required mounting parts for both Intel and AMD platforms.

Inside the box, the following parts are included:

  • Radiator (tower heatsink)
  • Forward fan 120mm (A12-B)
  • Reverse fan 120mm (A12-A)
  • Universal mounting bracket
  • Intel backplate (LGA1851 / LGA1700)
  • Intel spacers (LGA1851 / LGA1700) Γ—4
  • AMD spacers (AM4 / AM5) Γ—4
  • Intel screws Γ—4
  • AMD screws Γ—4
  • Buckle strips / fan clips Γ—4
  • Thermal paste Γ—1
  • Small scraper Γ—1
GAMEMAX SIGMA 620 CPU Air Cooler 10
GAMEMAX Sigma 620

Overall, the accessories are well organised and provide everything needed for installation.

GAMEMAX Sigma 620 specifications

SpecificationDetails
ModelSIGMA 620 WH
Cooler TypeSingle Tower Air Cooler
Dimensions120 Γ— 114.2 Γ— 158.8 mm
TDP SupportUp to 245W
Heatsink MaterialAluminium Fins
Number of Fins48
Heatpipes6 Γ— 6mm Heatpipes
Heat BaseSoldered Copper Base
Display2.8-inch LCD Screen
Fan Size120 Γ— 120 Γ— 25 mm
Fan Quantity2 Fans
Fan TypePositive Blade + Reverse Blade
Bearing TypeRifle Bearing
Fan Speed800 – 1800 RPM Β±10%
LightingARGB (Motherboard Sync Supported)
Connector4-pin PWM, 3-pin ARGB
CPU CompatibilityIntel LGA1851 / 1700 / 1200 / 115X
AMD AM5 / AM4

A closer look

Heatsink

The Sigma 620 uses a single tower heatsink design. The cooler measures 120 Γ— 114.2 Γ— 158.8 mm and has a net weight of 154 g. It is available in black and white, and our review unit comes in white. The whole heatsink, including the heatpipes, is finished in full white, which gives it a very clean look.

GAMEMAX SIGMA 620 CPU Air Cooler 34
GAMEMAX SIGMA 620 CPU Air Cooler 29

The heatsink includes 48 aluminium fins. At the center, it uses 6 superconducting composite heatpipes, each with a 6 mm diameter. These heatpipes run through the tower and connect to the base. The sides of the heatsink fins use a raised design, which allows the fan clips to fit securely into the fins for mounting the fans.

GAMEMAX SIGMA 620 CPU Air Cooler 12
GAMEMAX SIGMA 620 CPU Air Cooler 13
GAMEMAX SIGMA 620 CPU Air Cooler 14

The cooler also includes an anti-insect intrusion design. The bottom panel uses an extended design that helps seal the hardware rack holes.

GAMEMAX SIGMA 620 CPU Air Cooler 15
GAMEMAX SIGMA 620 CPU Air Cooler 17

On the top cover, there is a 2.8-inch LCD monitor. This screen sits neatly on the top of the heatsink and adds a modern touch to the cooler.

Fans

The cooler includes two 120 mm fans, each measuring 120 Γ— 120 Γ— 25 mm. The main fan uses a regular blade design, while the secondary fan uses a reverse blade design.

GAMEMAX SIGMA 620 CPU Air Cooler 21

Both fans use rifle bearings. The fan frame colour is white, and each fan has 9 blades. Each fan also includes 28 ARGB LEDs.

Both fans run at 12 V rated voltage with a 5 V start-up voltage. The rated current is 0.22 A for the main fan and 0.2 A for the secondary fan. The rated power is 2.64 W and 2.4 W.

The fan speed ranges from 800 to 1800 RPM Β±10%. Maximum airflow is 71.66 CFM for the main fan and 70.71 CFM for the secondary fan. Maximum static pressure is 2.54 mmHβ‚‚O and 2.1 mmHβ‚‚O. The maximum noise level is 35.5 dBA and 42 dBA.

GAMEMAX SIGMA 620 CPU Air Cooler 22
GAMEMAX SIGMA 620 CPU Air Cooler 24

Both fans have a rated life of 30,000 hours. The connector includes 3-pin AURA ARGB and 4-pin PWM. Each fan also has soft rubber pads on the corners to reduce vibration. A thin ARGB light strip runs along the side of the fan frame, which remains visible and glows in a style similar to infinity fans.

GAMEMAX SIGMA 620 CPU Air Cooler 20
GAMEMAX SIGMA 620 CPU Air Cooler 23

Installation

The installation process of the Sigma 620 is simple and easy to follow. The steps are clearly explained in the user guide, so even new users can install it without confusion. One good thing is that the heatsink can be installed without attaching the fans first, which makes handling and mounting much easier.

The mounting system feels secure once installed, and the cooler sits firmly on the CPU. The included brackets and accessories make the process smooth for both Intel and AMD platforms.

GAMEMAX SIGMA 620 CPU Air Cooler 38
GAMEMAX SIGMA 620 Installation
GAMEMAX SIGMA 620 CPU Air Cooler 40

Clearance

When it comes to RAM clearance, the space is quite tight. As seen in the images, the cooler sits very close to the RAM slots, leaving limited room on that side. If you are using RAM with tall heatsinks, you may face compatibility issues. Low-profile RAM would be a better fit in this case.

On the other hand, the clearance on the opposite side is much better. There is enough space around the motherboard area, so it does not cause any issues with other components. You can raise the fan position slightly to get more RAM clearance. However, this comes with a small trade-off, as the fan may cover the RGB lighting, which affects the overall look. Overall, the installation is easy, but the RAM height should be considered before installing this cooler.

GAMEMAX SIGMA 620 CPU Air Cooler 41
GAMEMAX SIGMA 620 CPU Air Cooler 42
GAMEMAX SIGMA 620 CPU Air Cooler 45
GAMEMAX SIGMA 620 CPU Air Cooler 48

Software

The software for the Sigma 620 is very basic, but it gets the job done. The interface is simple and easy to understand, so you don’t need much time to get used to it.

Most of the software is focused on CPU temperature monitoring and screen themes. You can view real-time system data like CPU usage, temperature, and other basic stats directly on the LCD screen.

There are a few pre-built themes available, which you can apply easily. These include system info layouts and simple visual designs. You can also adjust settings like brightness and screen rotation.

One useful feature is that you can create your own custom theme. You can add your own images or simple layouts to personalise the display according to your setup.

GAMEMAX Sigma 620 software 2
GAMEMAX Sigma 620 software
GAMEMAX Sigma 620 software 1

Here are a few examples of themes displayed on the Sigma 620 cooler screen.

GAMEMAX SIGMA 620 CPU Air Cooler 50 edited scaled
GAMEMAX SIGMA 620 CPU Air Cooler 51
GAMEMAX SIGMA 620 CPU Air Cooler 52
GAMEMAX SIGMA 620 CPU Air Cooler 53
GAMEMAX SIGMA 620 CPU Air Cooler 54
GAMEMAX SIGMA 620 CPU Air Cooler 55

Testing and thermal performance

We tested the GAMEMAX SIGMA 620 in the GAMEMAX Leader 2 case using an Intel Core i7-12700K with the MSI MPG Z790 CARBON MAX WIFI II motherboard. The room temperature during testing was 28Β°C. At idle, the CPU stayed around 39Β°C with low fan speed. The fans remained quiet, and noise was barely noticeable.

Under load, we ran a CPU-Z stress test. The CPU reached around 185W, and temperatures went up to 72Β°C. The cooler handled this load well. Fan speed increased smoothly, and noise stayed at a comfortable level. There was no thermal throttling, and the system remained stable. For a heavier test, we used the AIDA64 single FPU stress test. In this test, the CPU again stayed in the 180–190W range, and temperatures reached 85Β°C. This is on the higher side but still within safe limits. The cooler maintained stable performance without any issues.

Overall, the Sigma 620 performs well for a high-performance air cooler. It handles heavy loads without stability problems. The claimed 245W TDP support also seems reasonable based on these results, as it can manage around 190W+ comfortably.

GAMEMAX Sigma 620 WH thermal performance

Final thoughts

The GAMEMAX SIGMA 620 WH offers a good balance between performance and design. It stands out by adding a customizable LCD screen, which is not common in air coolers. This gives it a unique touch while still keeping the reliability of traditional air cooling.

The build quality is clean and consistent. The full white finish, including the heatsink and heatpipes, looks neat inside the case. The ARGB lighting and top display add extra visual appeal without feeling too much. In terms of performance, the cooler handled the i7-12700K well. It managed around 190–200W loads while keeping temperatures in a safe range. Fan noise is also controlled, staying quiet at idle and reasonable under load.

The software is simple and basic, but it works fine. It mainly focuses on CPU temperature monitoring and screen themes. You can choose from a few built-in themes or even create your own custom theme, which adds a bit of personalisation.

There are a few things to consider. RAM clearance is tight, especially with taller memory modules. You can adjust the fan position for more space, but it may cover the RGB lighting. The GAMEMAX Sigma 620 WH delivers stable performance and adds a unique feature with its LCD screen. Based on its overall performance and usability, I would give it the EnosTech Performance Award.

Enos Tech Performance Award

GAMEMAX Introduces MAX PB Series ATX 3.1 80PLUS Bronze PSUs

By: Bahleem
26 March 2026 at 07:01

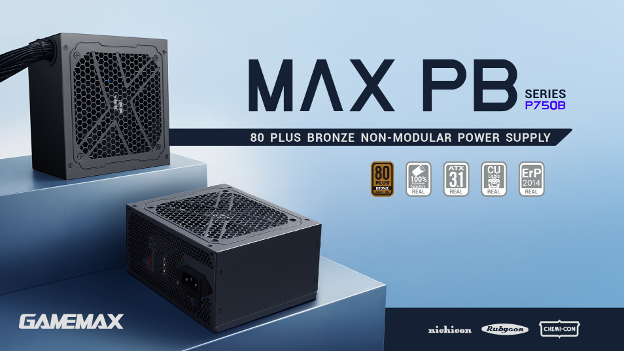
GAMEMAX, a rising innovator in PC gaming hardware, today announced the MAX PB-Series 80 PLUS Bronze Power Supply, a new lineup designed to deliver stable, efficient, and reliable power for modern gaming systems.

Engineered to meet the demands of today’s hardware, the GAMEMAX MAX PB Series is fully compliant with the latest Intel ATX 3.1 specification, supporting high transient power loads from next-generation GPUs while maintaining consistent performance. Built with premium internal components and a robust power design, the MAX PB Series is positioned as a dependable and cost-effective solution for entry-level and mainstream PC builders.

1 1
1 2
1

True Intel ATX 3.1 Compliance

Fully compliant with Intel ATX 3.1 standards, the MAX PB Series is designed to handle modern hardware demands with ease. It supports up to 200% system power excursions and 300% GPU transient loads, ensuring stable operation with next-generation graphics cards.

Native 12V-2Γ—6 Connectors

Select models in the GAMEMAX MAX PB Series, including the 750W and 850W variants, are equipped with native 12V-2Γ—6 connectors for next-generation GPU compatibility. This direct connection ensures stable and efficient power delivery for the latest NVIDIA RTX graphics cards, eliminating the need for adapters and simplifying cable management.

100% All-Japanese Capacitors

Built exclusively with premium Japanese capacitors sourced from Rubycon, Nippon-Chemicon, and Nichicon, the MAX PB-Series delivers superior reliability and durability. These high-quality components help maintain electrical stability and extend the lifespan of the power supply.

DSC00106

Pure Copper Cable Design

The MAX PB-Series features 100% pure copper output cables, enhancing conductivity and reducing power loss. This ensures stable and efficient power delivery, even under sustained high-load conditions.

Best-in-Class Long-Life Fan

Equipped with a silent hydraulic bearing cooling fan with smart temperature control, the MAX PB-Series is rated for 40,000 hours MTBF at 40 Β°C. It provides reliable thermal performance while maintaining low noise levels during extended operation.

Certified Safety & Efficiency

The MAX PB-Series meets genuine 3C safety certification standards including 8 protection features including OPP, UVP, OTP, OCP, SCP, NLP, and SIP, implemented via a 16-pin protection IC.

GAMEMAX PB Series Warranty, Availability, and Pricing

The GAMEMAX PB Series PSUs are backed with a 3-year warranty. See pricing below.

MAX P550B: $46.99

MAX P650B: $49.99

MAX P750B: $59.99

MAX P850B: $64.99

GAMEMAX Announces MAX PB Power Supply Series; ATX 3.1 Certified 80 Plus Bronze PSUs Available In Up To 850W Capacity

25 March 2026 at 16:11

A promotional image of the Gamemax MAX PB Series P750B, showcasing '80 Plus Bronze Non-Modular Power Supply' alongside certification icons.

Two budget-friendly power supply units arrive in GAMEMAX's catalog, offering reliable operation and good efficiency. GAMEMAX Launches MAX PB Non-Modular PSUs in 550W-850W Capacities, Bringing ATX 3.1 Standards for Modern PC Builds Popular hardware maker GAMEMAX has launched its brand new power supply units in the MAX-PB series. These power supplies are aimed at budget-tier PC builds, offering reliable operation for those who are running the latest hardware. The MAX PB series brings several units, offering up to 850W capacity to keep up with the demands of modern GPUs, thanks to Intel ATX 3.1 compliance. MAX PB series power supplies […]

Read full article at https://wccftech.com/gamemax-announces-max-pb-power-supply-series/

GameMax launches entry-level MAX PB PSUs starting at $49.99

25 March 2026 at 11:00

A good power supply is the heart of any PC. Typically for a budget build, you will want one with at least an 80Plus Bronze efficiency rating. GameMax is introducing its latest line of affordable bronze-rated PSUs this week, which are fully compliant with the ATX 3.1 specification.

While cheap with prices starting at just $49.99, these PSUs are not modular, so you will have to deal with hiding away some extra or unnecessary cables. If you are running a current-gen RTX graphics card, then you'll also want to opt for a 750W or 850W model, as these are the only ones featuring nativeΒ 12V‑2Γ—6 connectors. Internally, all of the new MAX PB PSUs use 100% Japanese capacitors from Rubycon, Nippon‑Chemicon and Nichicon, alongside pure copper output cables to improve conductivity and reduce power loss under sustained load.

Cooling is handled by a hydraulic‑bearing fan rated for 40,000 hours at 40Β°C, with smart temperature control to keep noise levels low. The MAX PB PSUs also include eight hardware protection features, including over‑power protection, under‑voltage protection, over‑temperature protection, over‑current protection, short‑circuit protection, no‑load protection, surge and inrush protection, and over‑voltage protection.

The GAMEMAX MAX PB‑Series will be available soon, with prices starting at $46.99 for the 550W model, rising to $49.99 for the 650W, $59.99 for the 750W, and $64.99 for the 850W. All models are backed by a 3-year warranty.

Discuss on our Facebook page, HERE.

KitGuru Says: How much do you typically spend on a power supply when pricing up a new PC build?

The post GameMax launches entry-level MAX PB PSUs starting at $49.99 first appeared on KitGuru.

GAMEMAX N90 WH ARGB review – dual chamber design with dot matrix display

By: Bahleem
5 March 2026 at 19:31

The GAMEMAX N90 WH is the upgraded version of the GAMEMAX N80. It keeps the same dual-chamber design but adds some cool new features. The lower part now has a 512-LED dot matrix display on the front, which looks really nice and bright. This GAMEMAX N90 ARGB gaming case is easy to build with, thanks to its modular design and tool-free panels. It has a big 270Β° curved wrap-around tempered glass on the front and side, so you can see your build clearly. The case supports BTF motherboards and hides cables neatly for a clean look. It also comes with six ARGB fans already installed, giving good airflow and keeping your PC cool.

Unboxing

Opening the GAMEMAX N90 WH ARGB does not feel like opening a normal PC case. It feels more premium right from the start. The case comes inside a thick and strong cardboard box. The packaging is simple and focused on protection rather than flashy design. On the outside, you can see technical details about the case, including its strong 0.8mm SPCC steel build and its split dual-chamber design.

GAMEMAX N90 case box
GAMEMAX N90 WH ARGB Dual Chamber PC Case 2 1
GAMEMAX N90 WH ARGB Dual Chamber PC Case 3 1

When you open the box, the case is held tightly between two large foam blocks. These are solid and strong, not the cheap, messy foam you sometimes see in budget cases. They keep the case safe during shipping. The whole case is wrapped in plastic, so the white finish and curved tempered glass stay clean and scratch-free. When I removed the cover, the β€œTrue White” colour looked smooth and fresh.

GAMEMAX N90 WH ARGB Dual Chamber PC Case 4 1

Inside the case, the accessories are neatly packed. Everything is organised properly, which makes the setup process easier. You get:

  • Motherboard screws (10 pieces) to install ATX, Micro-ATX, or ITX boards.
  • PSU screws (5 pieces) to mount the power supply in the rear chamber.
  • 2.5-inch SSD screws (8 pieces) for installing solid state drives.
  • Hard drive rubber dampers (8 pieces) to reduce vibration and noise.
  • White cable ties (6 pieces) to keep cables clean and tidy.
  • A standoff socket tool (1 piece) to tighten or remove motherboard standoffs.
  • An ARGB remote to control the lighting effects quickly.
GAMEMAX N90 WH ARGB Dual Chamber PC Case 67

The biggest highlight during unboxing is the curved glass panel. It gives a clean, wide view of the inside, almost like an aquarium. There is no front pillar blocking the view, so the case looks very open and spacious. Overall, the unboxing experience feels premium and well thought out, giving a strong first impression before the build even begins.

GAMEMAX N90 WH ARGB specifications

CategoryDetails
Form FactorMid Tower
Chassis MaterialSPCC 0.8mm Steel
PSU SupportBottom Mount / ATX (PSU not included)
Motherboard SupportATX, Micro-ATX, ITX (Supports BTF)
Front Panel270Β° Curved Tempered Glass
Top PanelMesh with wood grain decoration
Side Panel (Left)Curved Tempered Glass
Side Panel (Right)Metal
External Drive Bays0 Γ— 5.25” / 0 Γ— 3.5”
Internal Drive Bays2 Γ— 3.5” HDD (Compatible with 2.5” SSD) + 2 Γ— 2.5” SSD
Expansion Slots7
I/O Ports1 Γ— USB 3.0, 1 Γ— USB Type-C (Gen2), 1 Γ— Combo Audio
USB 2.00
Buttons1
RGB ControllerV4.10-24AS Controller + Remote
Max Fan Support (Controller)Up to 10 Fans
Pre-installed Fans6 Γ— ARGB Fans
Fan Support (Top)3 Γ— 120mm / 2 Γ— 140mm
Fan Support (Rear)1 Γ— 120mm (Tornado T12 ARGB)
Fan Support (Motherboard Side)2 Γ— 120mm (Tornado T12 ARGB-R)
Fan Support (Bottom)3 Γ— 120mm (Tornado T12 ARGB-R)
Radiator Support (Top)120 / 140 / 240 / 280 / 360mm
Radiator Support (Motherboard Side)120 / 240mm
Radiator Support (Rear)120mm
Dust FiltersBottom dust filter, Top mesh
VGA ClearanceUp to 415mm
CPU Cooler HeightUp to 175mm
Cable Management Space32mm
Display Screen512-LED Dot Matrix Display
Chassis Dimensions439 Γ— 235 Γ— 511mm
Full Case Dimensions439 Γ— 240.5 Γ— 530mm
Carton Dimensions512 Γ— 310 Γ— 601mm
Net Weight12.95 kg
Gross Weight14.55 kg

A closer look – Exterior

The GAMEMAX N90 WH ARGB has a dual-chamber design. The top section holds the motherboard and graphics card. The bottom section hides the power supply and cables. This keeps the build clean and neat. It also helps with airflow. In terms of size, the case measures 439 Γ— 240.5 Γ— 530mm. It weighs 12.95 kg, which gives it a solid and sturdy feel on the desk.

GAMEMAX N90 WH ARGB Dual Chamber PC Case 5 1
GAMEMAX N90 WH ARGB Dual Chamber PC Case 12

The case has tool-free panels. You can remove the side panels easily. This makes building faster and less stressful.

The best part is the L shaped 270Β° curved tempered glass. It covers the front and left side in one smooth piece. There is no front pillar blocking the view. You get a wide and clear look inside the case.

At the front bottom, there is a 512-LED dot matrix display. It can show system info and custom lighting effects. It gives the case a unique and modern look.

GAMEMAX N90 WH ARGB Dual Chamber PC Case 6

The build feels strong. It uses 0.8mm steel. The case is heavy at around 12.95 kg. The white finish looks clean. The top panel has a wood-style design, which looks different from normal gaming cases.

GAMEMAX N90 WH ARGB Dual Chamber PC Case 12 1

On the bottom chamber, you get I/O ports. There is one USB 3.0 port, one USB Type-C (Gen2), and one combo audio jack.

GAMEMAX N90 WH ARGB Dual Chamber PC Case 9

The top of the GAMEMAX N90 uses a smart three-layer design. Each layer has a clear purpose. It starts with looks and ends with cooling support.

GAMEMAX N90 WH ARGB Dual Chamber PC Case 8
GAMEMAX N90 WH ARGB Dual Chamber PC Case 11

At the very top, there is a Walnut-grain decorative Top Panel wood-style mesh dust filter. It gives the case a unique and classy feel. The filter is magnetic, so you can lift it off easily for cleaning. It blocks dust while still letting air pass through.

Under this layer sits a white metal cover with angled cut-out vents. This panel wraps around and continues to the right side of the case. It hides the internal structure and keeps the outside looking clean. Removing this cover gives full access to the top and side areas.

GAMEMAX N90 WH ARGB Dual Chamber PC Case 21
GAMEMAX N90 WH ARGB Dual Chamber PC Case 23

The last layer is the fan and radiator mounting area. This section is designed for cooling hardware. You can install up to three 120mm fans or a large liquid cooler. The layout feels open and easy to work with. All screws and mounts stay hidden once everything is installed.

GAMEMAX N90 WH ARGB Dual Chamber PC Case 60

The right side of the GAMEMAX N90 is focused on airflow and clean cable management. A mesh grille is provided for the side intake fans, allowing fresh air to flow inside. The main side panel is metal and is held in place with two thumb screws, so it can be removed easily without tools.

GAMEMAX N90 WH ARGB Dual Chamber PC Case 64

The bottom compartment is used for the power supply and storage bays. To access this area, a separate cover is provided. Like the other panels on the case, this cover follows a tool-less design. You can simply pull it out to reach the PSU and storage bays.

GAMEMAX N90 WH ARGB Dual Chamber PC Case 41

The rear of the GAMEMAX N90 follows a standard layout. The top section includes a motherboard I/O cutout and a rear exhaust fan mount with round ventilation holes. Below this are reusable graphics card expansion slots. On the right side, an additional mesh grille continues the same round-hole design.

GAMEMAX N90 WH ARGB Dual Chamber PC Case 19

The bottom section is dedicated to the power supply and uses a separate lower compartment. This area includes its own ventilation and follows the dual-chamber layout.

GAMEMAX N90 WH ARGB Dual Chamber PC Case 17


The bottom of the GAMEMAX N90 case features four round feet with rubber padding. It has a raised base with good ground clearance. A large honeycomb-style intake grille is placed underneath. This intake is covered by a removable mesh dust filter.

GAMEMAX N90 WH ARGB Dual Chamber PC Case 54

Interior

Inside the GAMEMAX N90, the left and front sides use a 270Β° curved tempered glass panel. This glass is easy to remove thanks to the tool-less design. The case follows a modular dual-chamber layout with quick-release panels, which makes access simple during building. The curved glass is made from a single piece and wraps around the front and side. It also comes with a high-transparency safety film. This keeps the look clean and uniform while adding protection.

GAMEMAX N90 WH ARGB Dual Chamber PC Case 71
GAMEMAX N90 WH ARGB Dual Chamber PC Case 72

Looking at the motherboard tray, you will notice large cut-outs. These are designed for modern builds and support BTF stealth motherboards. The case supports ATX and M-ATX BTF motherboards.

GAMEMAX N90 WH ARGB Dual Chamber PC Case 35

The case comes with six pre-installed fans. Three are placed at the bottom, two on the motherboard side, and one at the rear. All fans are Tornado T12 ARGB. The bottom and motherboard-side fans are reverse fans. Additional fan support includes 3Γ—120mm or 2Γ—140mm at the top.

GAMEMAX N90 WH ARGB Dual Chamber PC Case 75

There is good support for cooling hardware. The case supports air coolers up to 185mm in height. Liquid cooling options include 360mm on top, 240mm on the motherboard side, and 120mm at the rear.

Graphics card support goes up to 425mm, allowing large GPUs to fit easily.

In the bottom section, the I/O ports are placed on the left side. These include USB 3.2 Gen2 Type-C, USB 3.2 Gen1 Type-A, Power button, and Combo Audio. There is also a dedicated button for the dot matrix LED display, which will be discussed later.

GAMEMAX N90 WH ARGB Dual Chamber PC Case 73

After removing right side panel, you will find another cover. This cover is used to hide cables and keep everything looking neat. To remove this cover, two more thumb screws are placed at the back of the case. Once opened, you get full access to the cable area.

GAMEMAX N90 WH ARGB Dual Chamber PC Case 38
GAMEMAX N90 WH ARGB Dual Chamber PC Case 39
GAMEMAX N90 WH ARGB Dual Chamber PC Case 50

On the right side, this area is called the cable compartment. The cable cover can be pulled up easily and removed from its hinges. It does not require tools. Once removed, you get full access to the cable area.

A fan hub is also provided here. The six pre-installed fans are already connected to it. You can add more fans and ARGB connections if needed. The layout feels open and organised.

GAMEMAX N90 WH ARGB Dual Chamber PC Case 40

There is a large motherboard cut-out in this section. Separate cut-outs for BTF motherboards are also visible. You also get mounting options for 2.5-inch SSDs here. Even if cable management is not perfect, the cover helps hide the cables and keeps the build looking clean.

GAMEMAX N90 WH ARGB Dual Chamber PC Case 62

To access the lower compartment, you can easily pull the mesh cover from the back side. Once removed, the storage and PSU area becomes fully accessible.

GAMEMAX N90 WH ARGB Dual Chamber PC Case 41

Inside the drive bay, two plastic trays are provided. You can install two 3.5-inch HDDs here. There is also a dedicated 2.5-inch SSD mount on top of the bay. The case supports a PSU up to 170mm in length. Large soft pads are placed under the PSU area for proper support and clearance.

GAMEMAX N90 WH ARGB Dual Chamber PC Case 56
GAMEMAX N90 WH ARGB Dual Chamber PC Case 51

You get the front panel connector, a Thunderbolt connector, and a USB 3.0 connector. There are also dedicated connectors for the Dot Matrix display, along with USB and audio connectors.

GAMEMAX N90 WH ARGB Dual Chamber PC Case 85

Installation

I shifted my main PC into the GAMEMAX N90 because this case is going to stay on my desk for a long time. Here are the components I used:

  • Processor: Intel Core i7 12700K
  • Motherboard: MSI Z790 Carbon Max WiFi
  • Cooler: Valkyrie A360
  • RAM: Kingbank DDR5 32GB 6800MHz CL32
  • GPU: Colorful RTX 5070 Battle AX
  • Storage: Silicon Power 2TB NVMe + Lexar 512GB (Windows)
  • PSU: GAMEMAX 1050W
  • RGB Cables: GAMEMAX

Building inside this case was a great experience. Even though it is a mid-tower case, space management feels well planned. Installation is easy, but there is one important thing to remember. If you are using an ATX motherboard, pass the HD Audio, front panel, fan, and ARGB connectors through the lower cutouts before fixing the motherboard in place.

I installed the motherboard first, and later I did not have enough space to route and plug in the bottom connectors easily. So it is better to connect or at least route them first.

After installing the 360mm cooler on top, there was still enough space to plug and unplug cables from the upper area without difficulty. The layout does not feel cramped.

On the right side, I honestly did not even try hard with cable management. I just connected everything and closed the dedicated cable cover. All the PSU cables adjusted easily inside. The cover hides everything well and gives a clean look.

The L-shaped panels are also easy to remove and reinstall. Overall, building in the N90 feels simple and builder friendly, even with high-end components.

GAMEMAX N90 WH ARGB Dual Chamber PC Case 89

Some more pictures of the build.

GAMEMAX N90 WH ARGB Dual Chamber PC Case 96
GAMEMAX N90 WH ARGB Dual Chamber PC Case 111
GAMEMAX N90 WH ARGB Dual Chamber PC Case 102
GAMEMAX N90 WH ARGB Dual Chamber PC Case 103
GAMEMAX N90 WH ARGB Dual Chamber PC Case 112
GAMEMAX N90 WH ARGB Dual Chamber PC Case 106

GAMEMAX N90 – Dot matrix LED display features

The GAMEMAX N90 comes with an 8Γ—64 dot matrix LED display at the front bottom. It works with Windows. You need to install the software first. The file name is SysMonitorUSB_V1.0.7.msi. After installing, you can run the program. The temperature unit can be set to Celsius or Fahrenheit.

The display gets power from the PC power supply (5V). It connects to the motherboard using a USB 2.0 header. It reads system data directly from the motherboard.

When you turn on the PC, the full screen lights up for 3 seconds. Then the startup screen shows for 7 seconds. After that, it enters normal working mode.

GAMEMAX N90 Dot Matrix Display Software 2

In normal mode, it shows different system details one by one. This includes date, time, CPU temperature, GPU temperature, CPU usage, RAM usage, and other selected parameters. Each item stays on screen for about 5 seconds. Longer text scrolls across the screen. The display changes with a vertical sliding animation.

GAMEMAX N90 Dot Matrix Display Software
WhatsApp Image 2026 03 03 at 11.01.33 PM

You can also set a custom message. In the software, type your message in the custom string box and press Send. It supports English letters and numbers only. After saving, the display shows β€œMyString” for one second. The message stays saved even after power off. To show your custom text, press and hold the button for 2 seconds. The text will scroll across the screen. If no message is saved, it shows β€œNULL”.

GAMEMAX N90 Dot Matrix Display Software 3
WhatsApp Image 2026 03 03 at 11.01.34 PM 1

If the software is not running, or the USB cable is disconnected, the screen shows β€œNO SIGNAL”. After 20 seconds, it enters standby mode. After 40 more seconds, it goes into sleep mode and slowly turns off.

GAMEMAX N90 WH ARGB Dual Chamber PC Case 92

There is only one button for control.
Press and hold for 3 seconds to turn the display on or off.
Press and hold for 2 seconds to enter or exit custom message mode.
Press once to switch to the next parameter.
Press twice to lock or unlock the current parameter.
Press three times to enter brightness control mode. Brightness levels go from 0 to 7.

Overall, the dot matrix display adds a unique touch to the case. It shows live system data and allows simple customization without making things complicated.

WhatsApp Image 2026 03 03 at 11.01.34 PM 2

Final verdict

After building and using the GAMEMAX N90 as my main system, I can confidently say this case feels well balanced in both design and performance. The dual-chamber layout keeps everything organised and gives the build a very clean appearance. The tool-free panels make installation and removal simple. Whether it is the curved glass, the cable cover, or the bottom compartment, everything can be opened and closed without stress.

Recently, one of my friends reviewed a similar dual-chamber case where the top AIO section was fully separated. The N90 follows a slightly different approach. It keeps the layout connected while still offering proper support for large coolers and clean cable routing. In daily use, this design feels practical and easy to work with.

Thermal performance is impressive. The six pre-installed fans provide strong airflow. The fans are slightly audible, but nothing extreme. CPU and GPU temperatures remained very reasonable at idle and during gaming sessions. That is what really matters in a gaming build.

Dust protection is also well handled. There are three magnetic dust covers in total. One is the wooden-accent top panel. The second is for the motherboard-side intake fans. The third is placed under the PSU area. All of them are easy to remove and clean.

The dot matrix LED display adds something different to the case. It shows system information and custom text, which makes the setup feel more personal. Many brands are now offering full front display panels with their cases, so it will be interesting to see when GAMEMAX steps into that space. For now, this display still makes the N90 stand out.

Overall, the N90 feels unique and complete. It looks different, performs well, and is easy to build in. For a gaming setup that needs both style and strong cooling, this case fits perfectly. I would confidently give it a design and performance award.

Enos Tech Design Award
Enos Tech Performance Award

Availability and pricing

The GAMEMAX N90 is available in two colour options. The black version is priced at $189.99, while the white version reviewed here has an MSRP of $194.99. Availability may vary depending on the region and retailer, so buyers may need to check with local distributors or online stores for stock and delivery options.

❌
❌