Reading view

There are new articles available, click to refresh the page.

BIWIN M560 2TB Gen5 SSD Review

INTRODUCTION


biwin m560 2tb review a


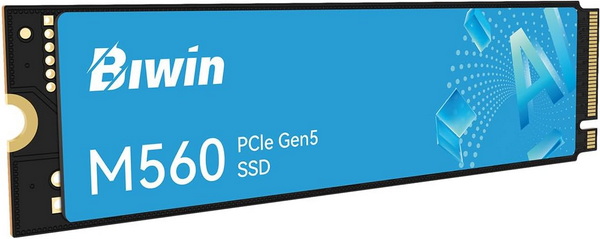
    PCIe M.2 NVMe SSDs pushed storage far beyond the limits of mechanical drives, with each generation multiplying bandwidth and shrinking load times. PCIe Gen3 established NVMe as the mainstream standard—reliable, cool‑running, and still perfectly adequate for everyday workloads. PCIe Gen4 doubled the available bandwidth, delivering noticeably faster game loading, smoother content‑creation pipelines, and stronger sustained transfers without demanding exotic cooling. PCIe Gen5 SSDs raised the ceiling again, offering massive throughput for high‑end systems, workstation‑level transfers, and next‑generation game engines. Initially that jump came with trade‑offs, higher thermals, mandatory heatsinks, stricter motherboard compatibility, and real‑world gains that vary depending on workload. Today most thermal related concerns have been resolved and so Gen5 drives bring undeniable advantages, blistering sequential speeds, improved parallelism, and headroom for future software and DirectStorage‑heavy titles. The M560 is the latest Gen5 model released by BIWIN and that's what I've been testing for a while now.


    For decades, BIWIN Storage Technology has made the critical storage and memory in many of the leading digital devices that have defined our digital world. The Biwin consumer brand offers the best of BIWIN’s experience, a range of SSDs, DRAM, memory cards and related accessories that will help you get the most out of your devices. Biwin, Built to Win. For more about Biwin, please visit www.biwintech.com


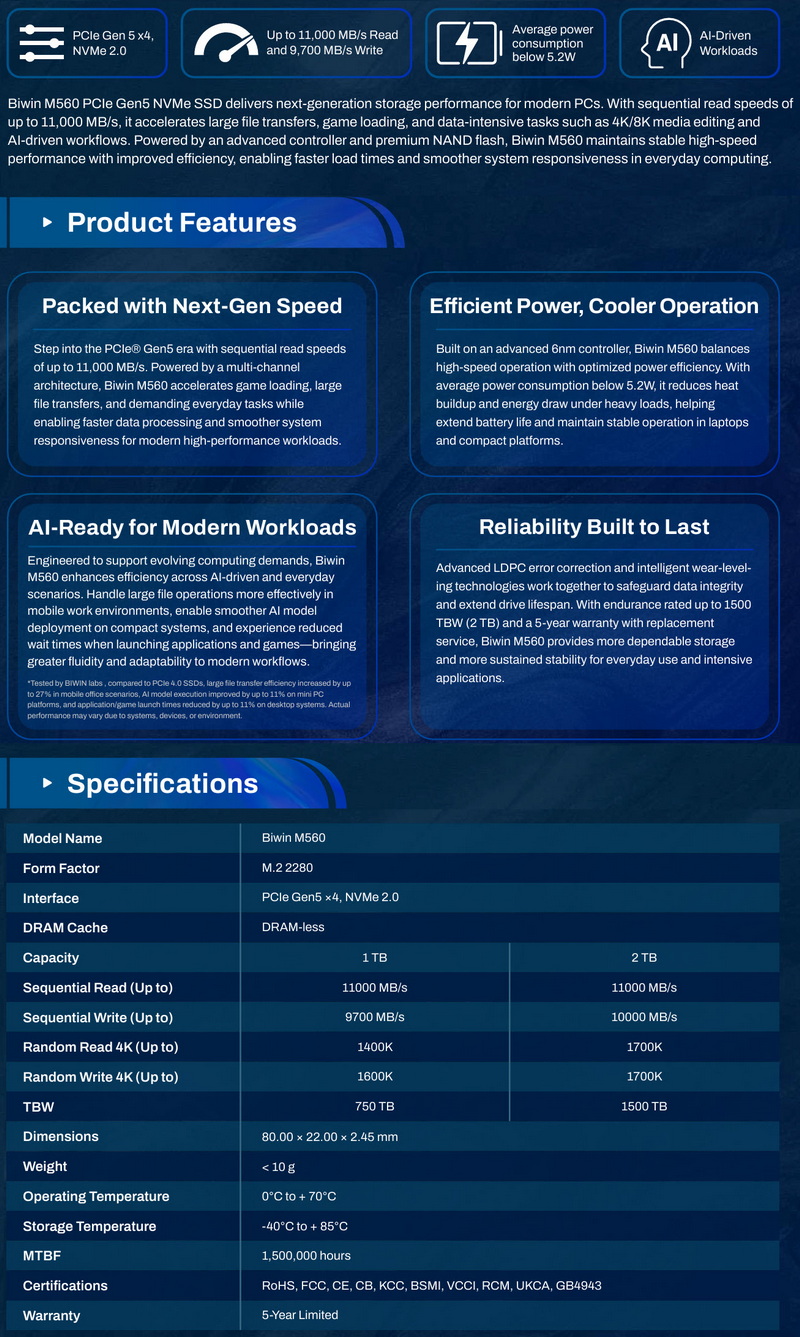
    The new M560 line of Gen5 M.2 NVMe SSDs by BIWIN currently includes only two capacities (1/2TB) both of which are based on the latest SM2504XTF DRAM-less flash controller by Silicon Motion which this time is paired with 218-layer 3D TLC NAND flash memory (BiCS 8) by Kioxia. The SM2504XTF is an 6nm, 4-channel NAND flash controller (tri-core Arm Cortex-R8 processor) with a speed of up to 3600MT/s per channel (16CE) that follows the NVMe 2.0 (Non-Volatile Memory Express) standard and packs technologies like NANDXtend 4K+ LDPC engine with end-to-end data path protection, SRAM ECC & CRC parity, real time AES 256-bit encryption, Host Memory Buffer (HMB) architecture (uses a fraction of your PC's system memory to cache mapping tables), ONFI 5.1 and Toggle 5.0 support and TCG Opal 2.0 compliance. Moving to warranty BIWIN covers the entire 560 Gen5 M.2 NVMe SSD line with a 5-year limited one and as for durability they report an MTBF (mean time between failures) of 1.5 million hours and TBW (terra bytes written) of 750/1500 for the 1/2TB models respectively.


SPECIFICATIONS AND FEATURES


PACKAGING AND CONTENTS


biwin m560 2tb review 1t

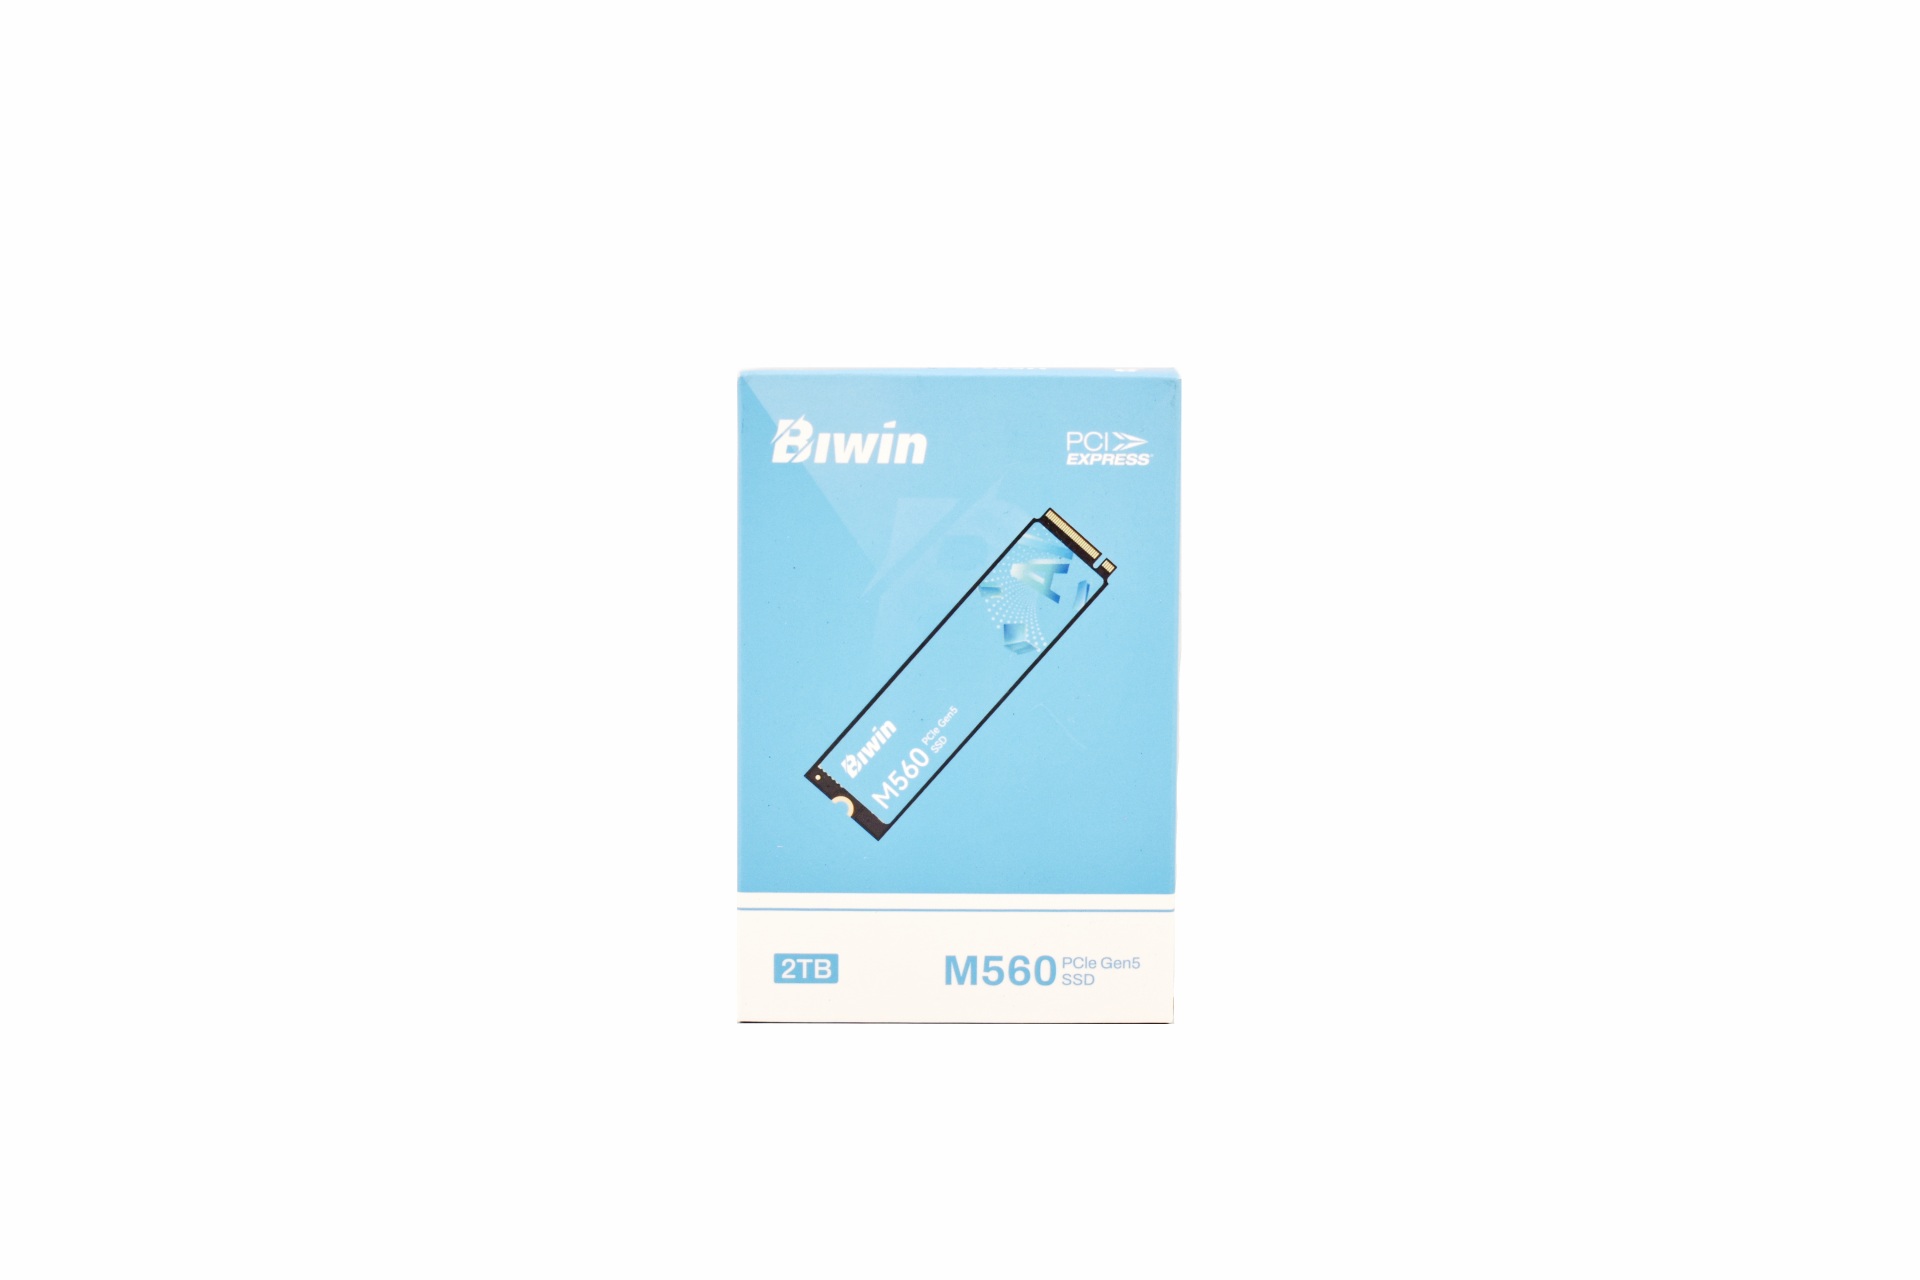
The M560 is placed inside a small light blue and white box that has a product picture at the front right under the company logo and above its capacity.


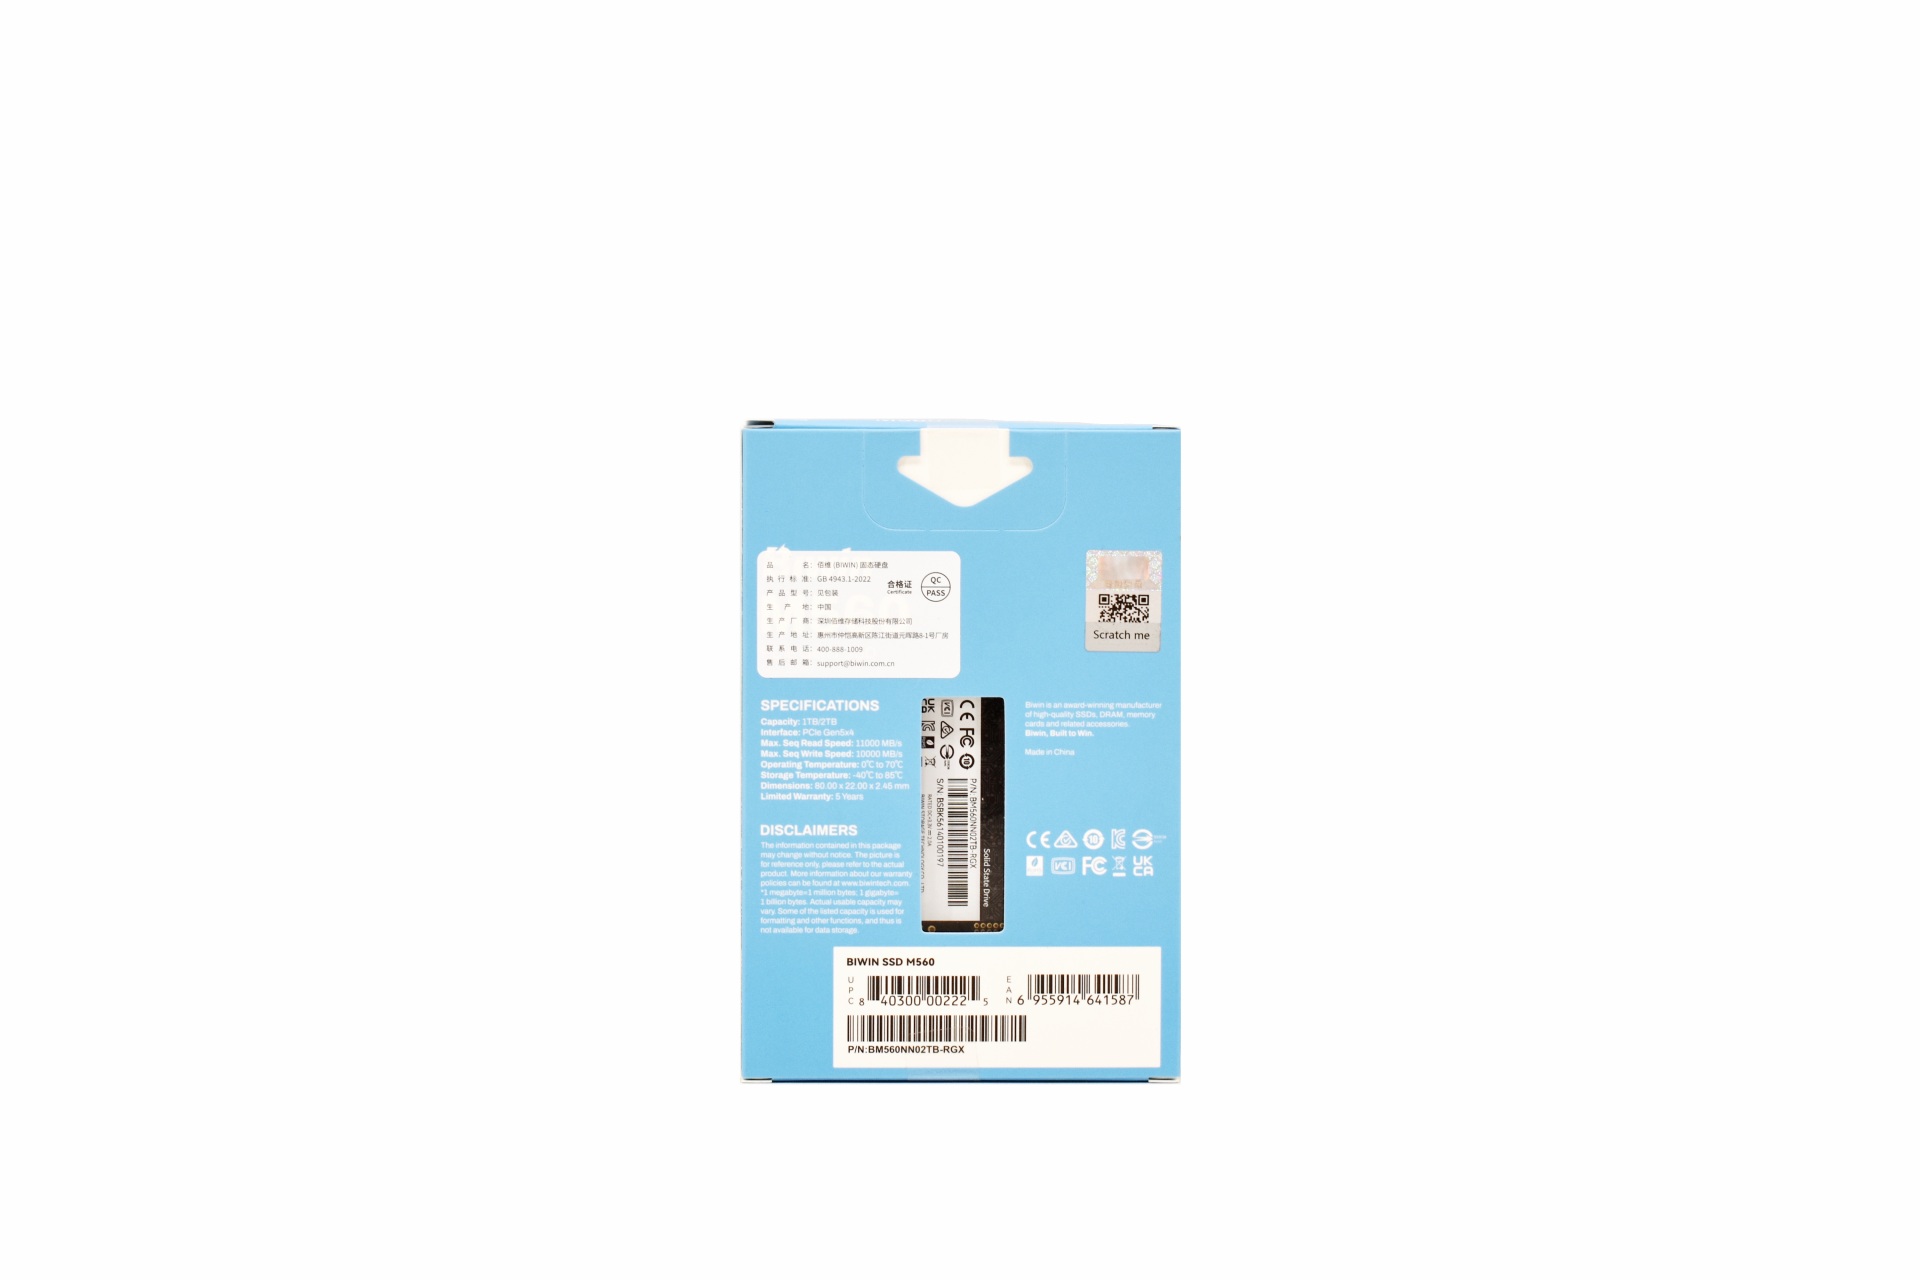
At the rear we find the product specifications, serial numbers and barcodes and an opening from where you can see the rear of the drive itself.


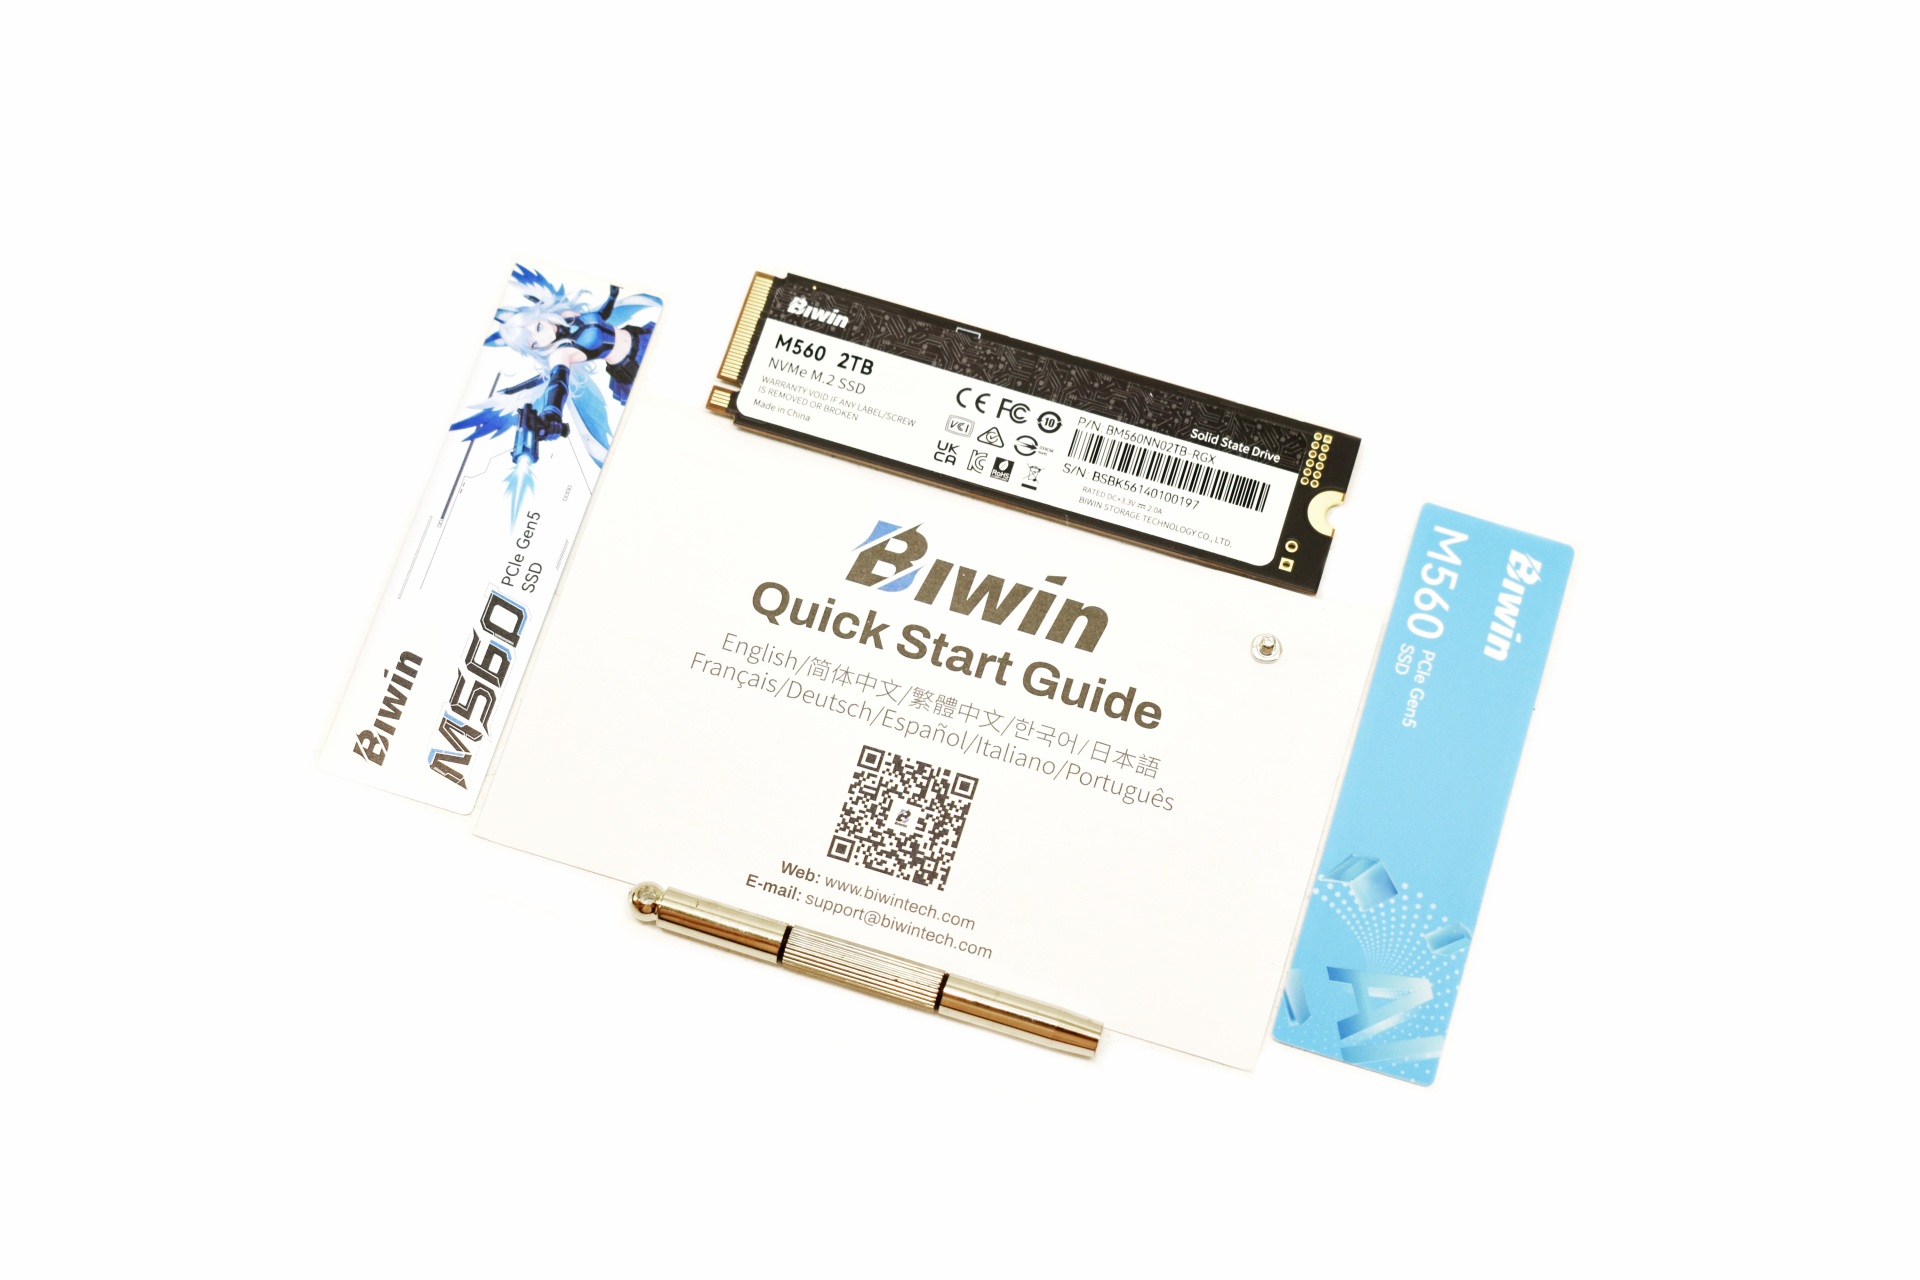
Contained inside the box are the M560 2TB SSD, two stickers (you can use whichever fits your case more), quick start guide, mounting tool and a mounting screw.


THE M560 2TB


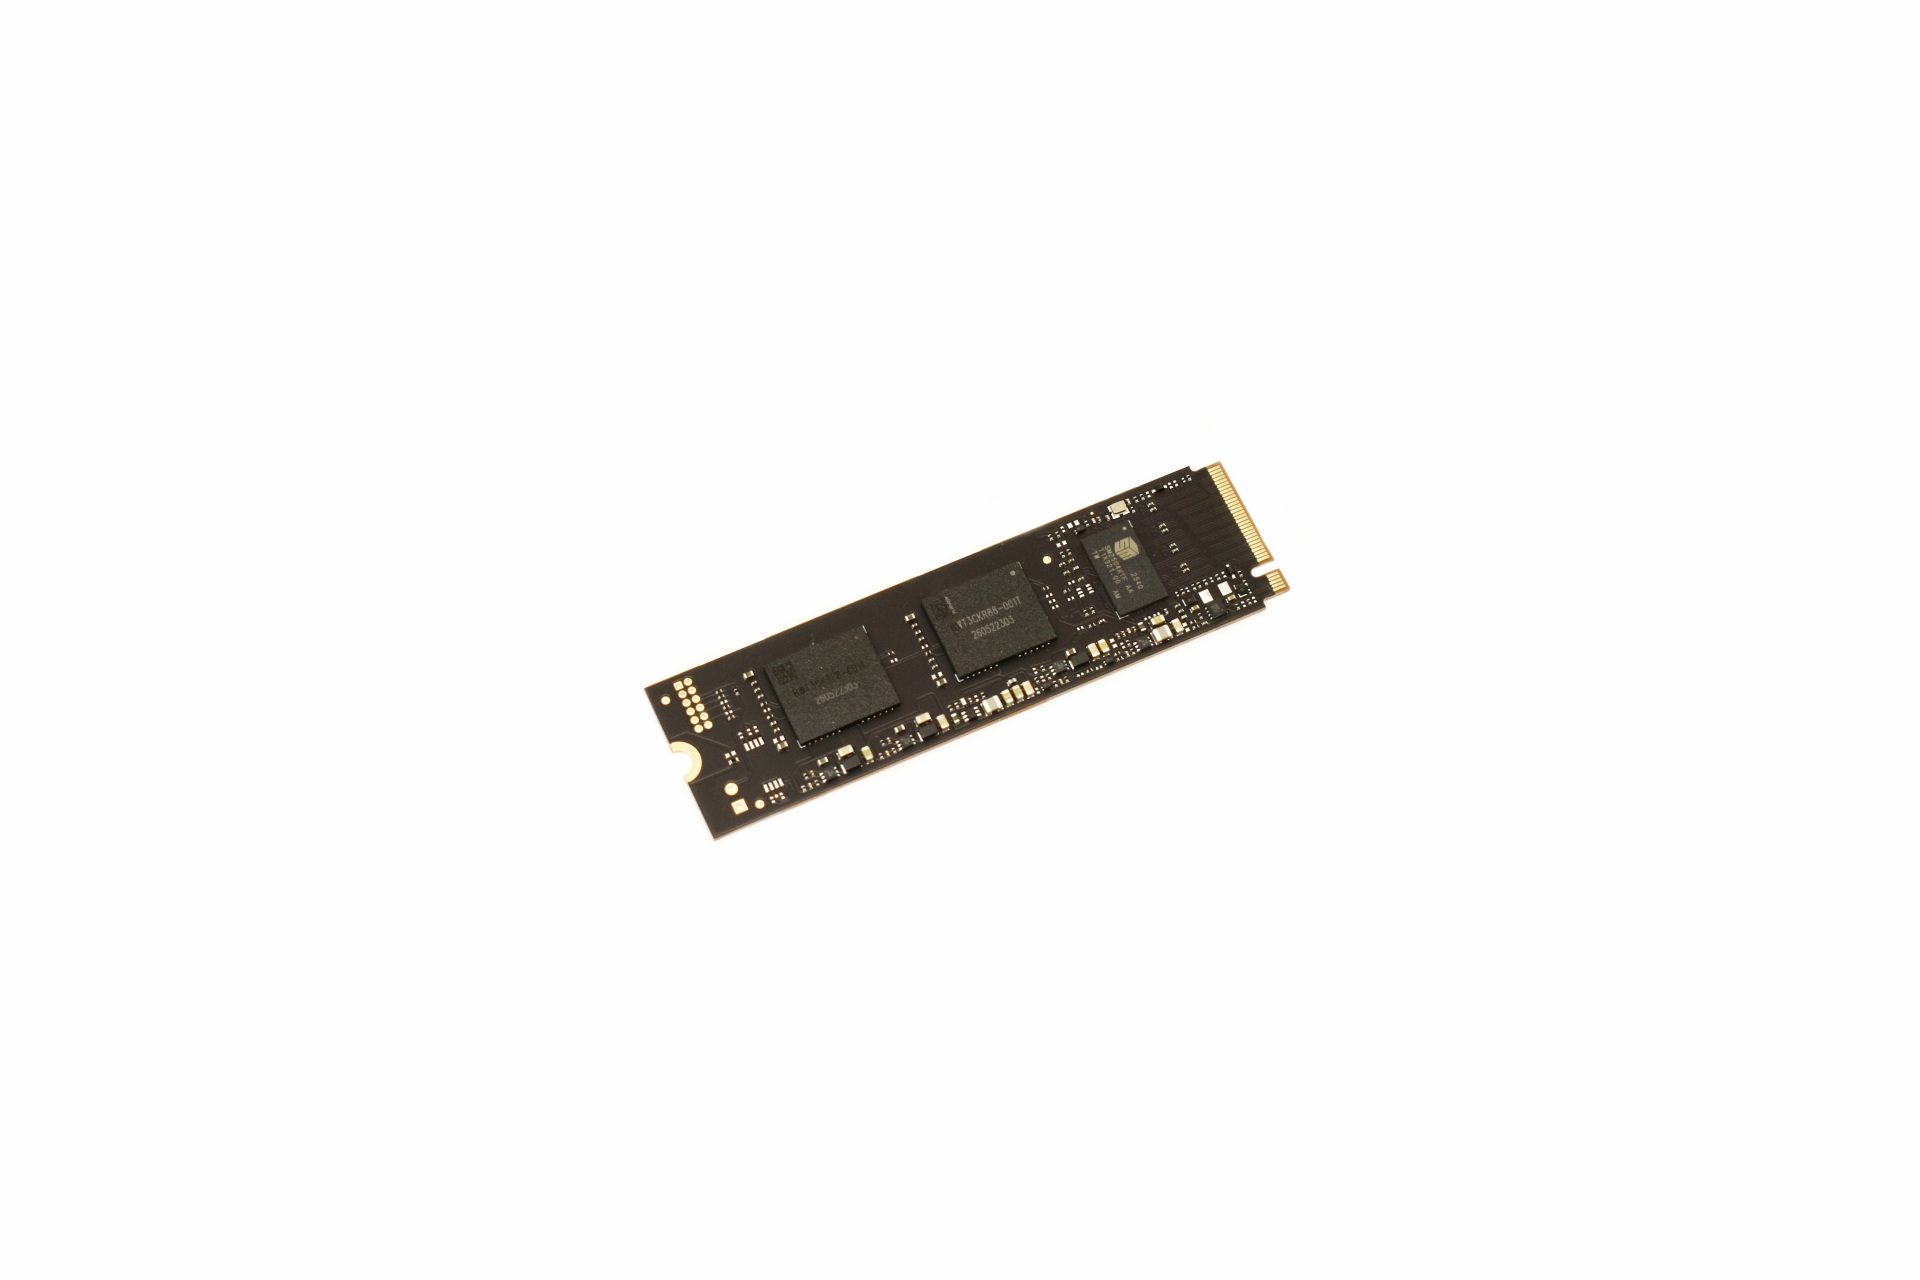
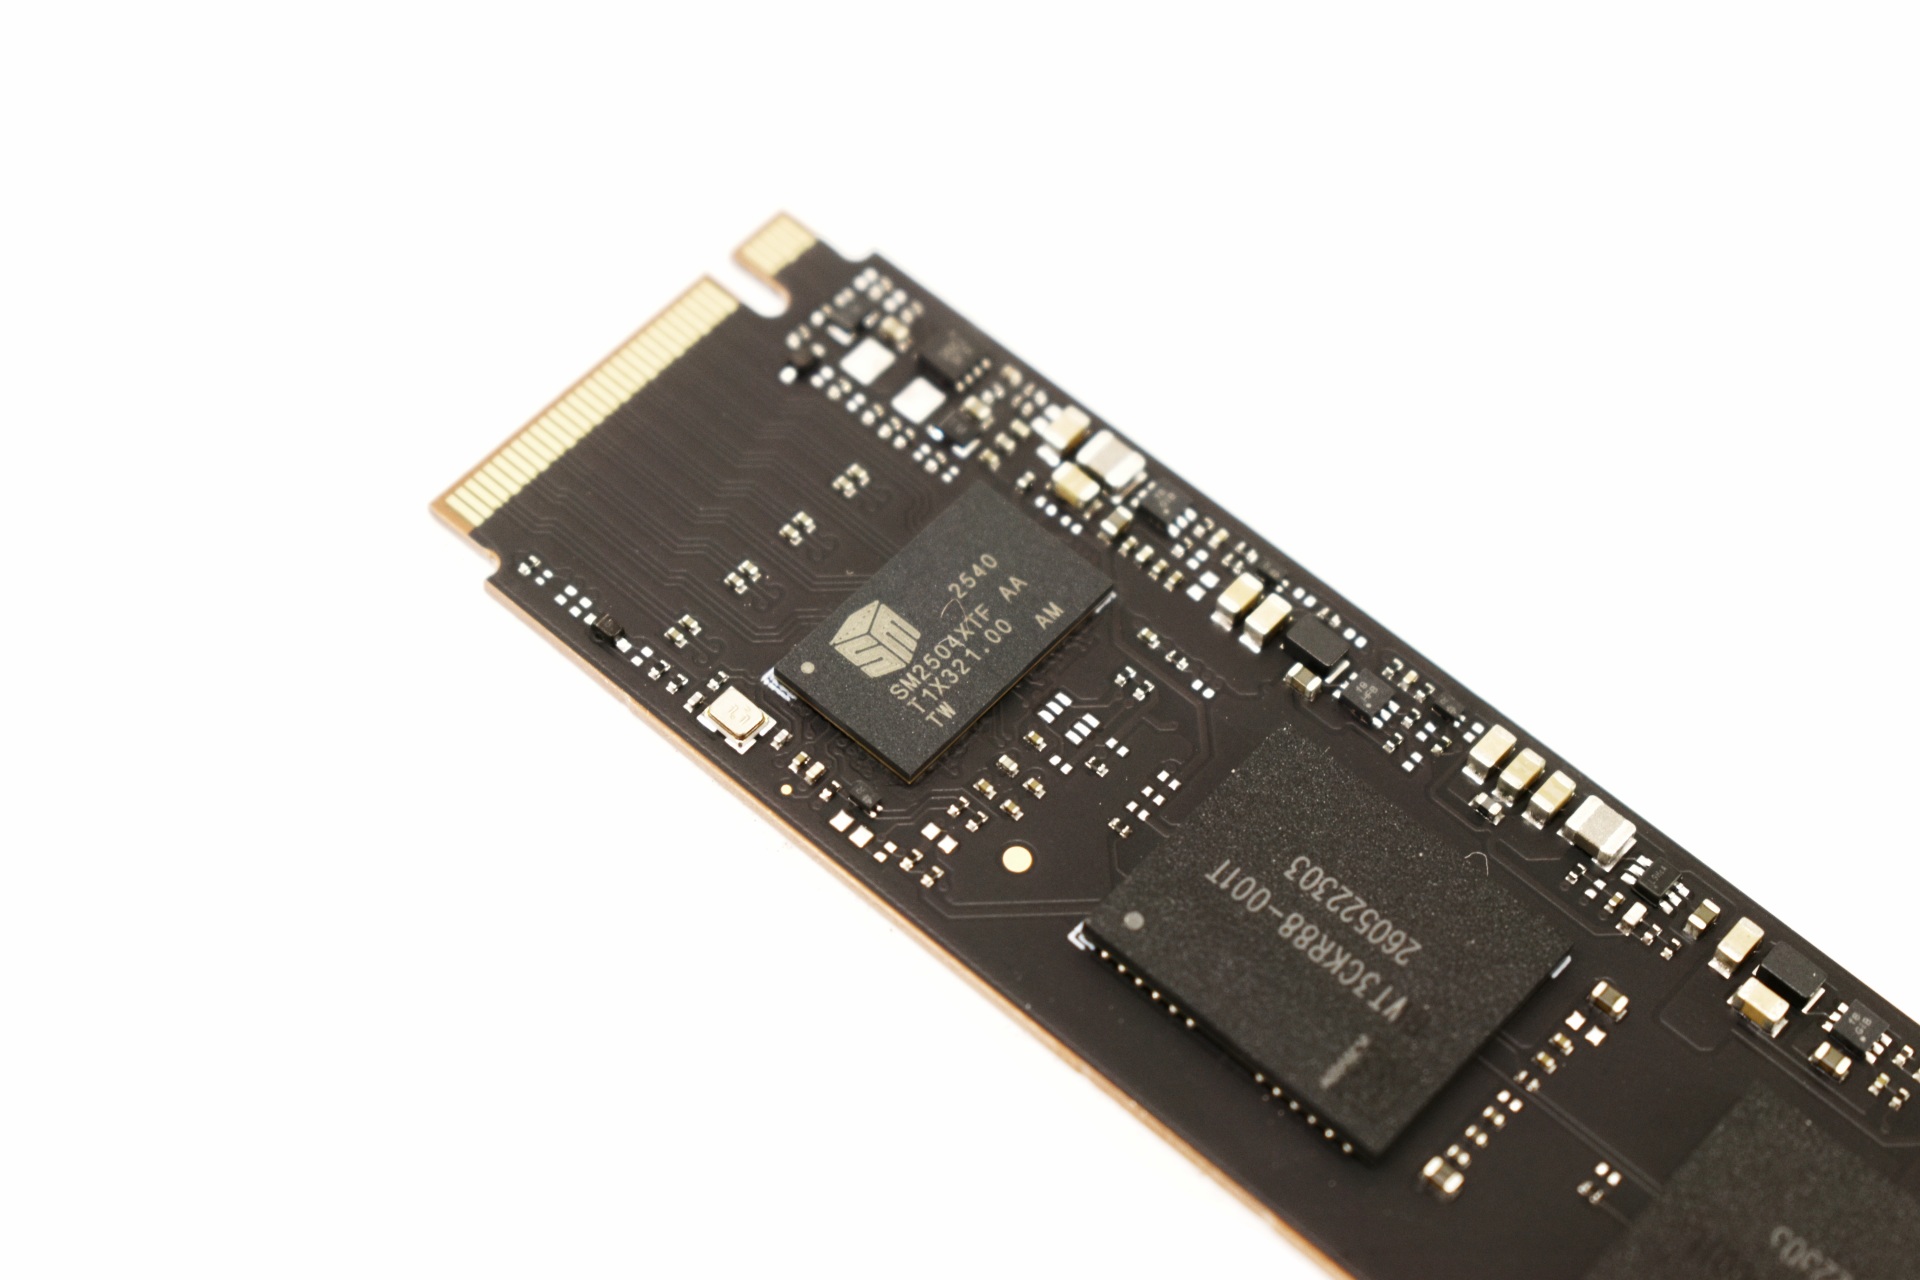
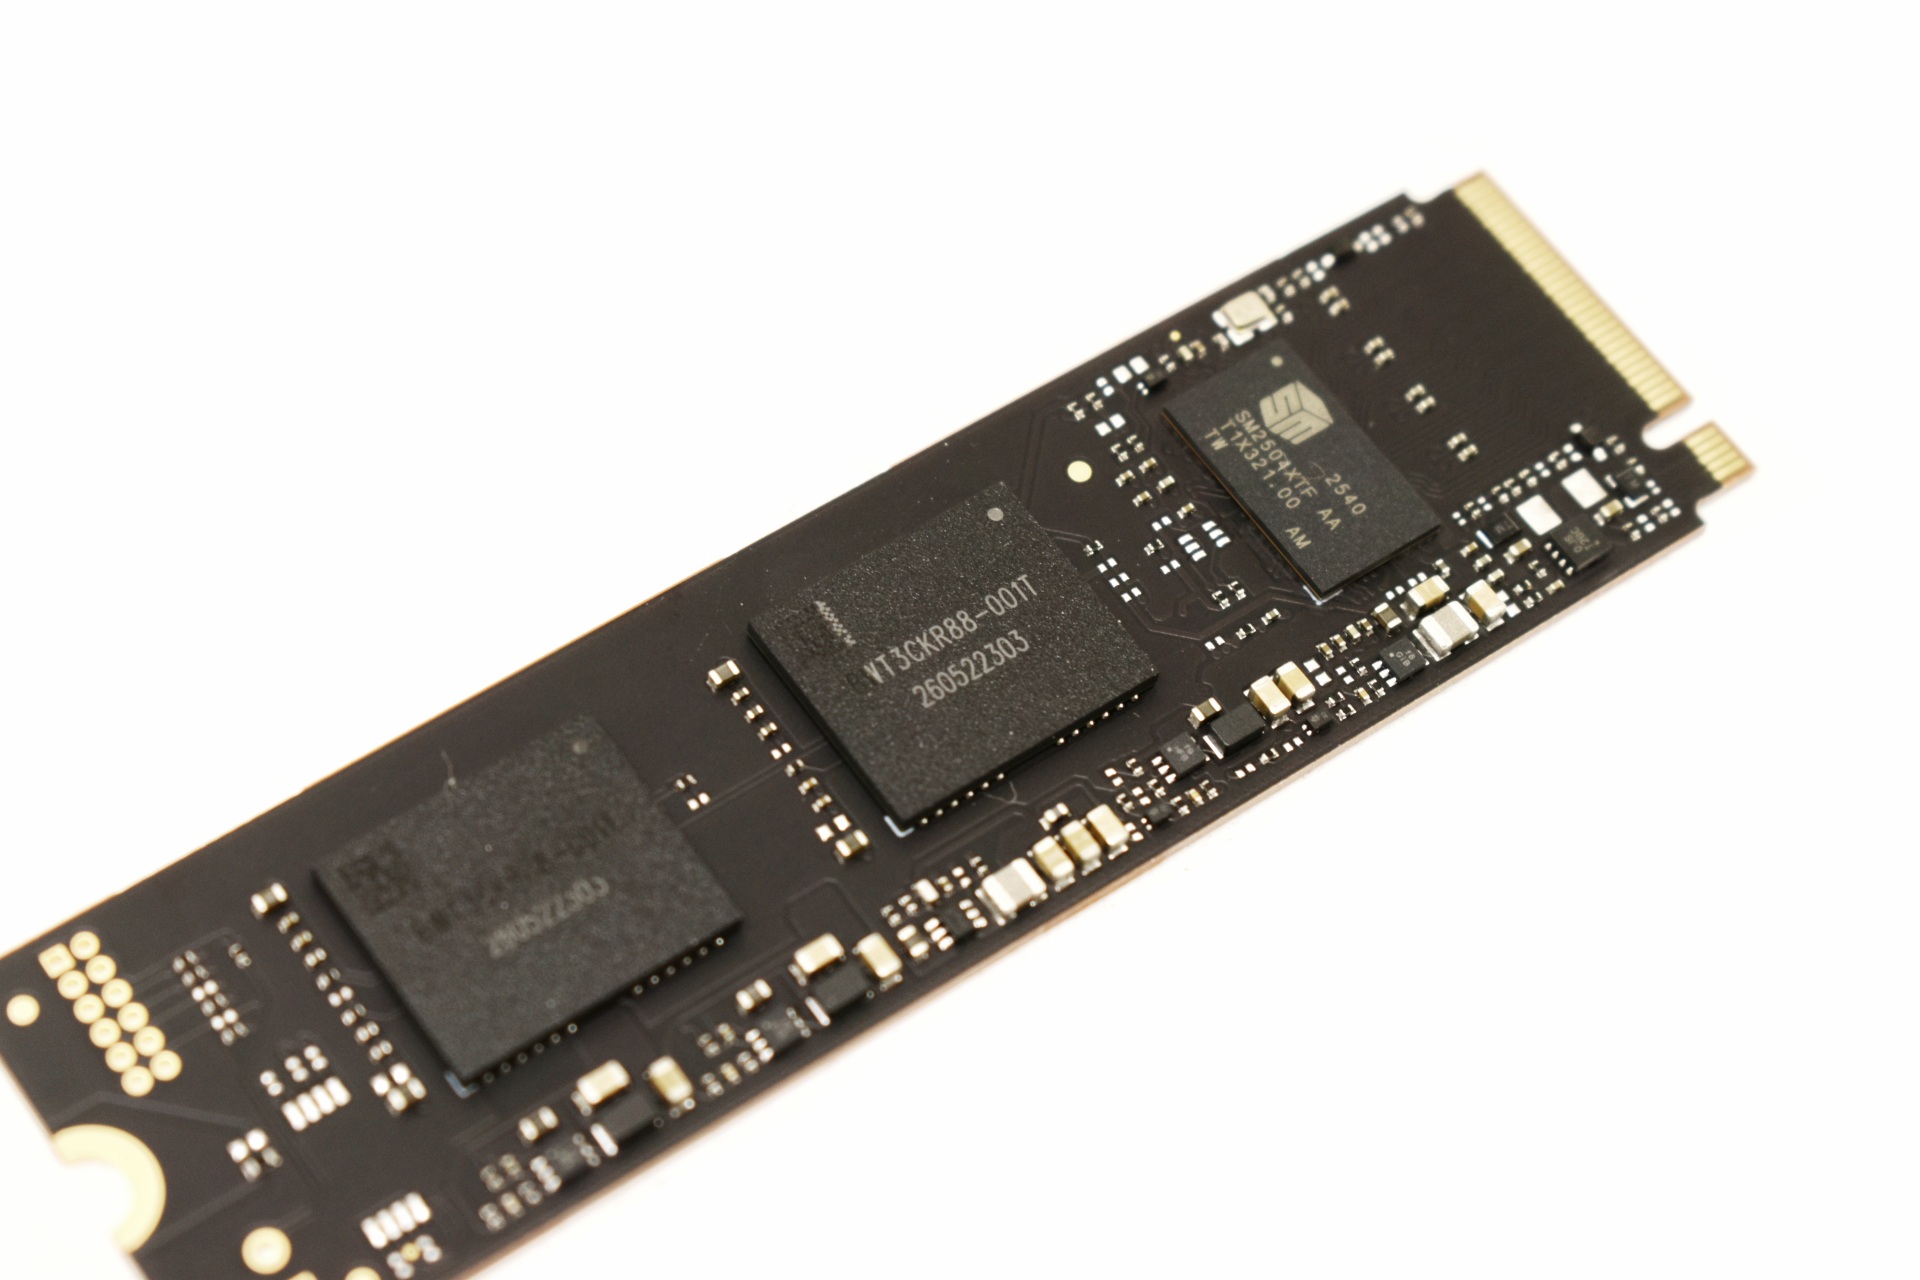
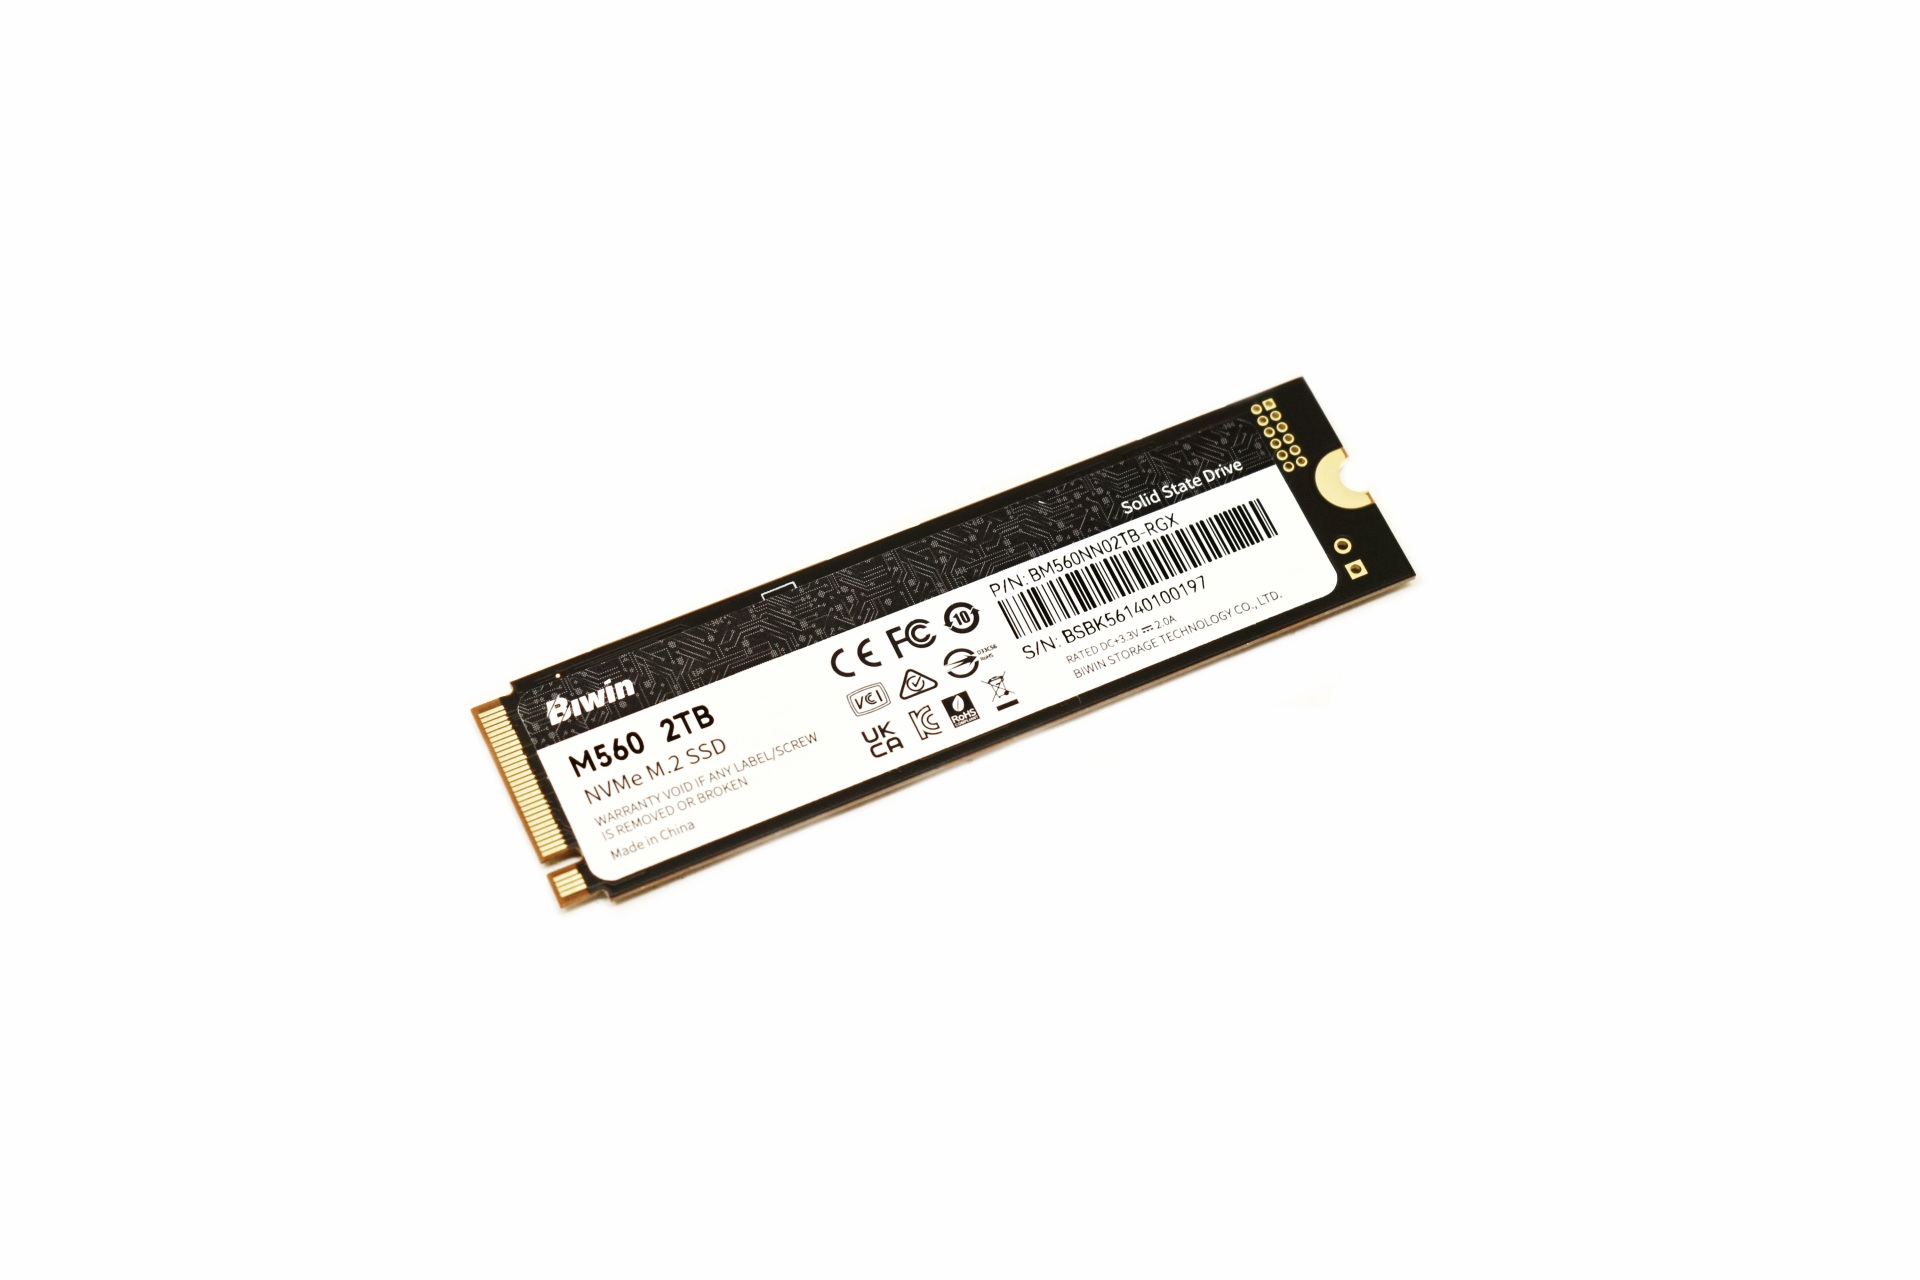
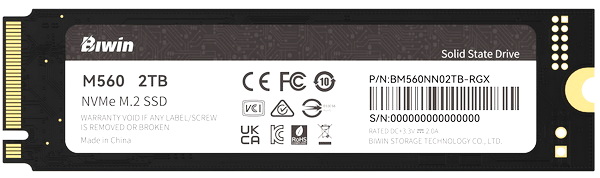
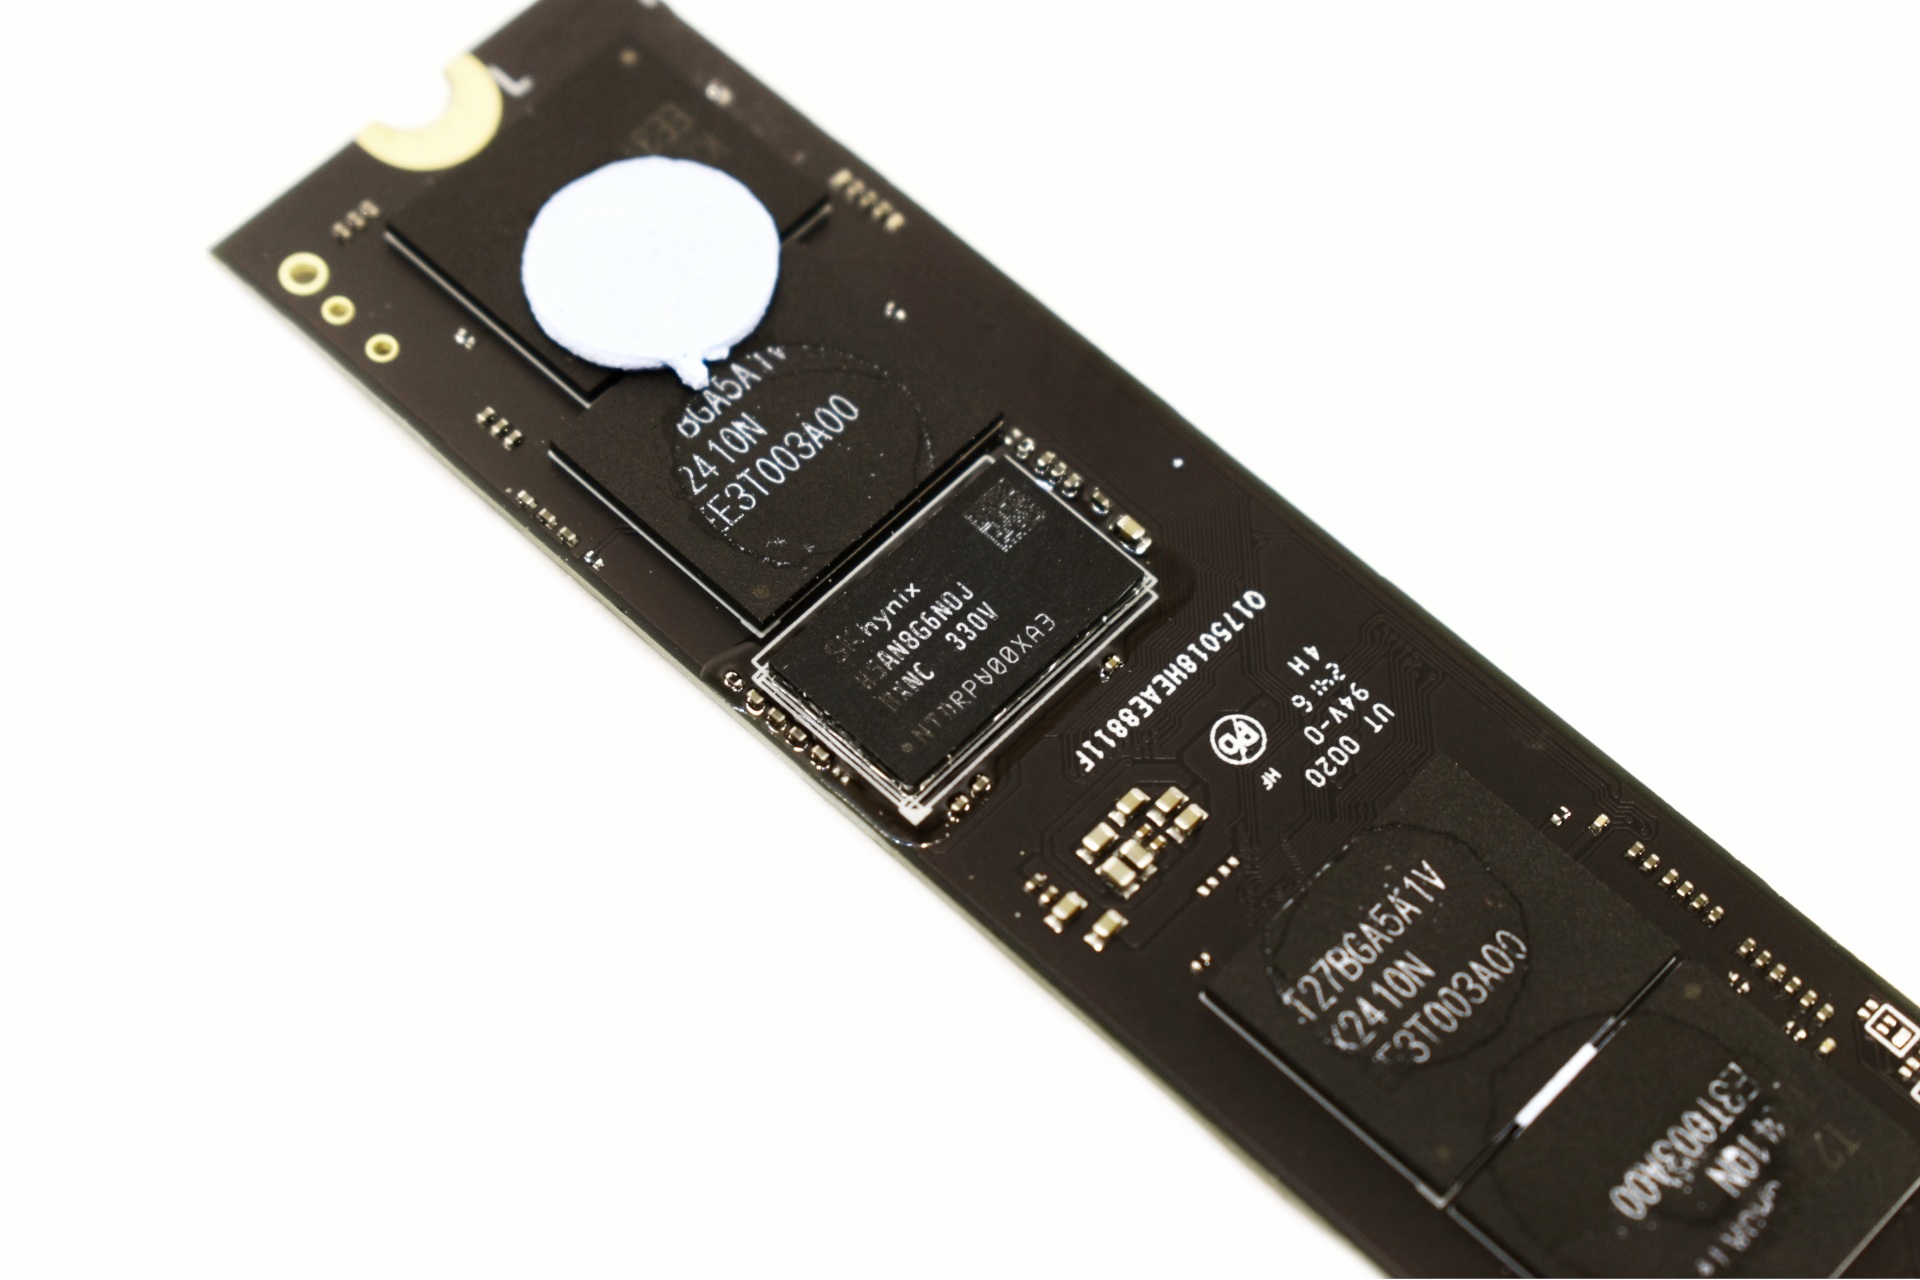
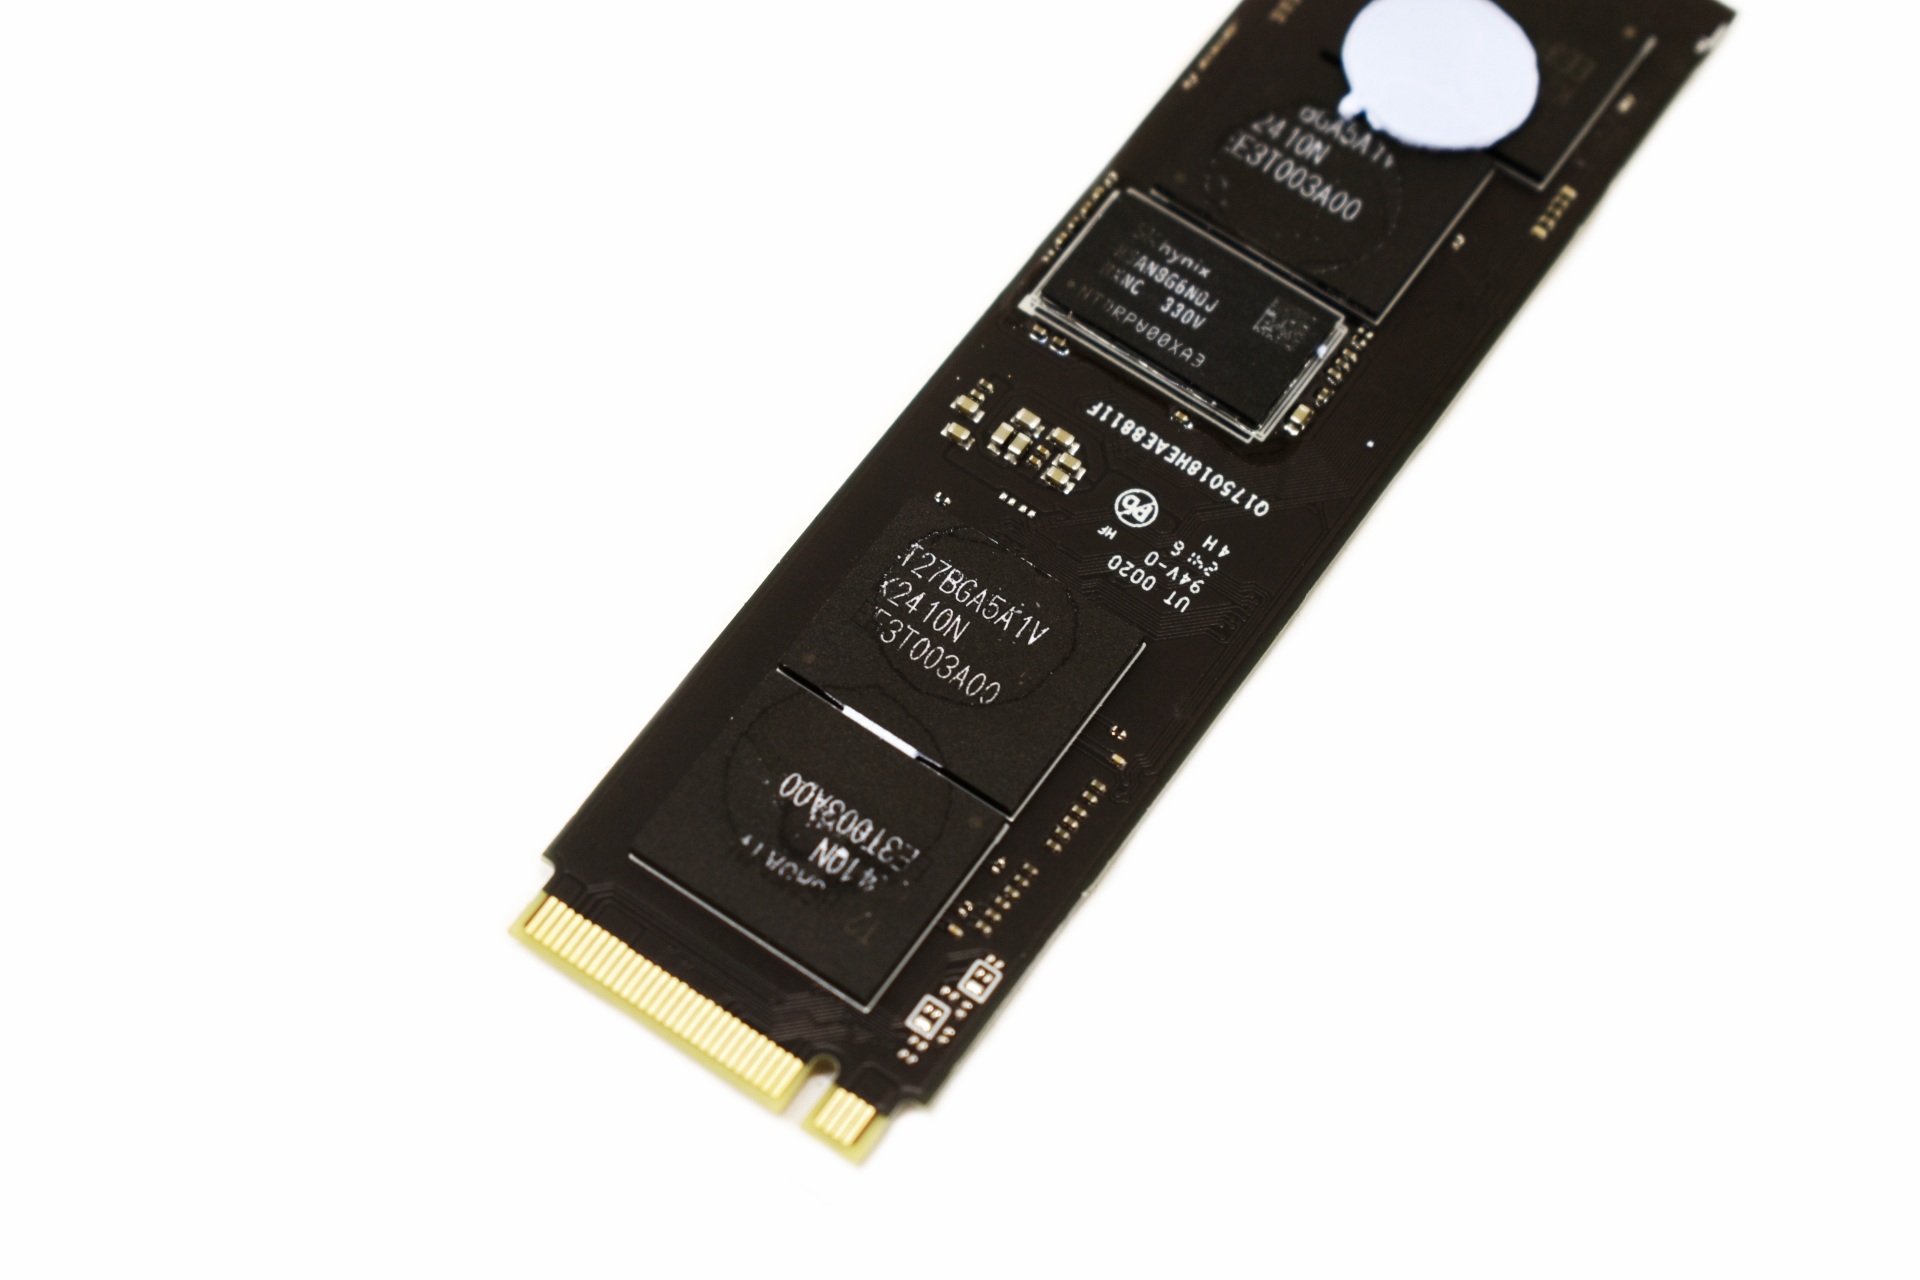
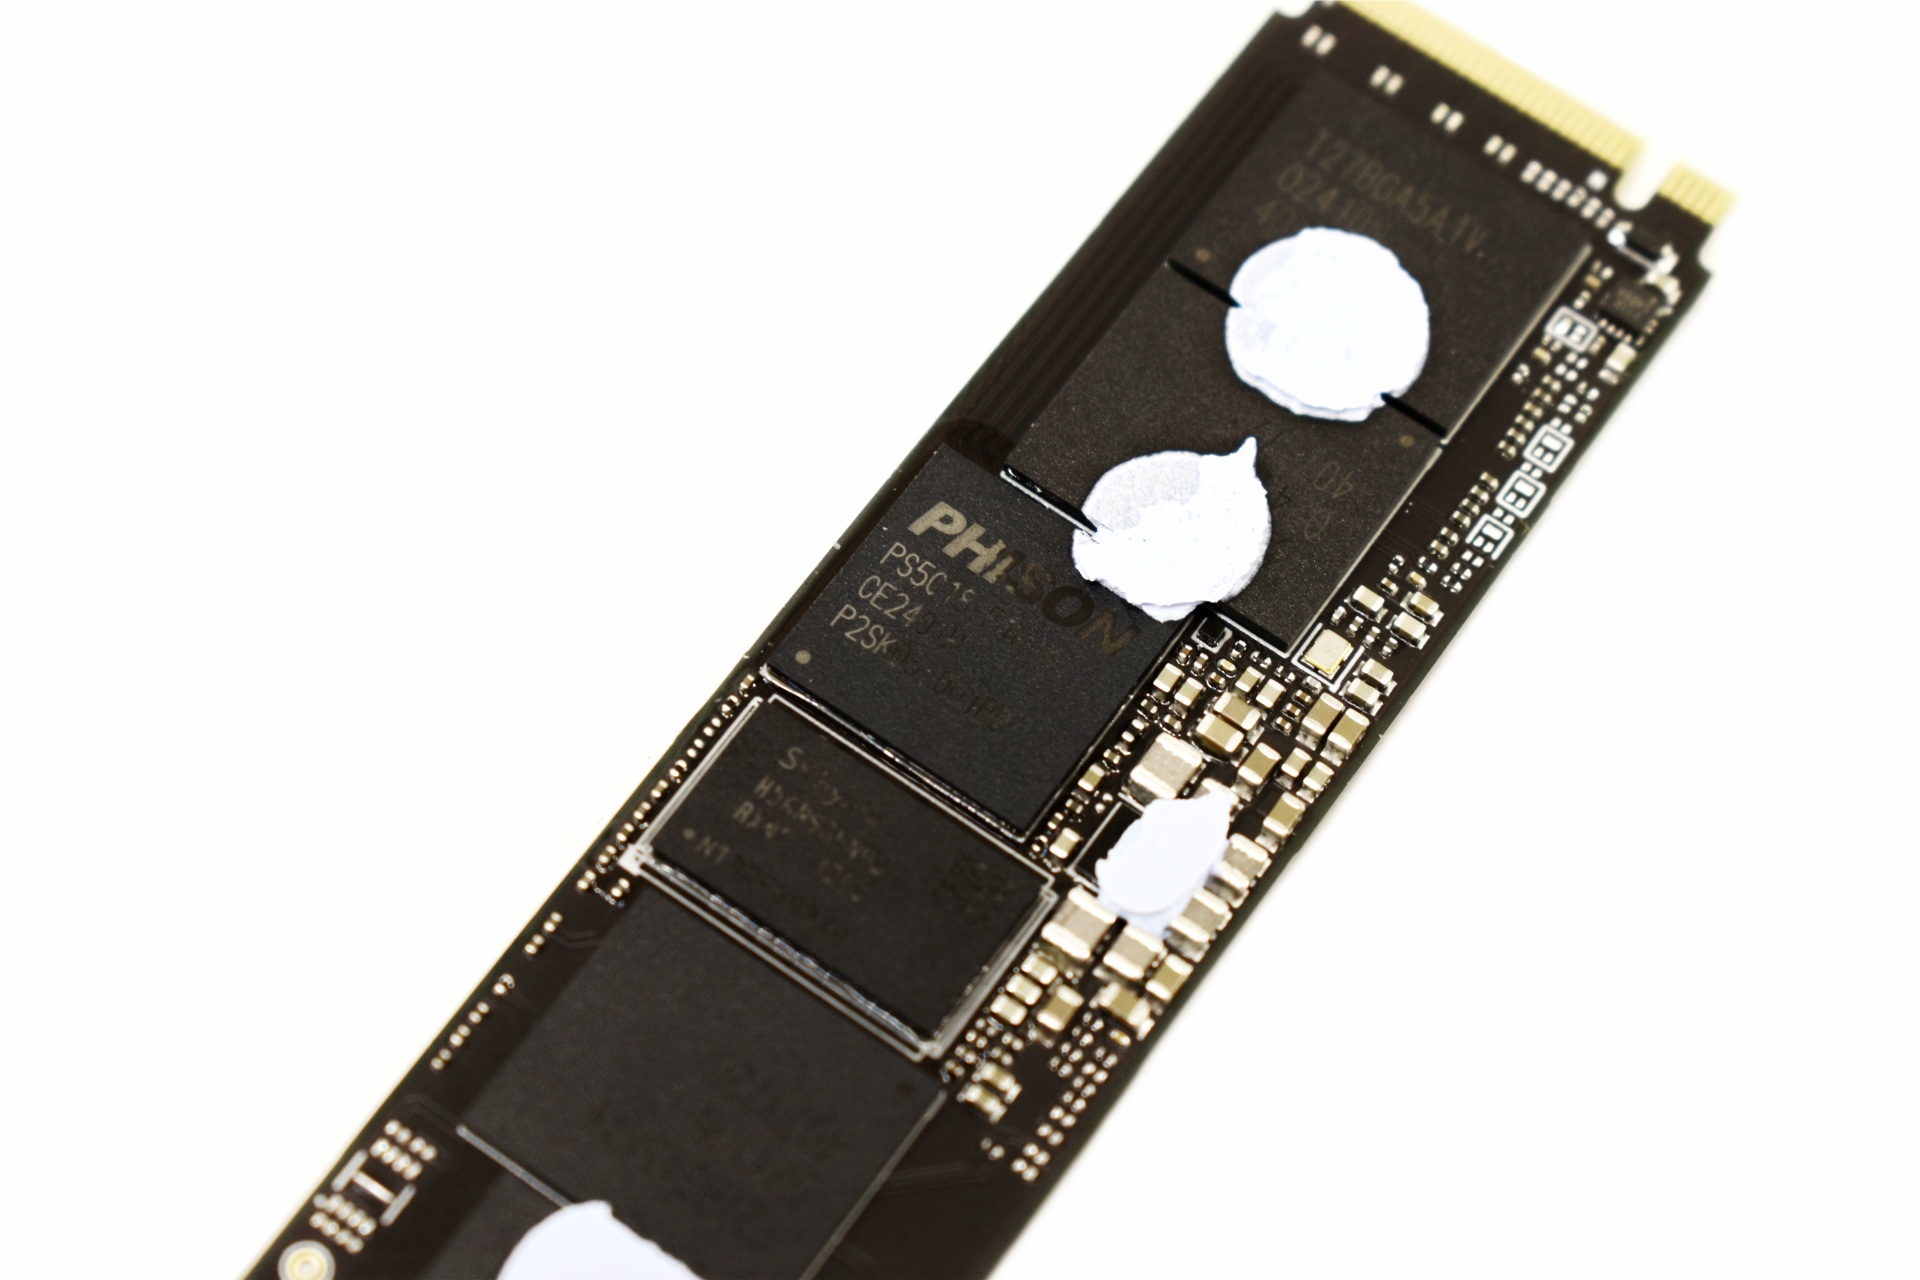
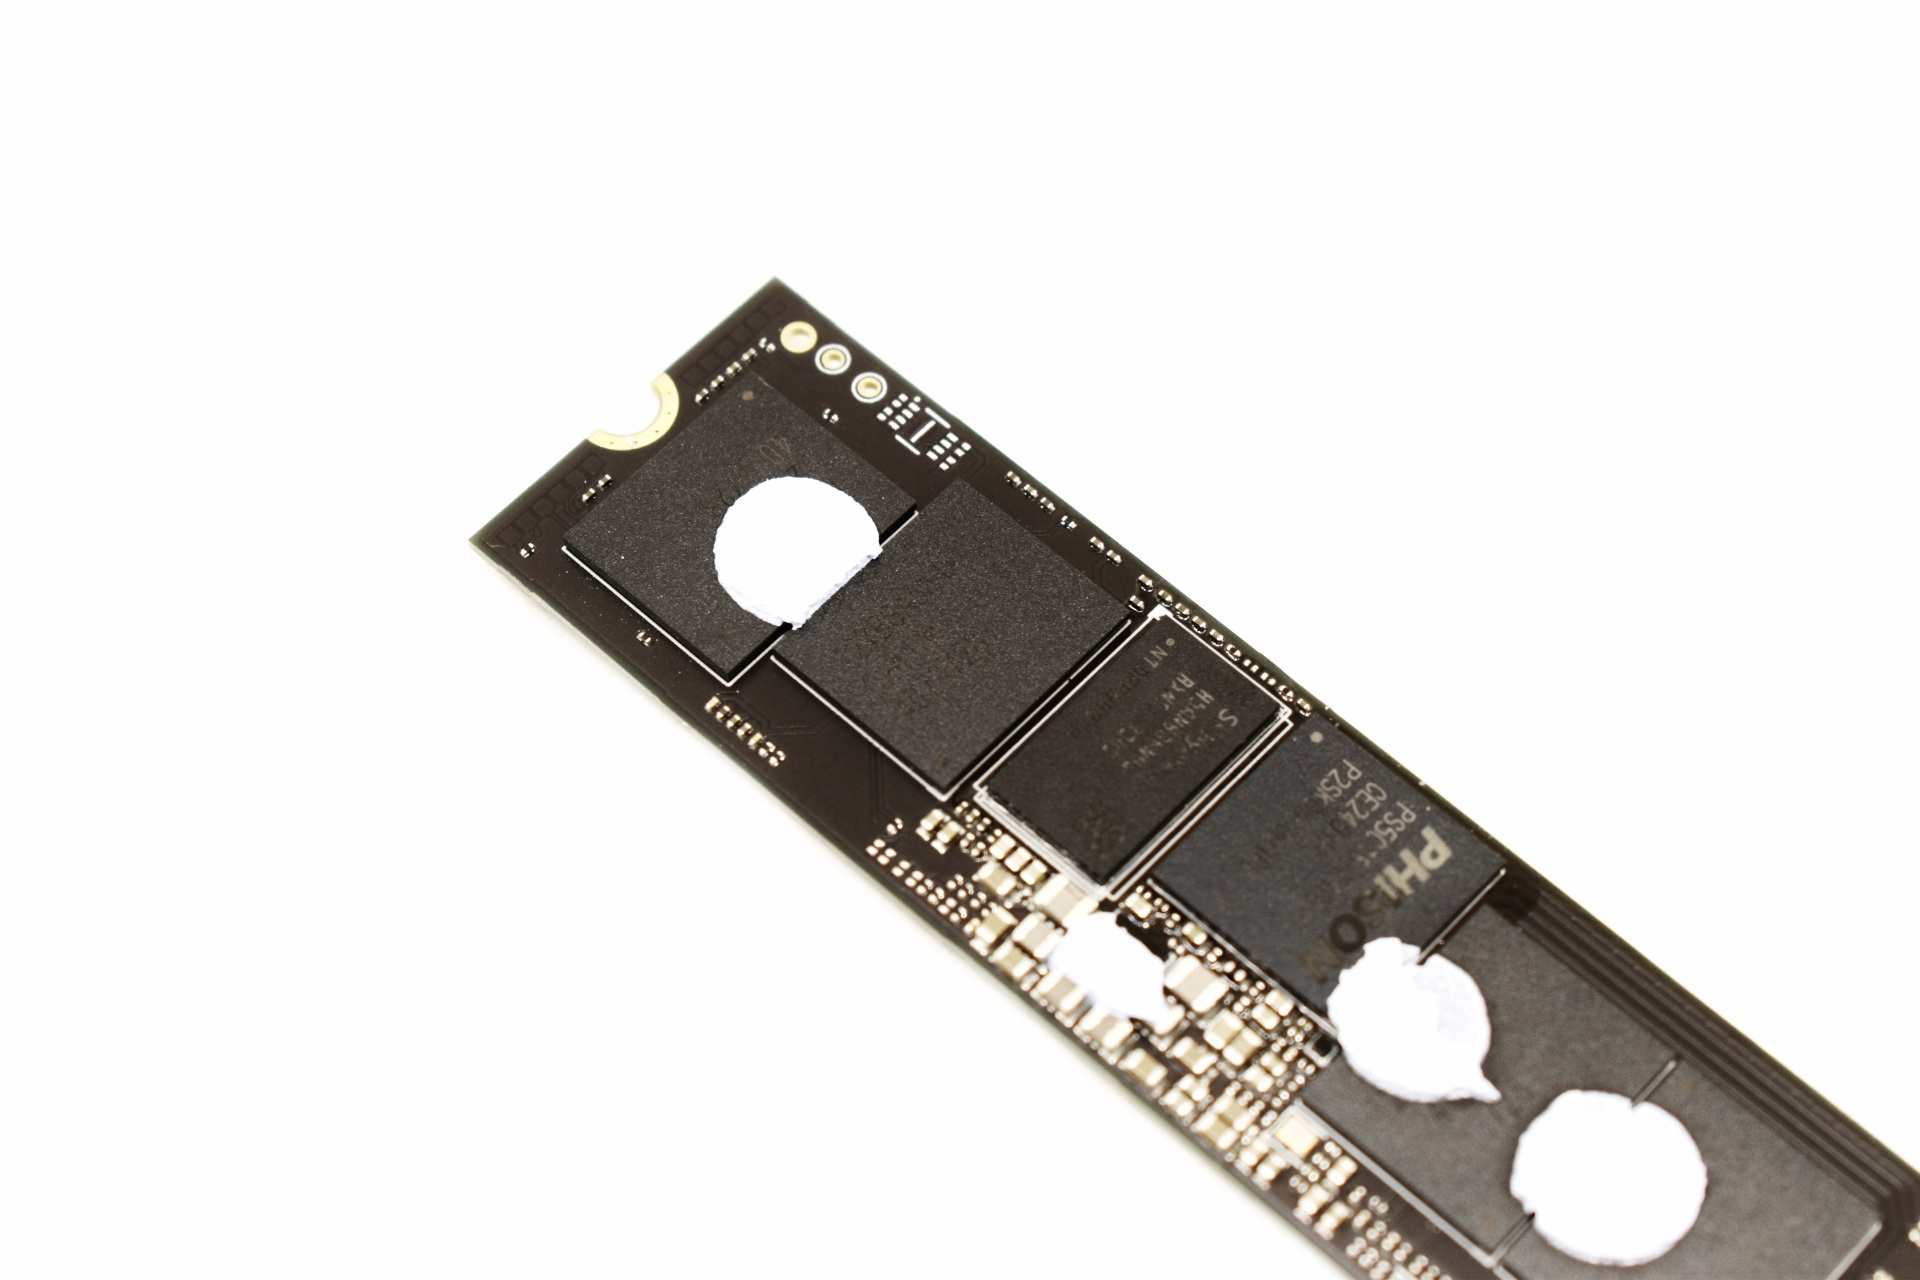
As a DRAM-less drive the M560 is quite simple and so on one side we just find the SM2504XTF NAND flash controller and two BiCS 8 NAND flash modules.


On the other side we see the same sticker visible from the rear of the box.


thermal idlet

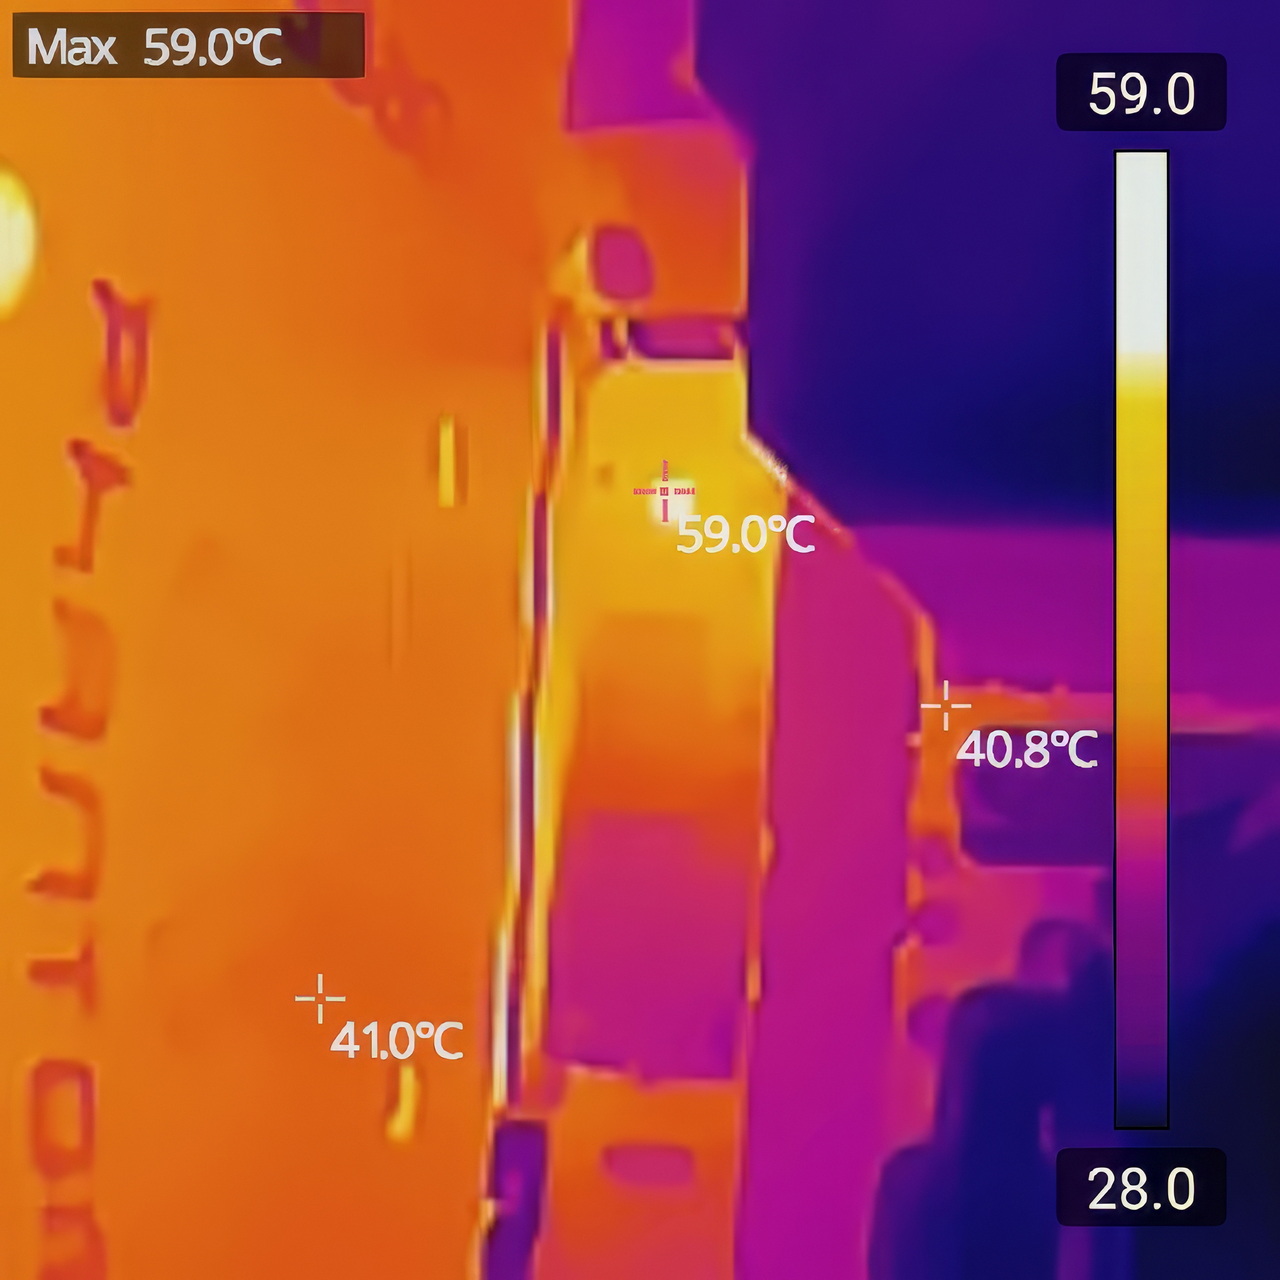
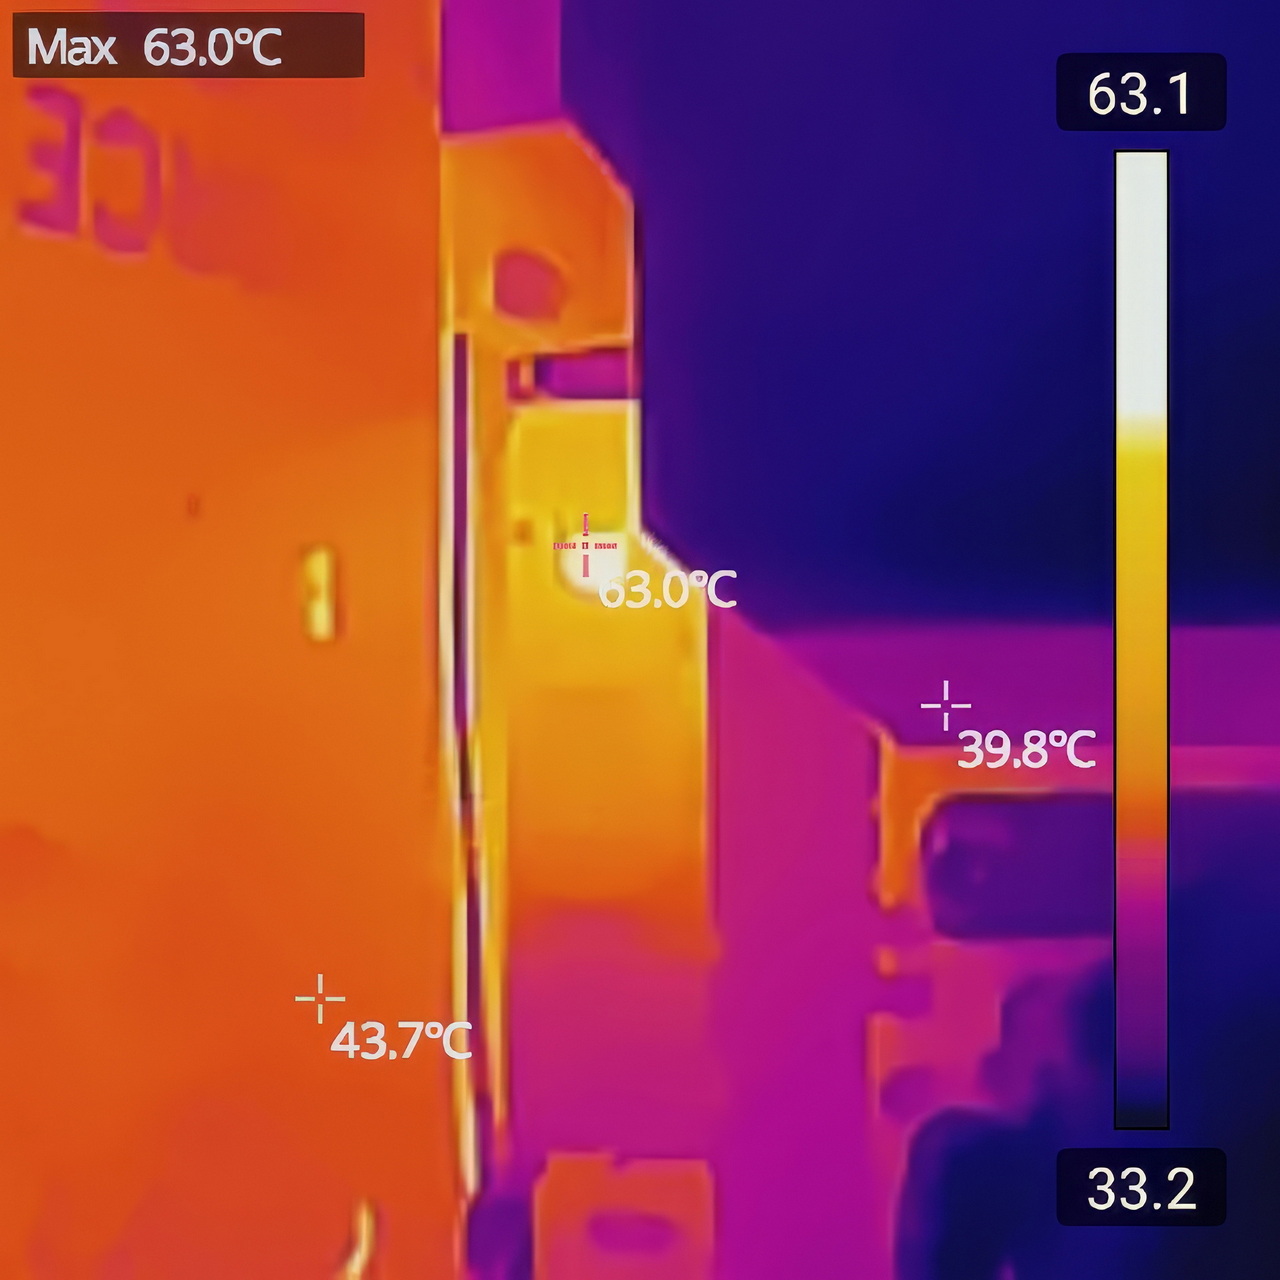
Although I perform all tests with the motherboard heatsink installed (unless a drive comes ready with its very own heatsink), I wanted to check and see if thermal issues on the new Gen5 controllers was a thing of the past and as you can all see from the thermal images above, even at load the SM2504XTF didn't surpass 63 degrees Celsius (59 degrees in idle - 23 degrees ambient room temperature).


BIWIN INTELLIGENCE


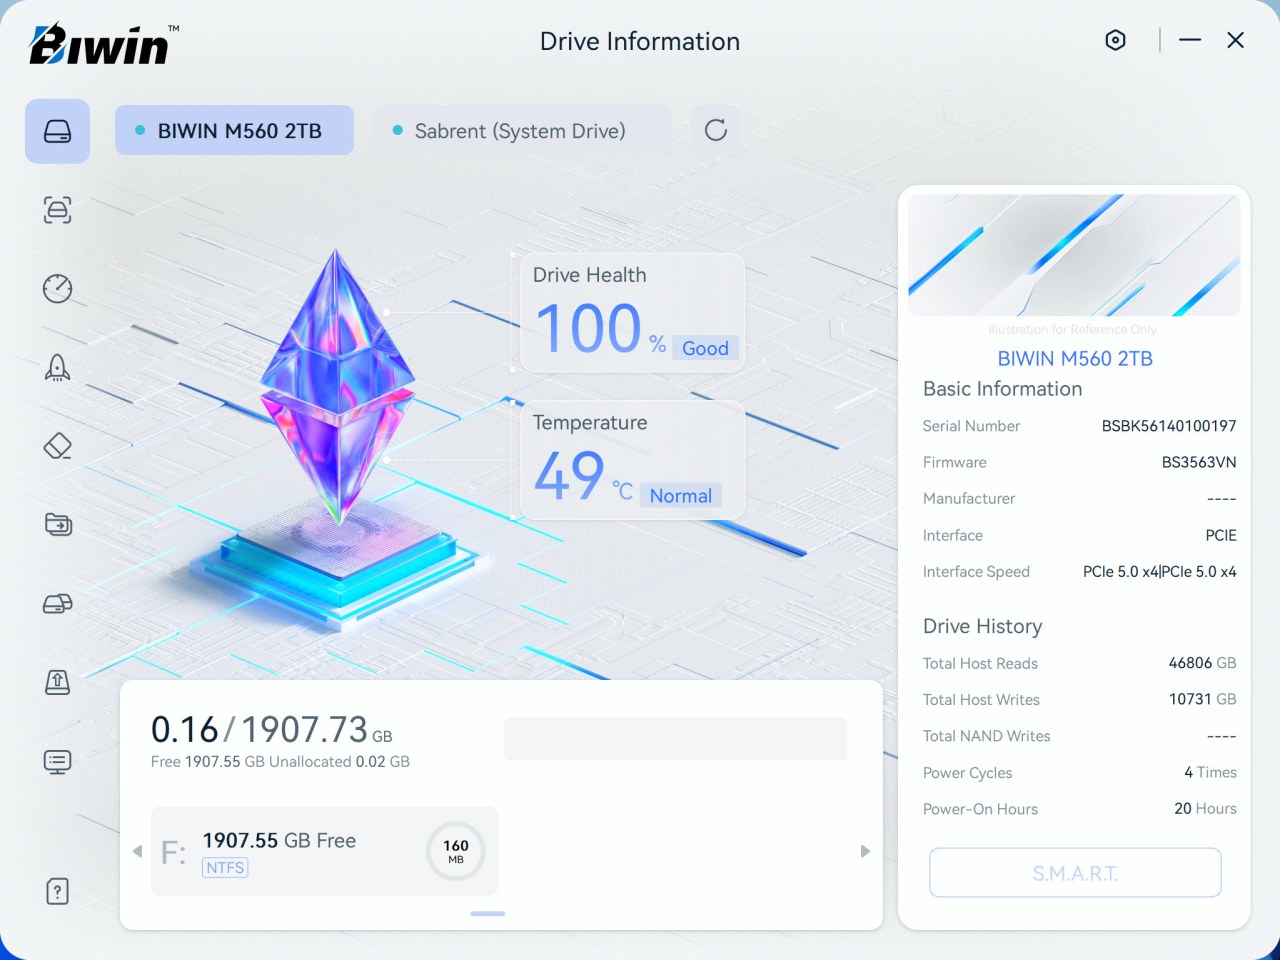
To monitor the drive and perform several functions you should download the Intelligence tool by BIWIN.

biwin intelligence 1t

Drive health, temperature, SMART details, and history are the things displayed on the main tab.


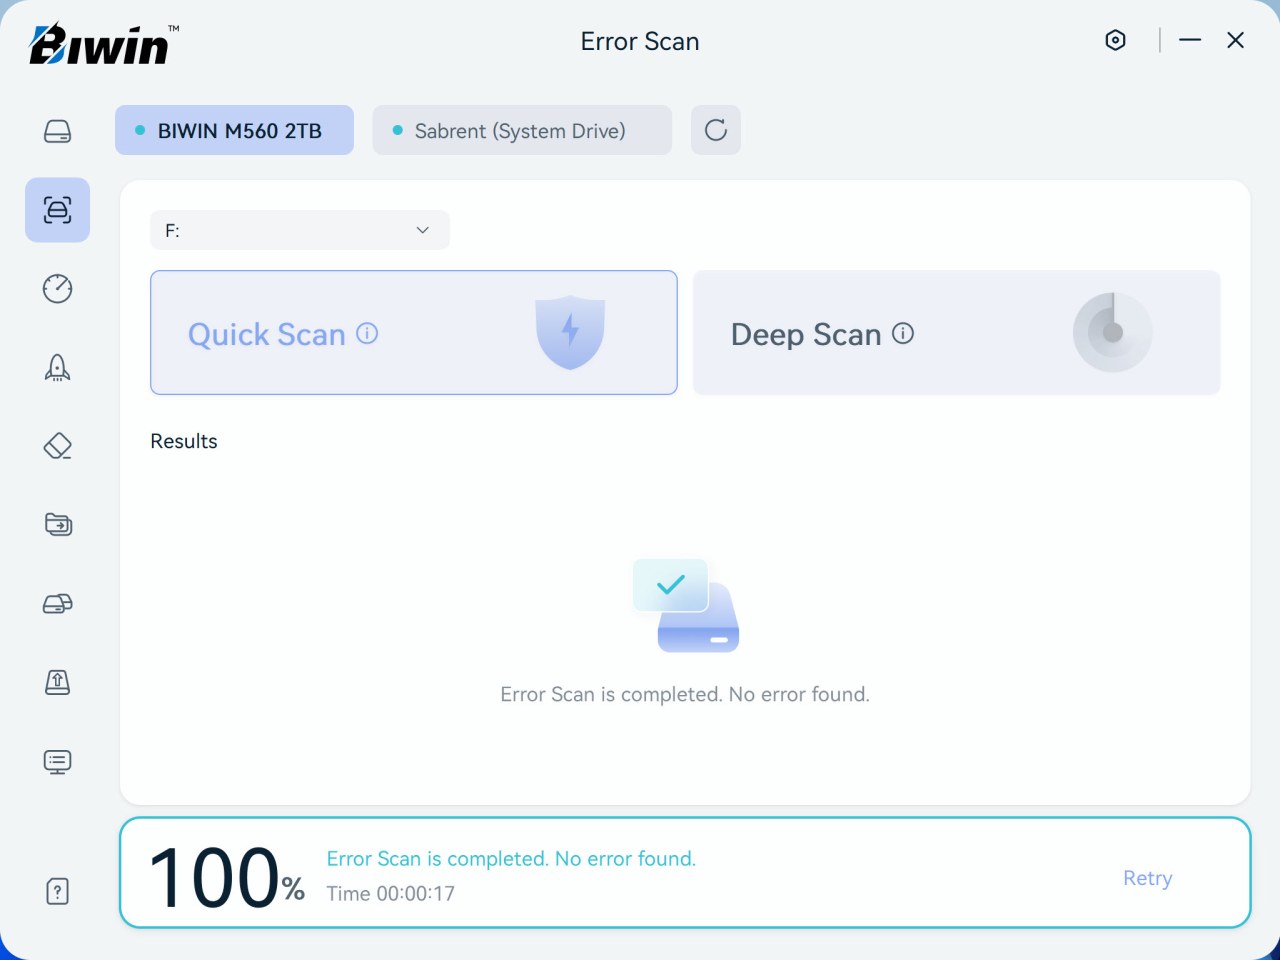
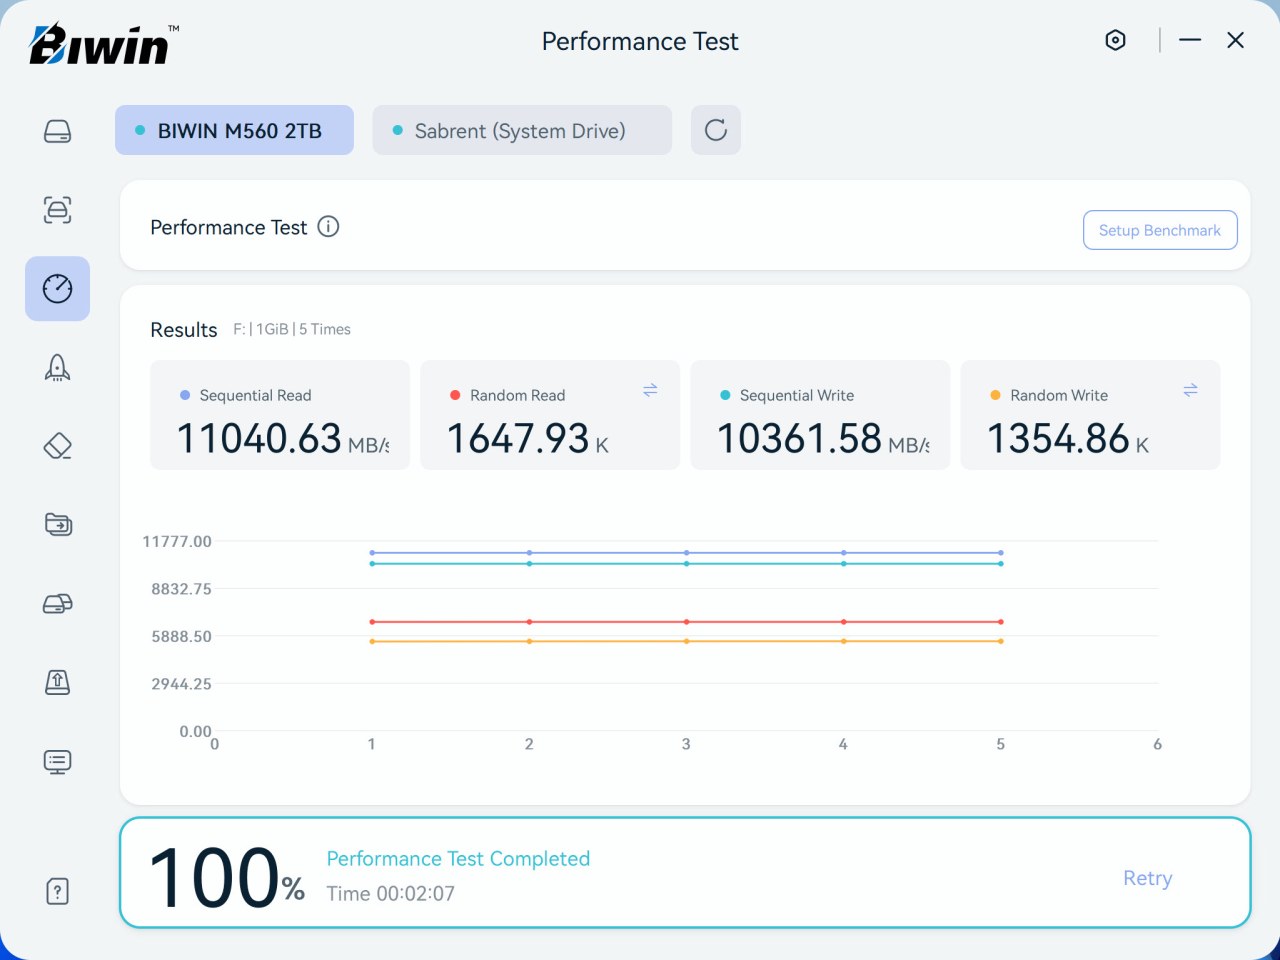
You can perform an error scan and even a performance test on the drive (as long as there's a partition on it).


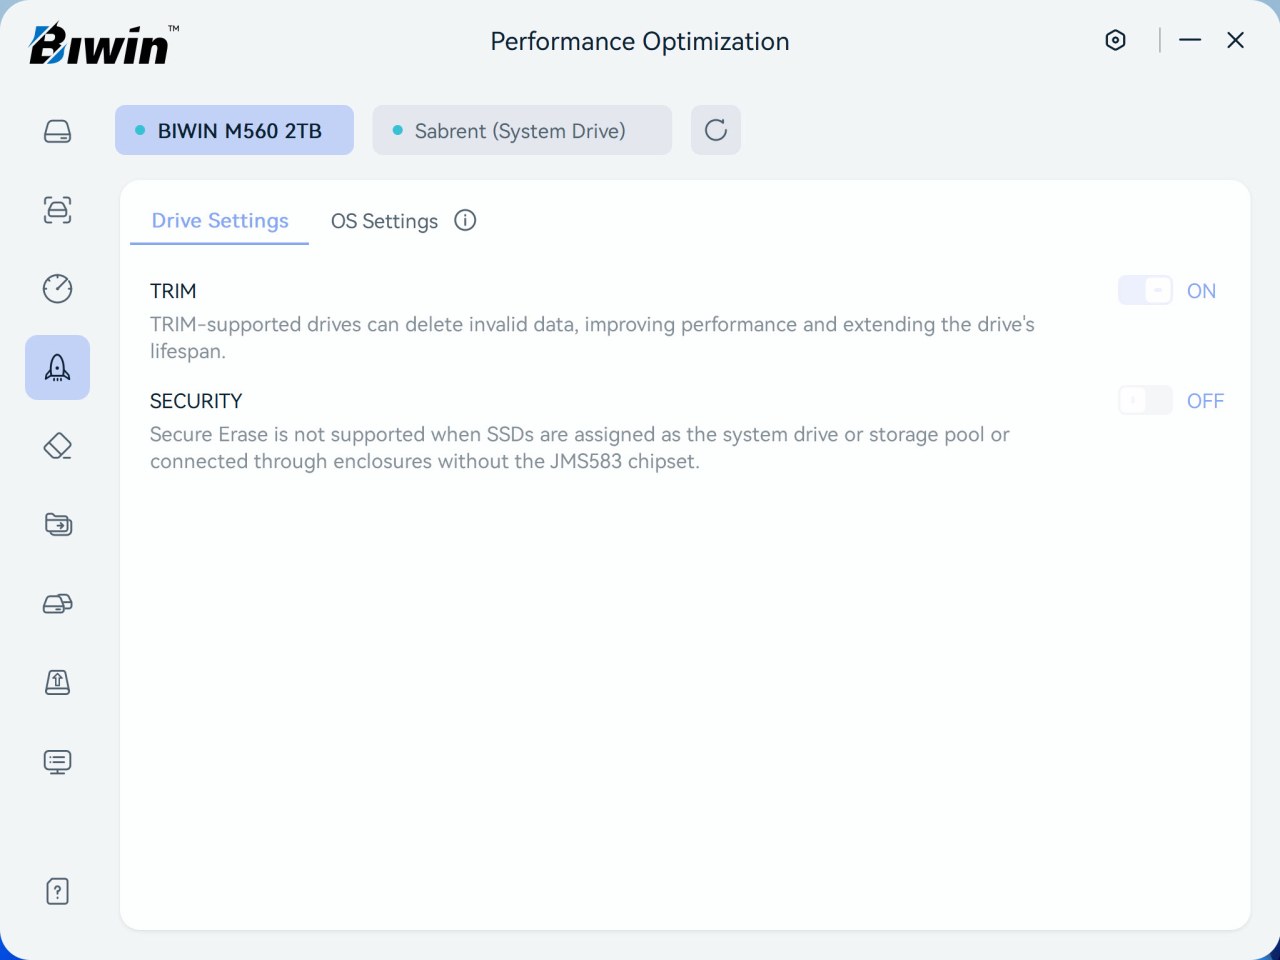
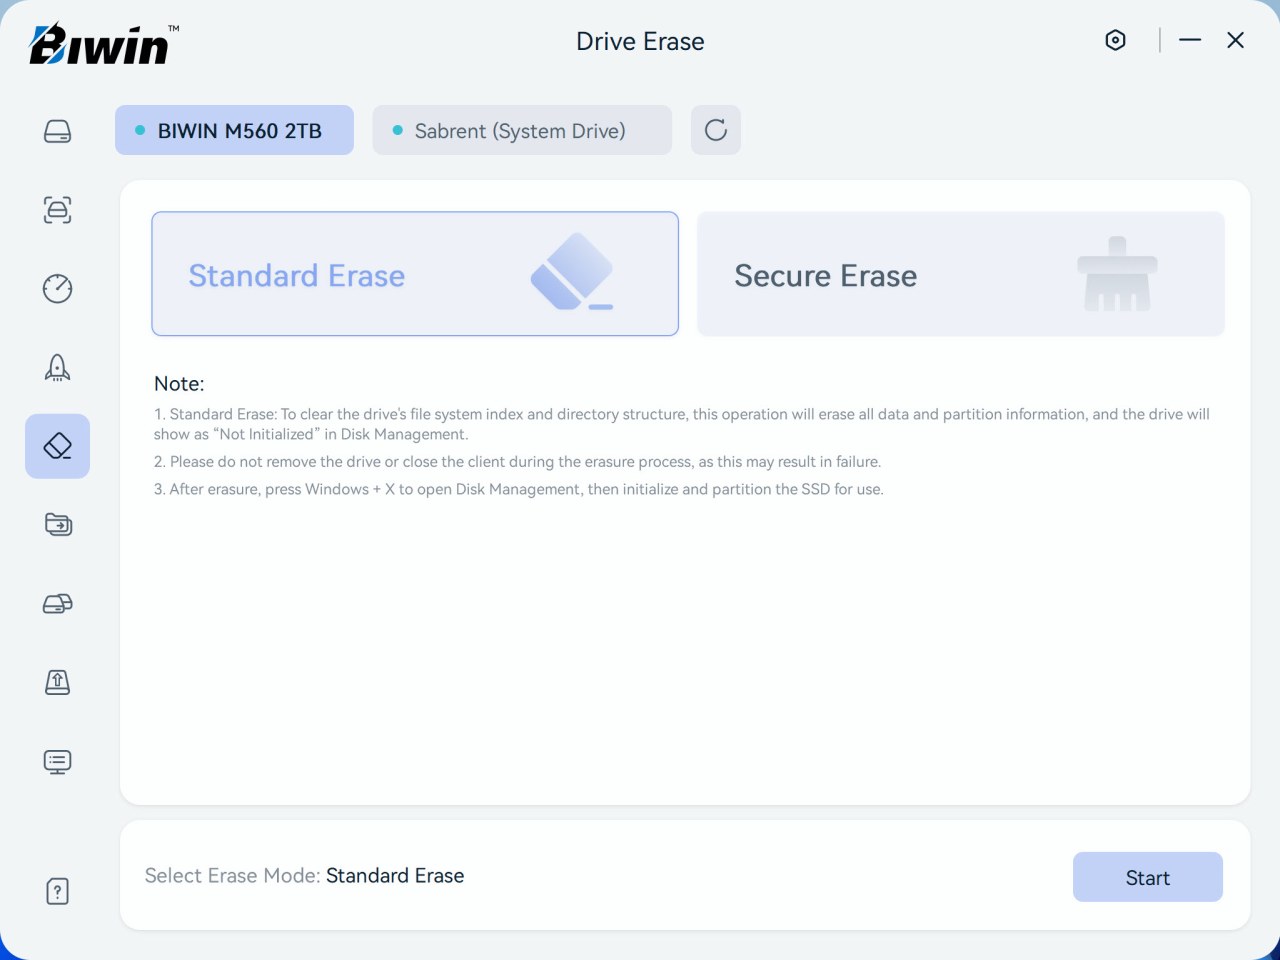
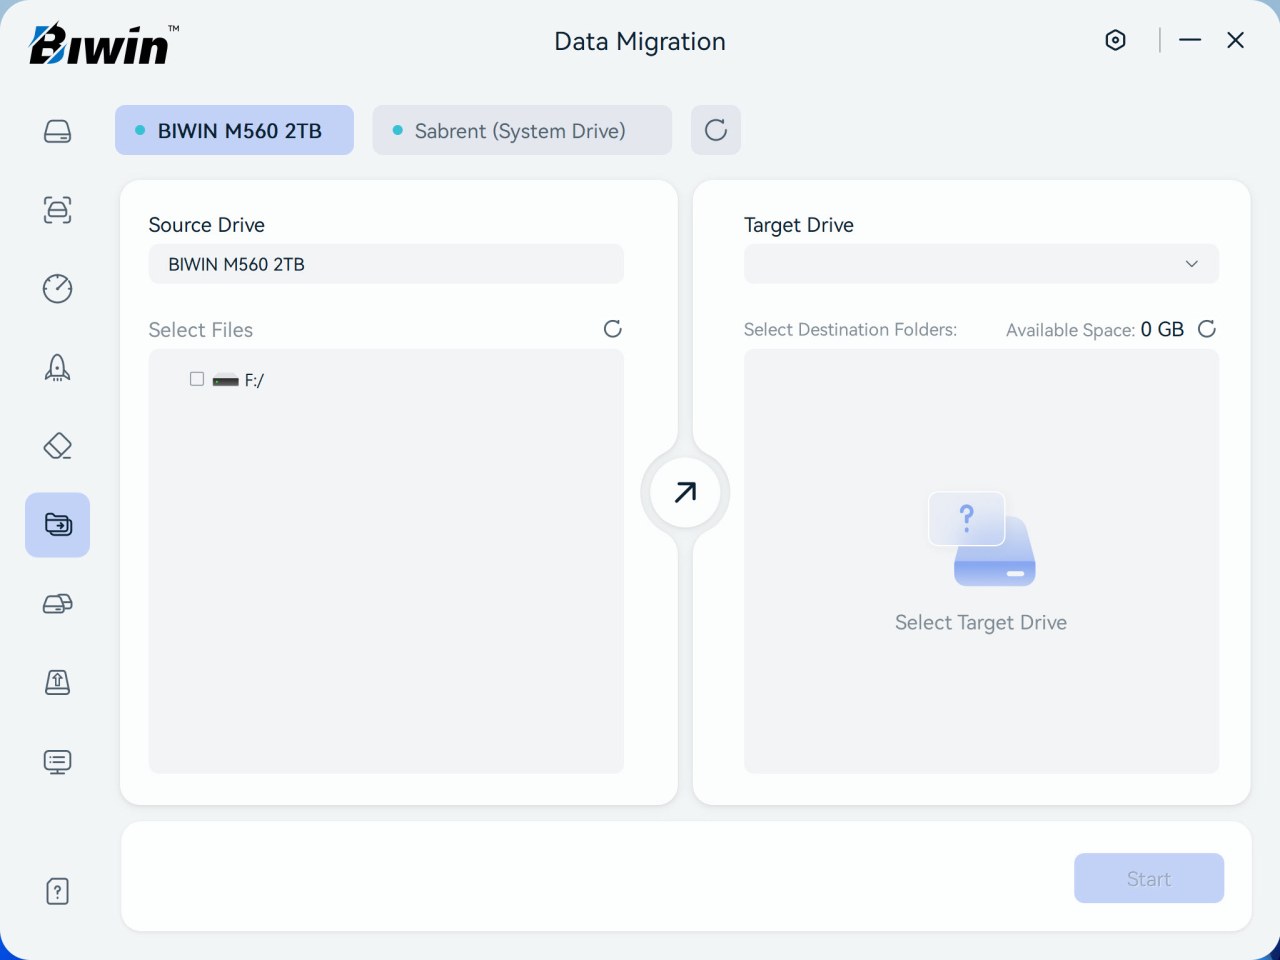
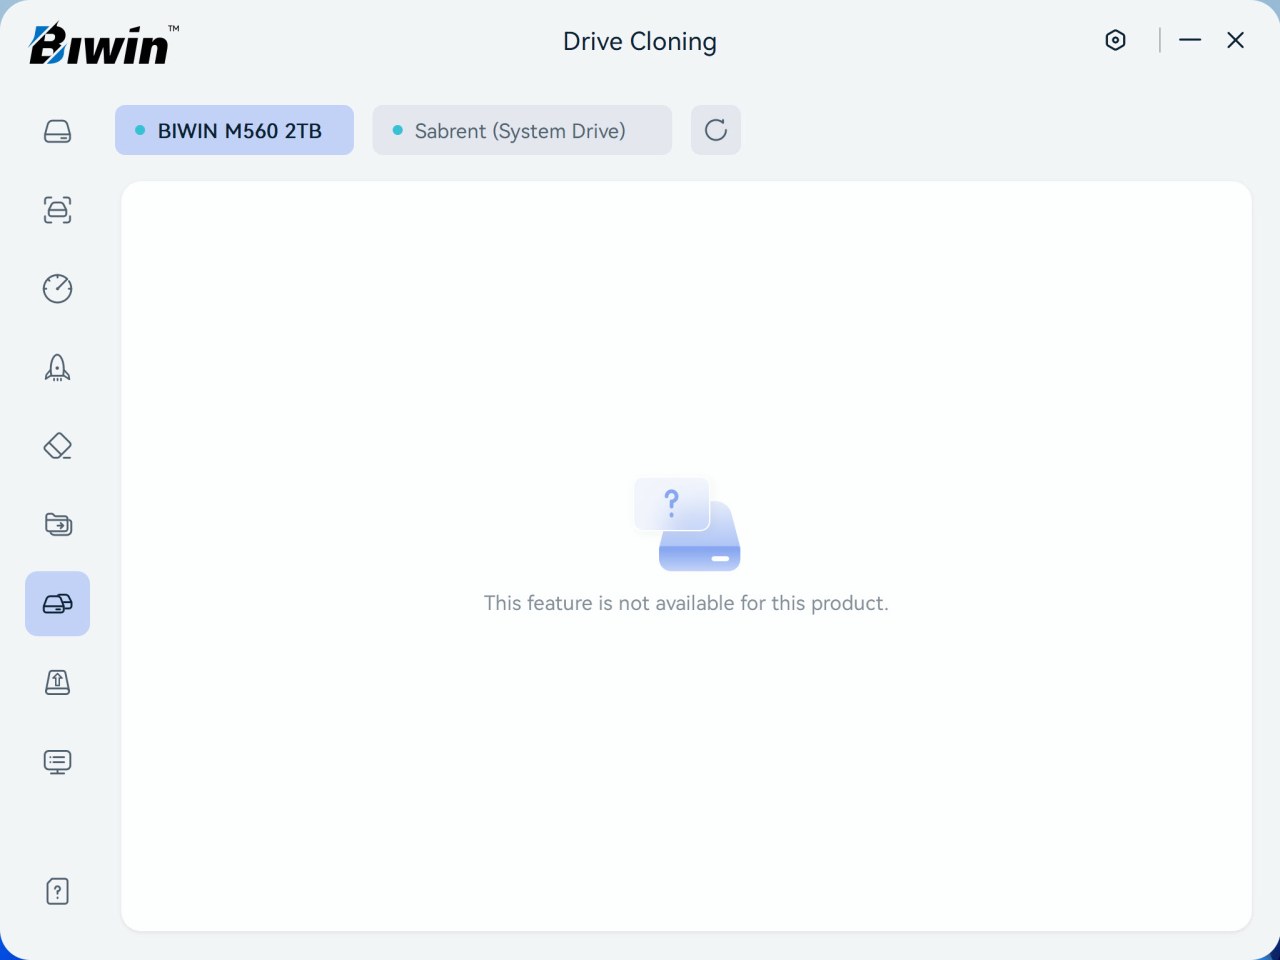
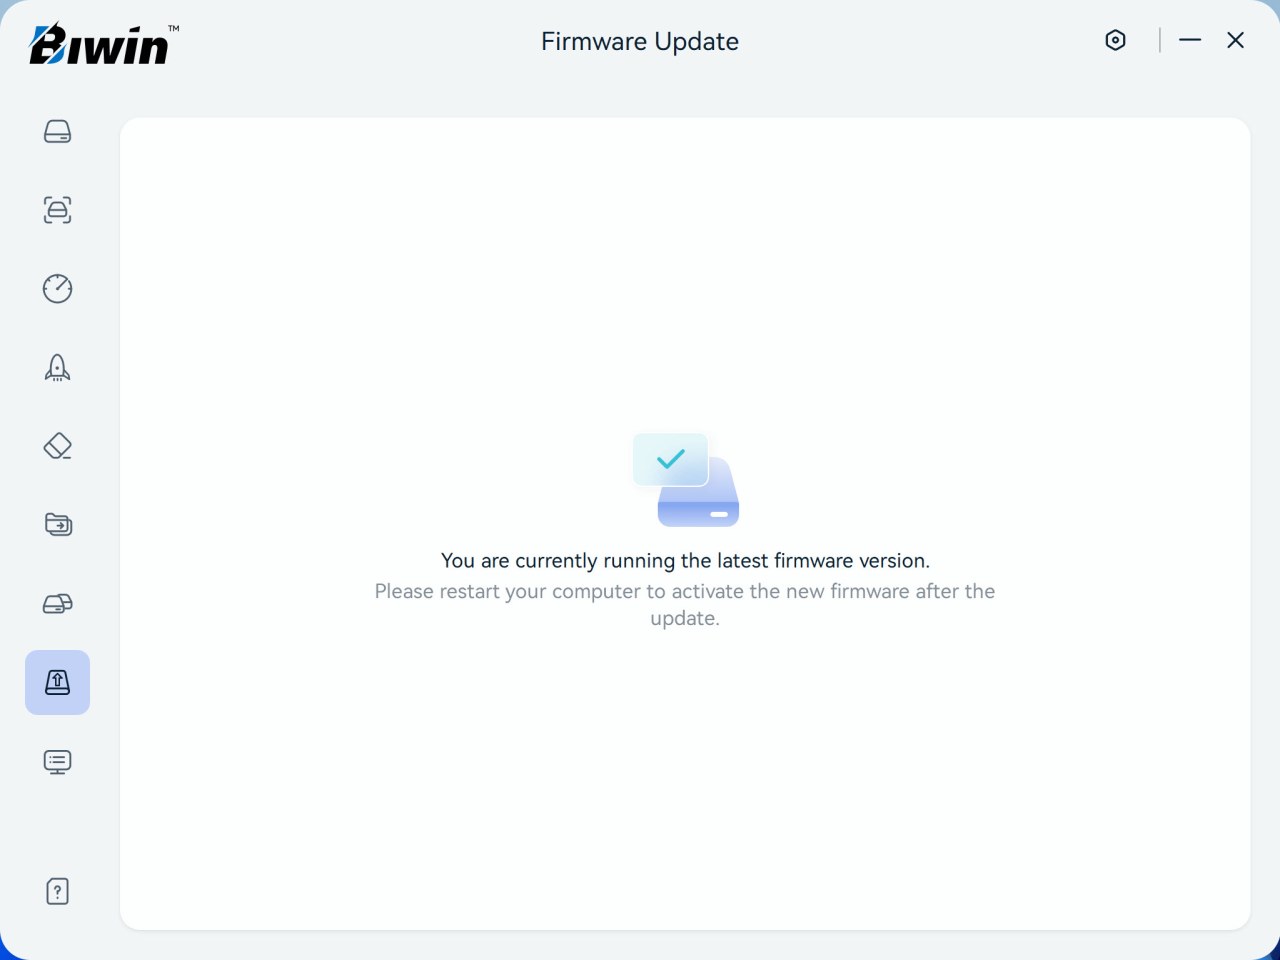
This software also allows you to enable/disable TRIM, erase the drive, migrate data, and check for firmware updates (drive cloning was greyed out).


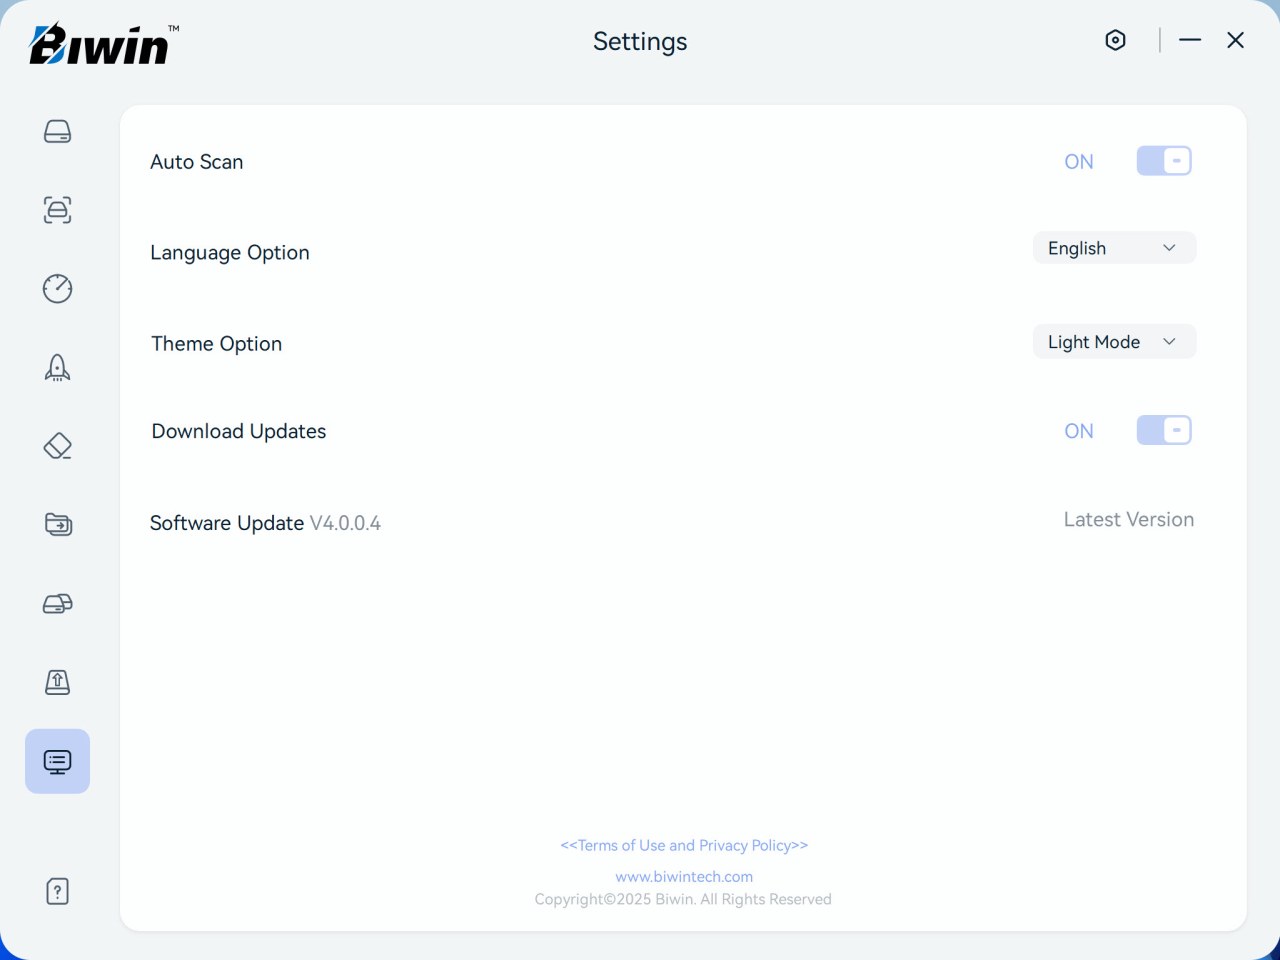
Version 4.0.0.4 was used for this review.


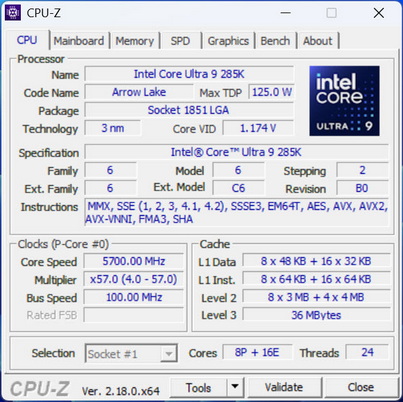
TEST BED


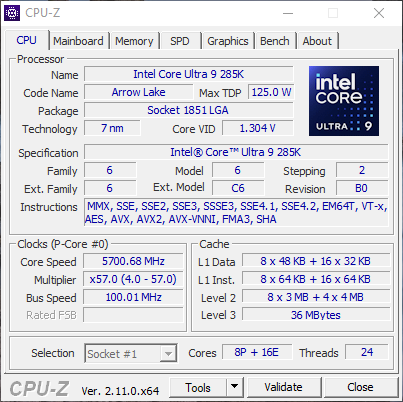
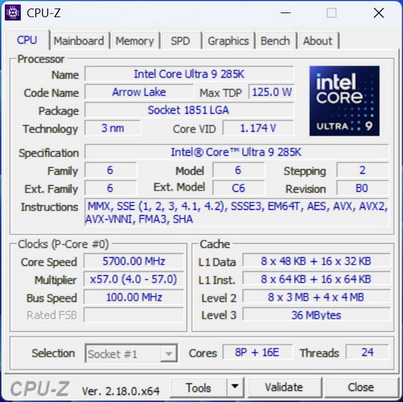
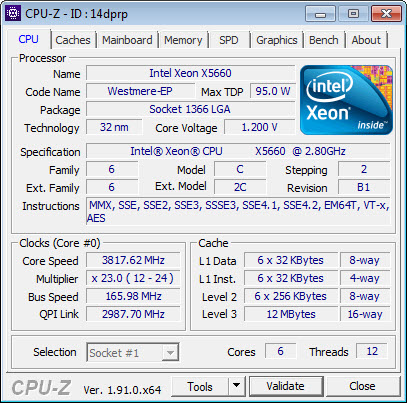
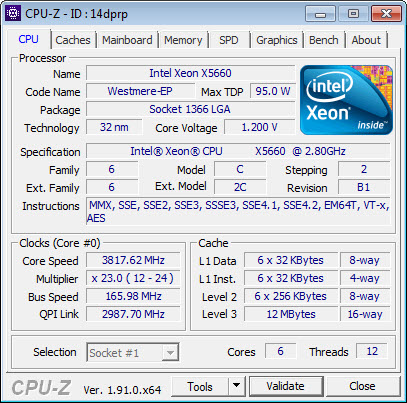
cpuza


TESTING METHODOLOGY


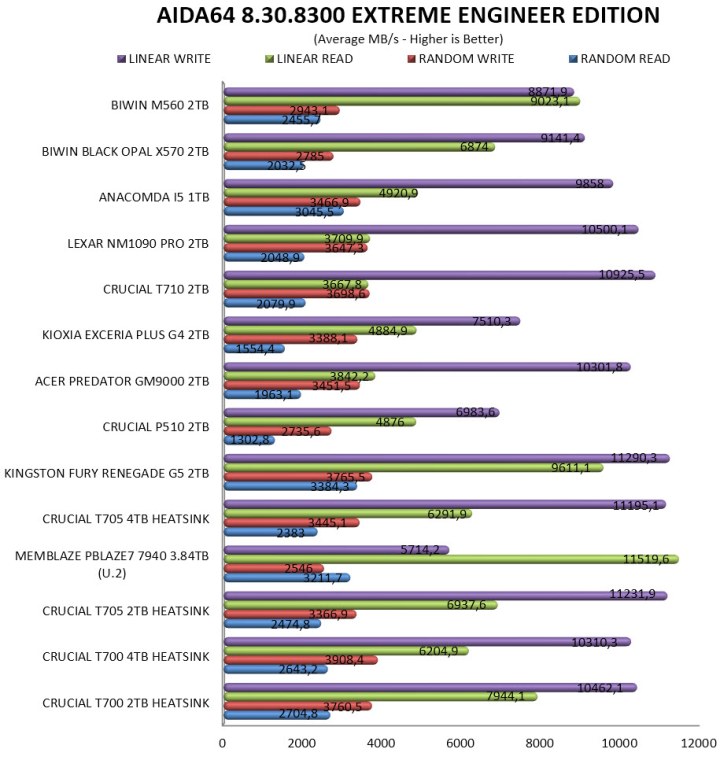
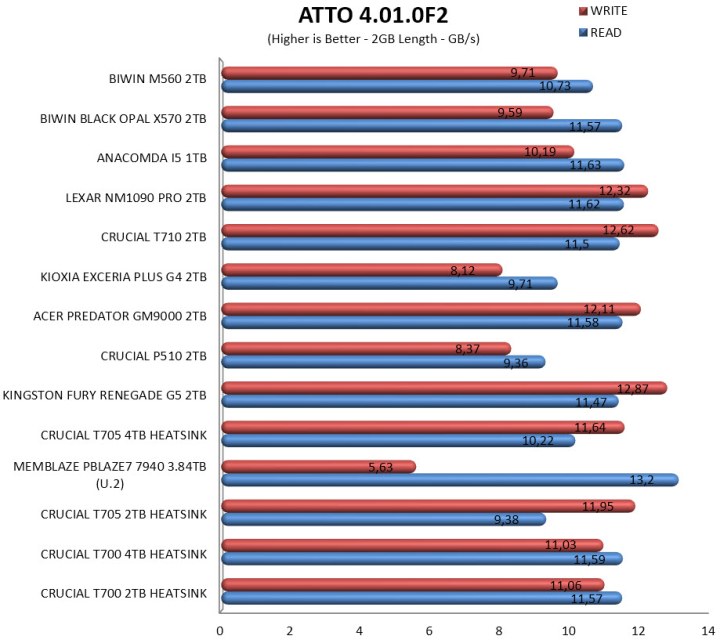
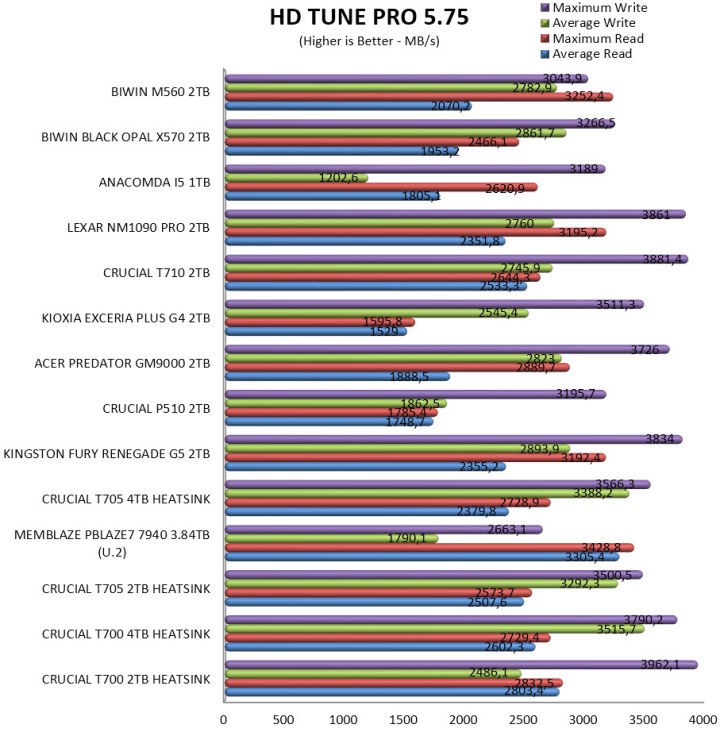
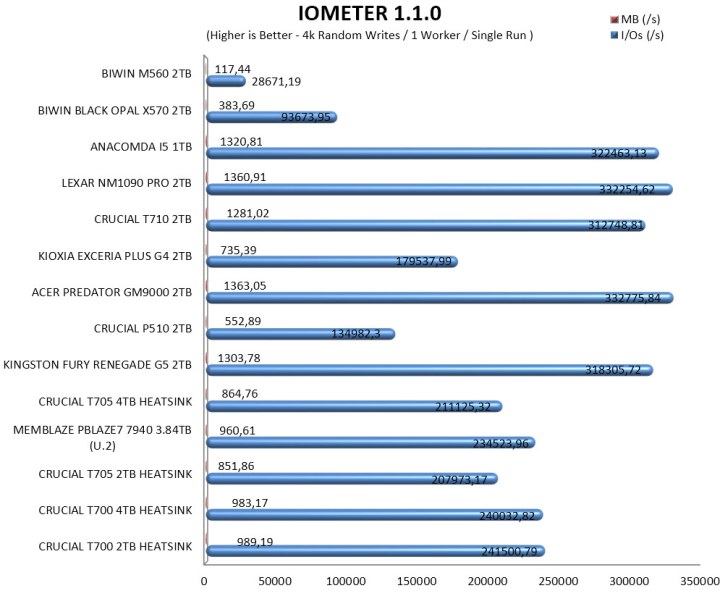
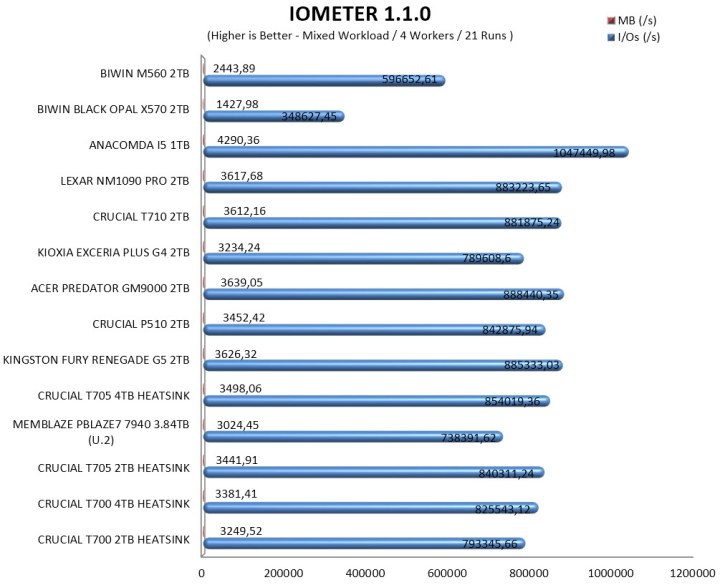
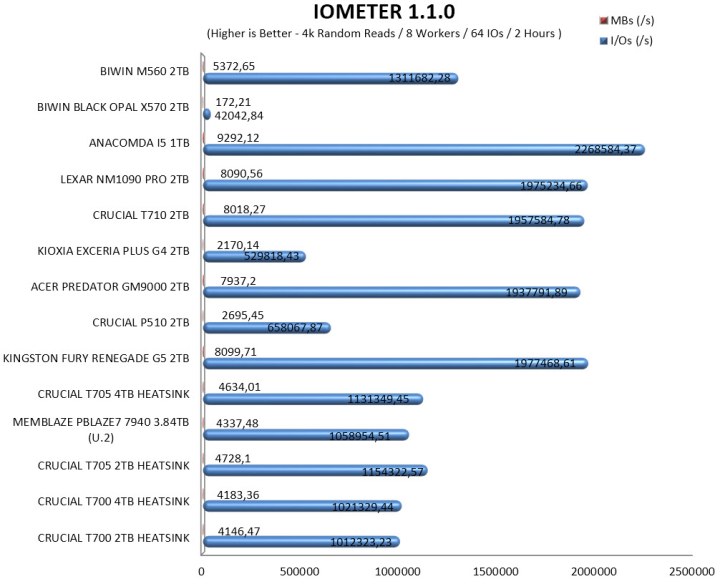
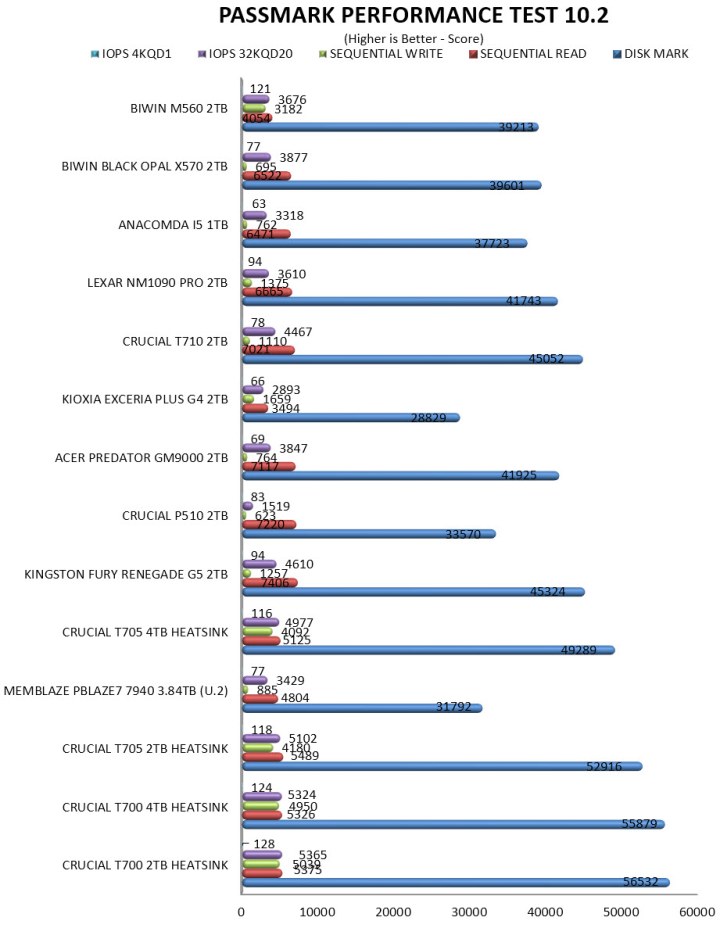
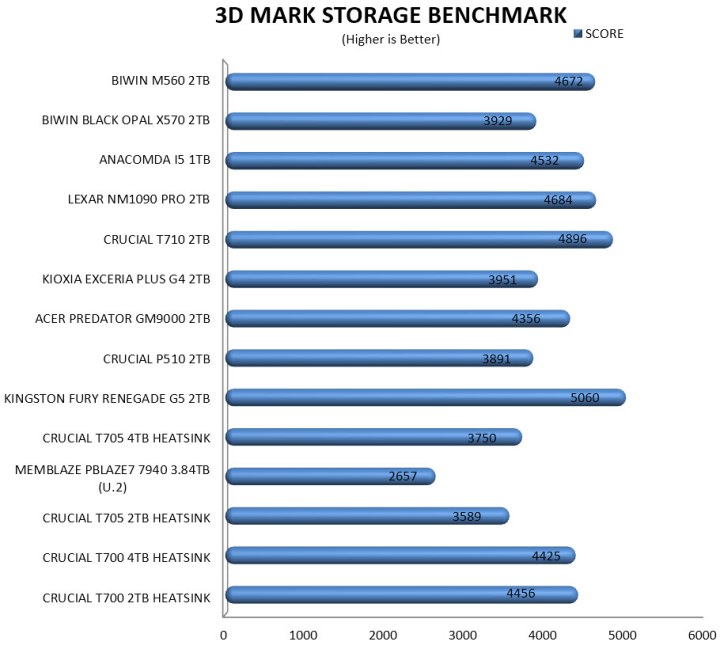
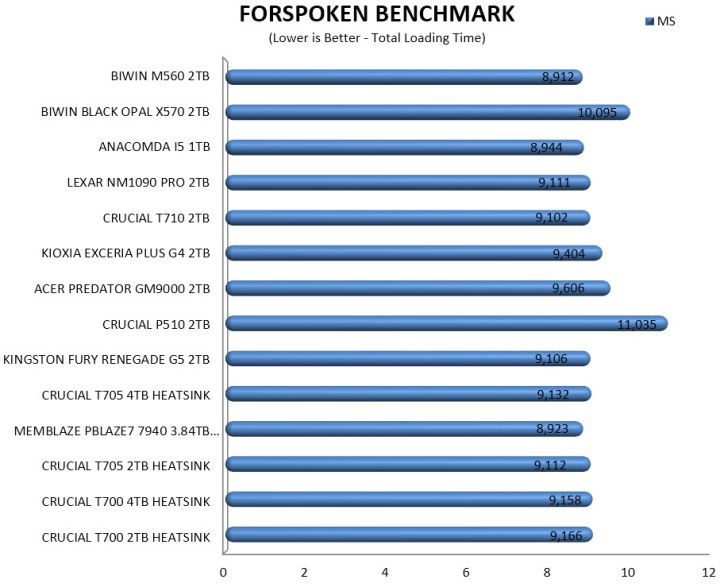
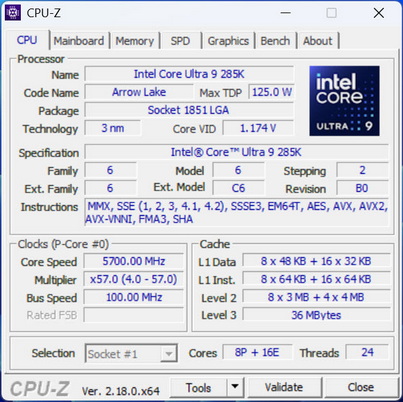
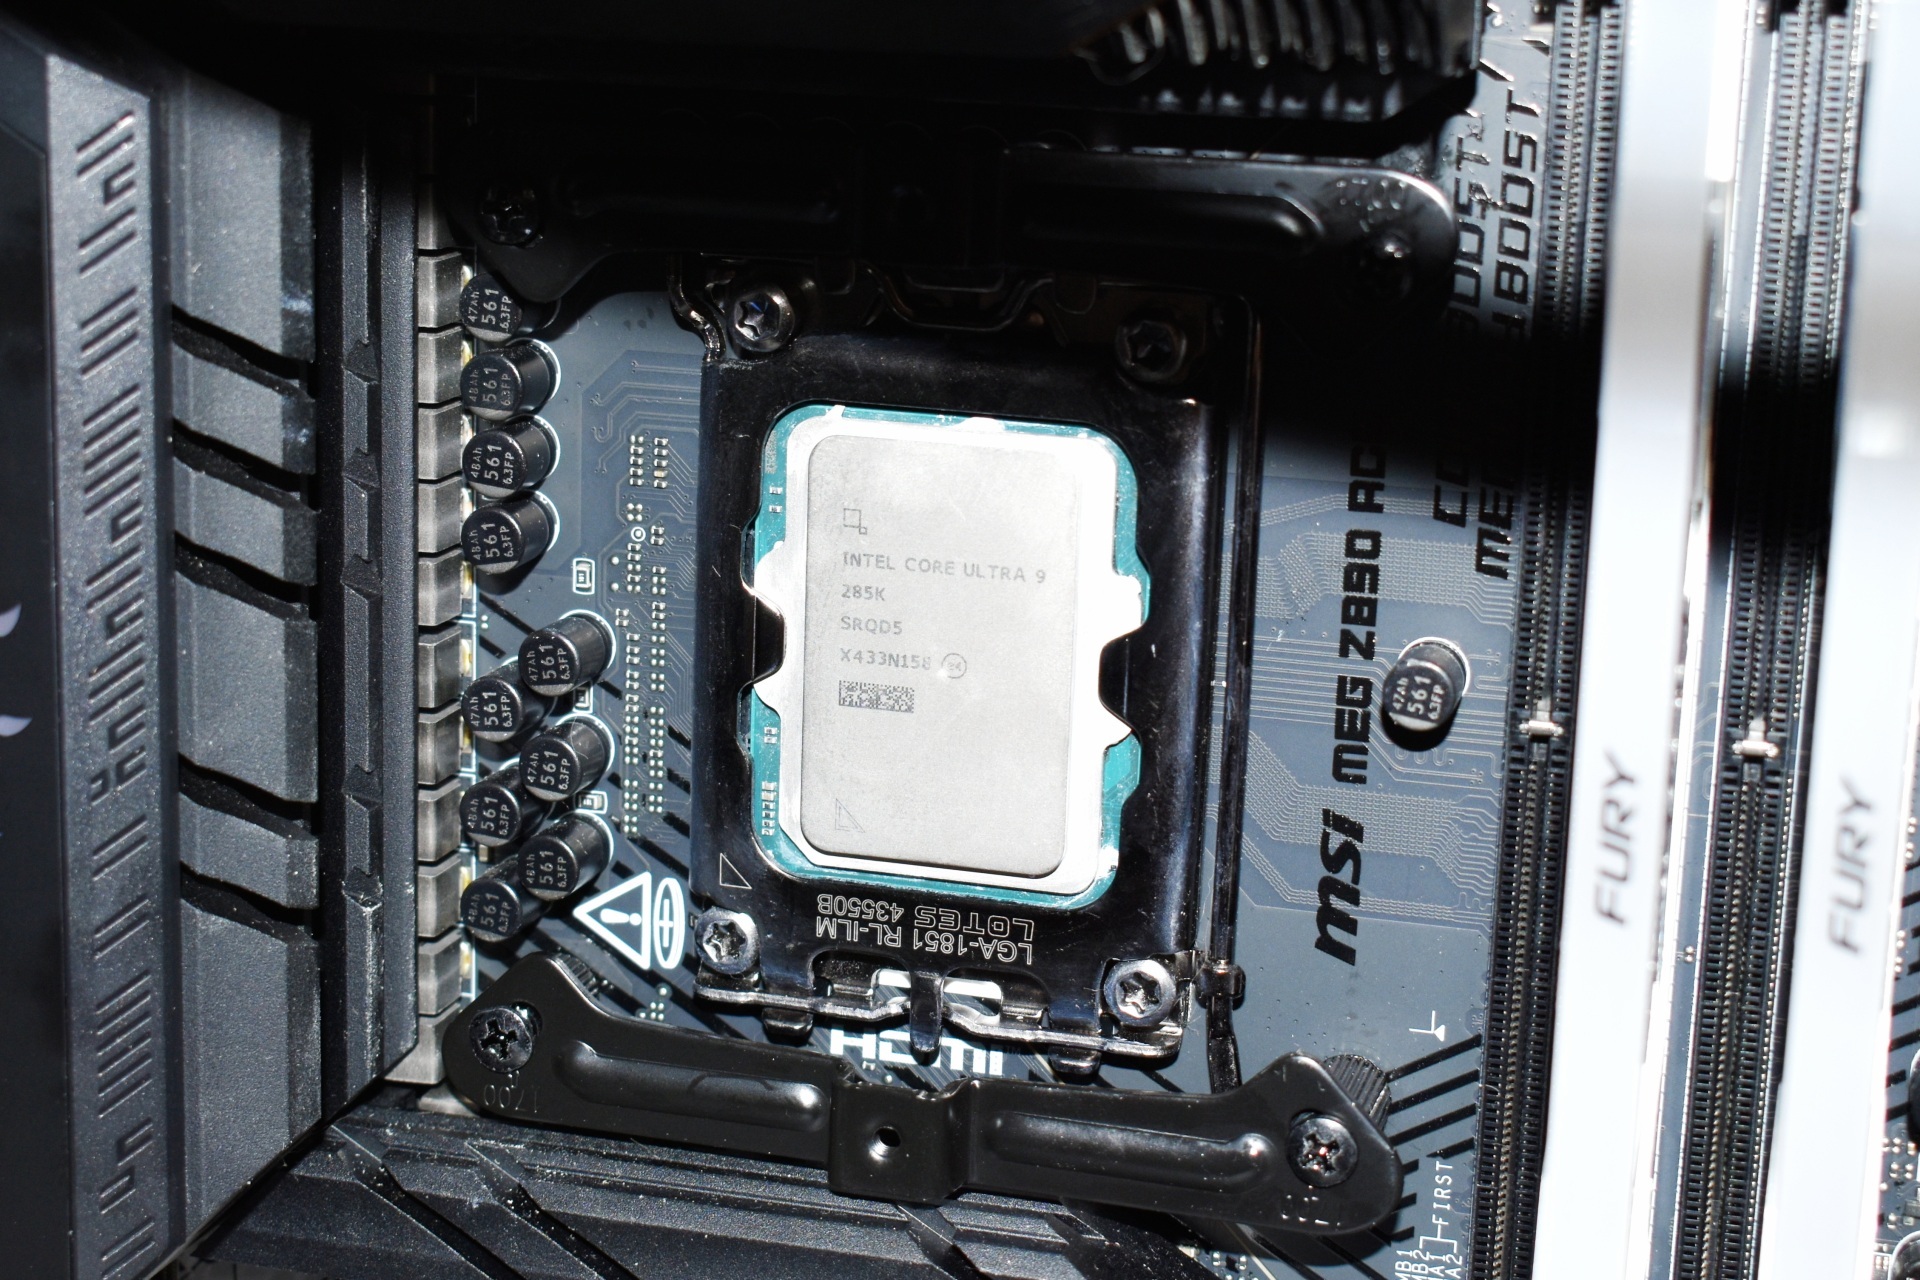
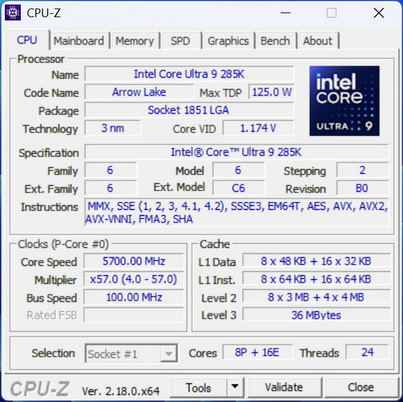
   I've been using pretty much the same testing methodology for PCIe 3.0 Gen3 and PCIe 4.0 Gen4 SSDs for far too many years now, so I decided to "tweak" it for PCIe 5.0 Gen5 models. Needless to say, Gen5 M.2 NVMe SSDs will be tested using one of my latest test rigs (Intel Core Ultra 285K / ASRock Z890 Taichi Lite) and unlike with both Gen3 and Gen4 SSDs I will not be using the SNIA (Storage Networking Industry Association) 12 hour IOMeter benchmark since it proved to be rather heavy for early Gen5 SSDs (temperature issues). Instead, I decided to use the latest versions of 3D Mark, AIDA64, AS SSD, ATTO, Crystal Disk Mark, HD Tune Pro, HD Tach RW, Performance Test, IOMeter (4k Random Writes / 4k Random Reads – since September 2024 / SNIA Mixed) and Sandra Titanium for performance measuring and ForSpoken for all of you who might be wondering just how well Gen5 SSDs do in regard to Microsoft's DirectStorage API/Technology. Each test will be run a total of 5 times after which the average number will be recorded in each chart.


TEST RESULTS - AIDA64 / ATTO


aida64


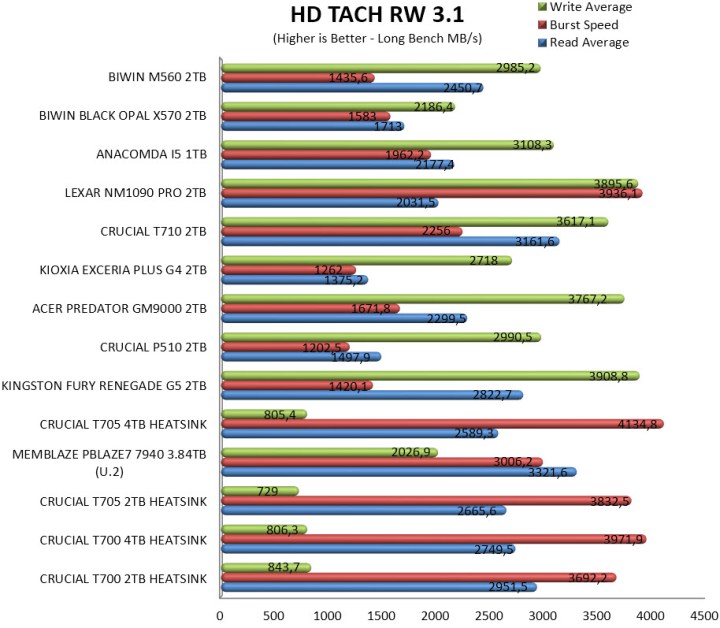
TEST RESULTS - HD TUNE PRO / HD TACH RW


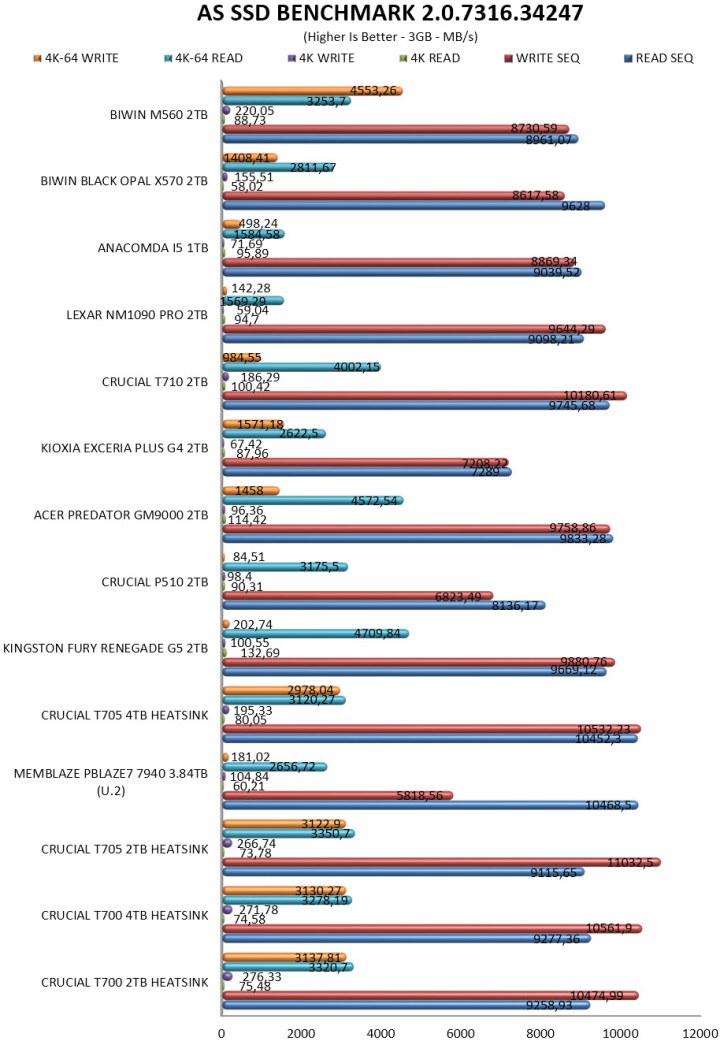
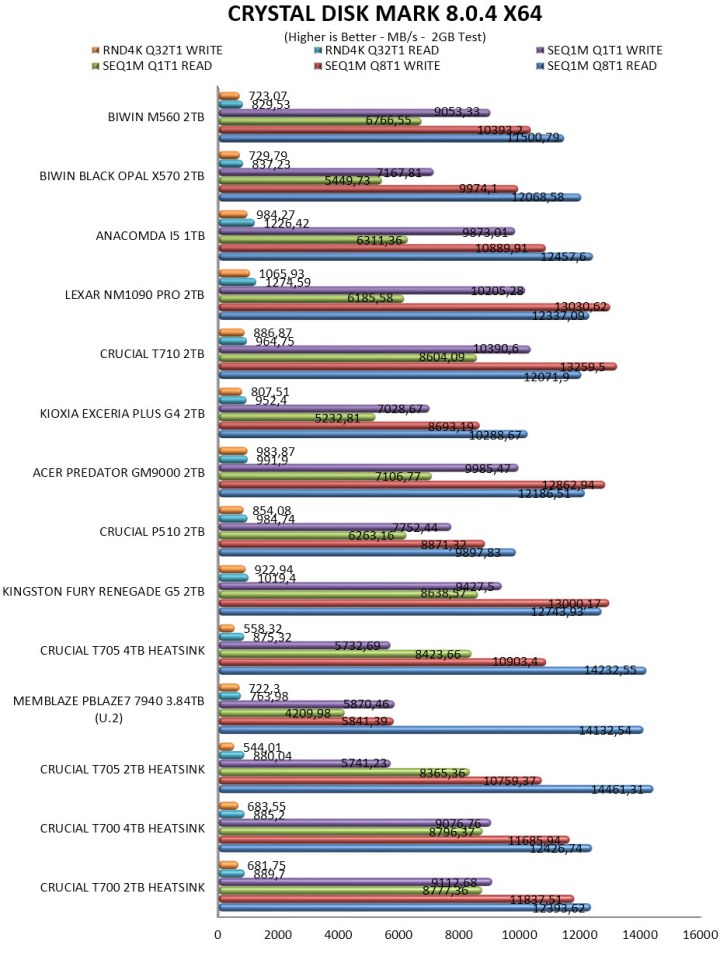
TEST RESULTS - AS SSD / CRYSTAL DISK MARK


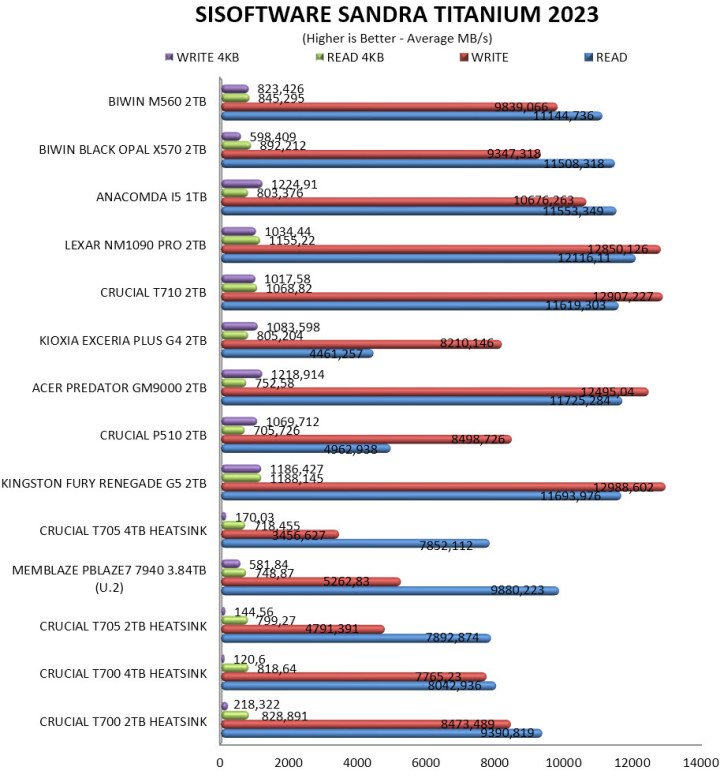
TEST RESULTS - SANDRA TITANIUM / IOMETER


TEST RESULTS - PERFORMANCE TEST / 3D MARK / FORSPOKEN


CONCLUSION


biwin m560 2tb review c


    The BIWIN M560 2TB stands out for its strong performance, especially its write speeds, which remain consistently high even under sustained workloads (BIWIN is actually underreporting write performance). Thermal behavior is another clear advantage since the SM2504XTF NAND controller by Silicon Motion never exceeded 63°C in my testing, making this one of the cooler Gen5 drives in its class. The included bundle adds practical value, rounding out the package for users who want a straightforward, ready‑to‑install solution. On the downside, the drive tops out at 2TB, leaving no higher‑capacity option for heavier workflows, and its IO performance, while adequate, doesn’t quite match the best‑in‑class Gen5 competitors (although it does surpass that of the X570 model in most).


    Right now, the M560 2TB PCIe 5.0 Gen5 M.2 NVMe SSD by BIWIN currently retails for 291.76Euros inside the EU (Amazon.de) meaning it’s priced the same as for example their very own X570 Pro model (USA availability is limited at best). Price aside however the M560 2TB SSD was a pleasant surprise, it surpassed many other Gen5 models in several tests, experienced no thermal throttling during my tests and in terms of durability it’s a tad higher than much of its competition right now so with all these in mind the Golden Award is in order.

PROS


- Quality
- Very Good Performance
- Endurance (1.5 Million Hours MTBF / 1500TBW)
- 5 Year Limited Warranty
- Bundle
- Intelligence Software


CONS


- Current USA Availability
- IOMeter Performance (In My Tests)
- Available Capacities (Up To 2TB)


Noctua NL-LC1-42 420mm AIO Liquid Cooler Review

INTRODUCTION


noctua nl lc1 42 review a


    All‑in‑one liquid coolers have become a cornerstone of modern PC cooling, offering strong thermal performance without the complexity and significant cost of custom loops. While radiator size is without doubt the biggest factor (larger units provide more surface area for heat dissipation) fans play an equally important role. Their bearings, blade profiles, and motor tuning determine how efficiently air moves through the radiator, especially at low RPM where noise and static pressure matter most. Enter Noctua’s new (and very first) NL‑LC1 AIO series and more specifically the NL‑LC1‑42, a 420mm model that blends sheer radiator size with Noctua’s trademark low‑RPM acoustic performance.


    Noctua’s award-winning, premium quality quiet cooling components are internationally renowned for their superb acoustics, industry-leading performance-to-noise efficiency and remarkable longevity. Since its foundation in 2005, the Austrian manufacturer’s engineering-first mindset, history of innovations and relentless pursuit of continuous optimisation have become just as iconic as its long-term product support and excellence in customer service. Today, PC enthusiasts and industry clients alike swear by the signature blend of cutting-edge performance, outstanding quietness and ultimate reliability that makes Noctua’s products unique.


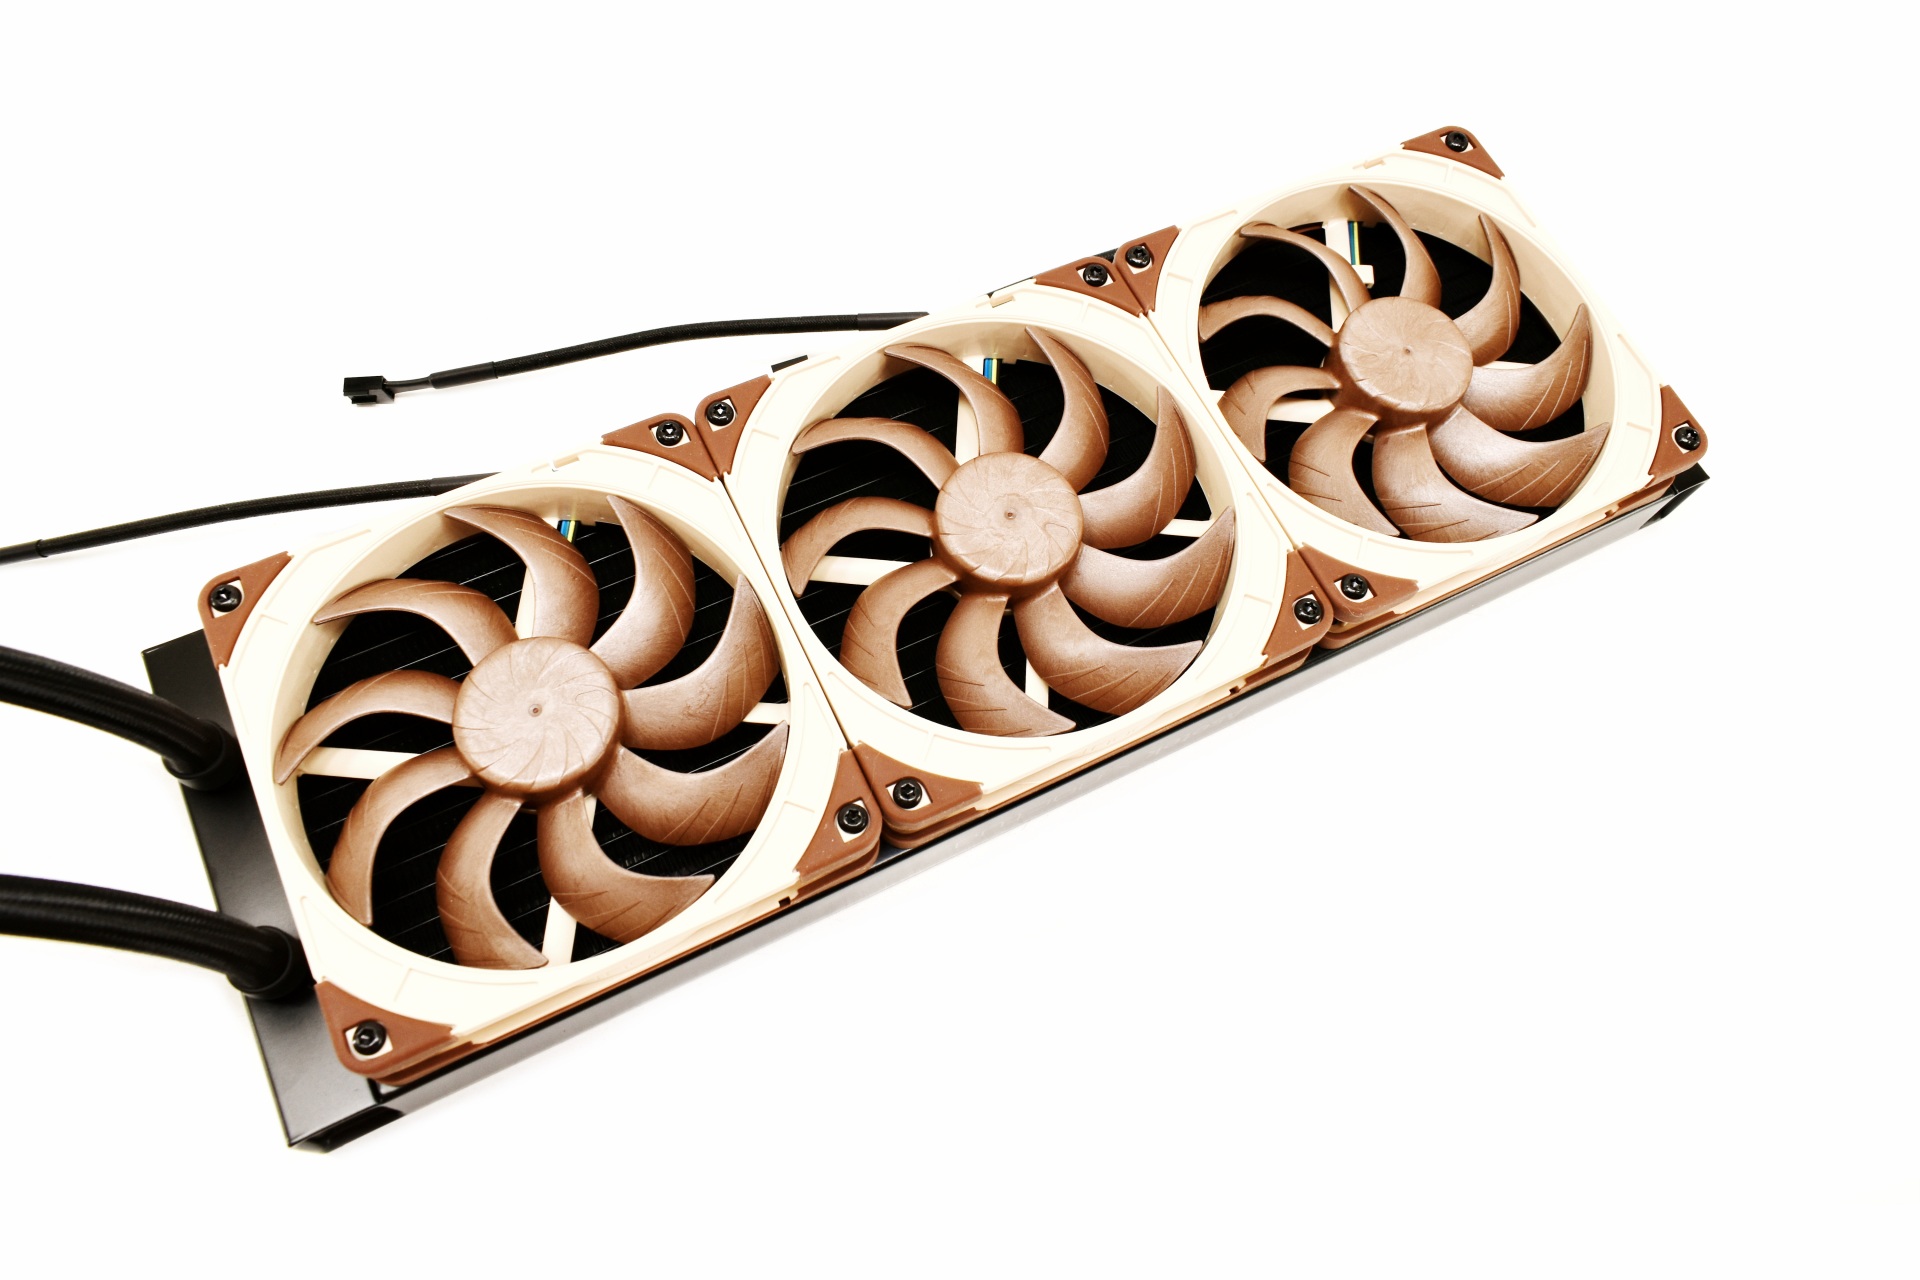
    The Noctua NL‑LC1‑42 is a 420mm ΑΙΟ (all‑in‑one) liquid CPU cooler built on Asetek’s Emma V2 pump platform, pairing a high‑capacity aluminum radiator with three NF‑A14x25 G2 PWM 140mm fans to deliver industry‑leading thermal performance at exceptionally low noise levels. The pump block stands 70mm tall and uses a three‑phase centrifugal motor with a ceramic sleeve and shaft, skived‑fin copper cold plate (55.5x55.5mm, CU1100 high‑purity copper), and a 4‑pin PWM interface while it offers three profiles, Quiet, Balanced, and Manual (2100/2600/3400RPM) with maximum pump noise staying below ~15dBA even in the fastest mode. Noctua’s custom NL‑PNA1 pump noise absorber surrounds the block with a three‑layer acoustic structure and tuned‑mass damper effect to cut both airborne noise and structure‑borne vibration, while an optional NL‑ACF1 80mm auxiliary fan can replace the magnetic metal faceplate to push airflow over nearby VRMs, RAM, or M.2 SSDs. The three NF‑A14x25 G2 fans (1500RPM/91.6CFM/2.56mmH₂O/24.8dBA) use second‑generation SSO2 bearings, advanced aerodynamics, and a deliberate speed‑offset strategy to avoid tonal harmonics and resonance, giving the cooler its characteristic “smooth” acoustic signature even under heavy load. Noctua Reveals its NL-LC1 AIO Series with Advanced Acoustic Design Coolant is a non‑toxic, electrically conductive mix of 22% propylene glycol / 78% water with anti‑freeze, anti‑corrosion, and anti‑biological inhibitors, routed through 450mm long braided EPDM tubes (12.5mm outer, 7mm inner, 26mm minimum bend radius) for robust, flexible installation. Mounting is handled by the SecuFirm2+ multi‑socket system with offset options, supporting AMD AM4/AM5 and Intel LGA1700/LGA1851, and tuned contact pressure for optimal hotspot alignment and as for warranty Noctua backs the NL-LC1 line with a 6‑year limited one.


SPECIFICATIONS AND FEATURES


PACKAGING AND CONTENTS


noctua nl lc1 42 review 1t

Noctua uses their usual color them for the box the front of which is taken by a large product picture, their logo, Asetek logo and the product name.


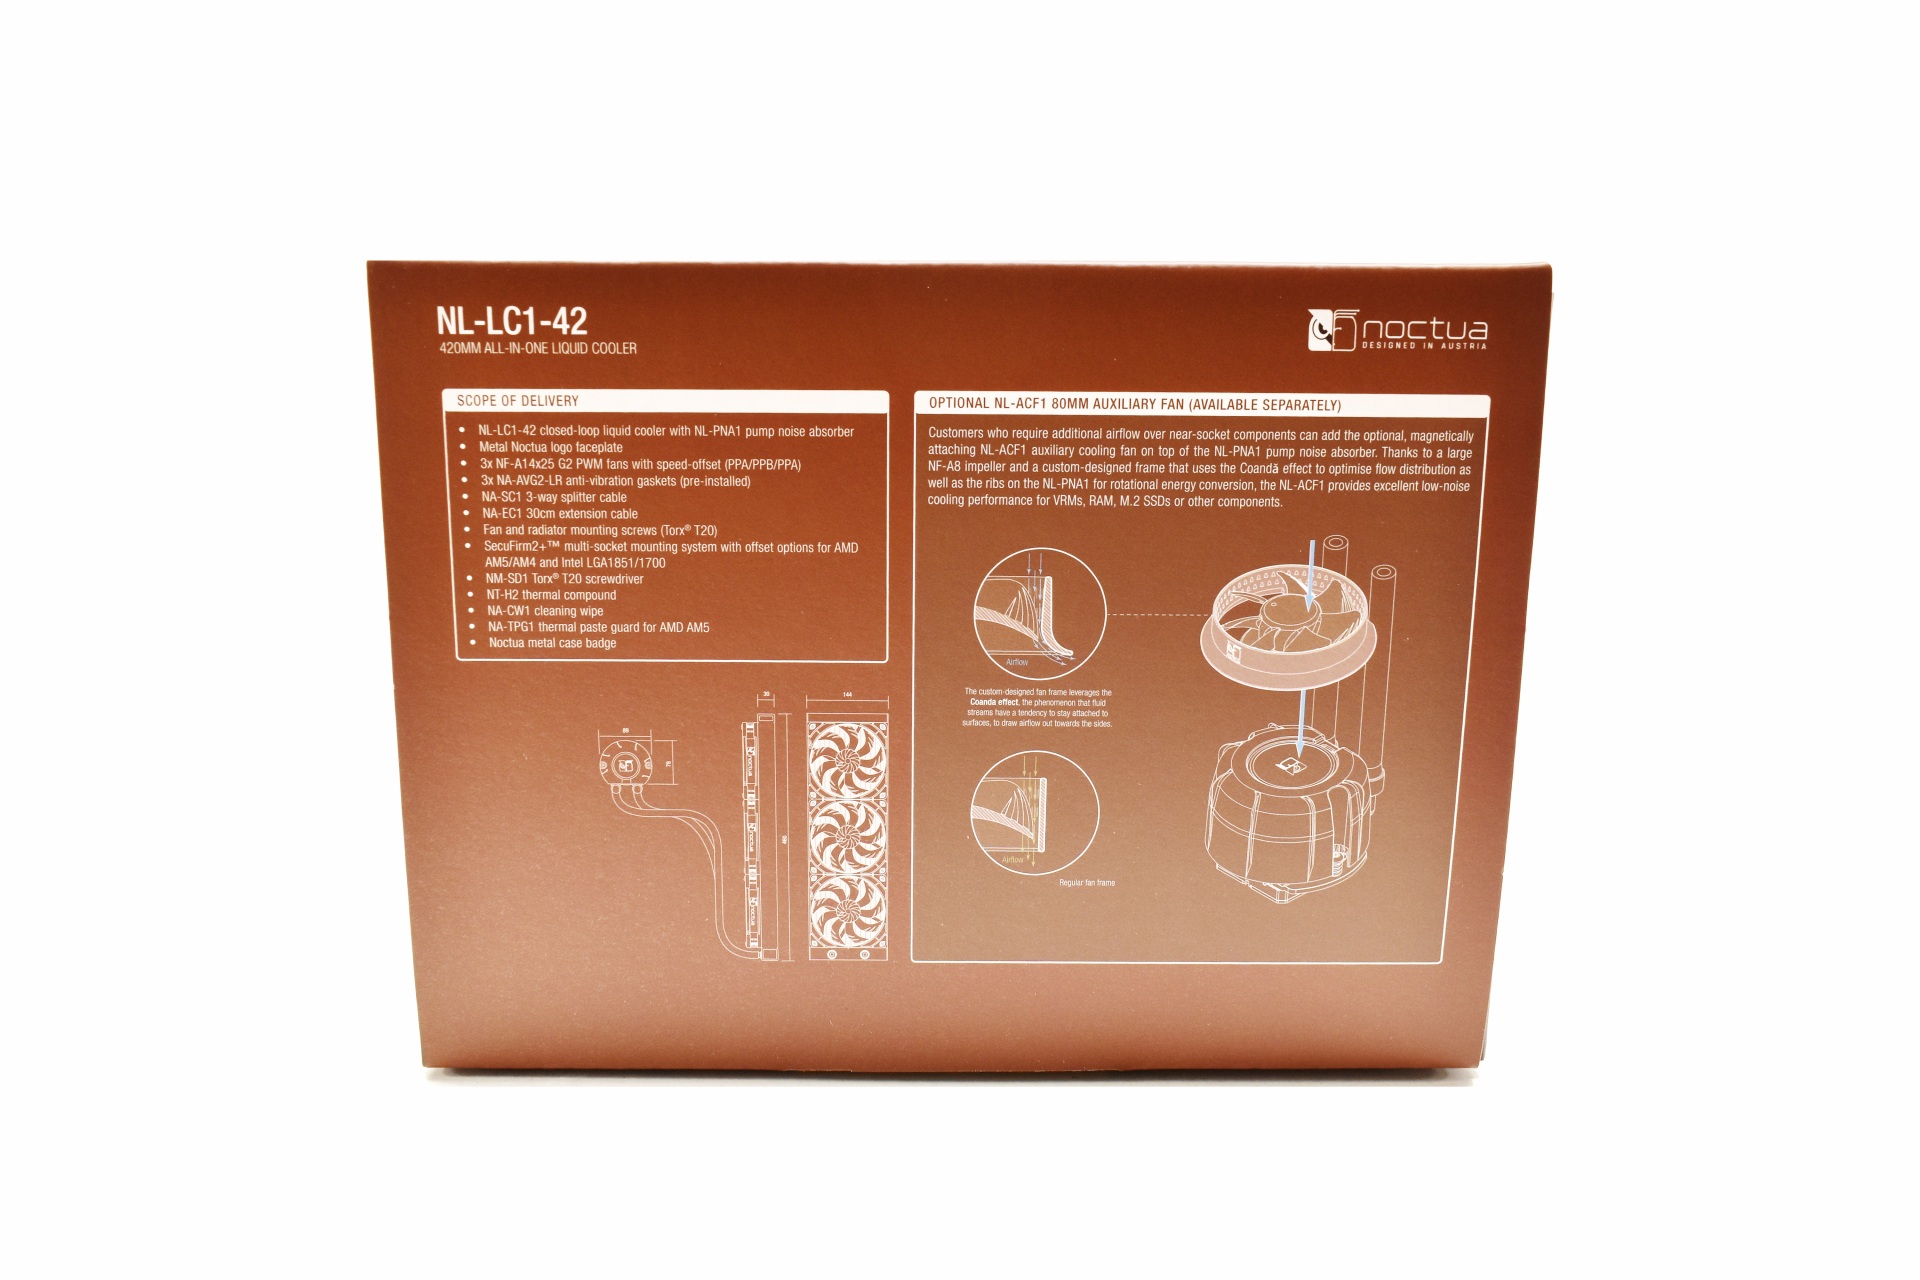
The fan and cooler specifications are available on the right side while on the left we find the bundle contents, two product drawings and a box in which Noctua speaks about the NL-ACF1 80mm auxiliary fan (optional).


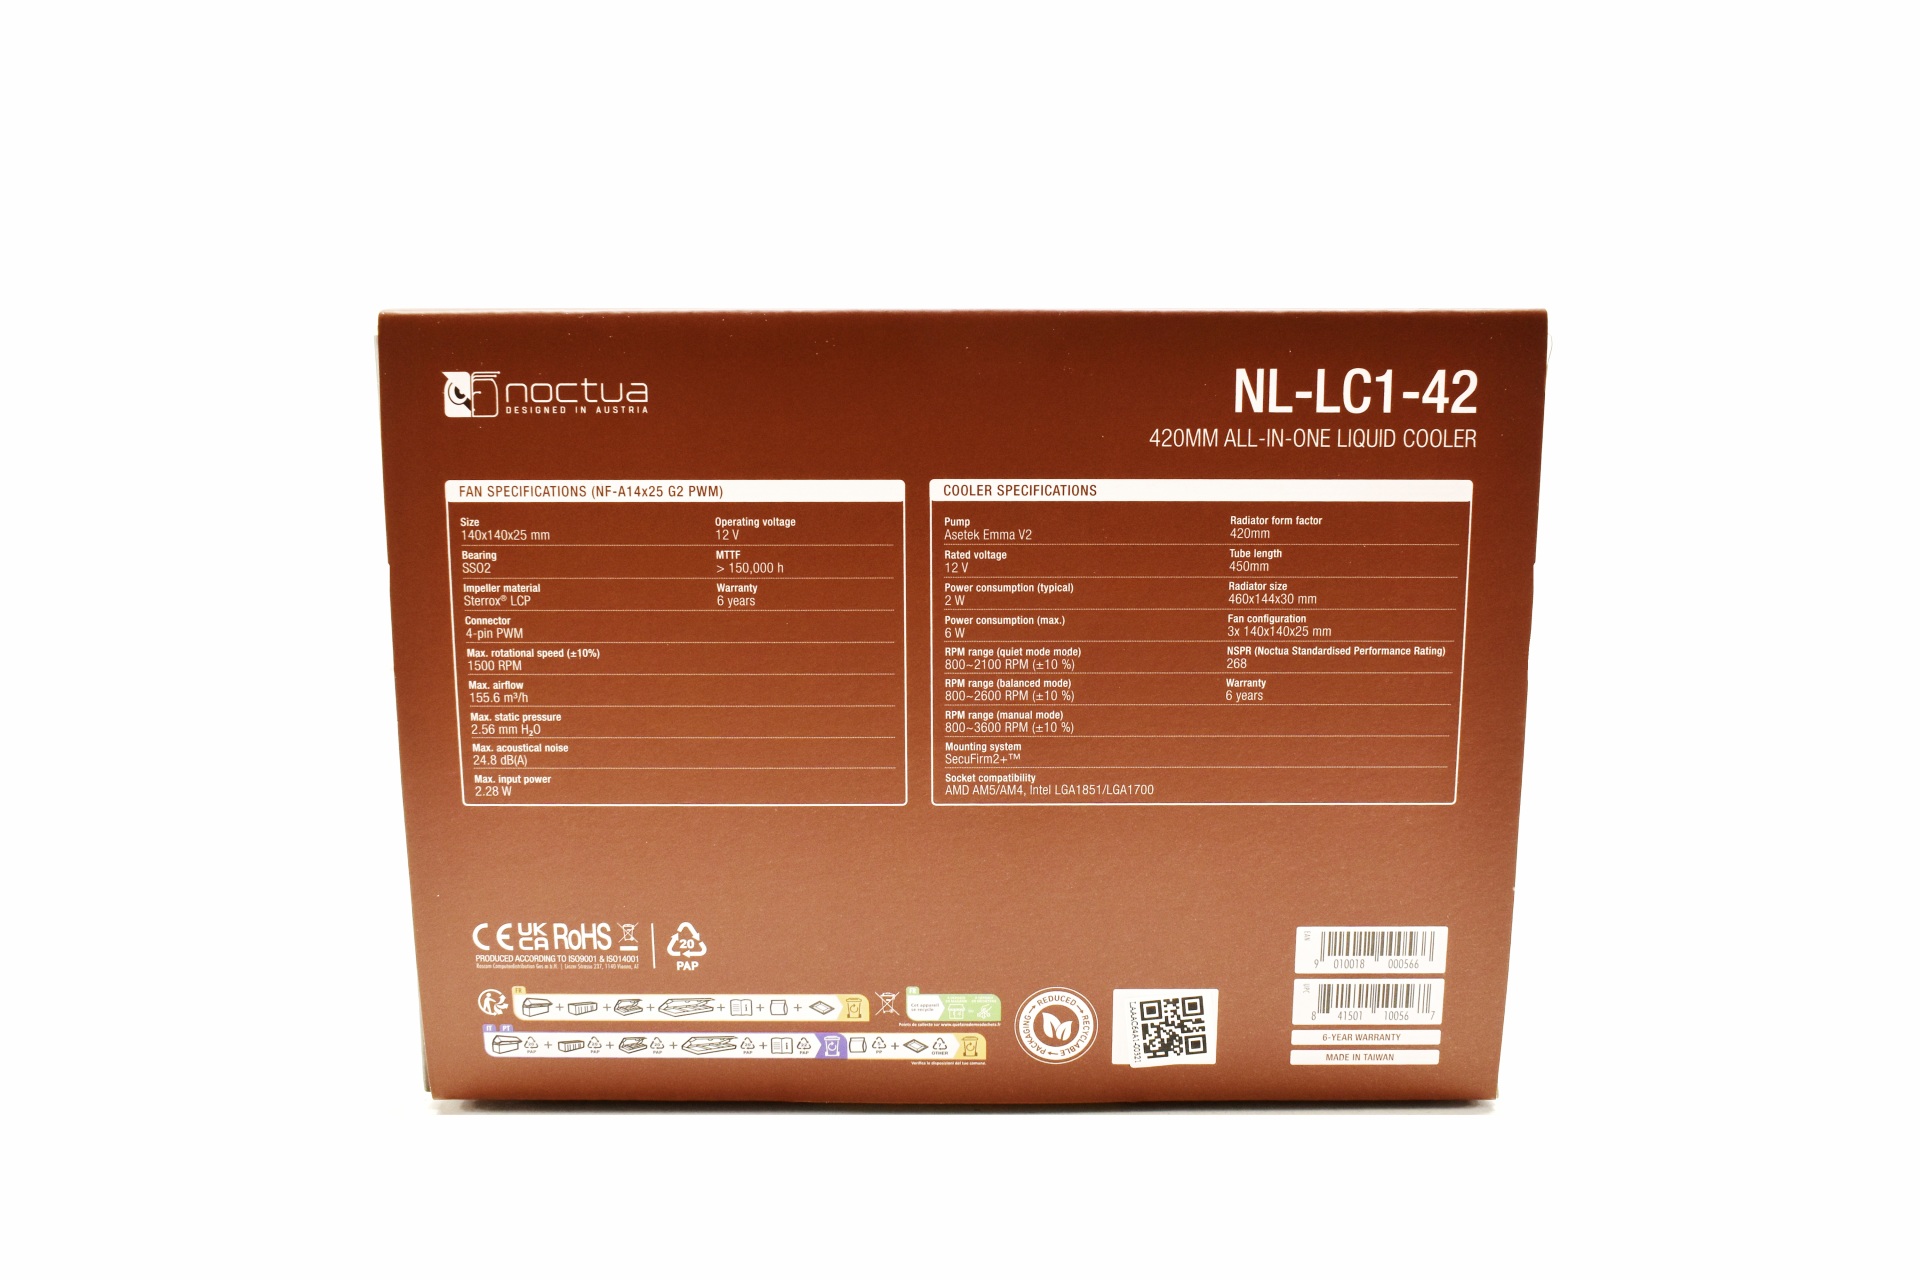
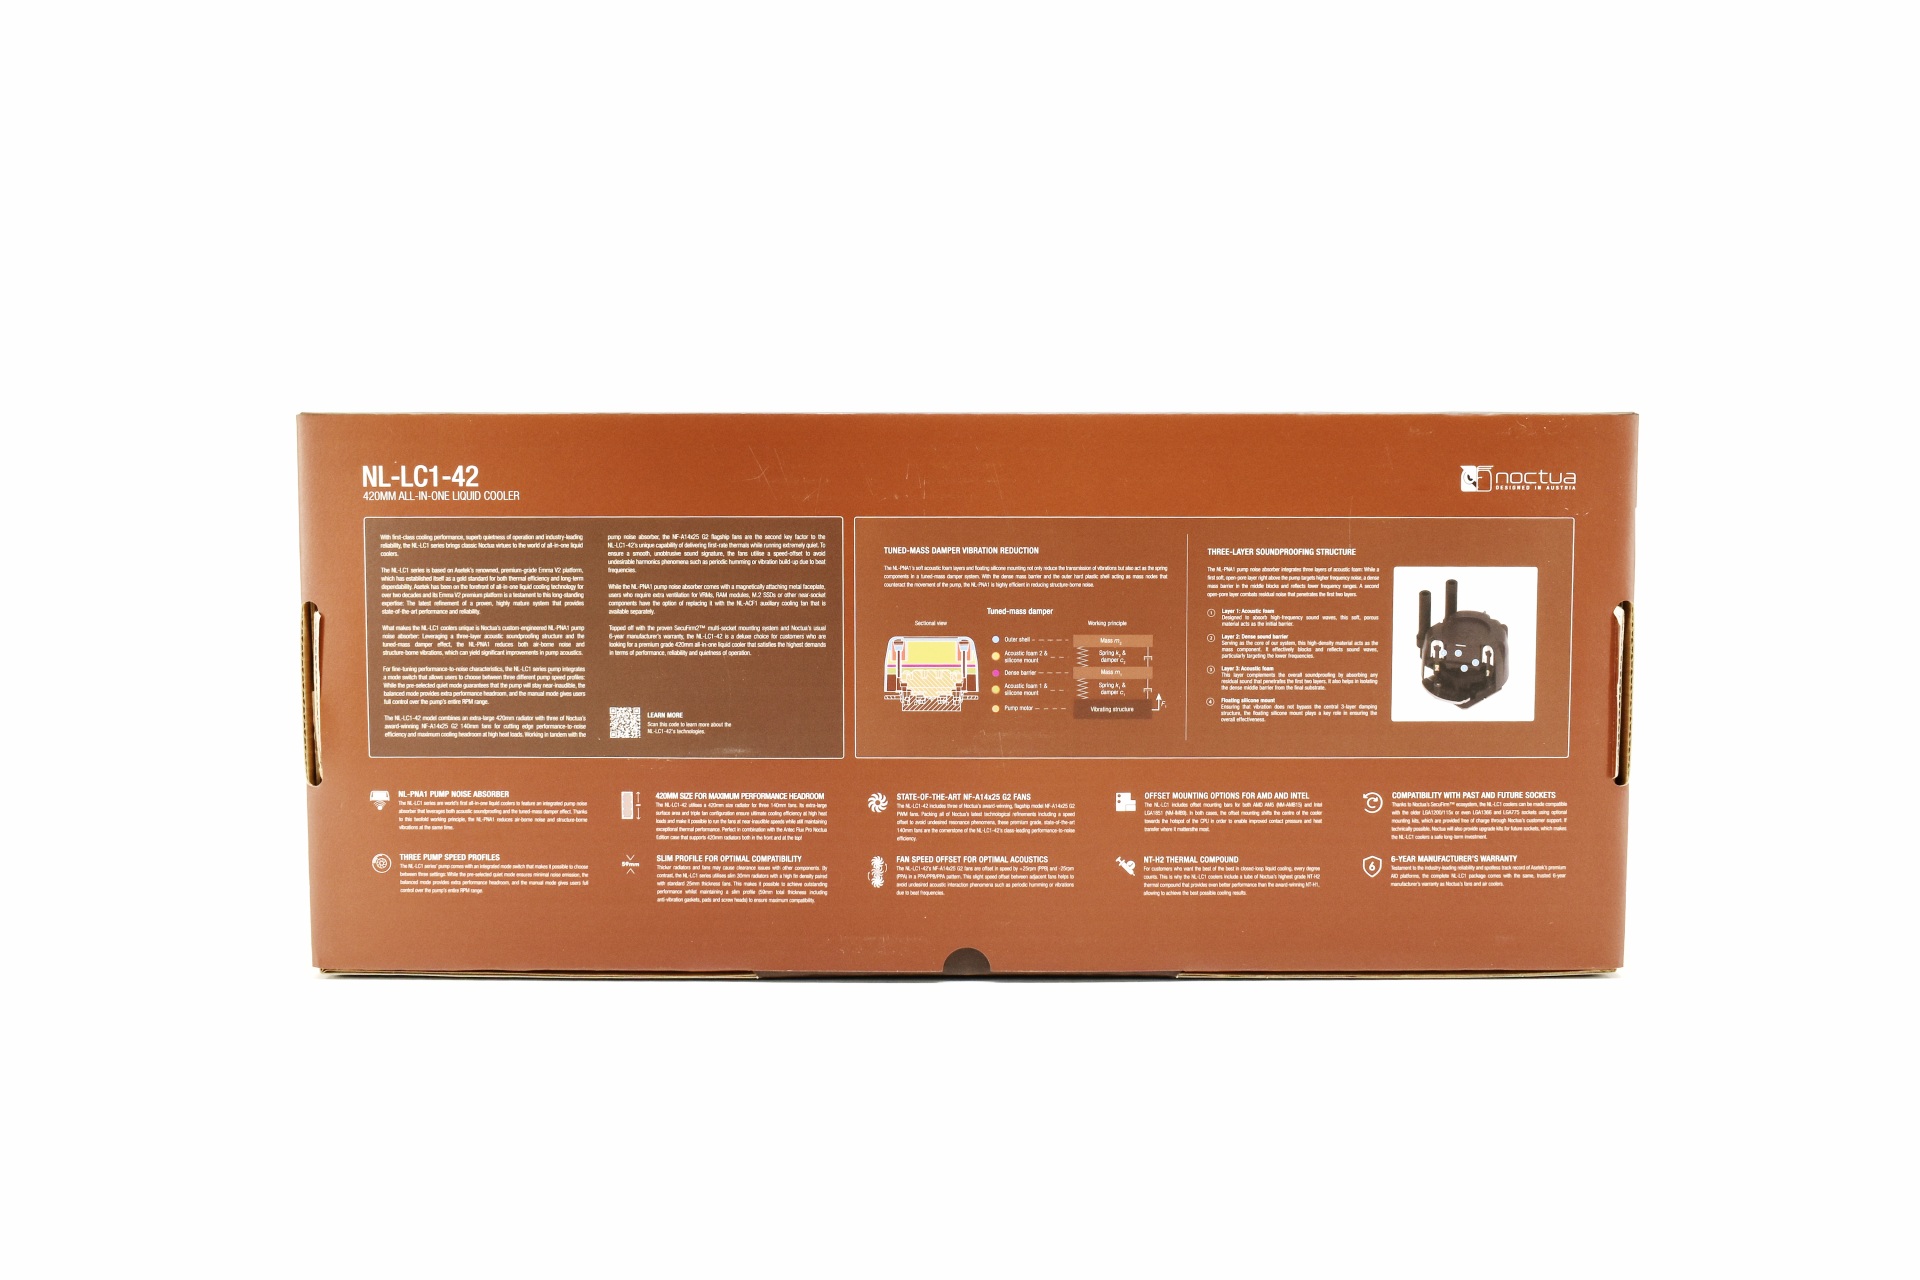
The features of the NL-LC1-42 are explained in depth at the rear of the box.


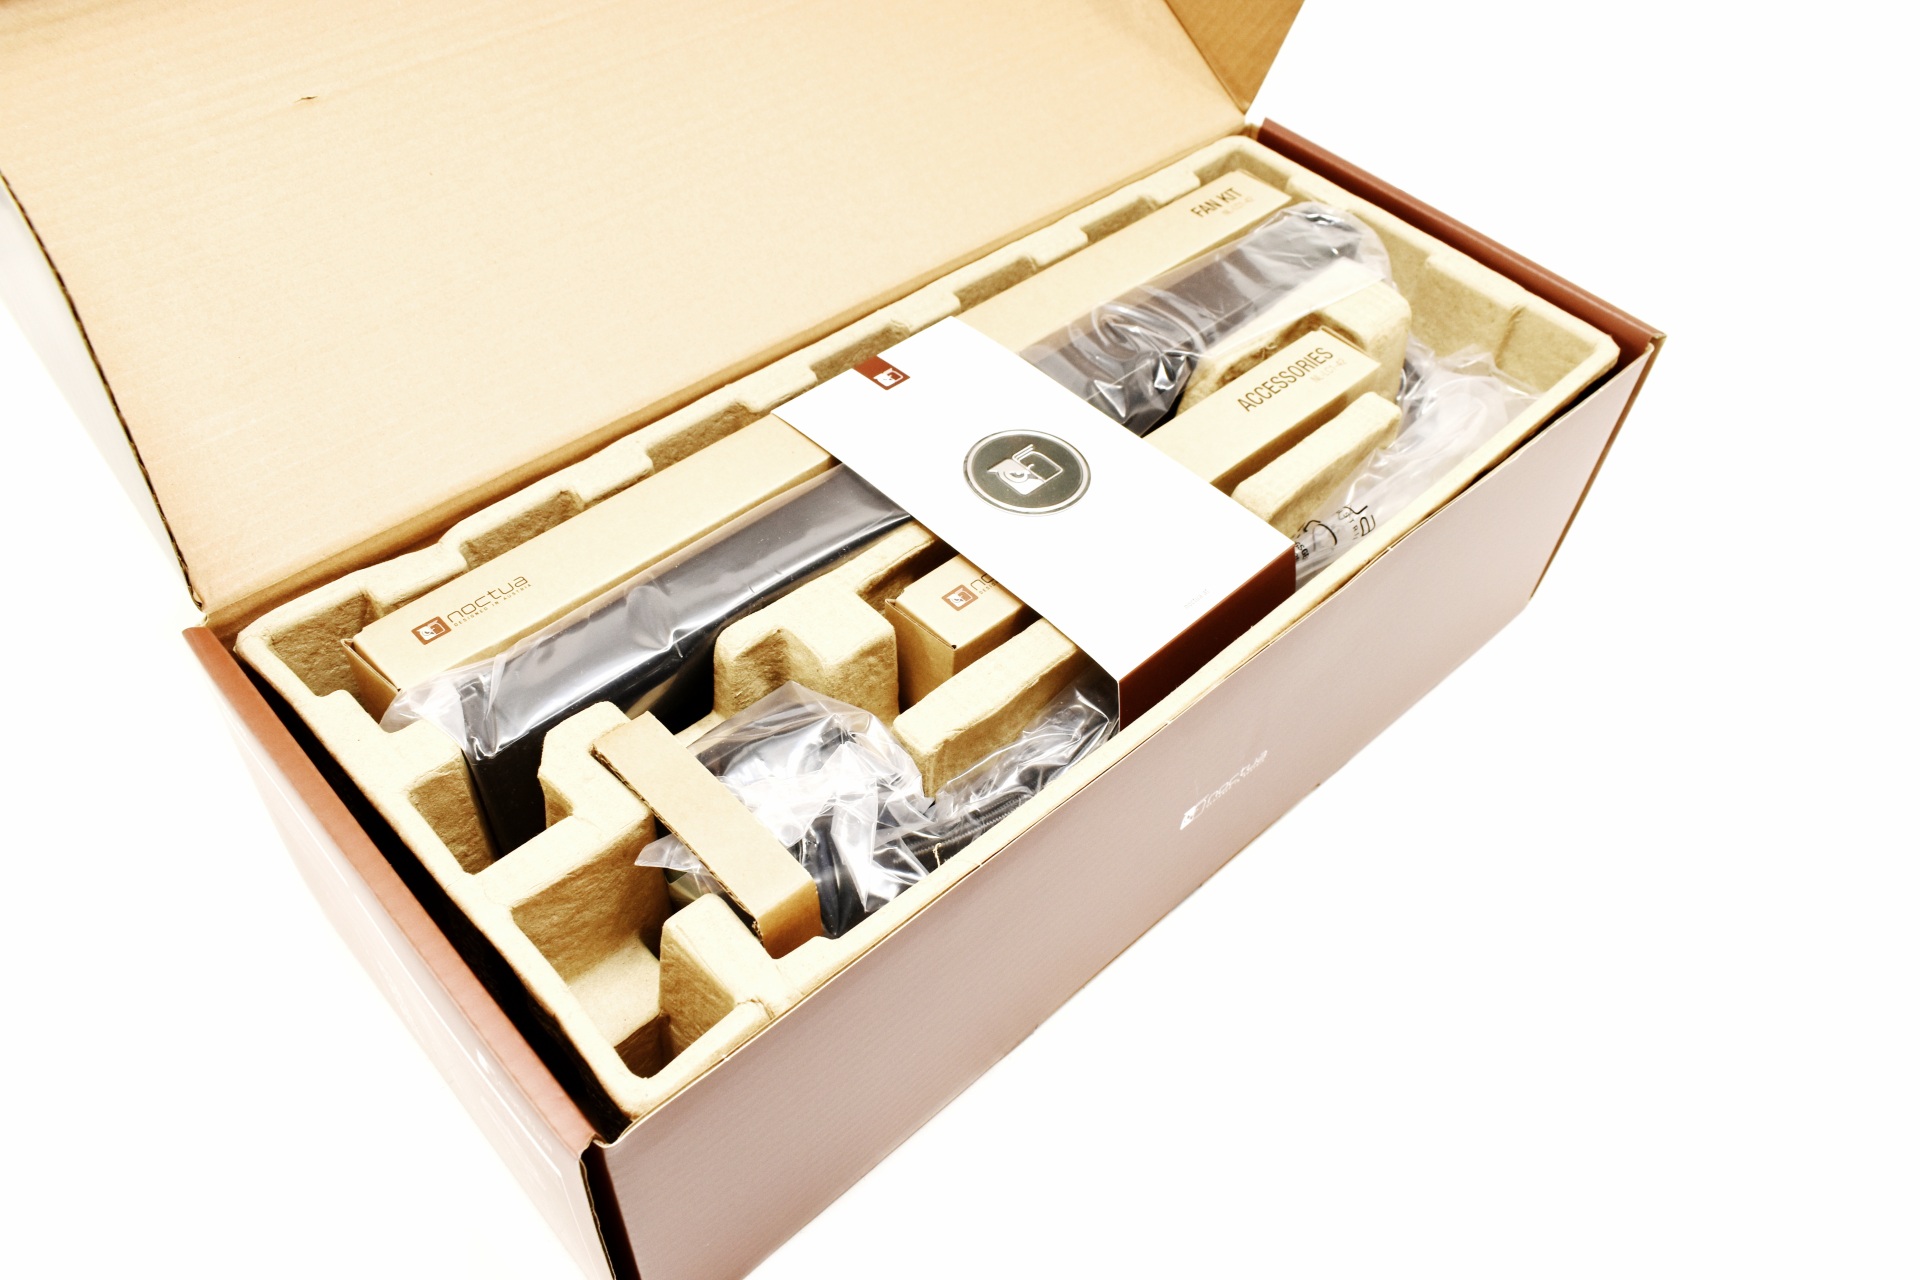
Typically, the entire bundle is placed in a formed piece of cardboard.


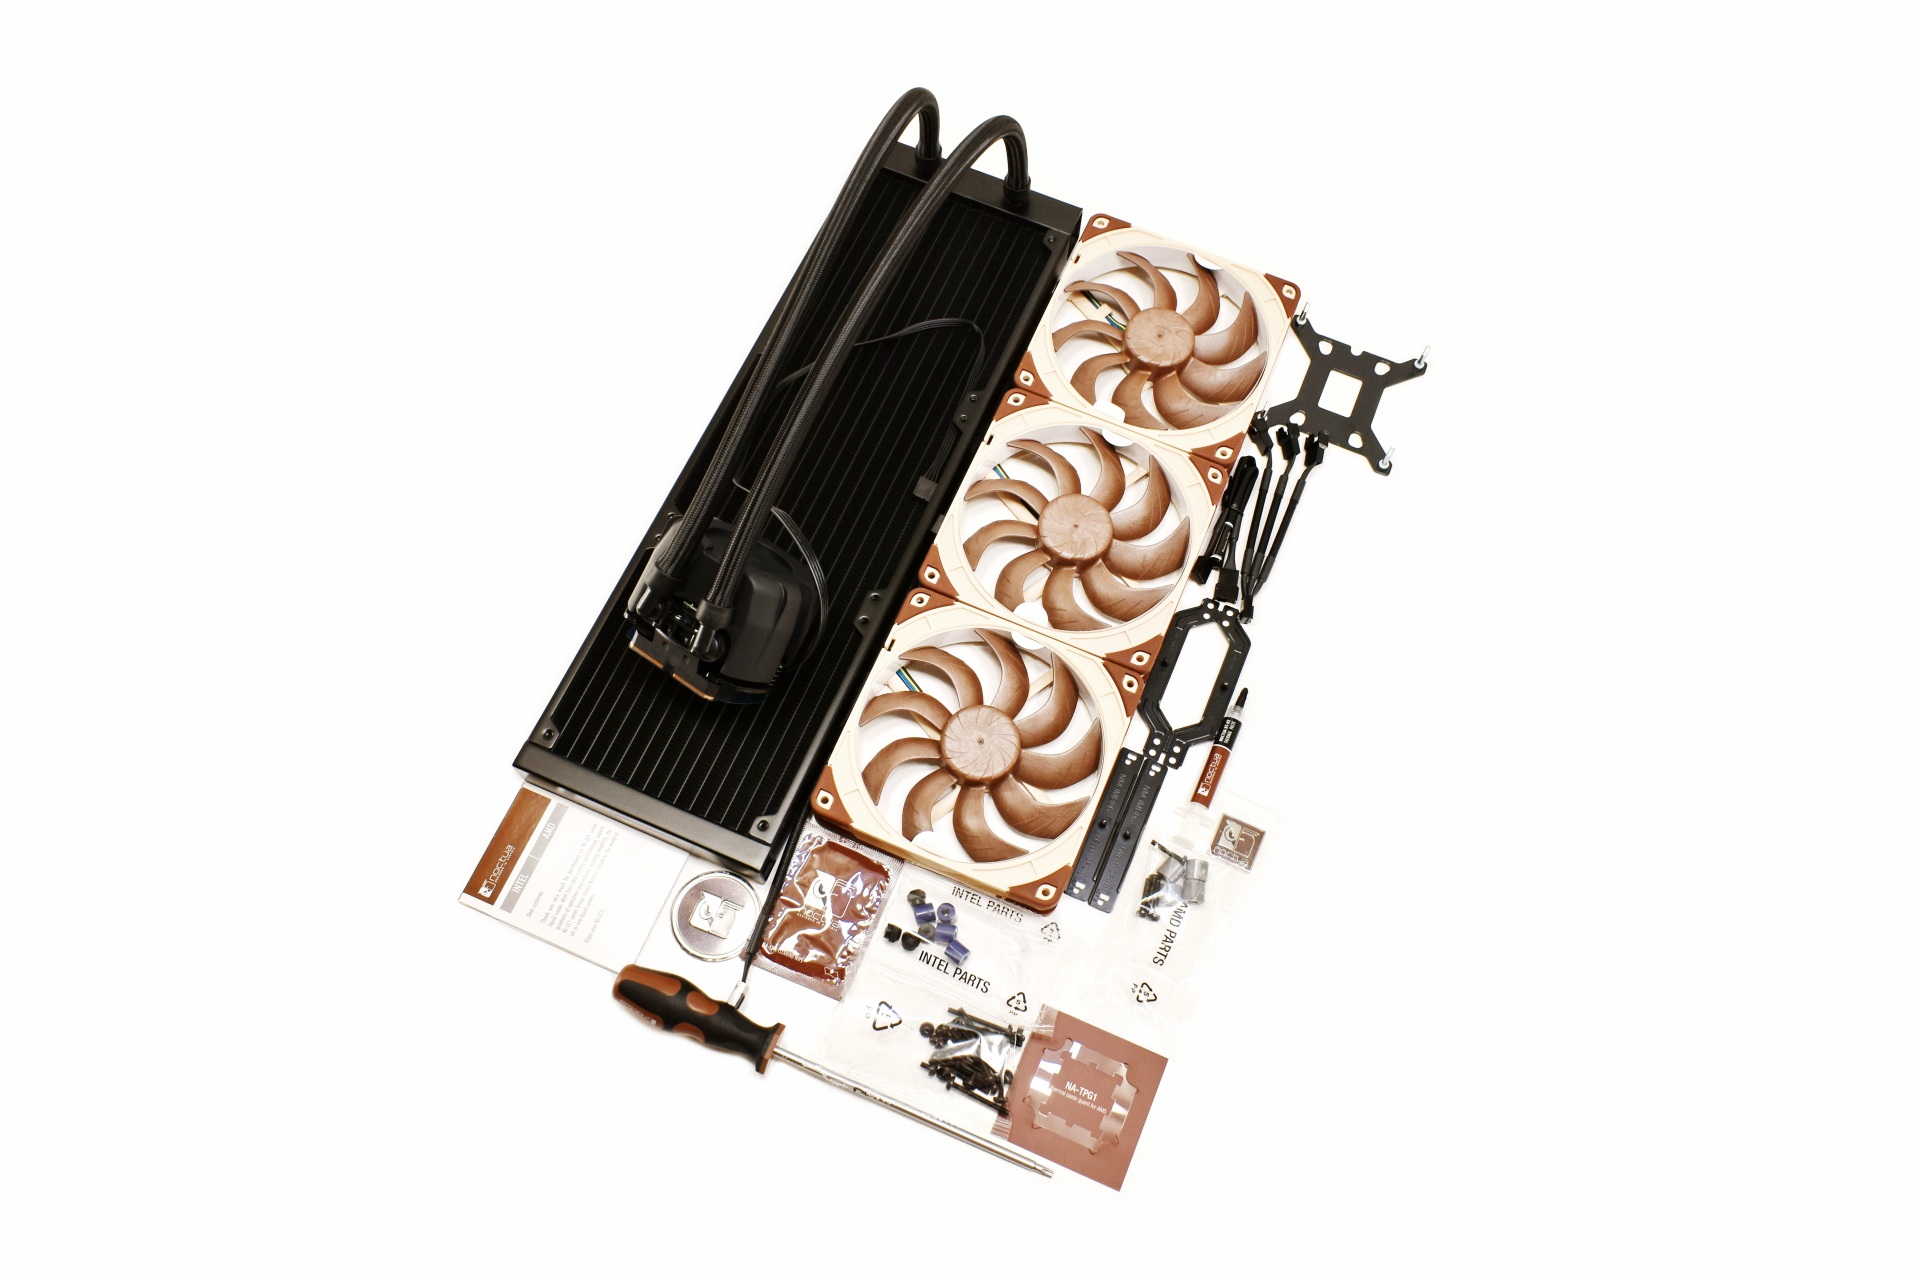
Along with the NL-LC1-42 radiator and pump combo inside the box you'll also fine three NF-A14x25 G2 PWM fans, backplate, 3-way splitter cable, fan extension cable, Torx T20 screwdriver, NT-H2 thermal paste tube, cleaning wipe, thermal paste guard for AMD AM5 motherboards, metal Noctua faceplate, metal Noctua case badge, user manual and all the necessary pieces needed to install the cooler onto Intel LGA1700/1851 and AMD AM4/AM5 motherboards.


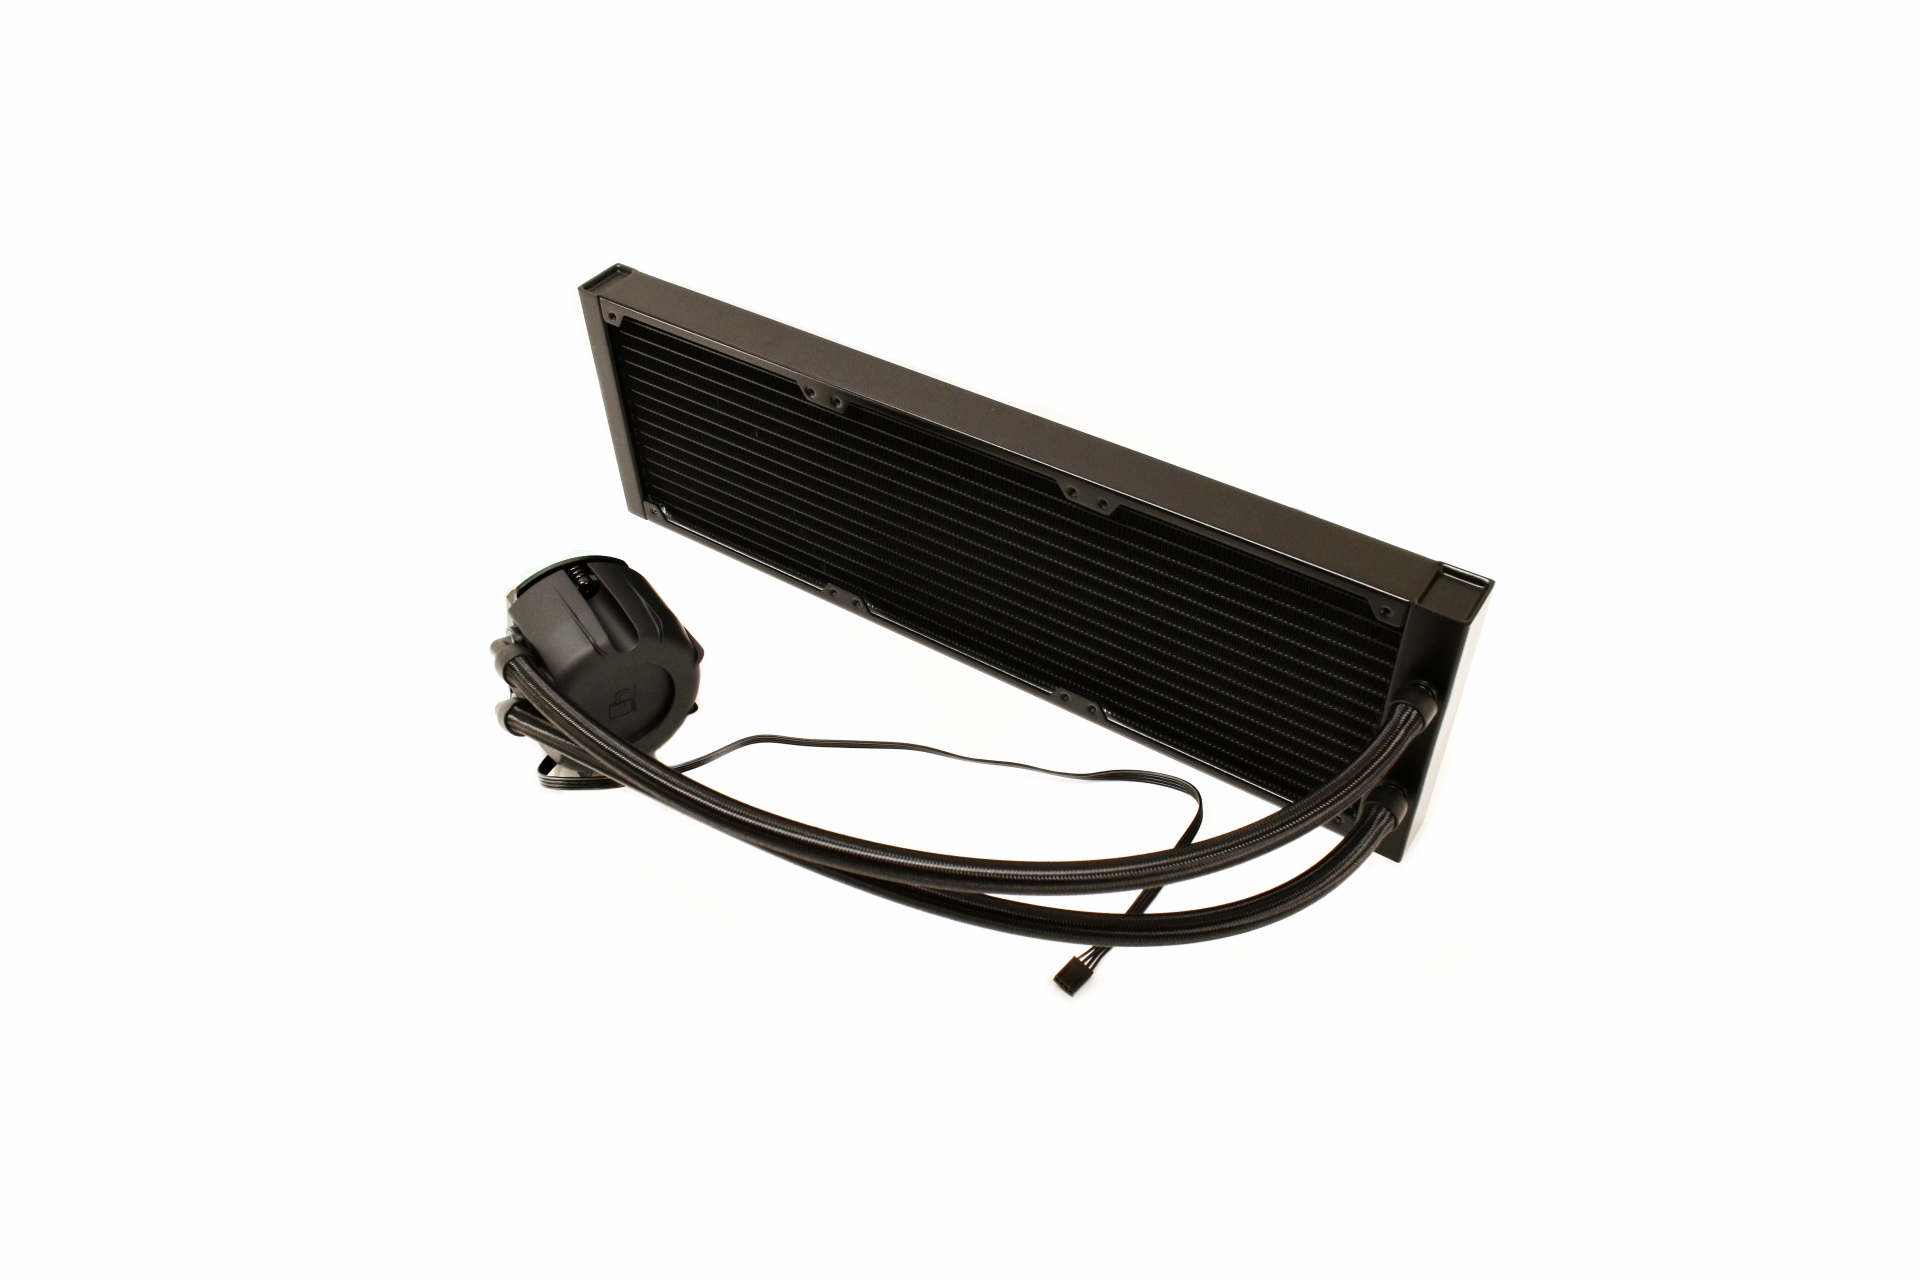
THE NL-LC1-42


noctua nl lc1 42 review 7t

Unlike with past Asetek models the NL-LC1-42 stands out quite a bit thanks to the Emma V2 pump.


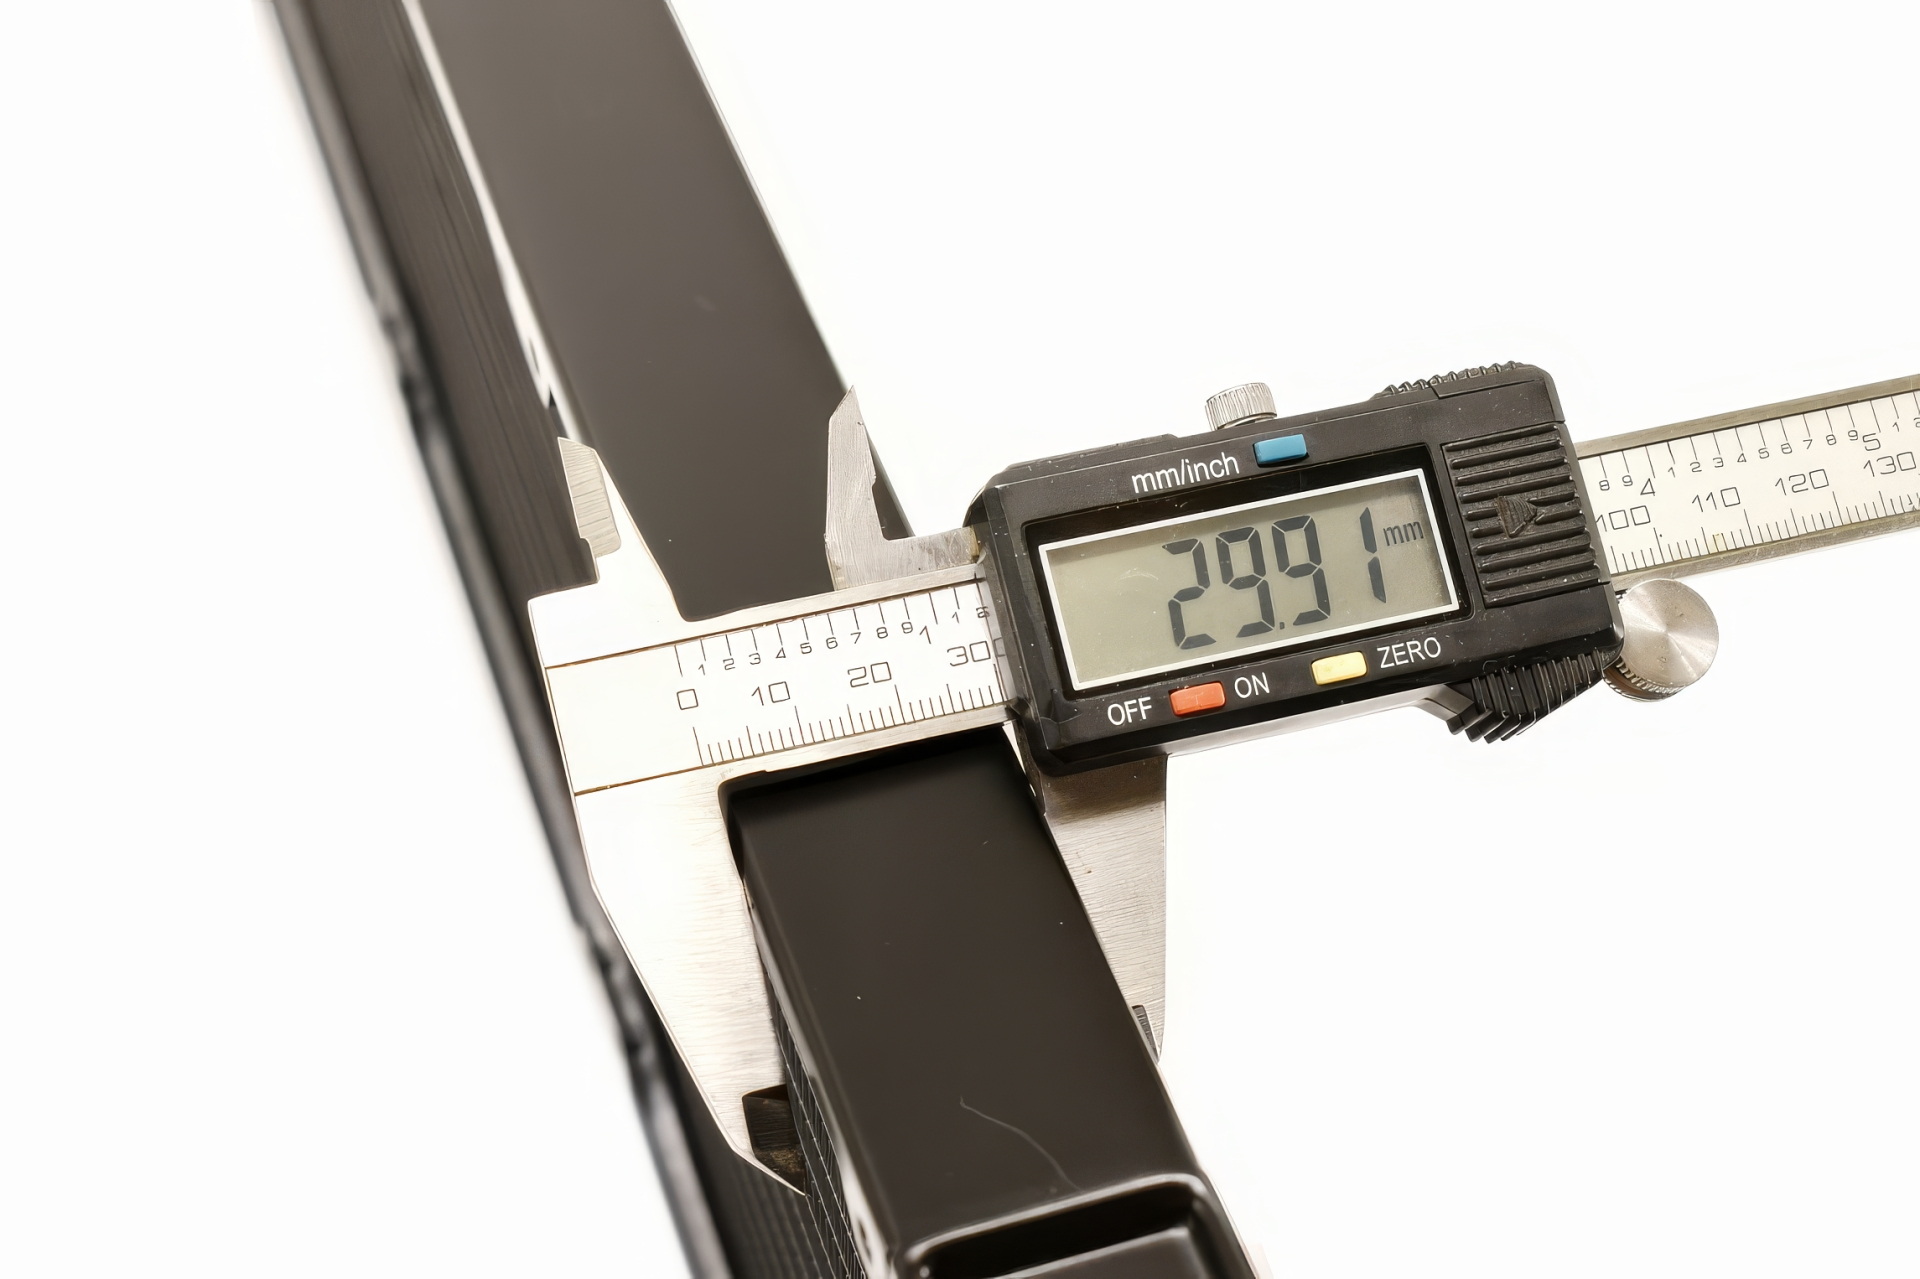
The 459.5mm long and 143.7mm wide aluminum radiator is roughly 30mm thick.


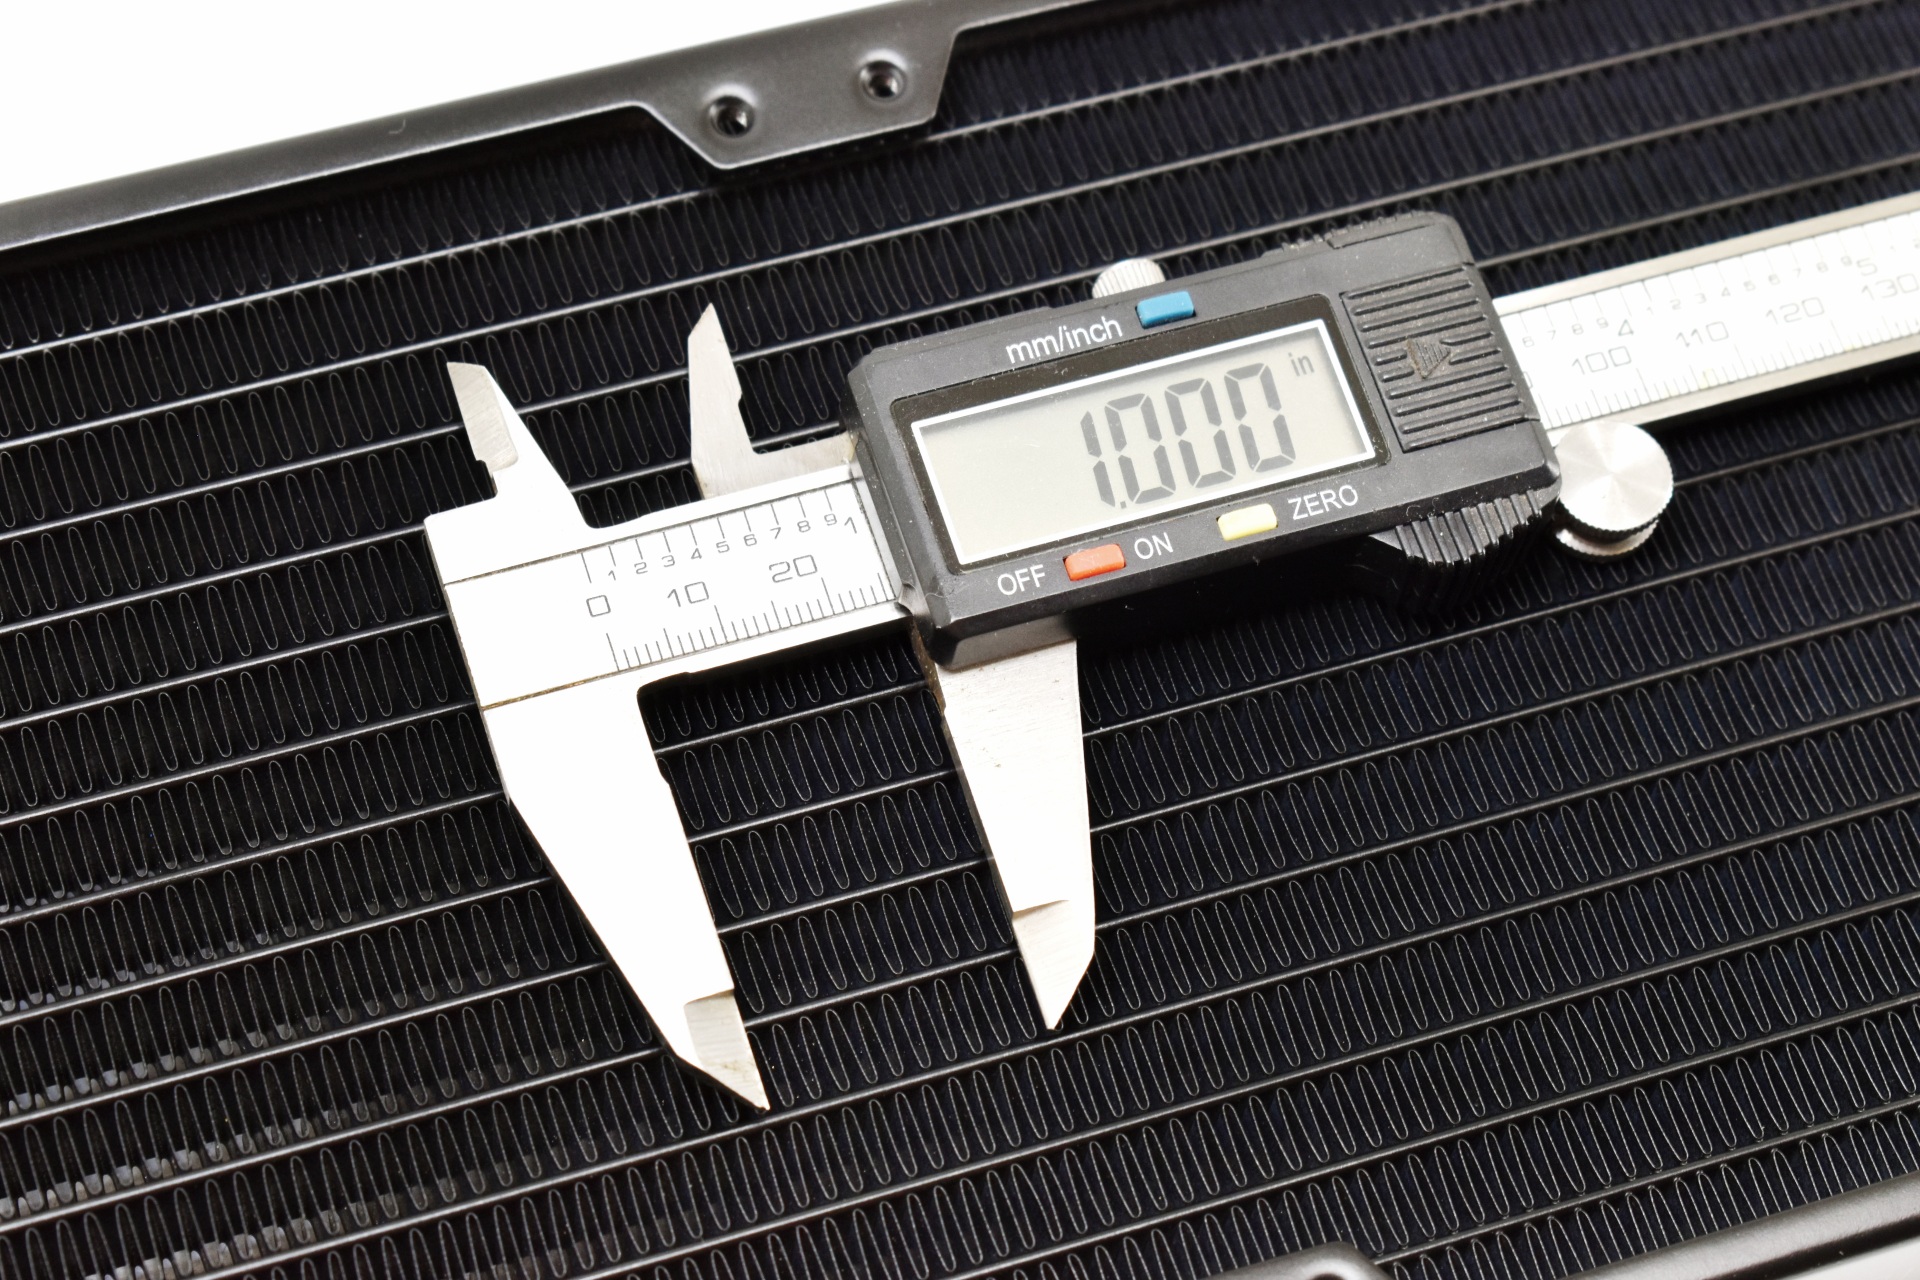
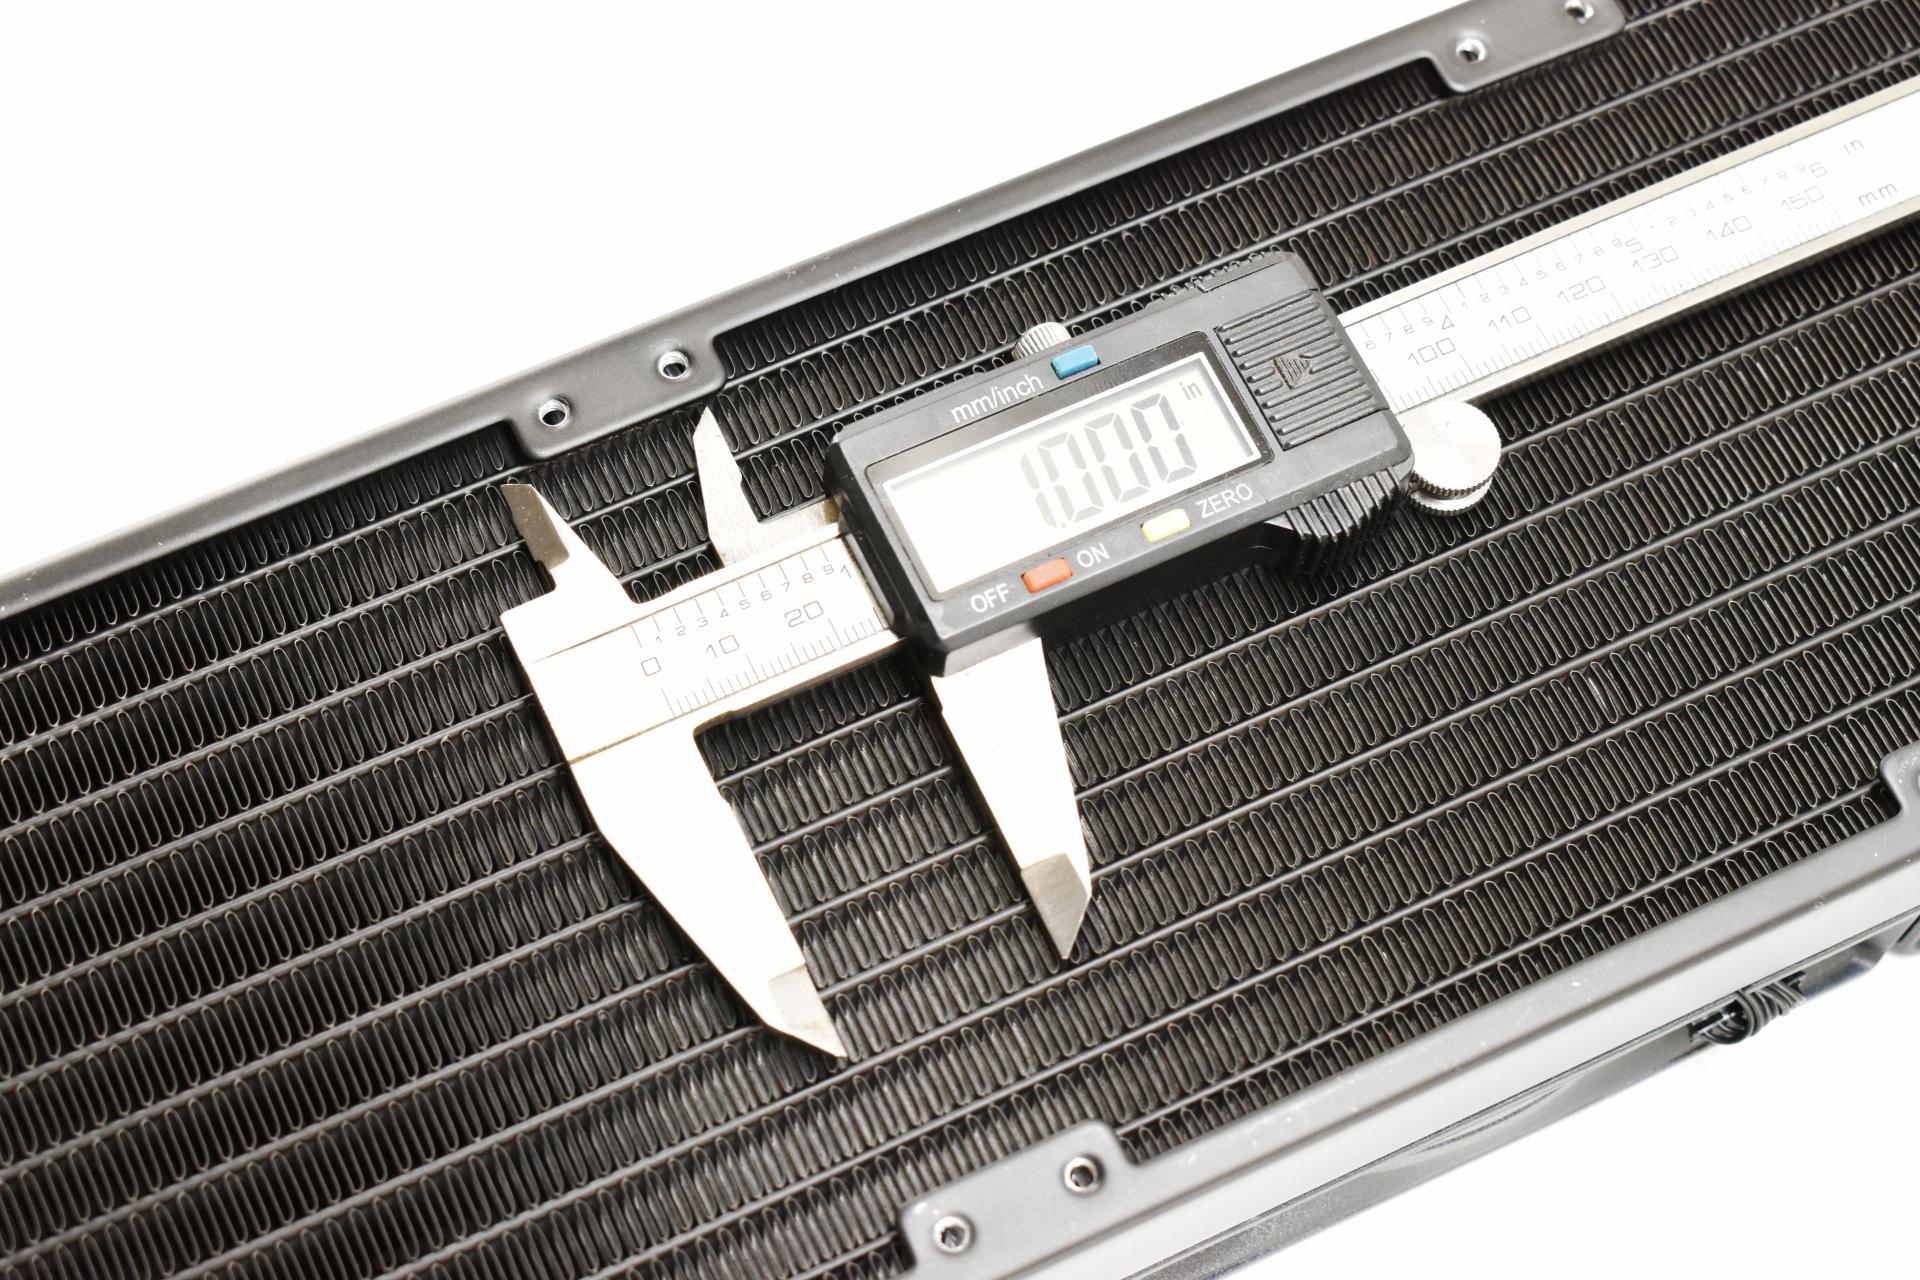
FPI (fins per inch) count according to my tool is closer to 21 than the reported 20 but small difference.


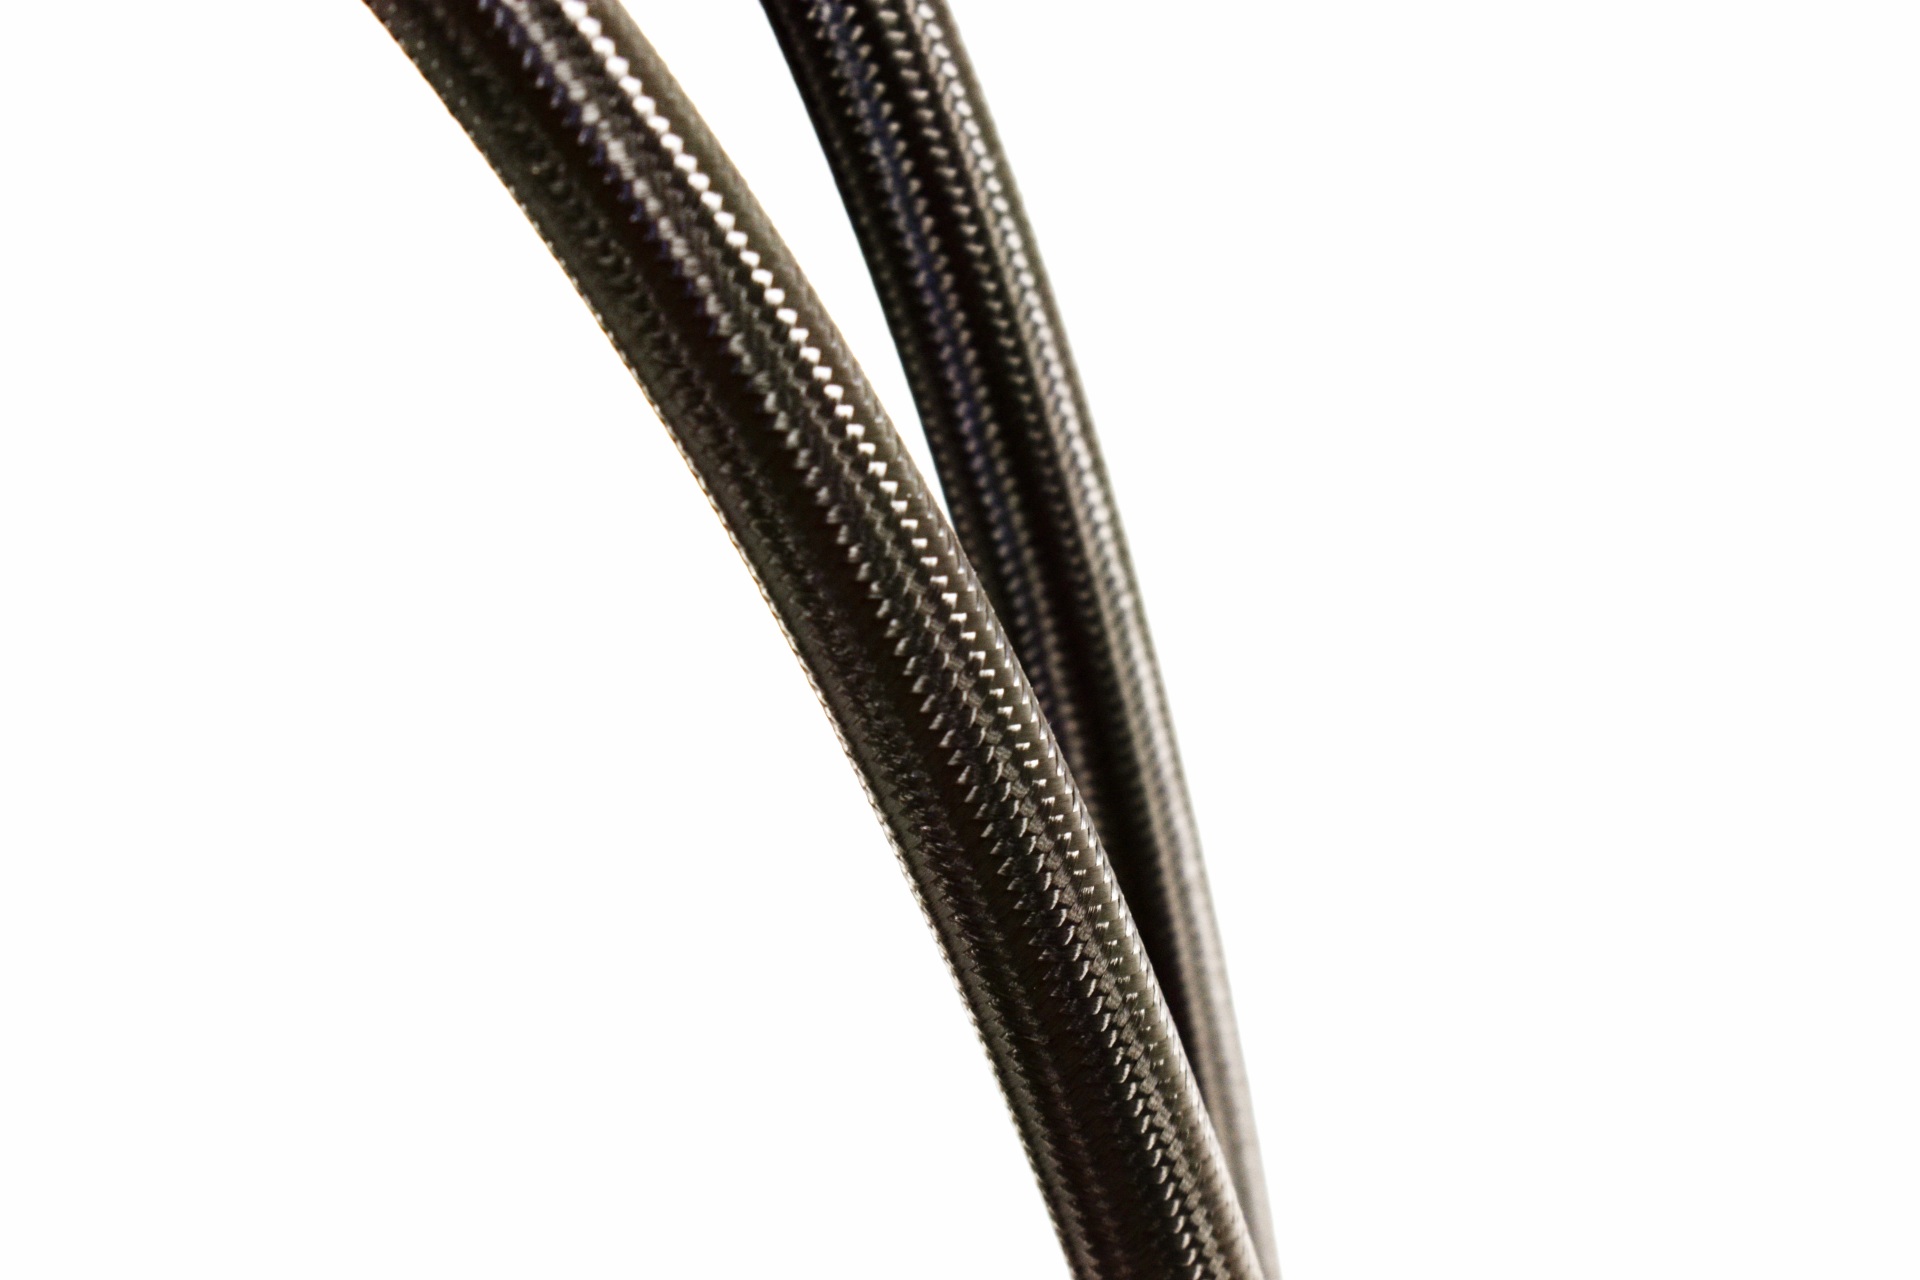
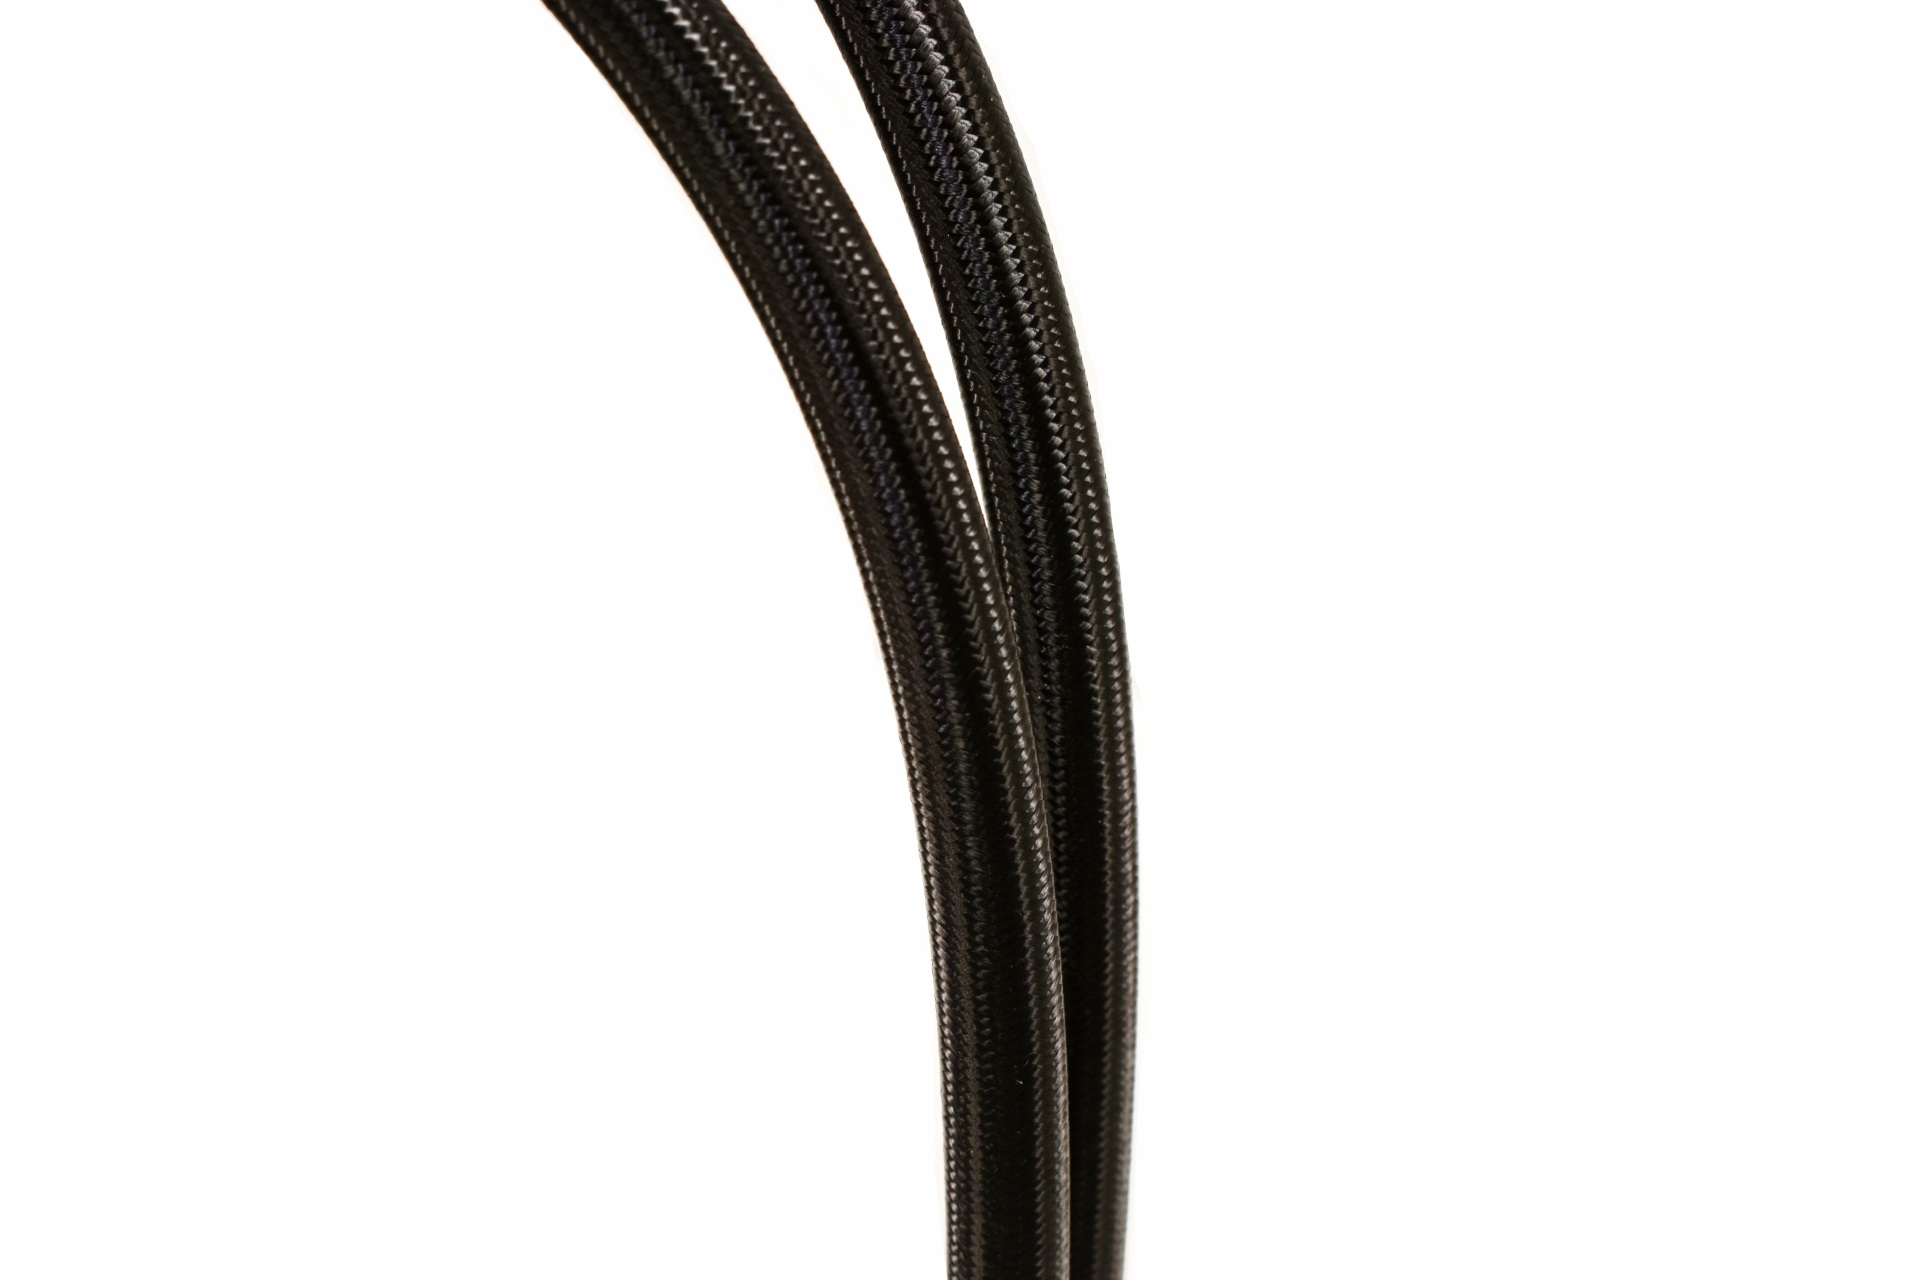
Using 450mm braided (EPDM) tubes is ideal for such a long AIO.


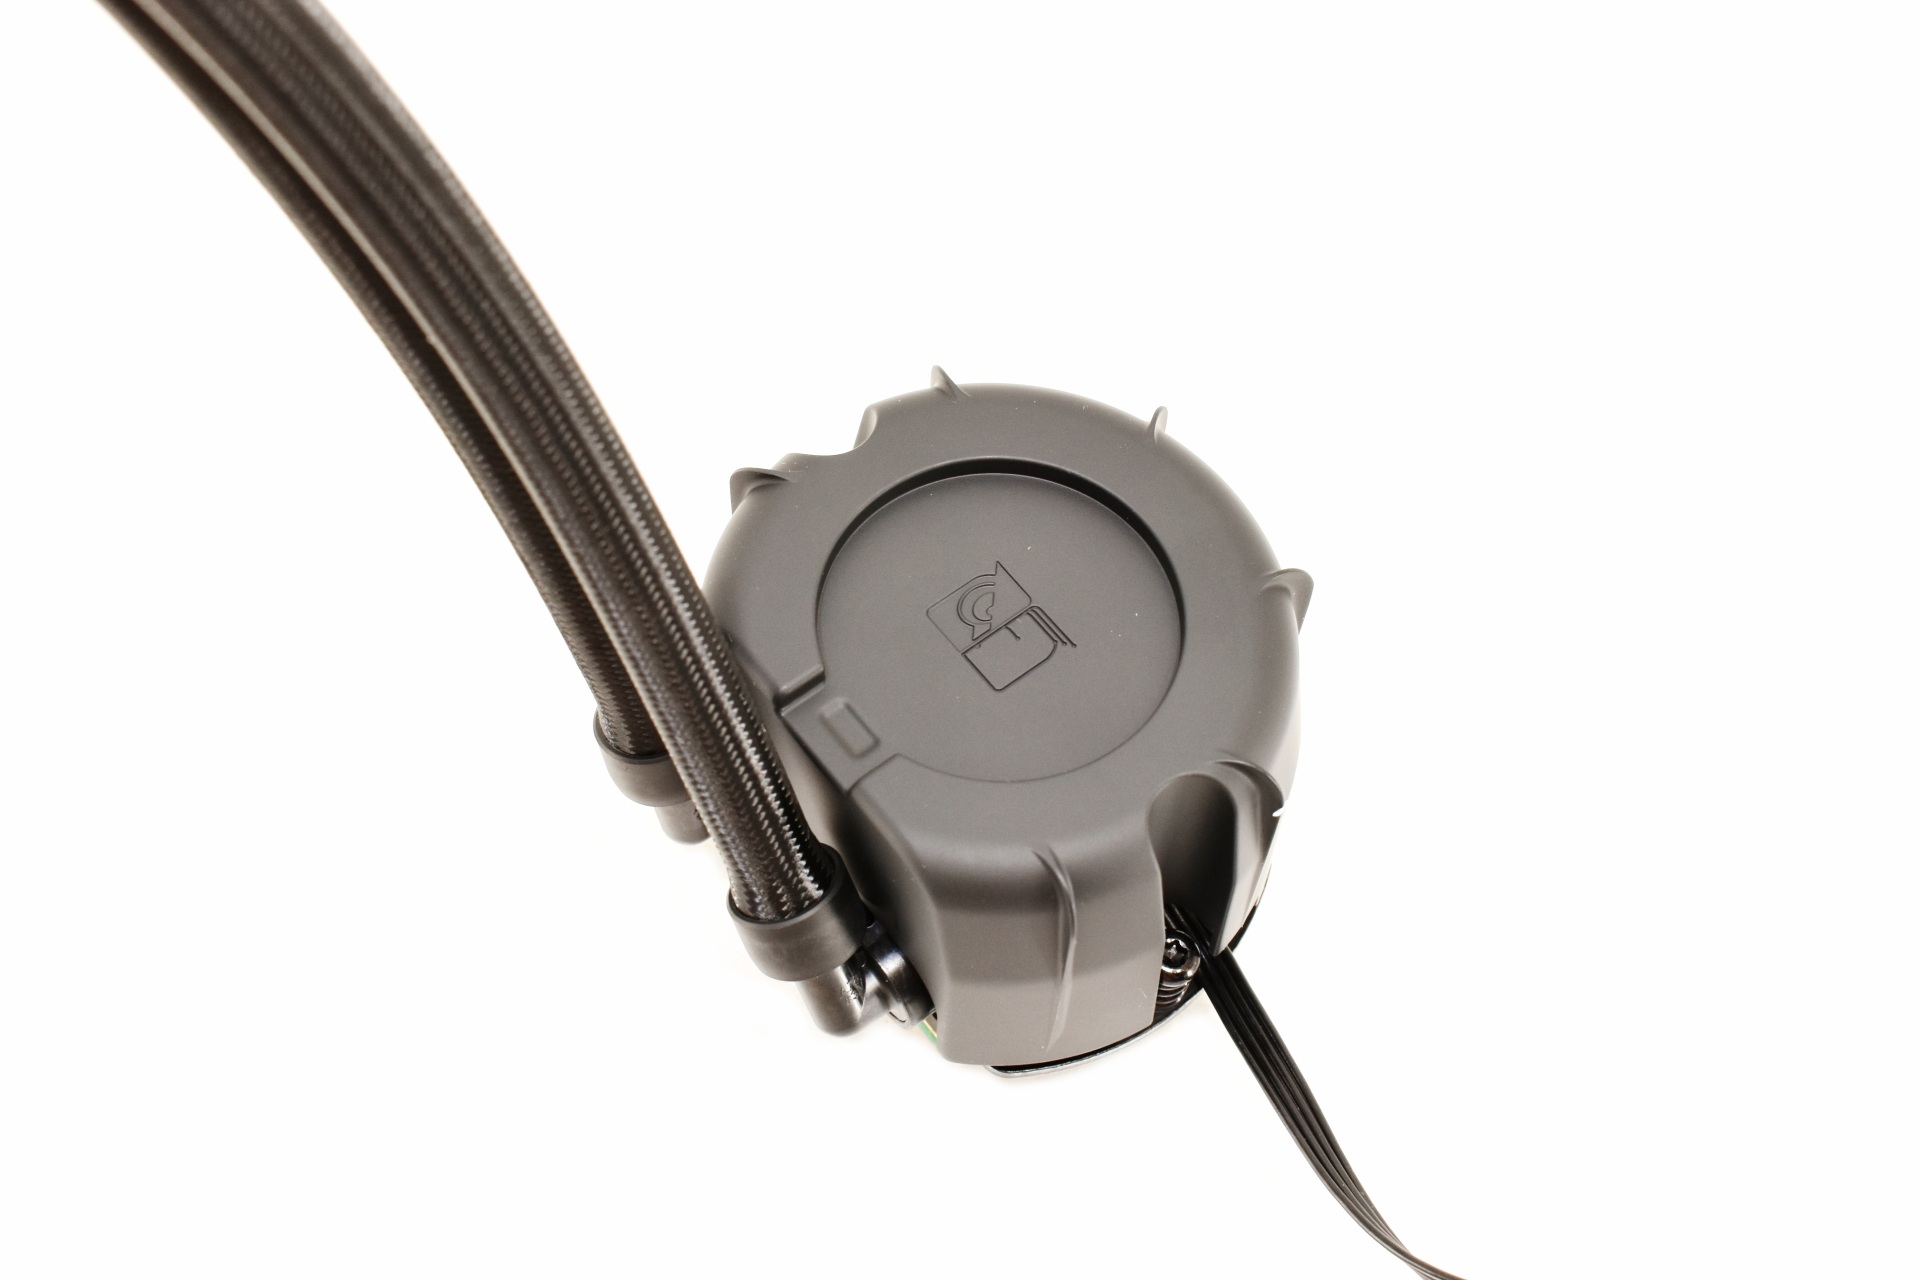
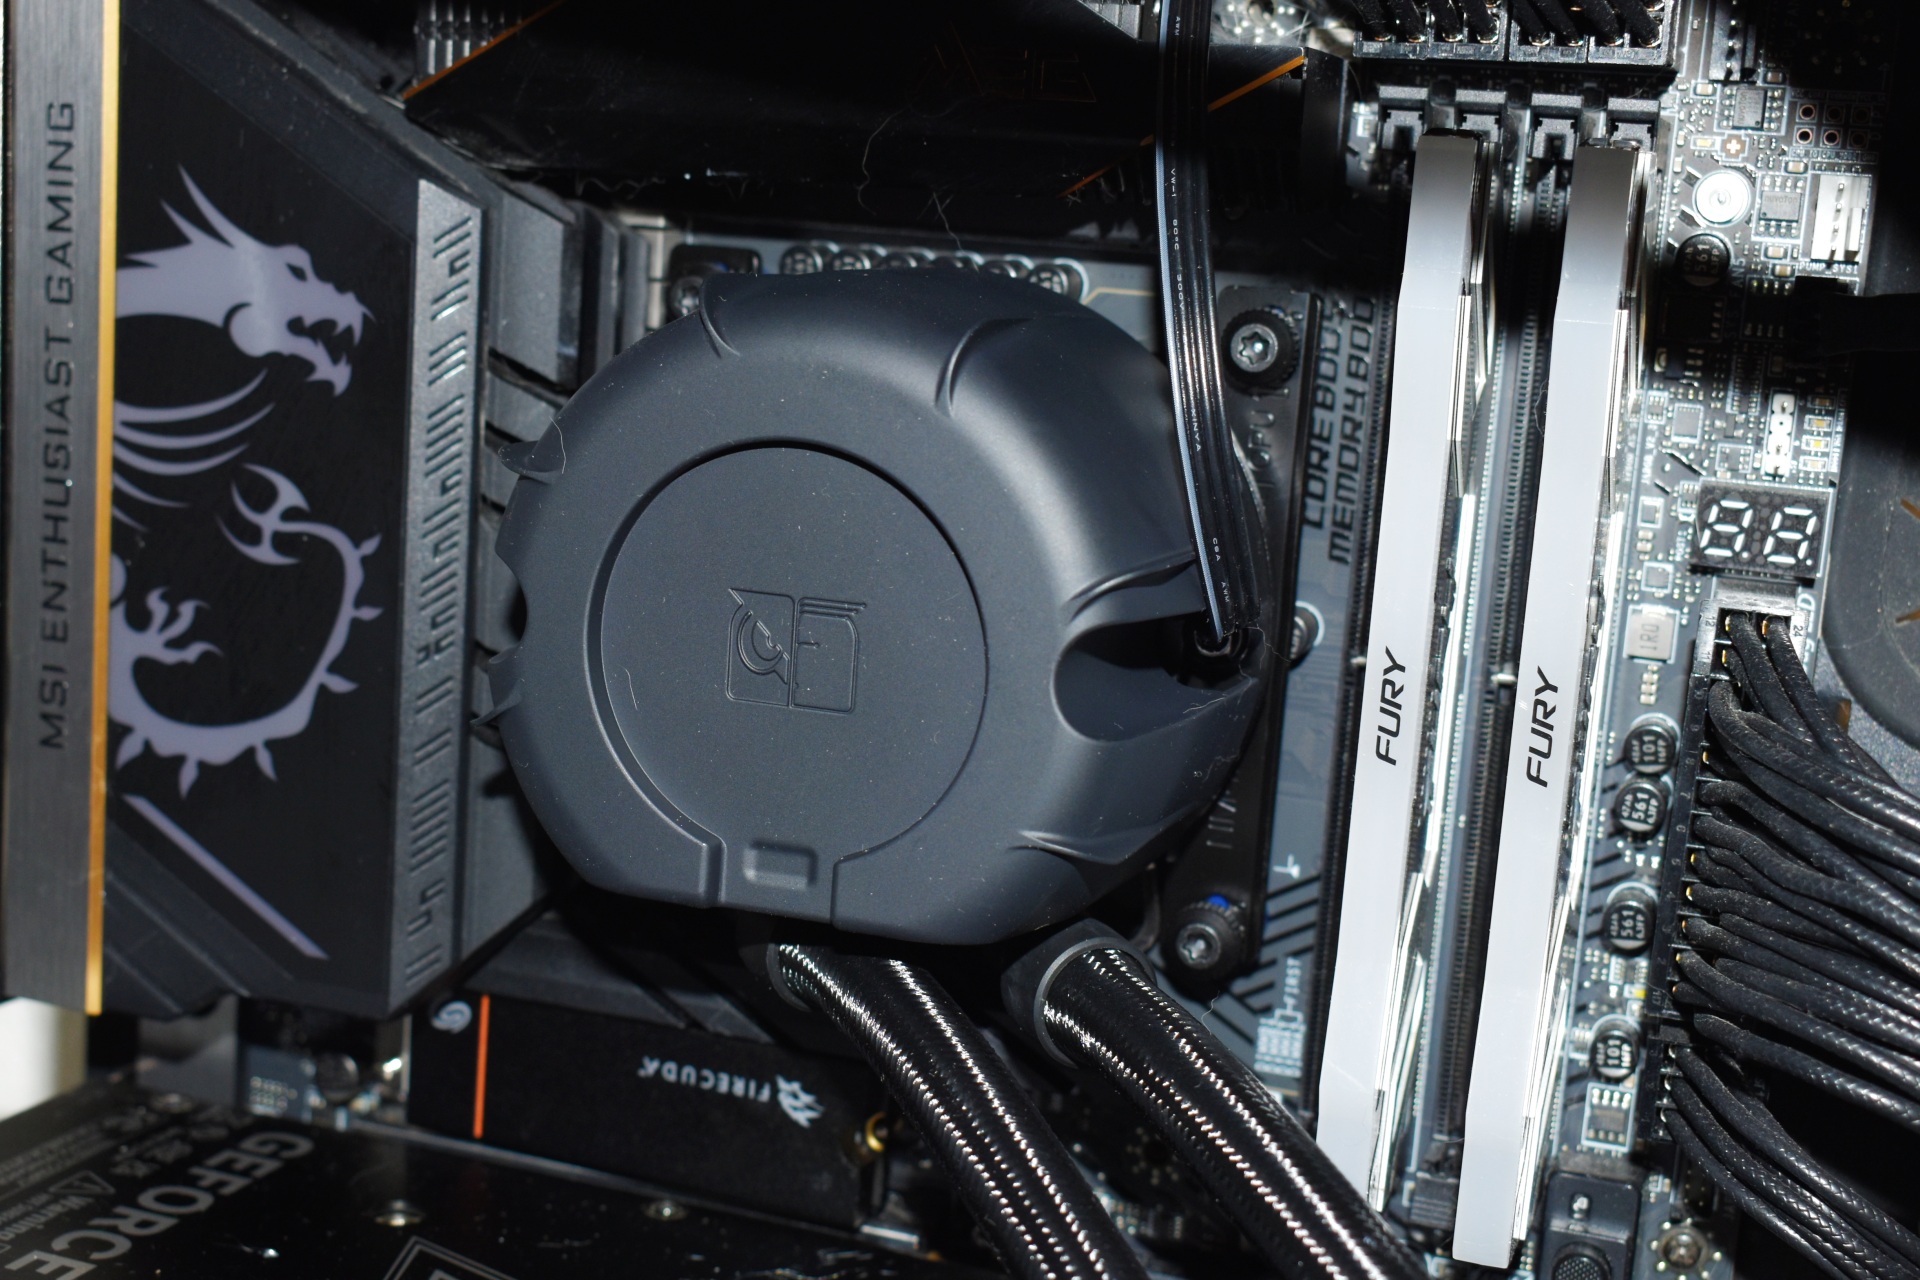
The 70mm tall pump/water block combo has the company logo on top and that's also where you can mount the bundled faceplate (or the NL-ACF1 80mm auxiliary fan).


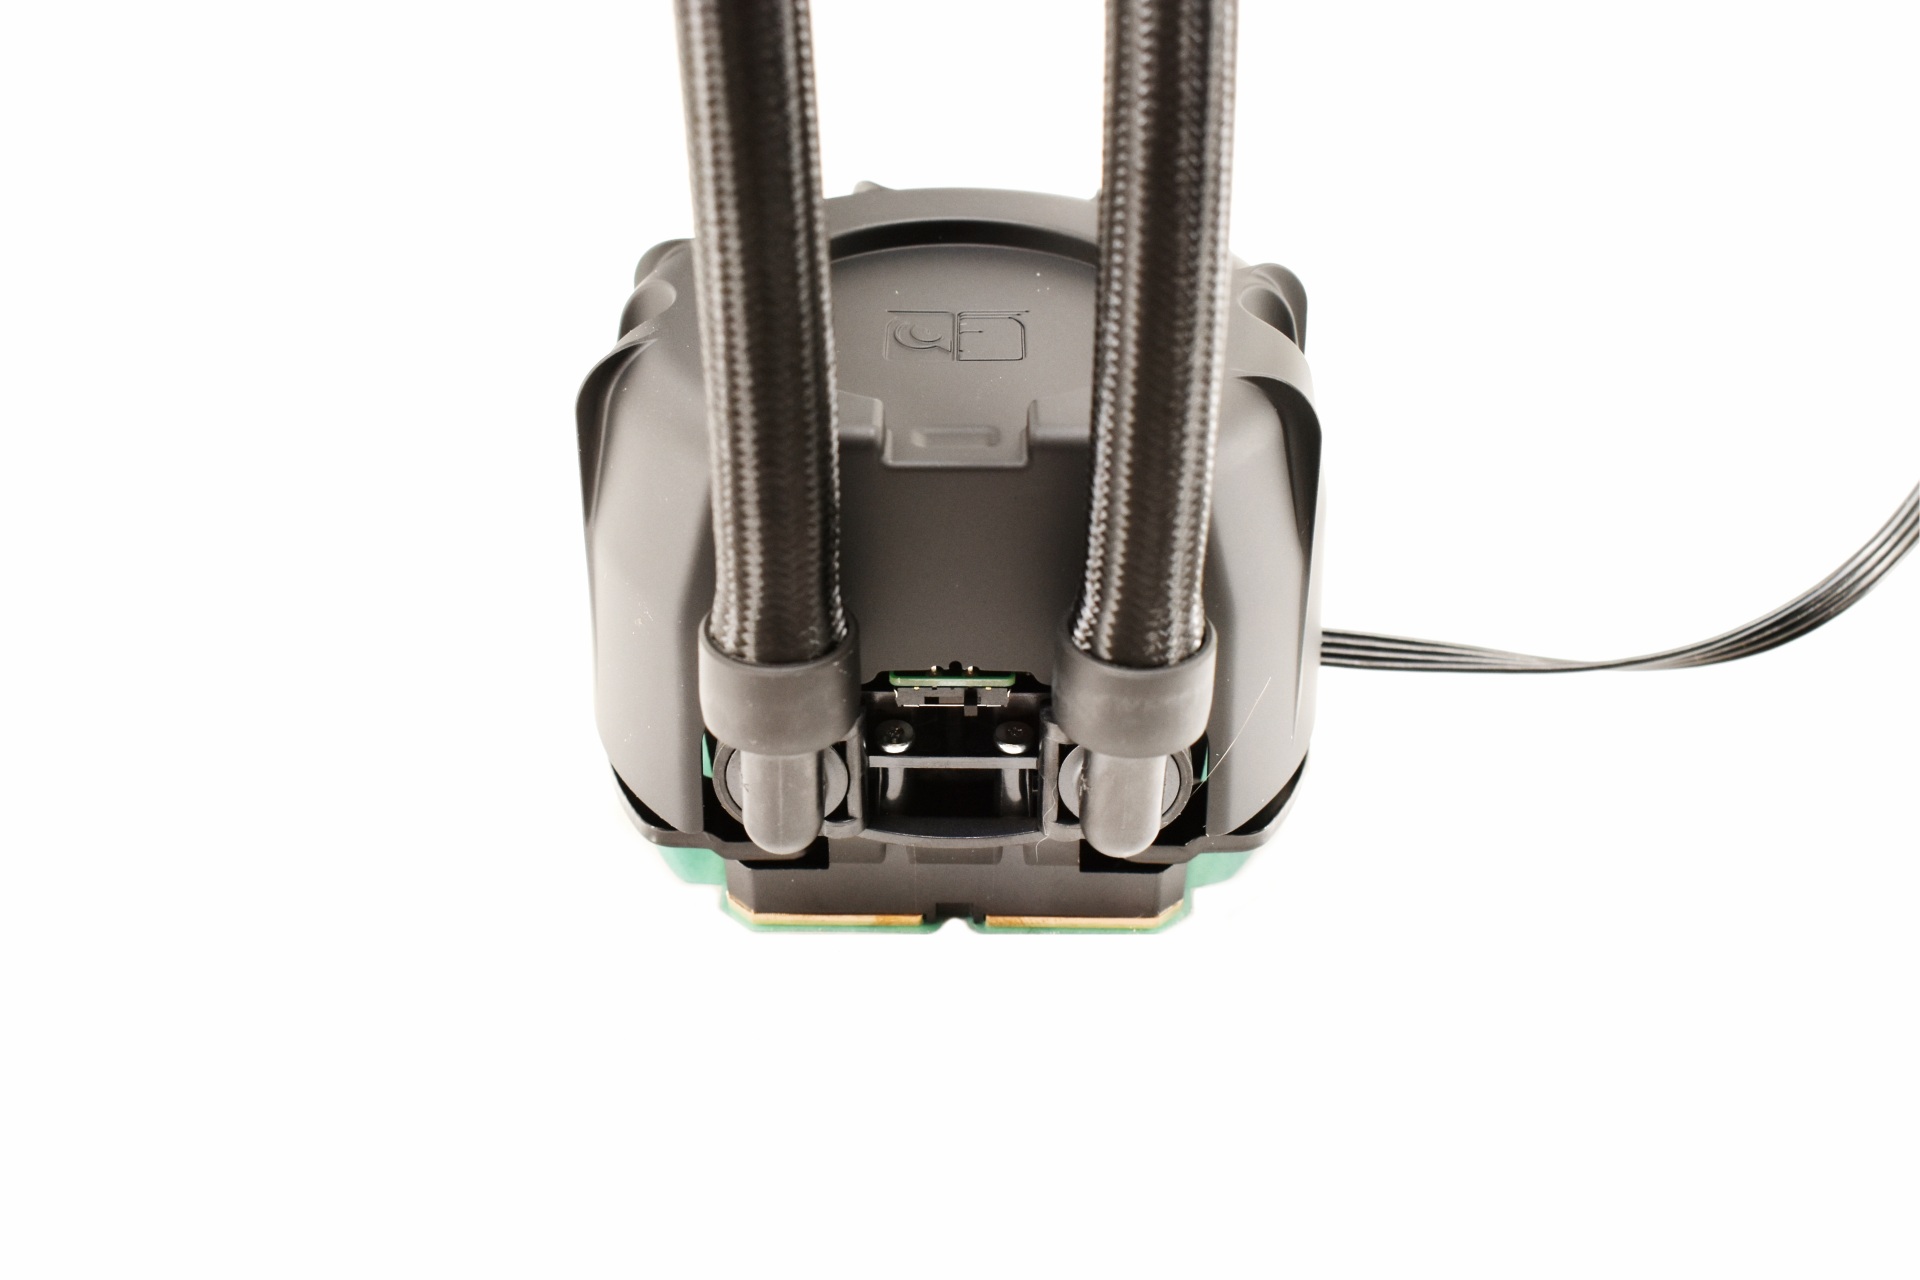
Both tubes can rotate from the base and here we also find the pump speed switch (quiet/balances/manual).


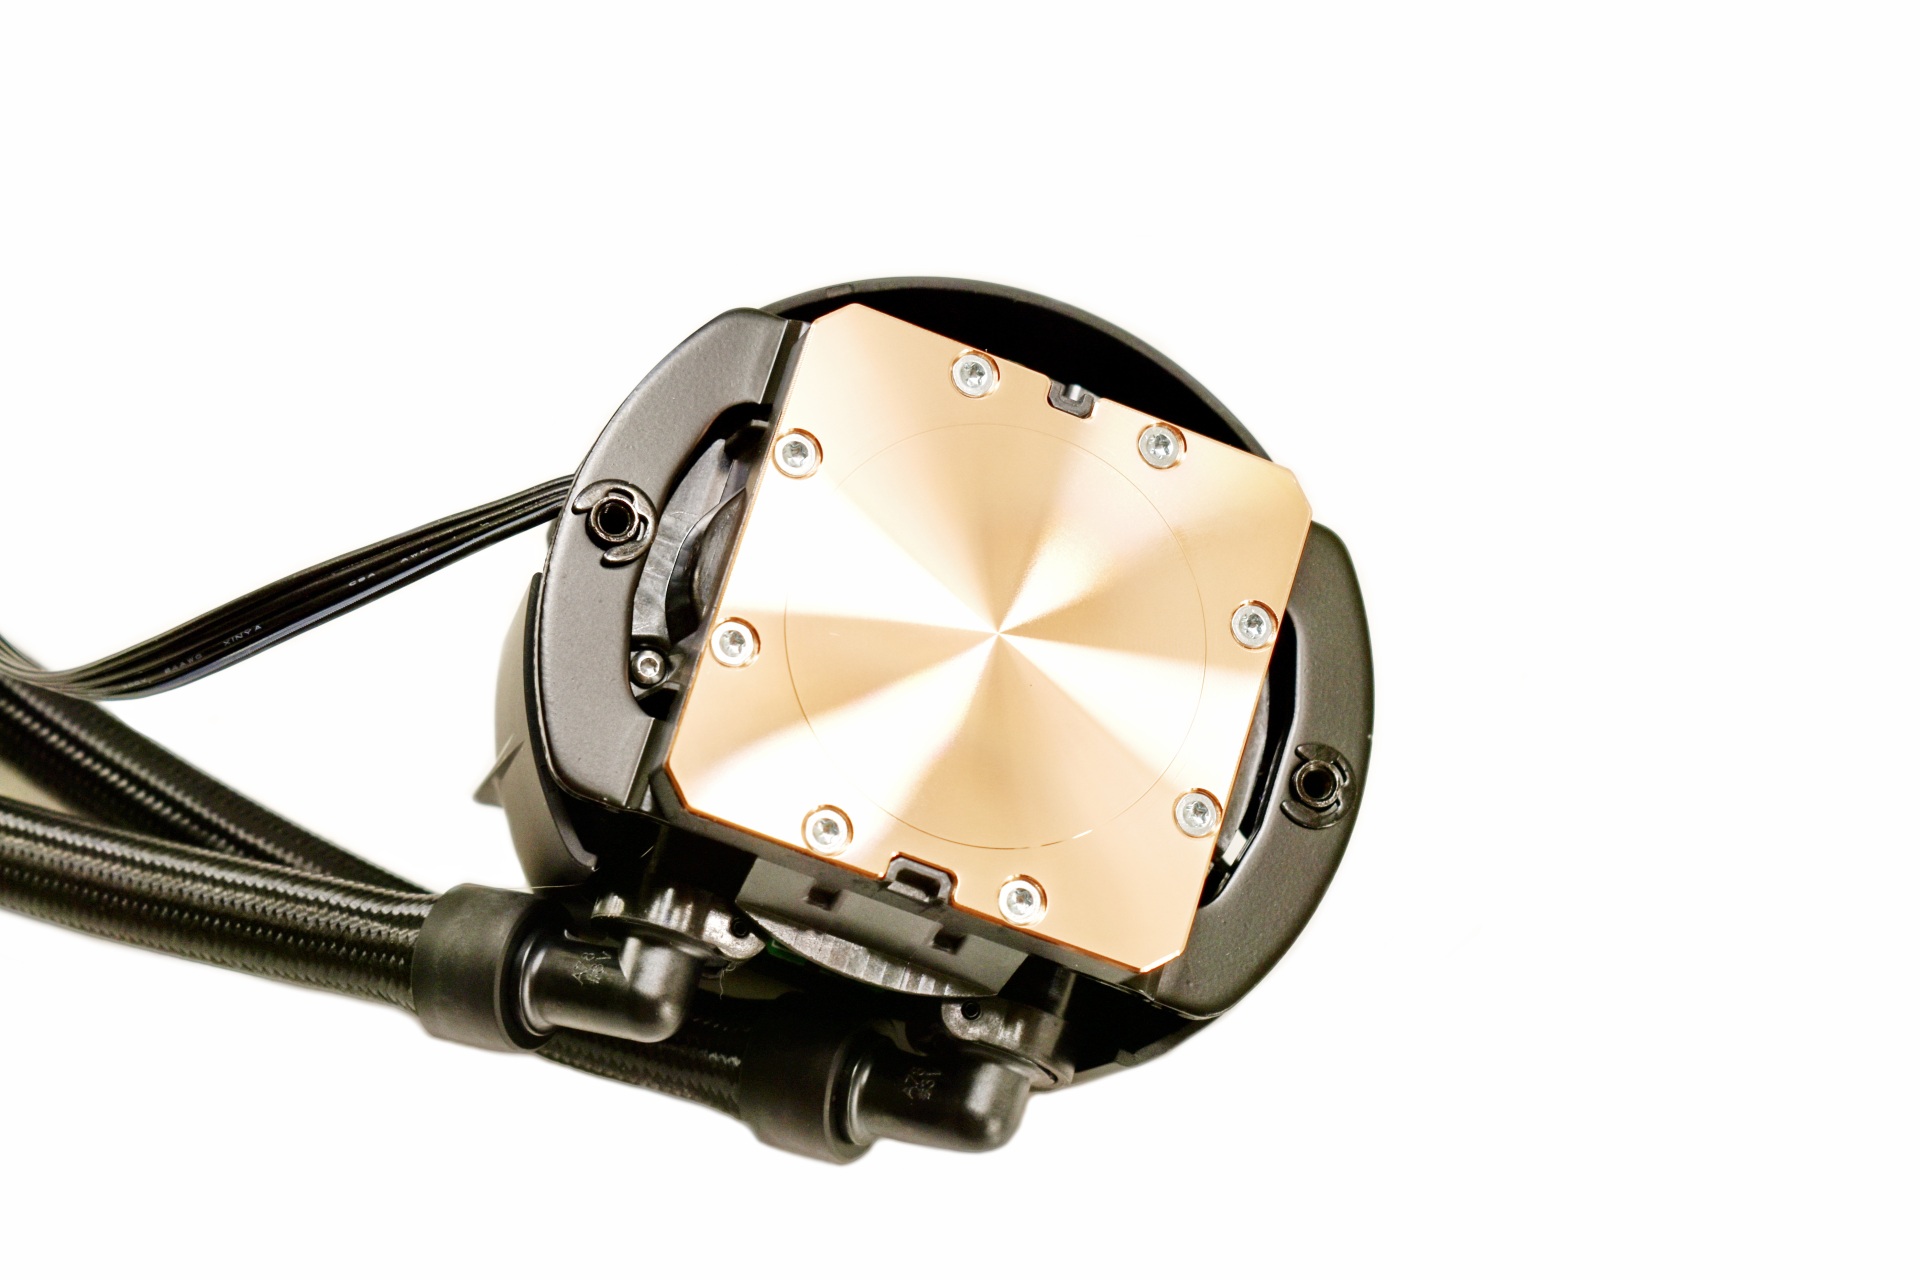
The Copper (CU1100) cold plate is also quite large and measures 55.5mm in length and width.


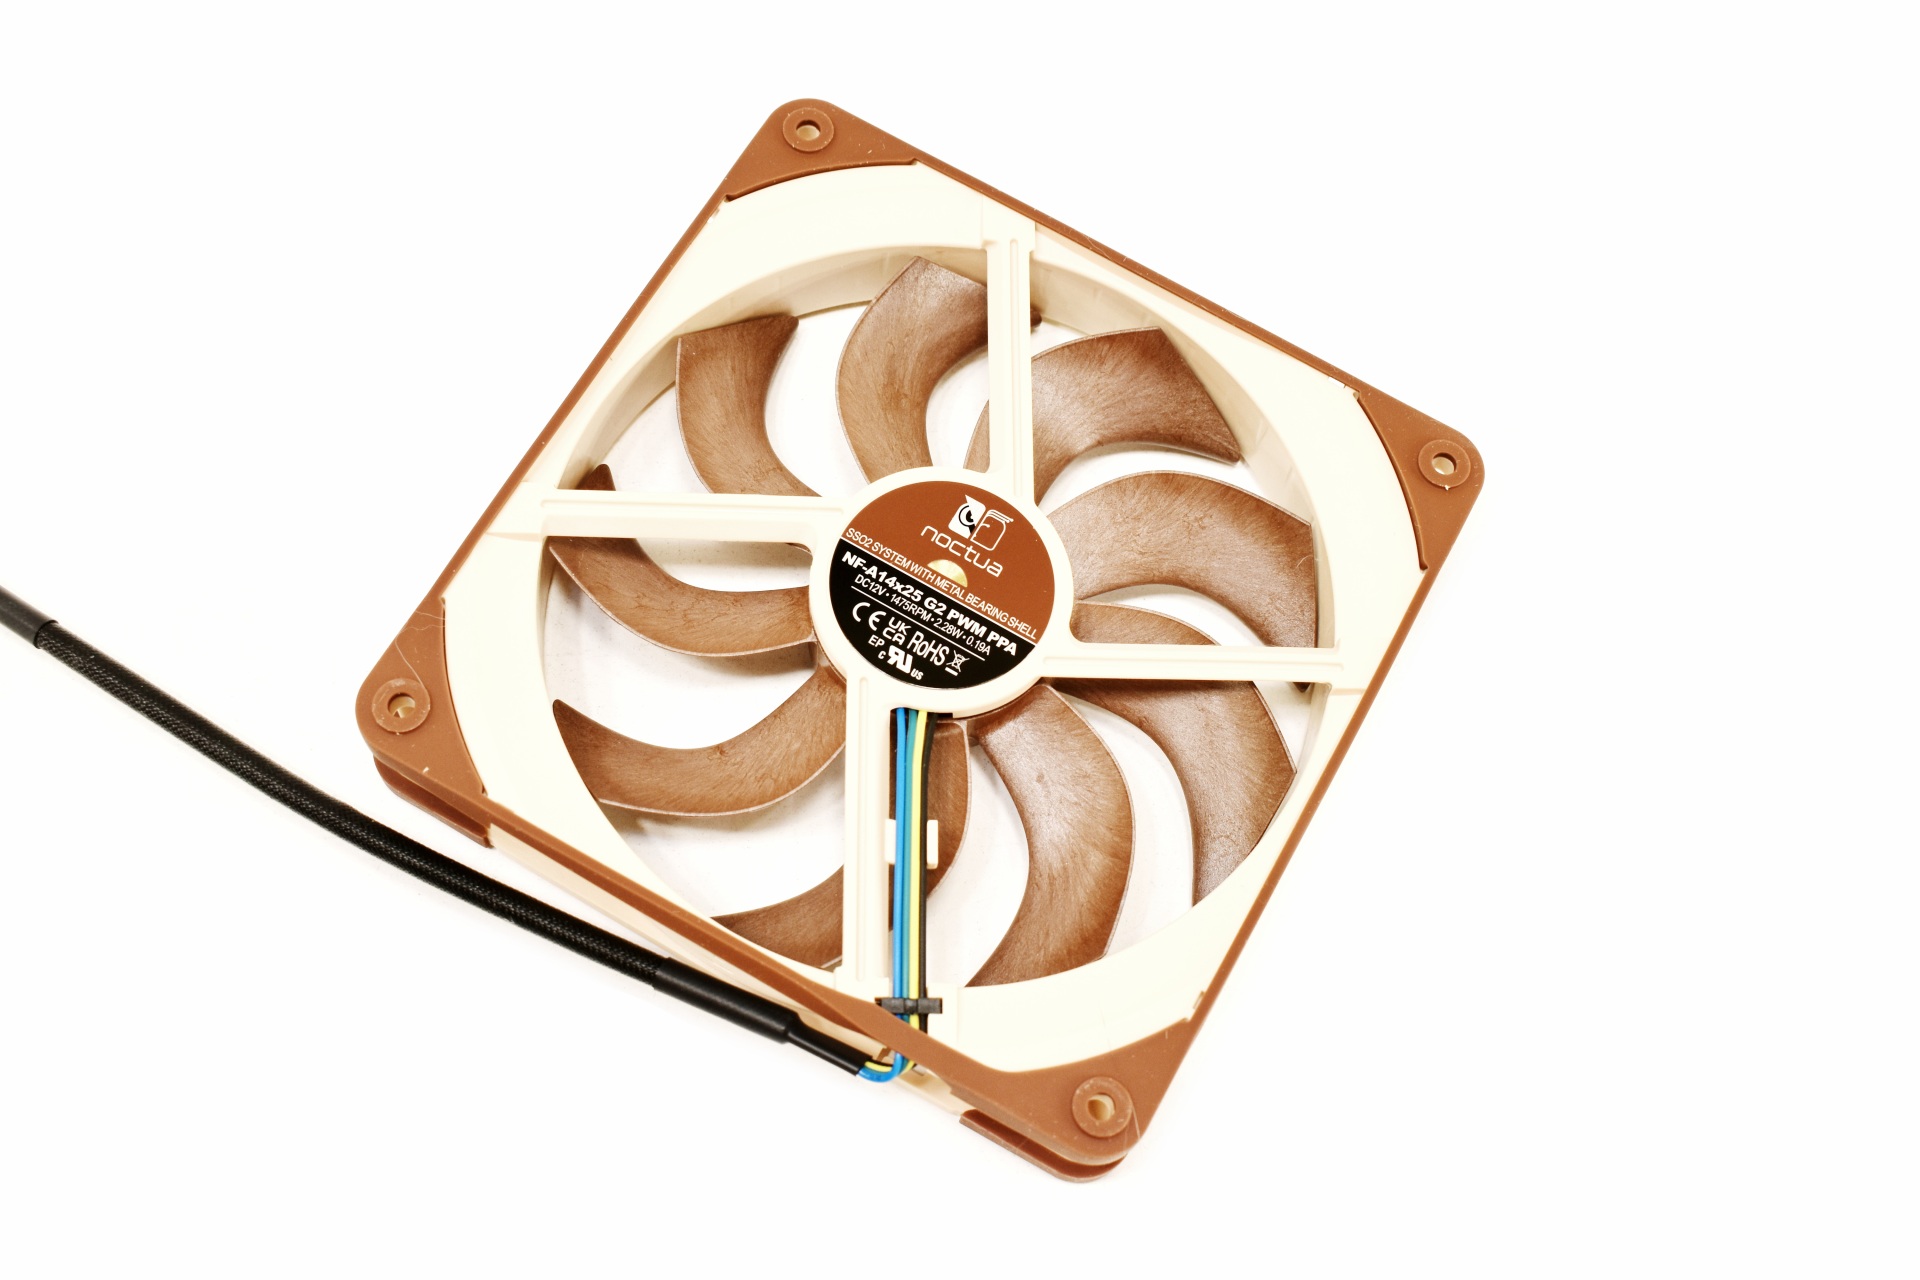
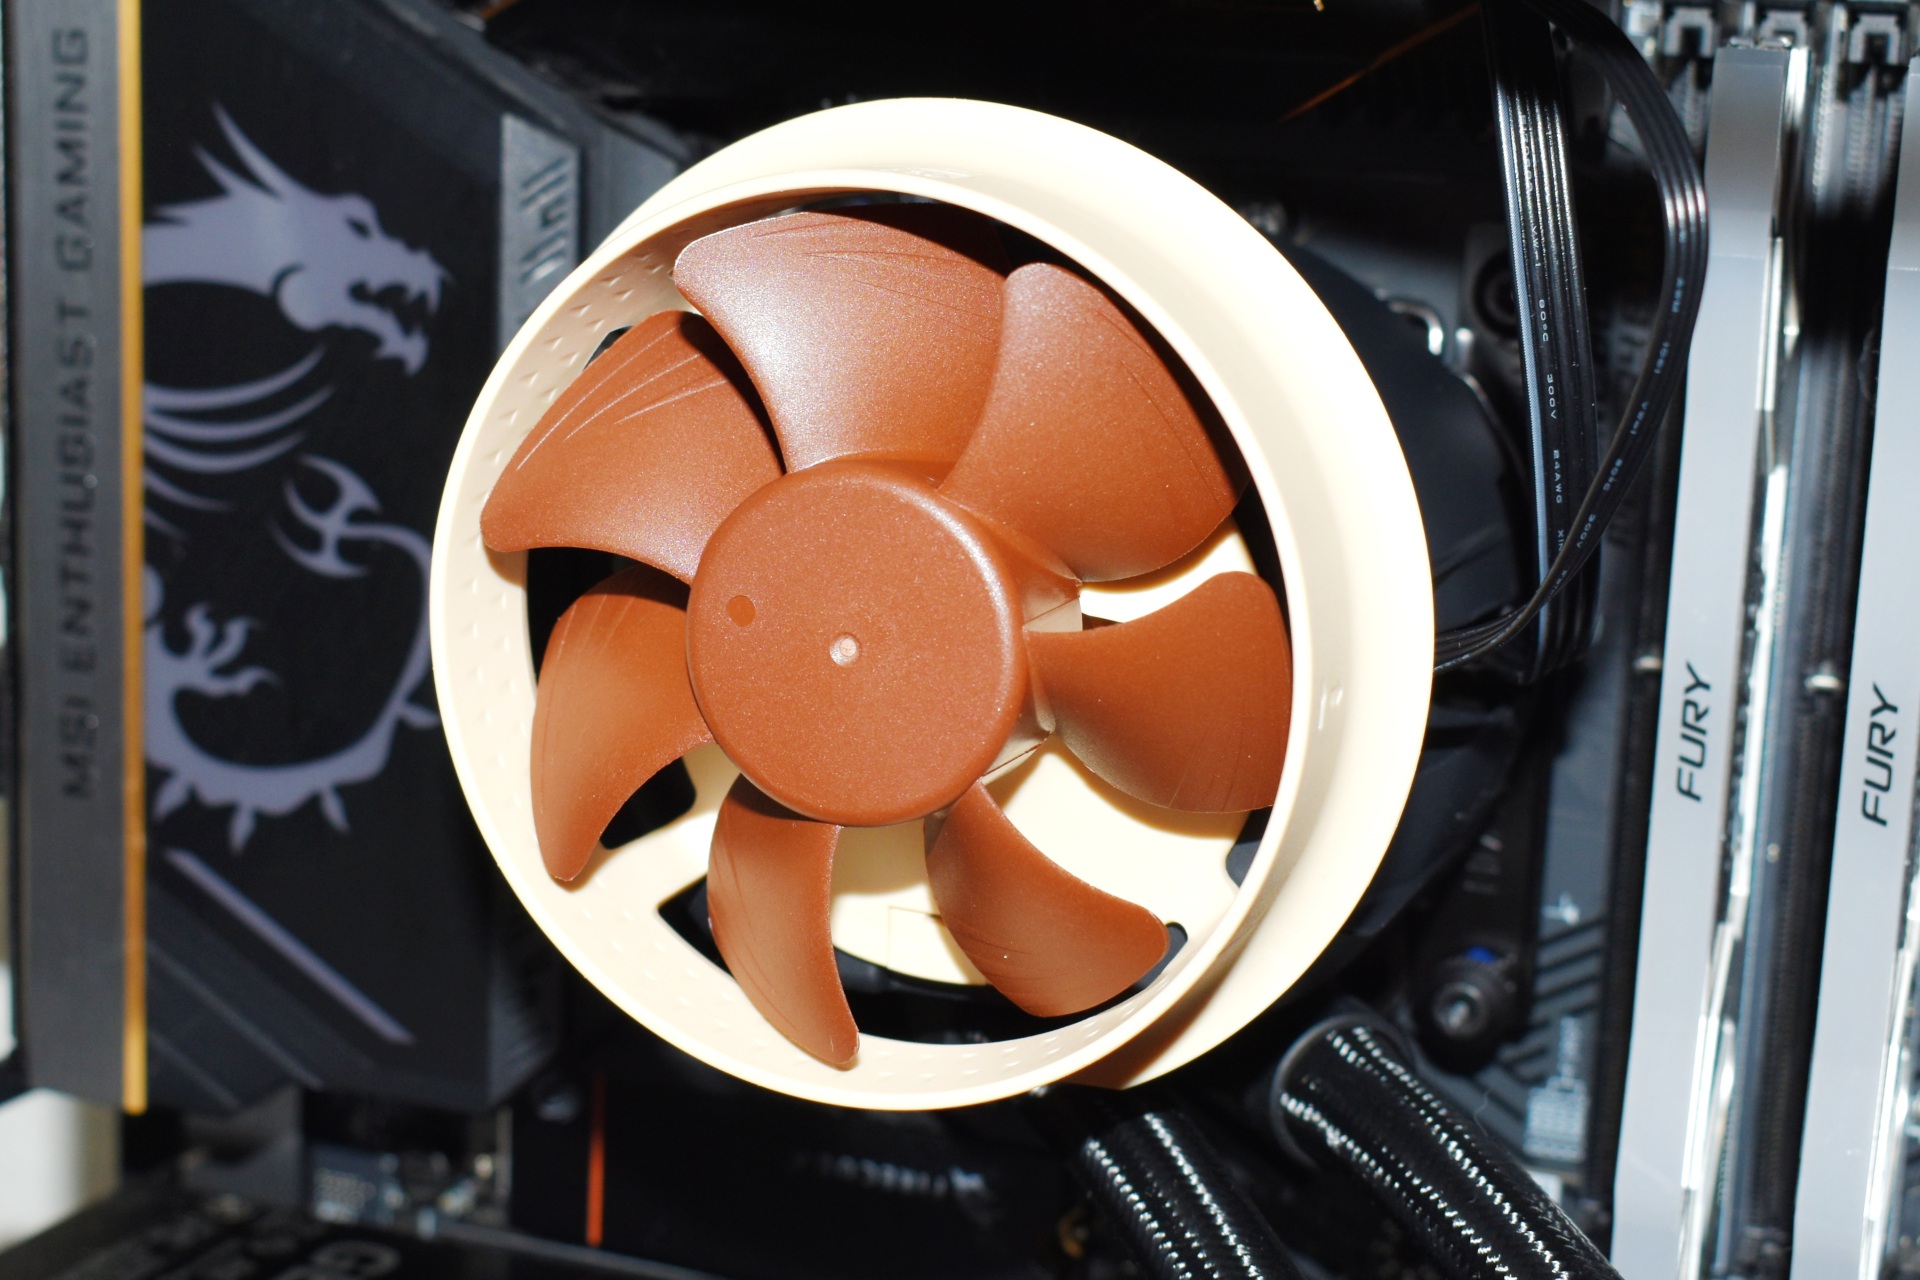
Noctua has paired the NL-LC1-42 model with their NF-A14x25 G2 fans which can reach up to 1500RPM to produce airflow levels of up to 155.6m3/h (91.6CFM) and 2.56mmH2O of air pressure with just 24.8dBA of noise.


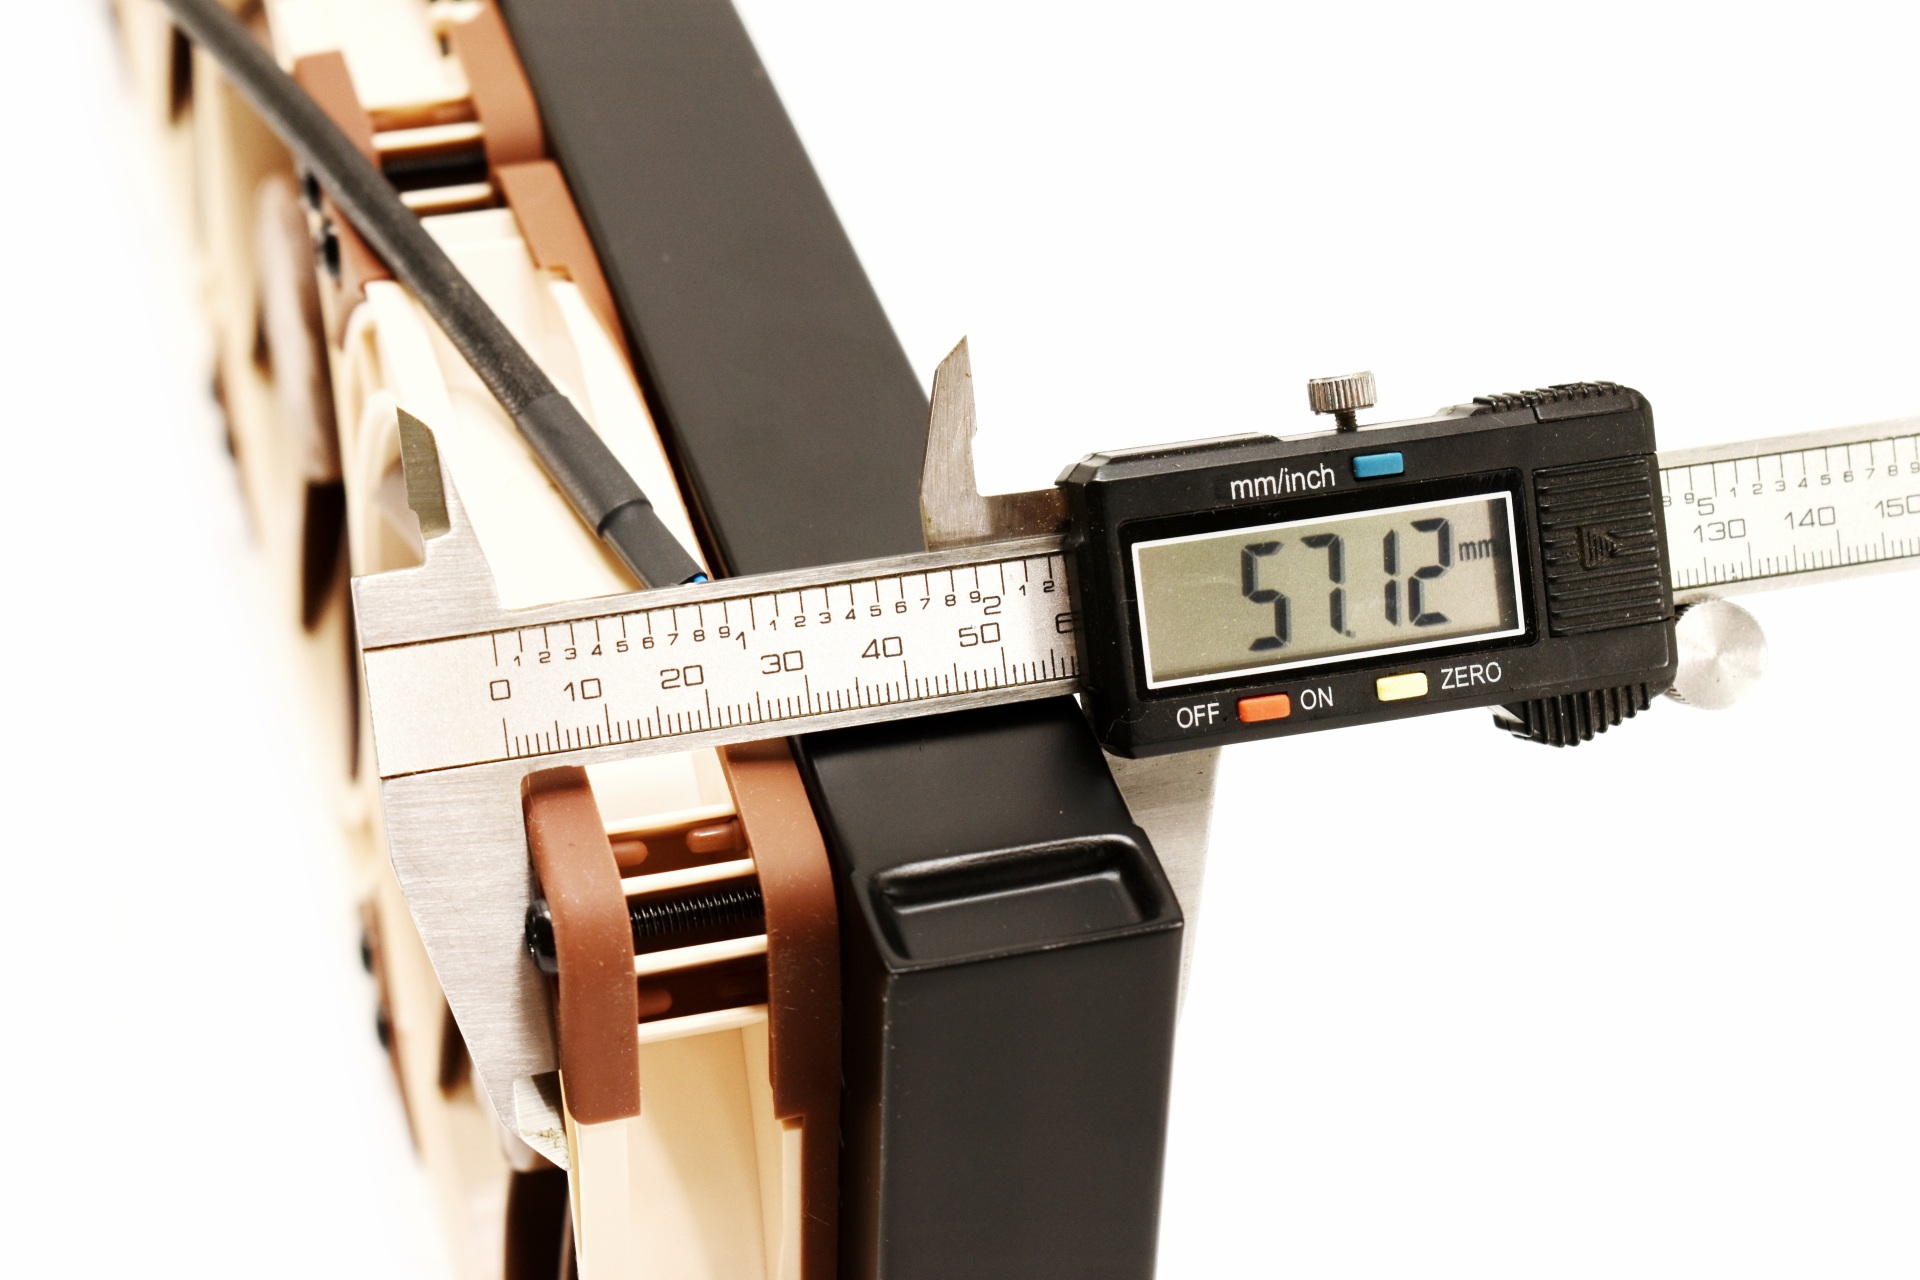
With the fans mounted thickness jumps to just over 57mm.


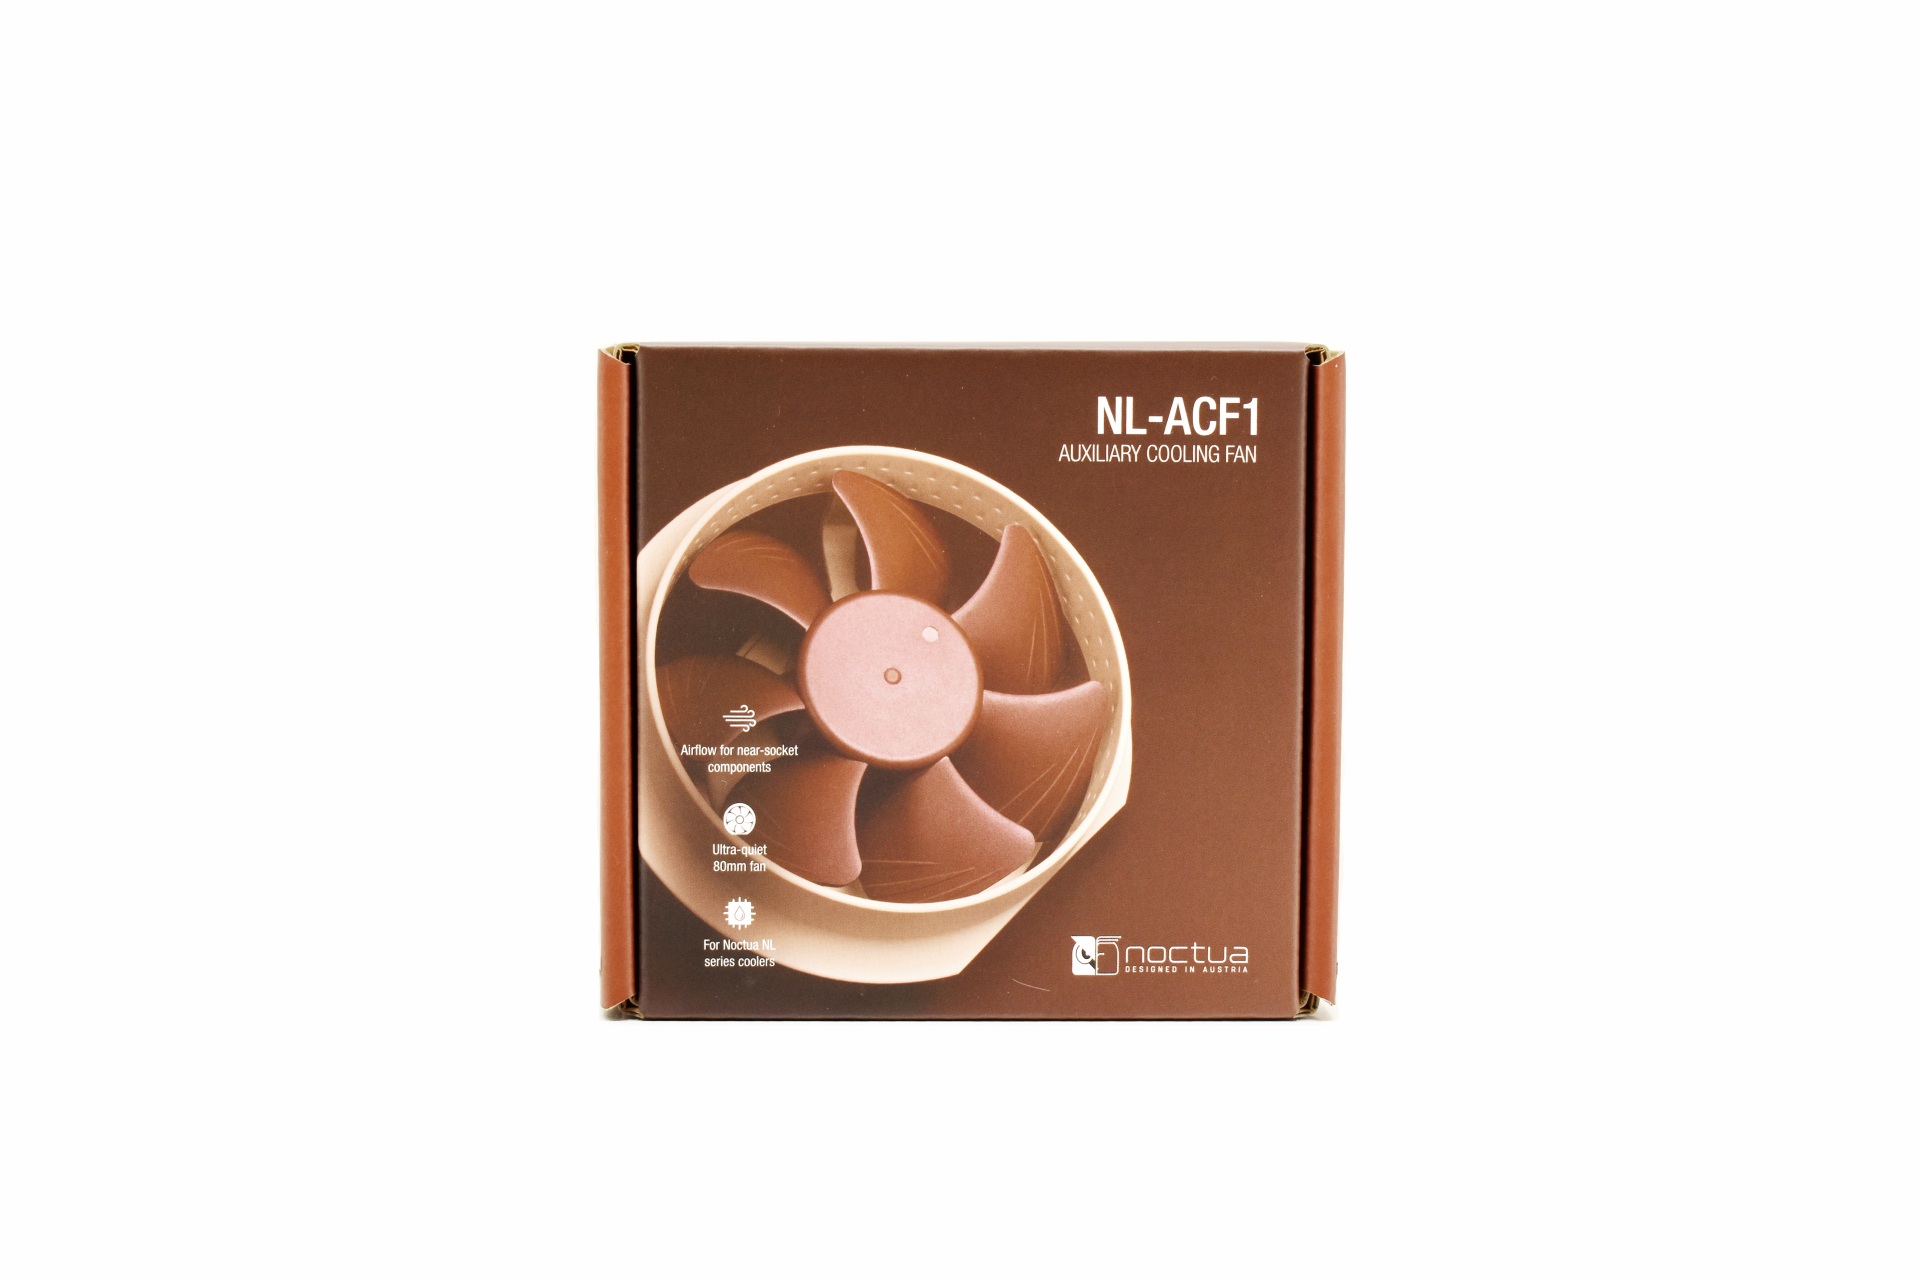
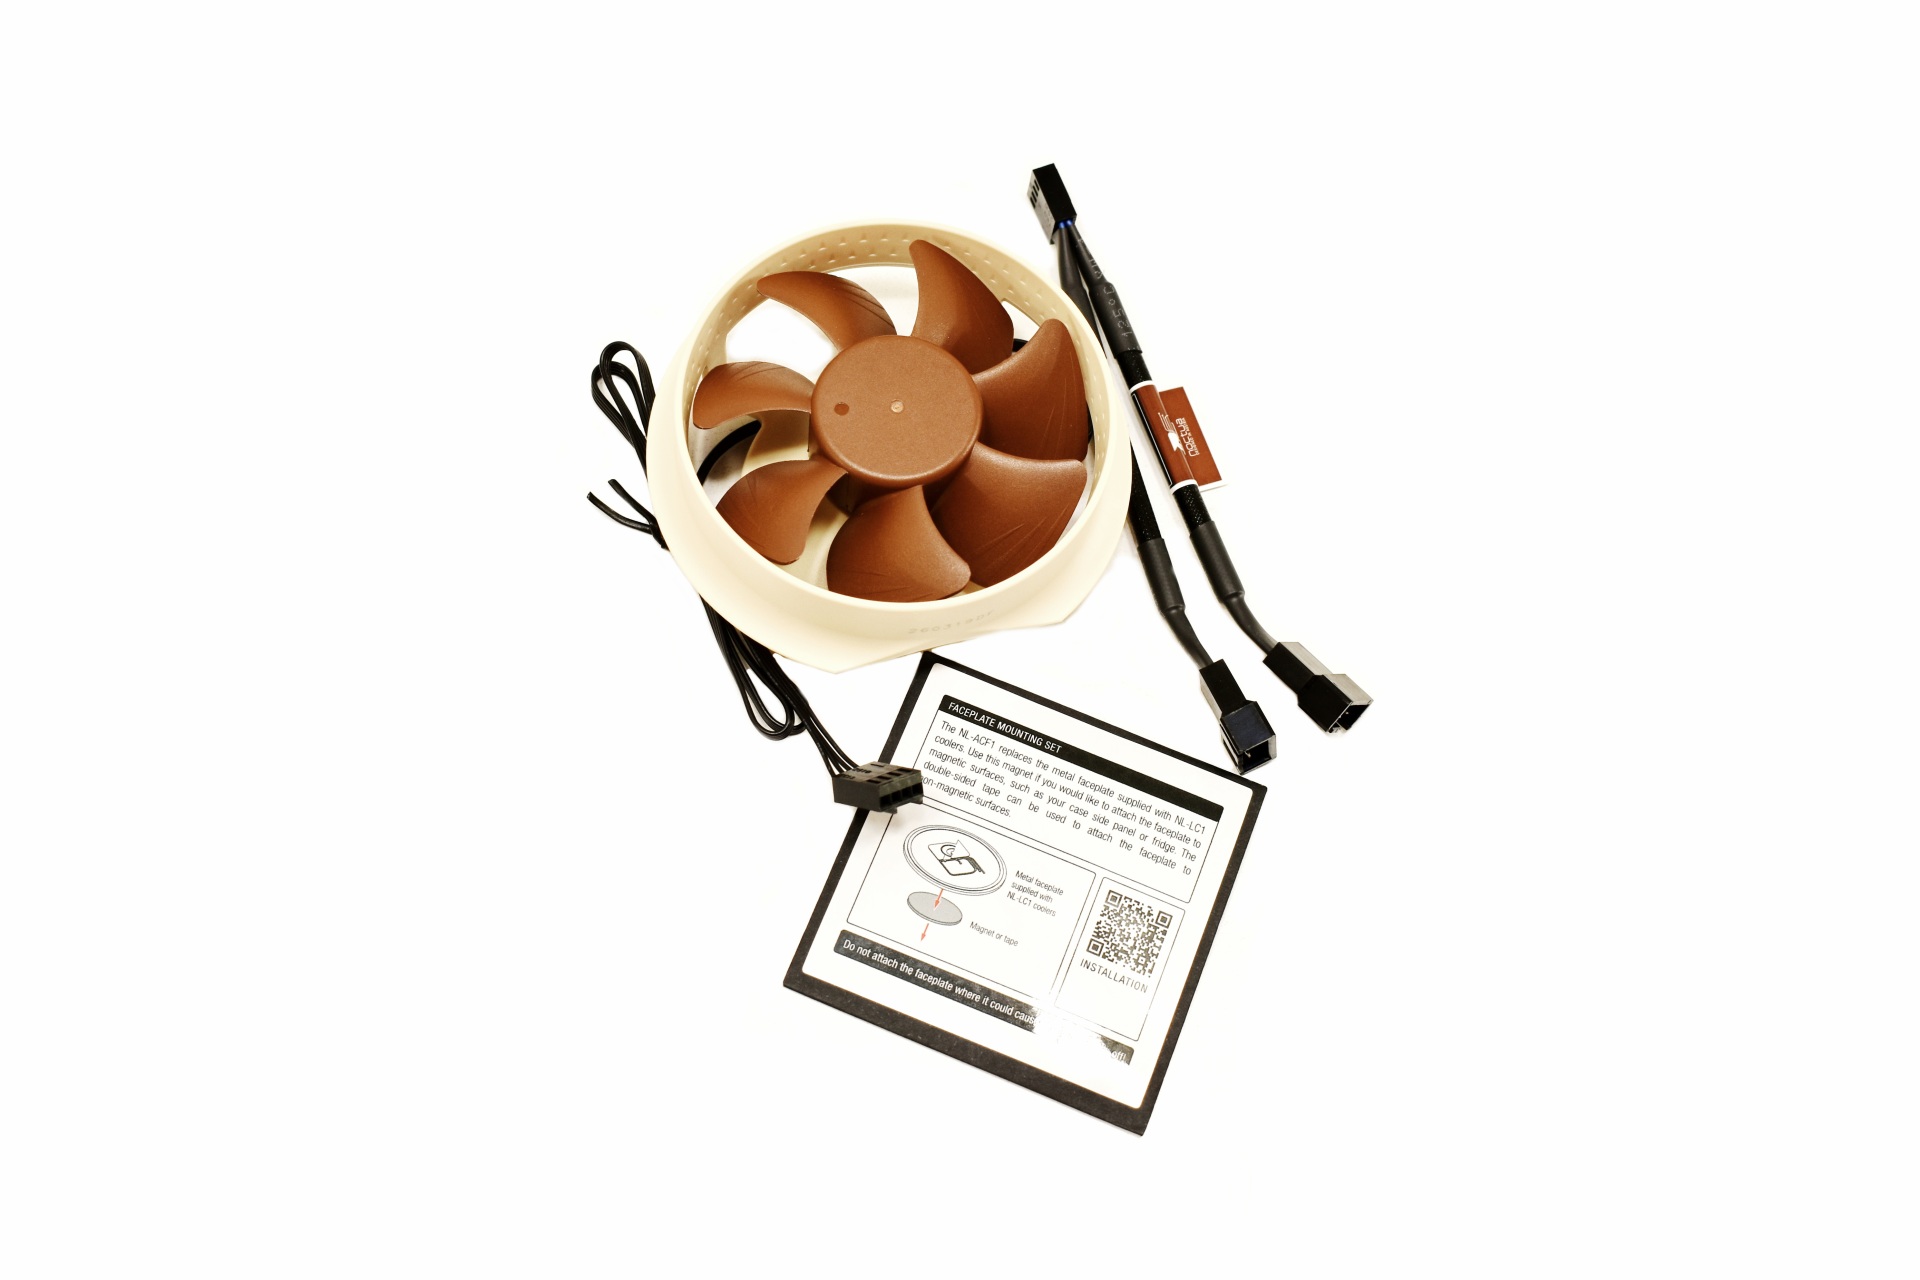
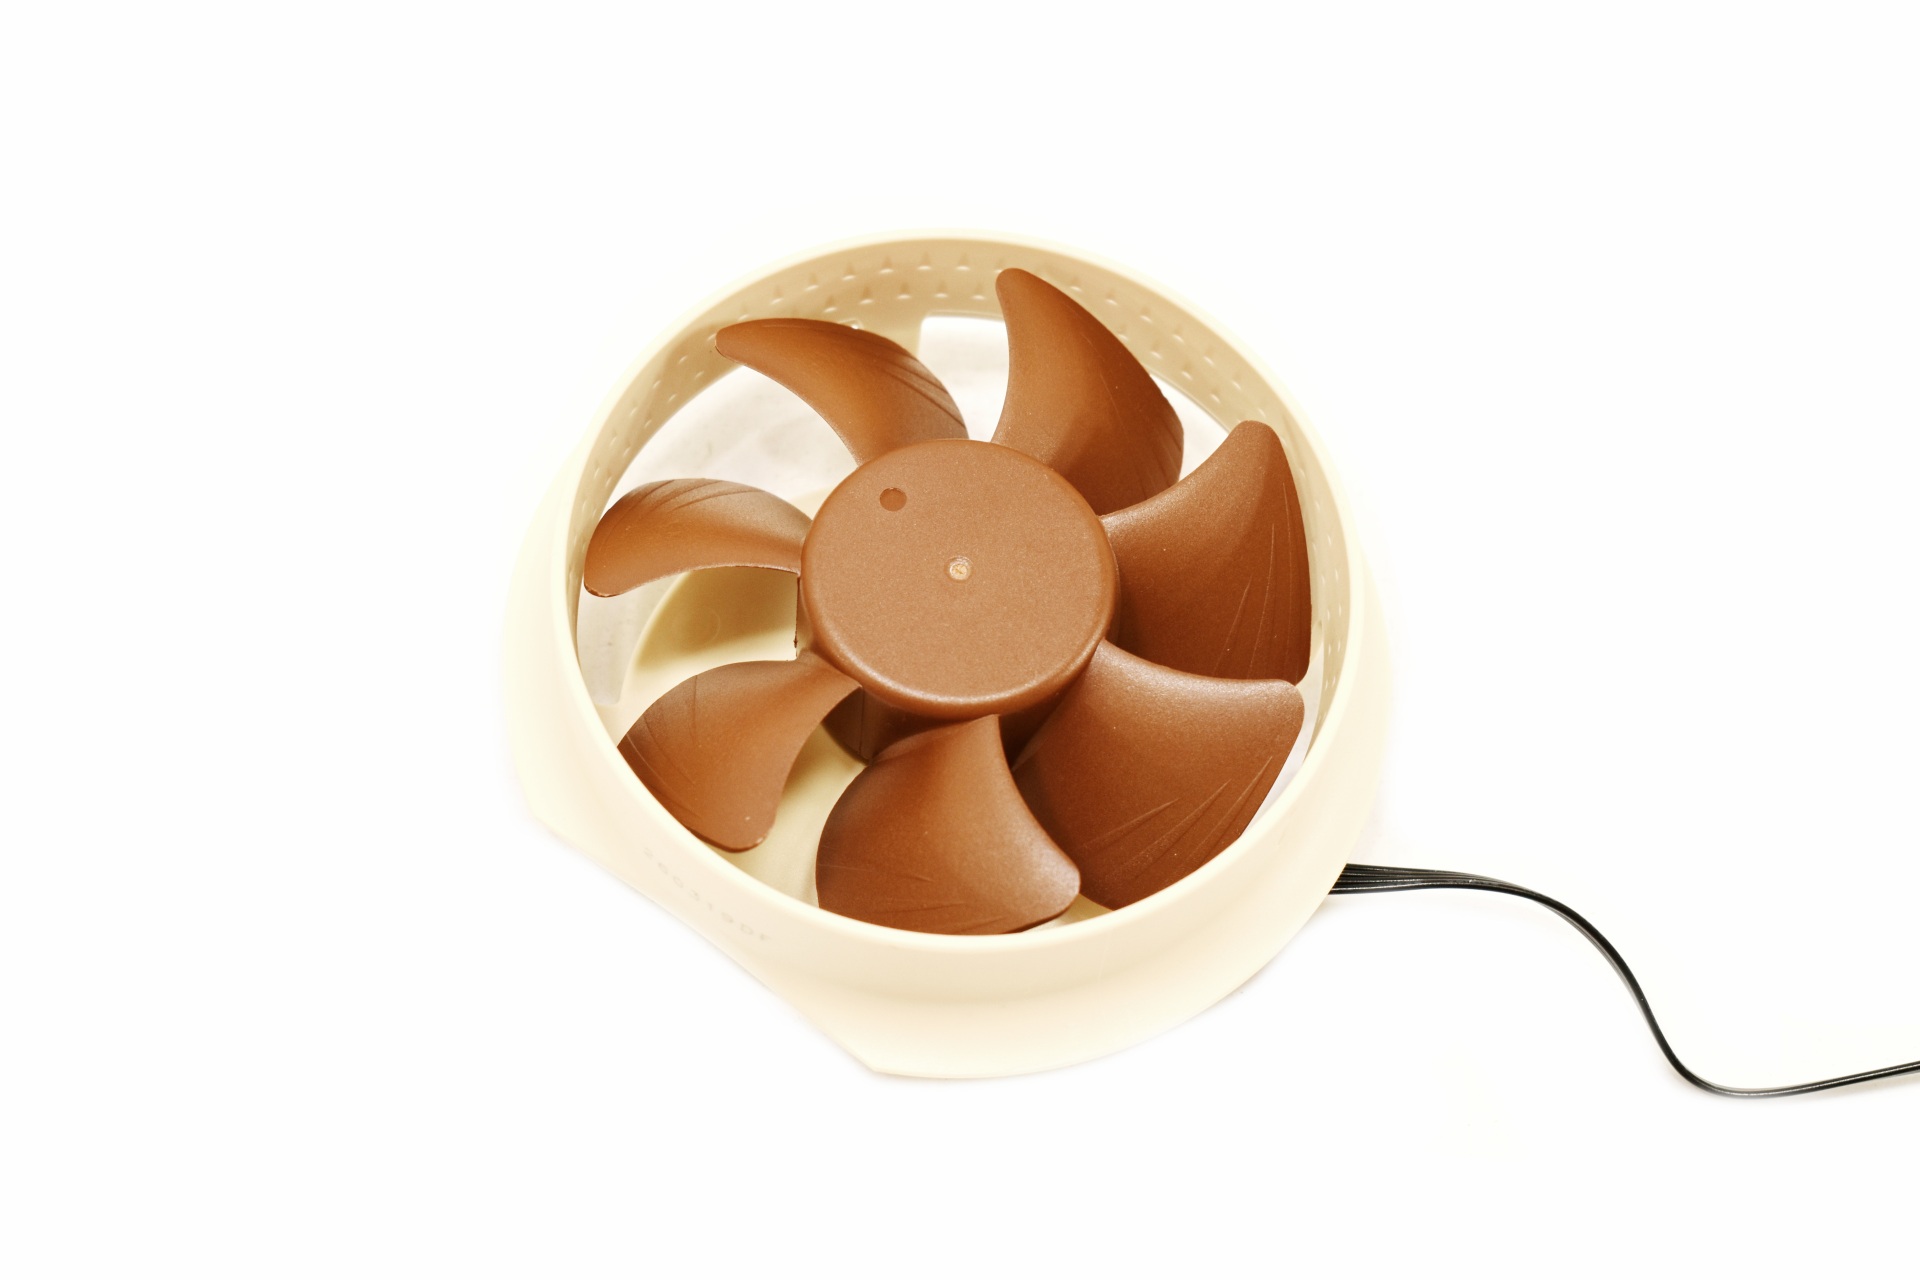
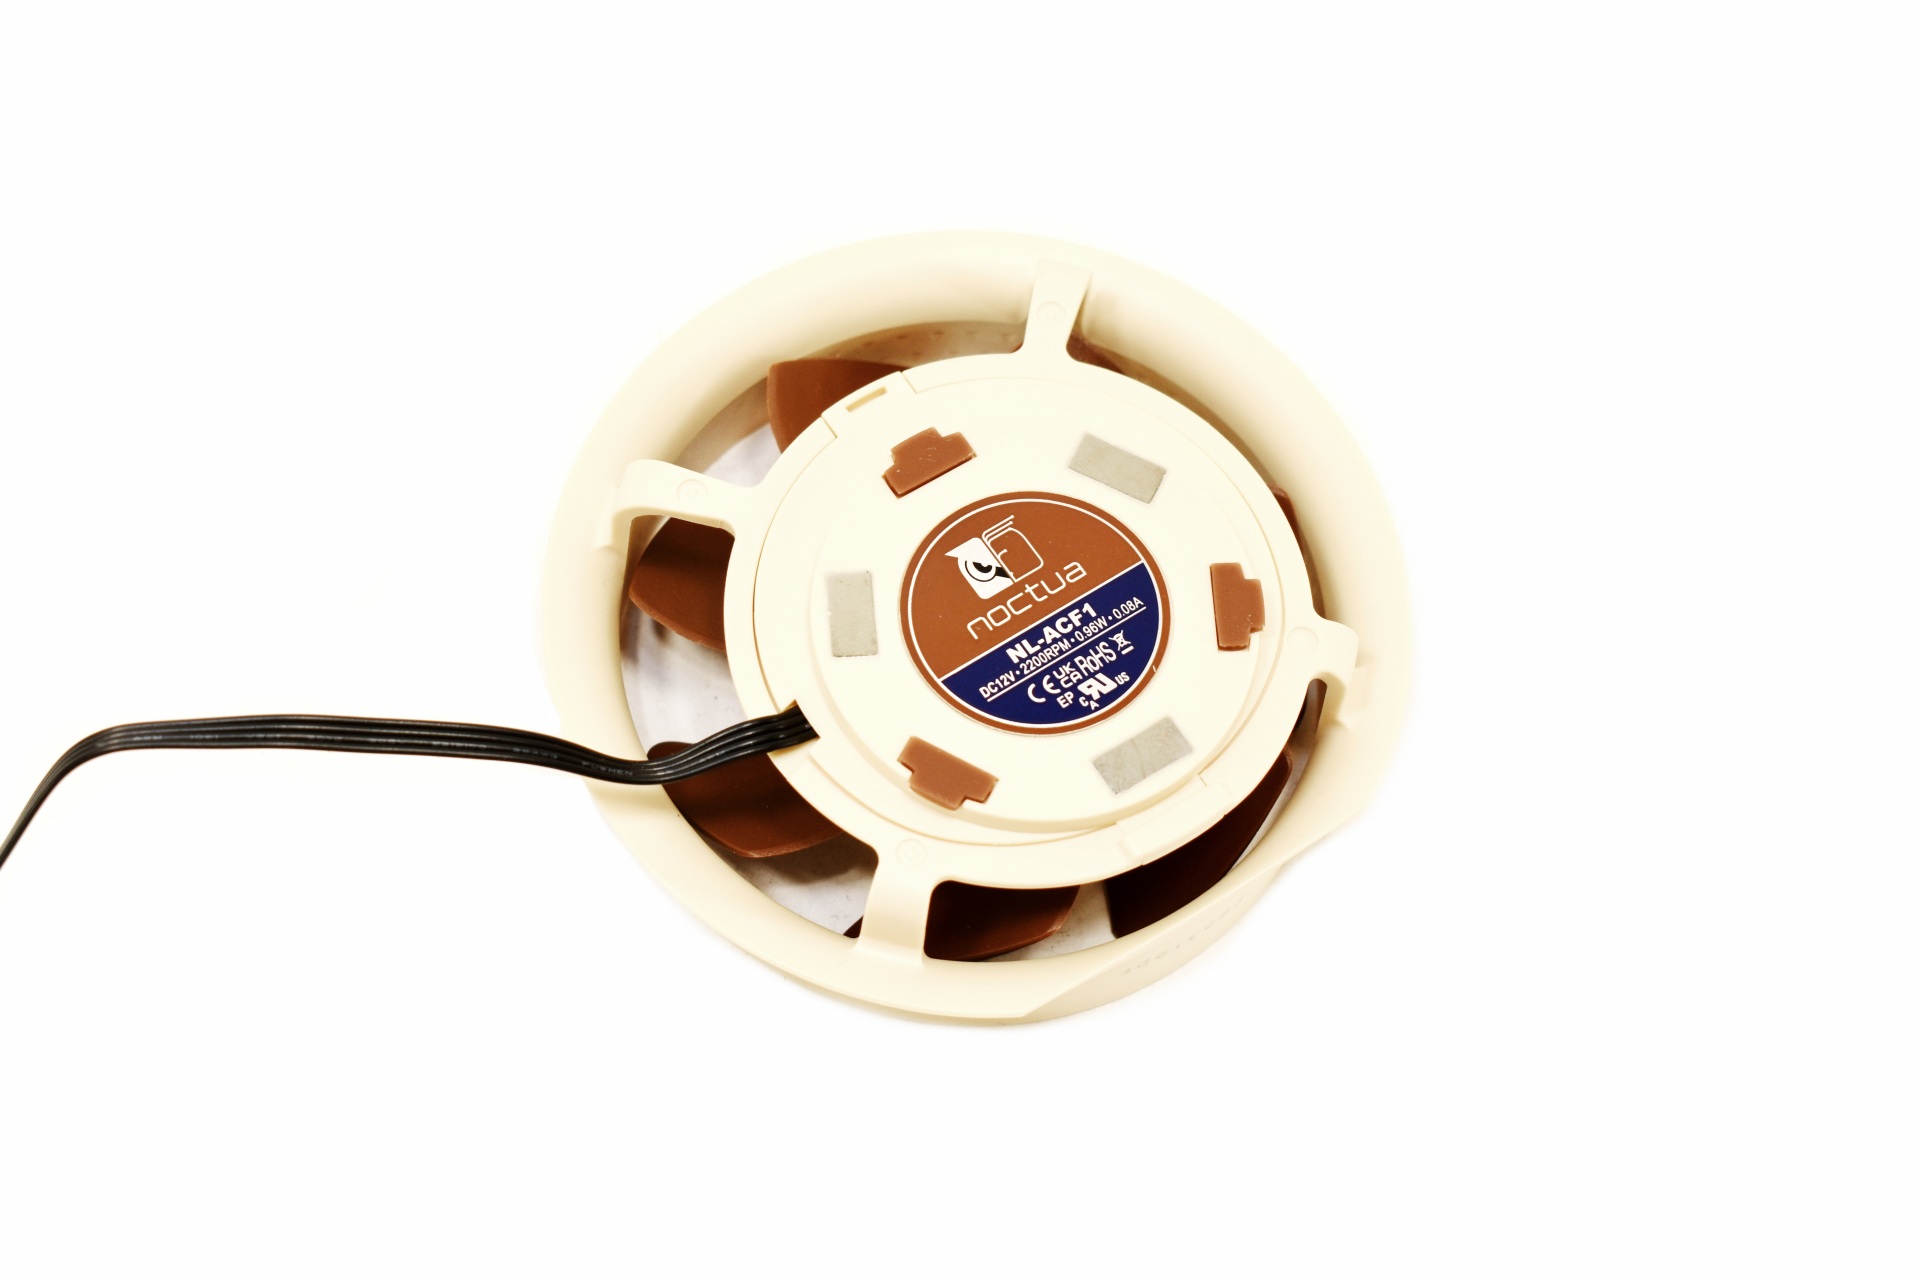
Users who'd like to also provide cooling for motherboard components surrounding the CPU socket can also get the NL-ACF1 auxiliary cooling fan.


This is a small 80mm fan that can spin up to 2200RPM.


INSTALLATION


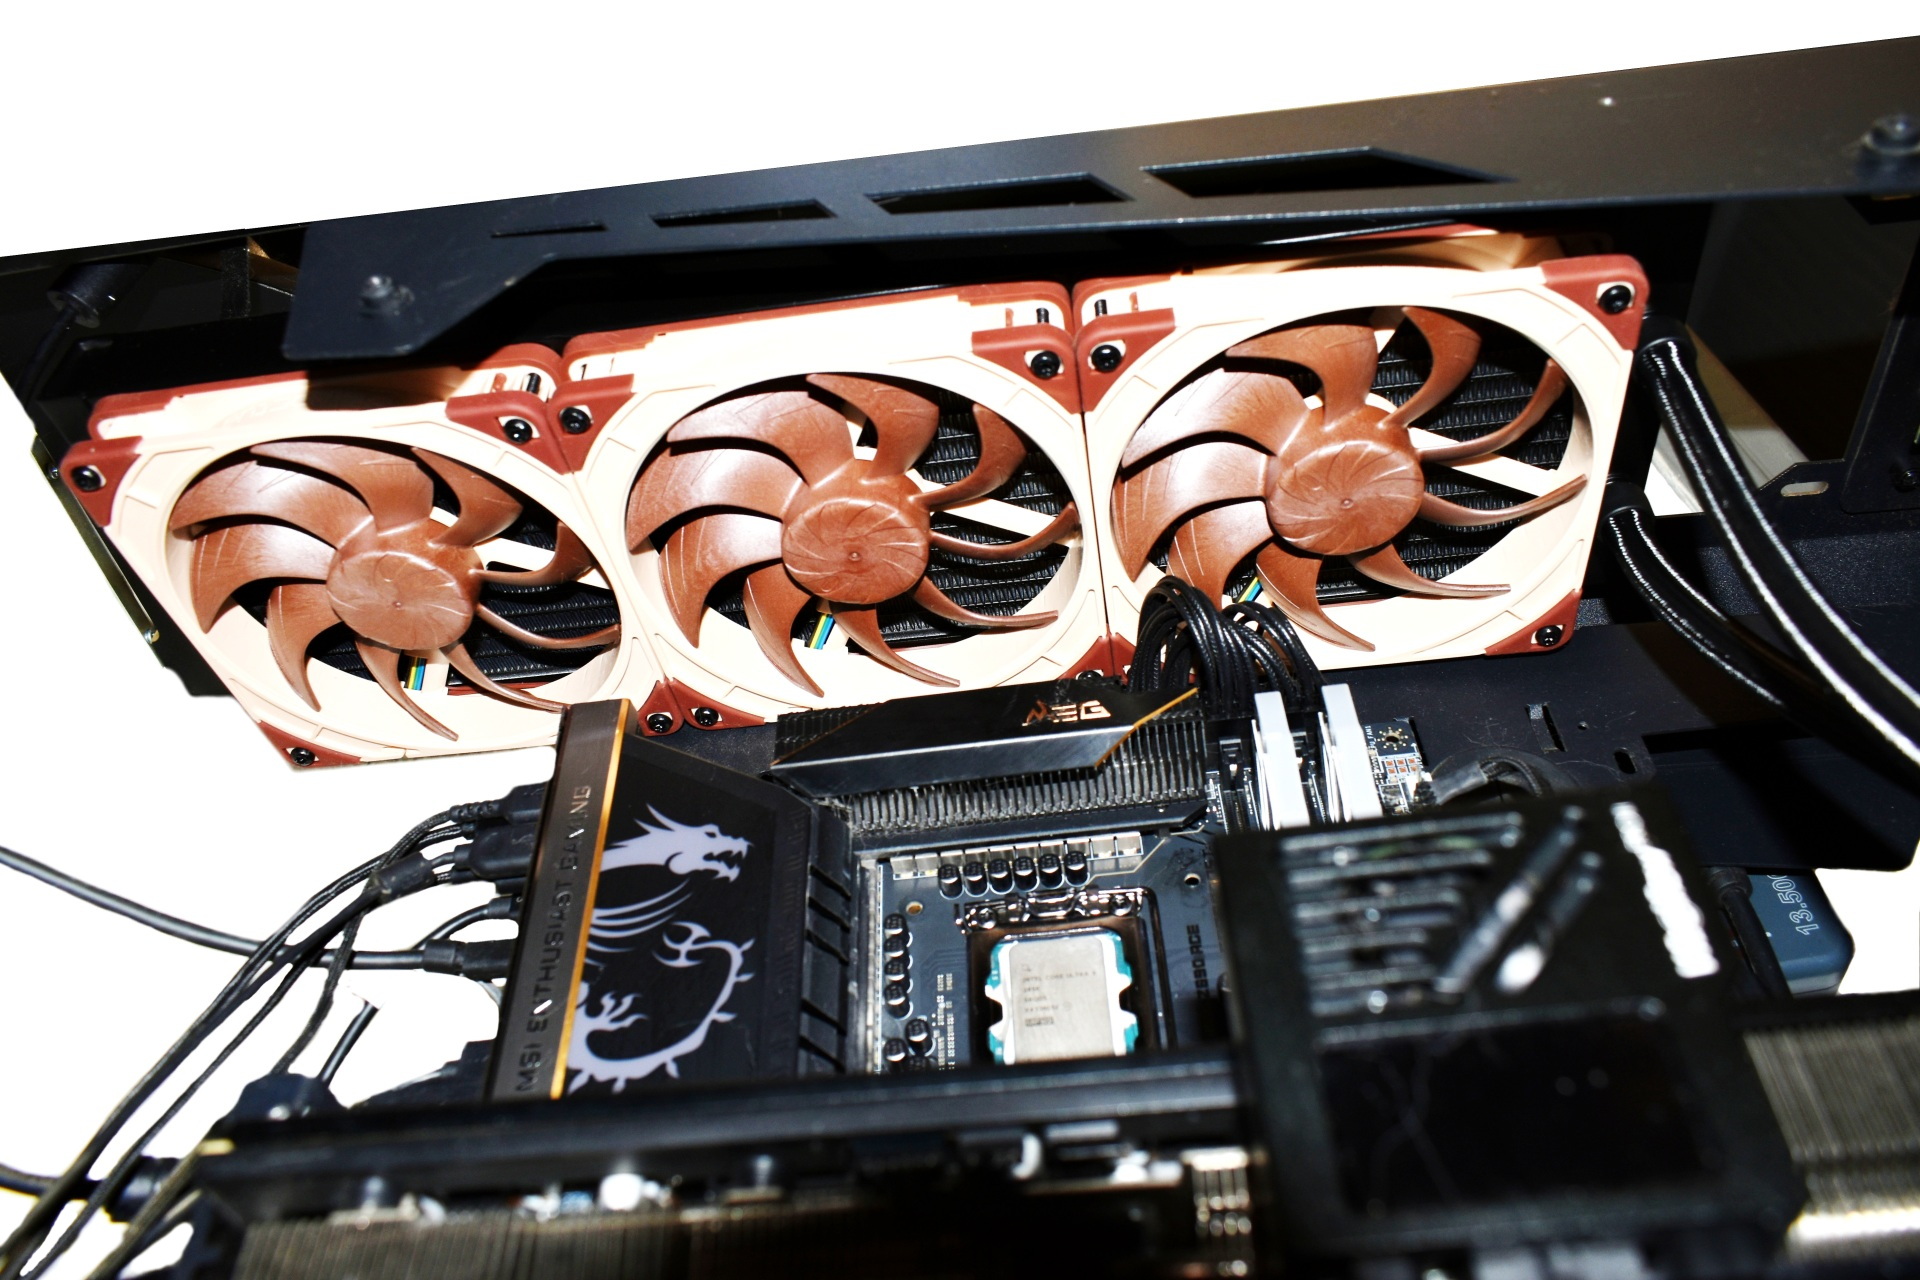
Size is always an issue with 420mm AIO coolers but with open-air cases/towers this is usually easy to resolve.


After the radiator you will need to place the backplate at the rear of the motherboard plate.


Next place the plastic standoffs on the inside side and secure the metal brackets with the Torx screws.


The pump is quite large (70mm tall, 89mm long and 78mm wide) but still a lot smaller compared to an air cooler.


Mounting the NL-ACF1 auxiliary cooling fan increases height to around 100mm (short video is available both on TikTok and YouTube).


TEST BED


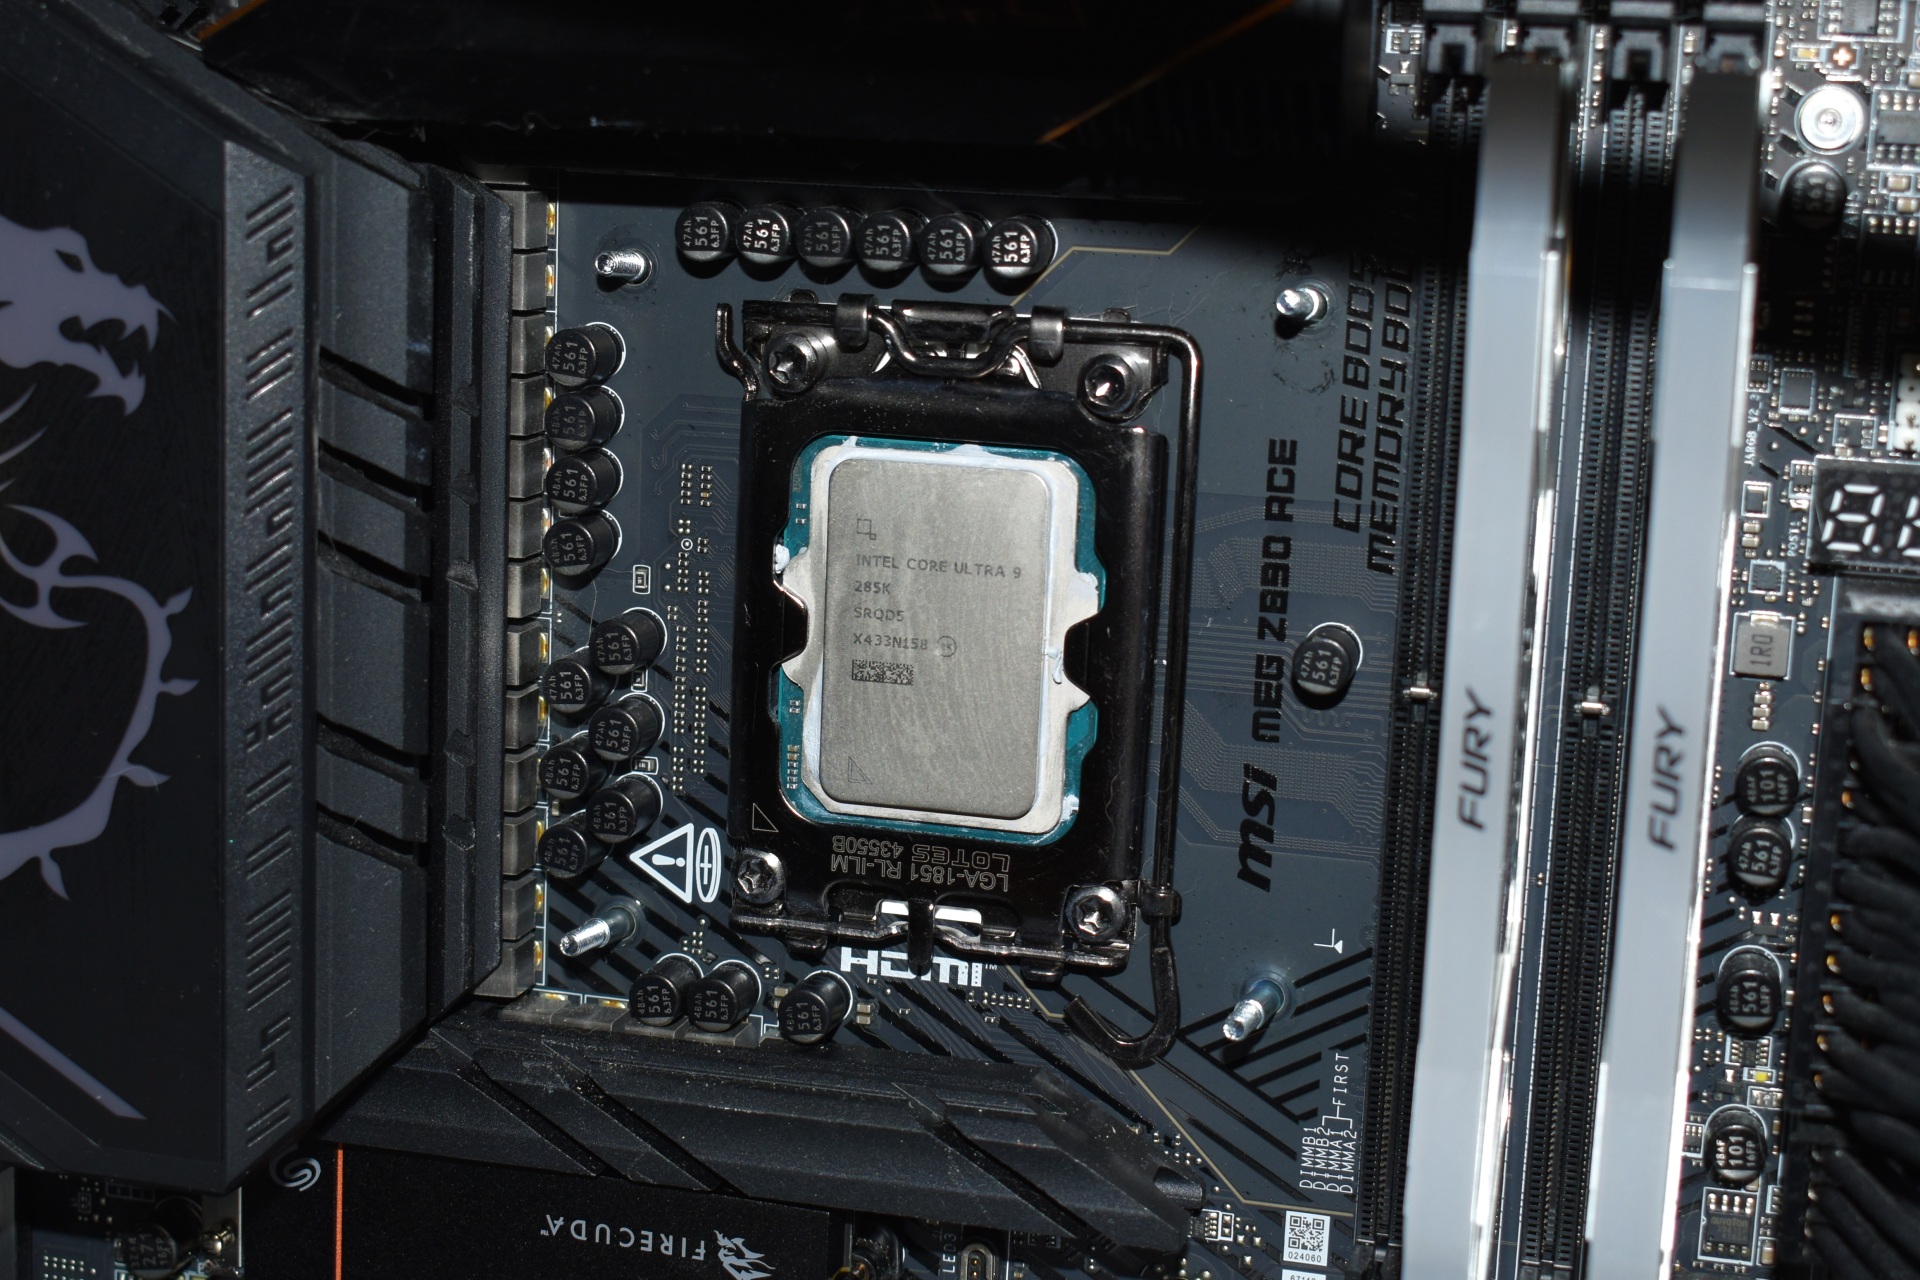
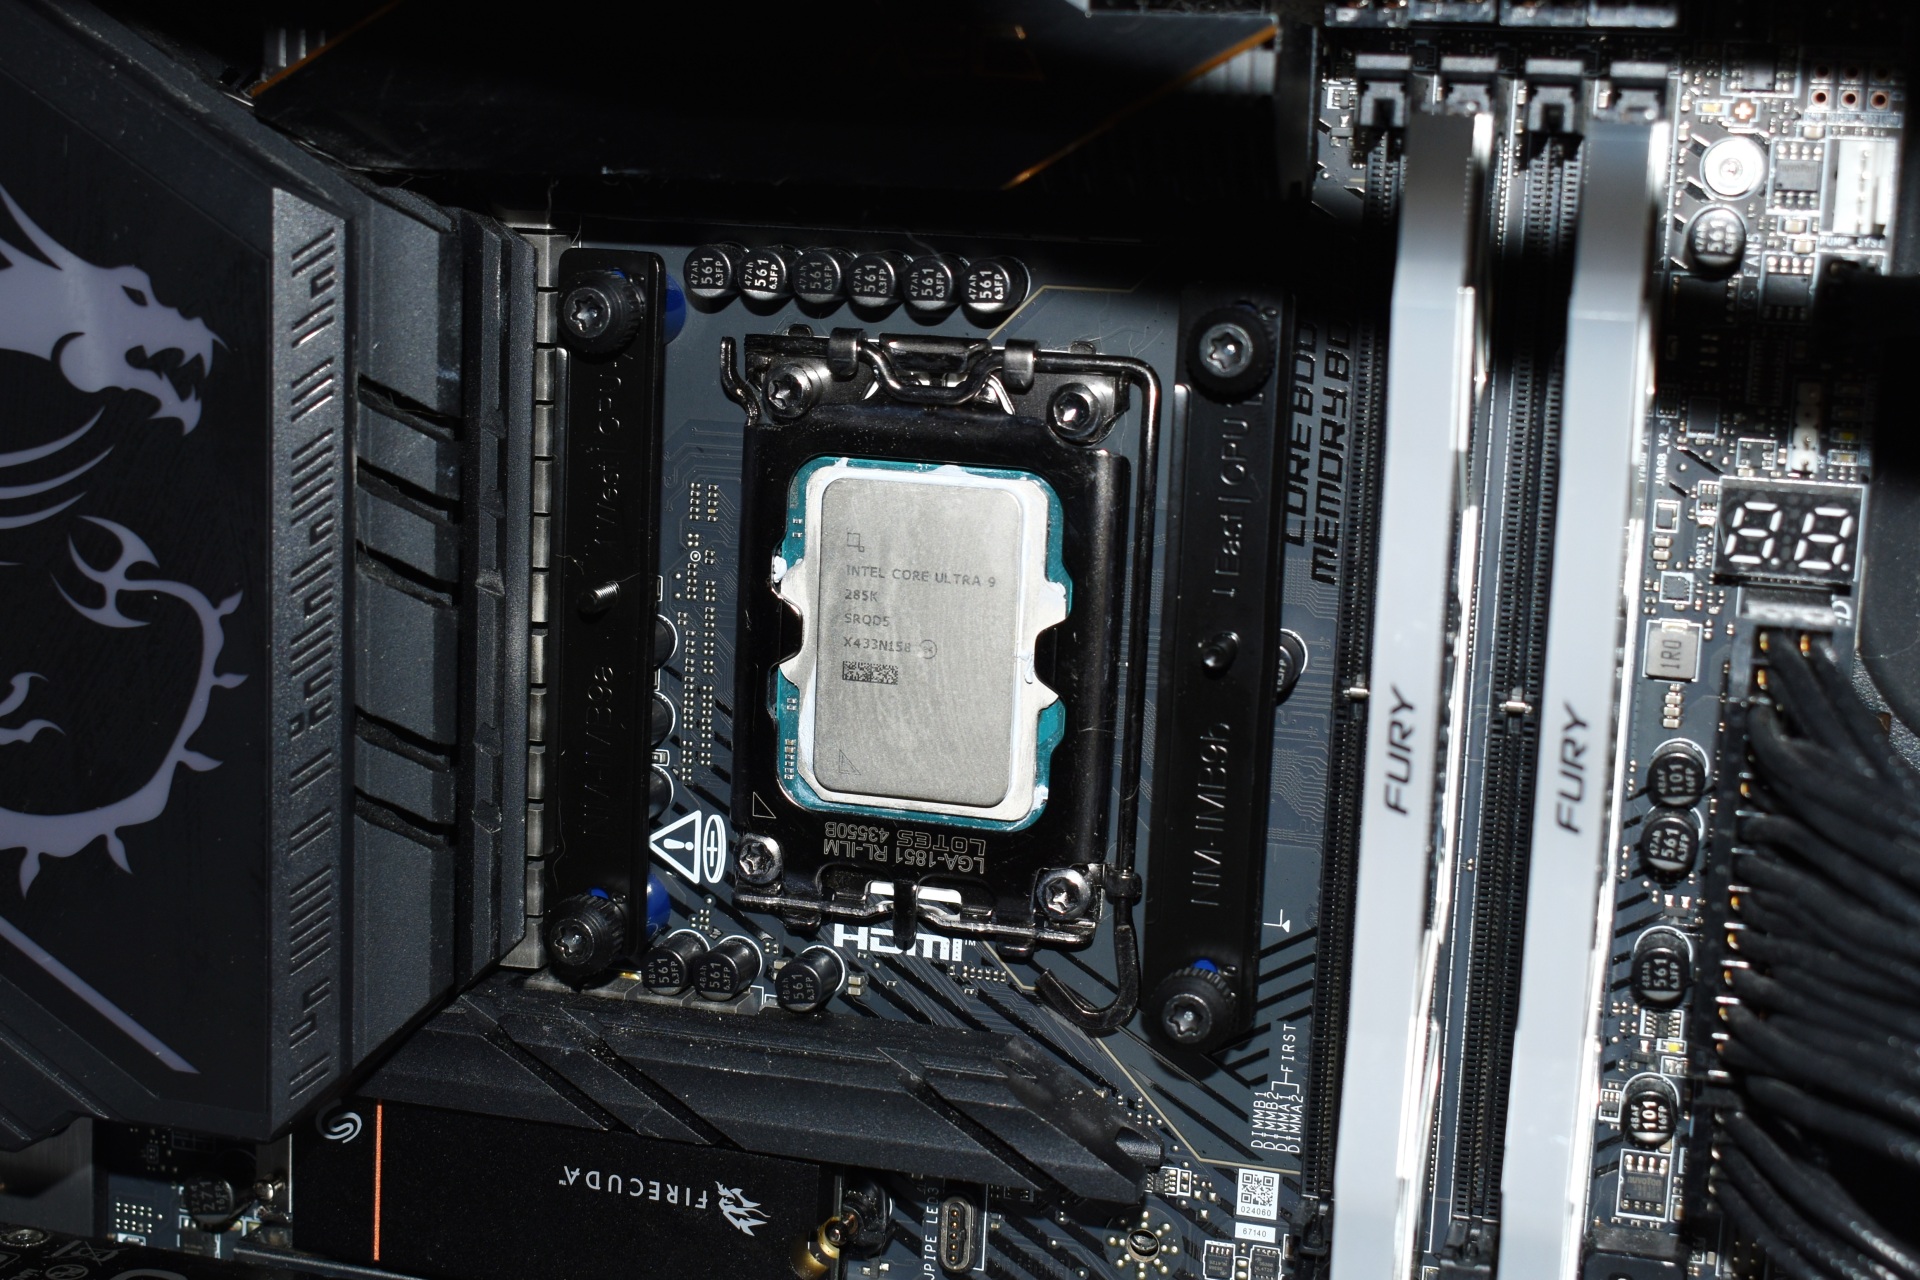
285k


TESTING METHODOLOGY


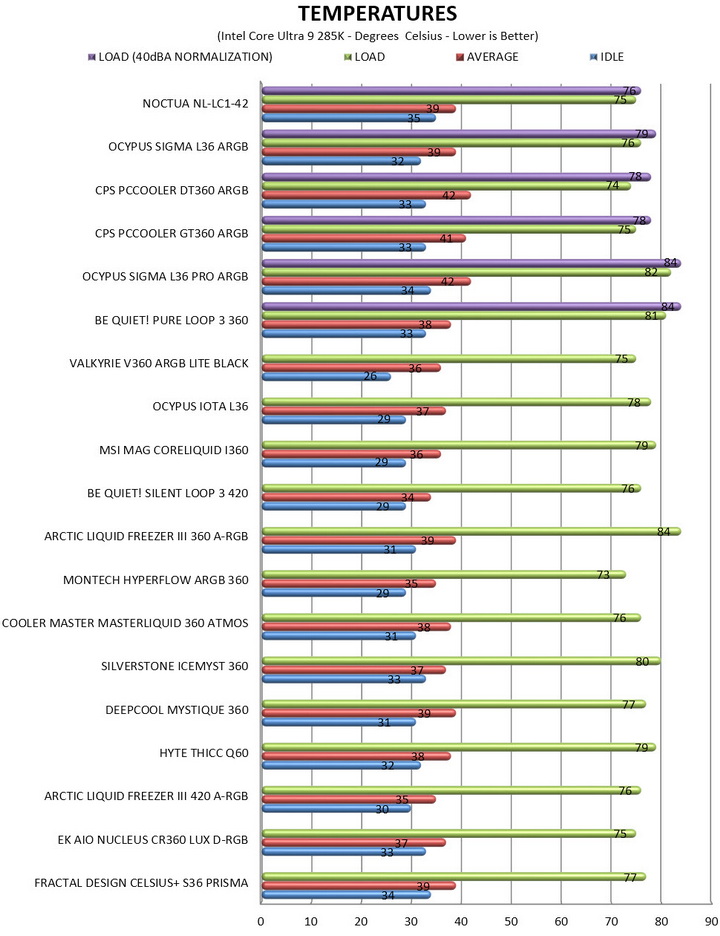
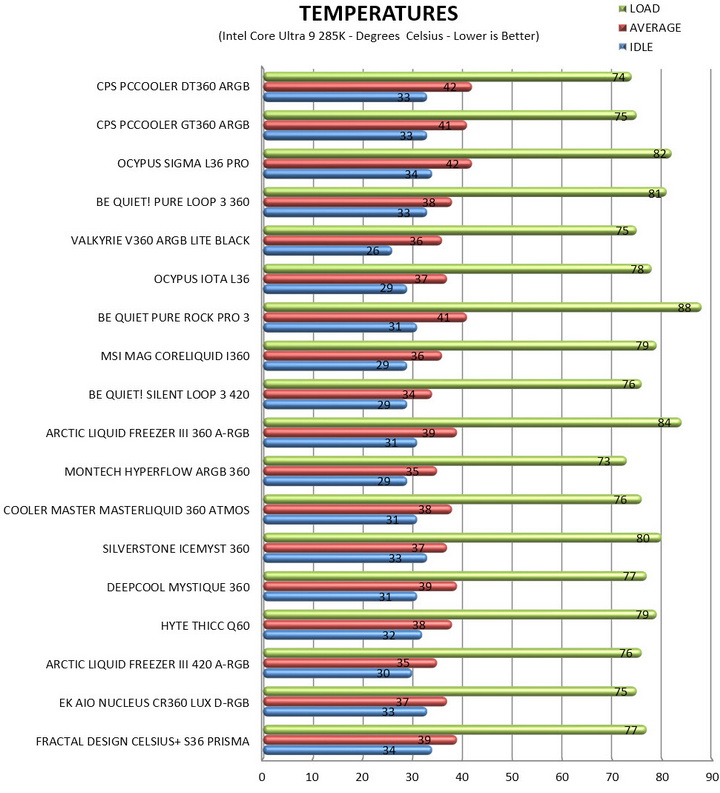
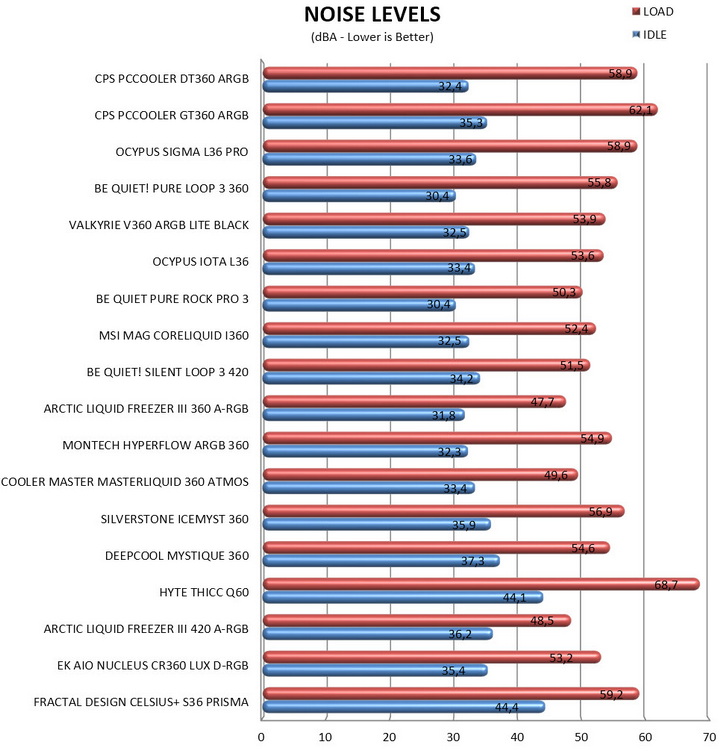
   Testing complete water-cooling kits or individual radiators is no different than testing CPU Coolers and since we want all of you to be able to compare similar products, we created new and separate charts (you can still cross-compare results however since we are using the same test rig). So once again single (120/140mm) watercooling solutions are tested with the radiator mounted at the rear of our test rig while dual/triple/quad (240/260/280/360/420/480/560mm) solutions with the radiator mounted at the top. For the dBA tests complete water cooling kits or radiators with bundled fans are measured both while on idle mode or with the fan controller in the minimum setting and while on extreme load or with the fan controller all the way to the highest possible setting (PWM fans do that on their own without our intervention). Every single test takes place in a temperature-controlled room of 23 degrees Celsius Ambient Temp with the help of two AC units placed diagonally inside the room and as for thermal paste I’m using the NT-H2 by Noctua. Finally, much like when testing CPU Coolers, it's very important to point out that just because a water-cooling kit (or an AIO) outperforms another when tested with our test rig (when we test complete water-cooling kits) that does not necessarily mean that the same performance differences will apply 100% for other CPU models and in other situations (such as different ambient temps and system configurations).


     To successfully record the load temperatures, we use the latest OCCT application for around 6-10 minutes to push the processor to its limits and after that is done and the temperatures are recorded, we wait for about 10-20 minutes for the CPU to cool down and record idle temperatures. This is done to allow time for the thermal conductive material to achieve the optimal performance level. Same procedure is then repeated with the Passmark BurnIn Test as a failsafe just in case the OCCT results are wrong. This procedure takes a lot more time than the usual peltier/thermometer tests, but this way not only can we deliver real world results to our readers based on real CPUs, but we can also triple check the results using a variety of programs. Last but not least the temperatures were recorded using the latest version of AIDA64 while noise level tests (when fans exist in the bundle) are performed using a high precision ExTech HD600 Decibel Meter placed about 10-15cm above the radiator. Still although the same testing procedure applies to all units do take into consideration that unlike the official numbers which are measured in special noise isolated labs with just the fans here, we also have both the rest of the cooler and the rest of the system (although all system fans are turned off when recording noise levels).


* Since some manufacturers have ceased support for the Intel LGA 2011-3 platform, for such coolers, I’ll be using the Ryzen 7900X / ASRock X670E test rig.
** After high demand since September 2024, I’ll be including average temperatures in my AMD Ryzen 9 7900Χ/Χ670Ε charts (under light load such as Internet browsing and Office use).
*** Since November 2024 I swapped test systems with the Intel Core Ultra 285K (same methodology as with the AMD Ryzen 9 7900X).
**** Following numerous reader requests from July 2026, I’ve added a load‑temperature test conducted with fan noise normalized to 40 dBA.


TEST RESULTS


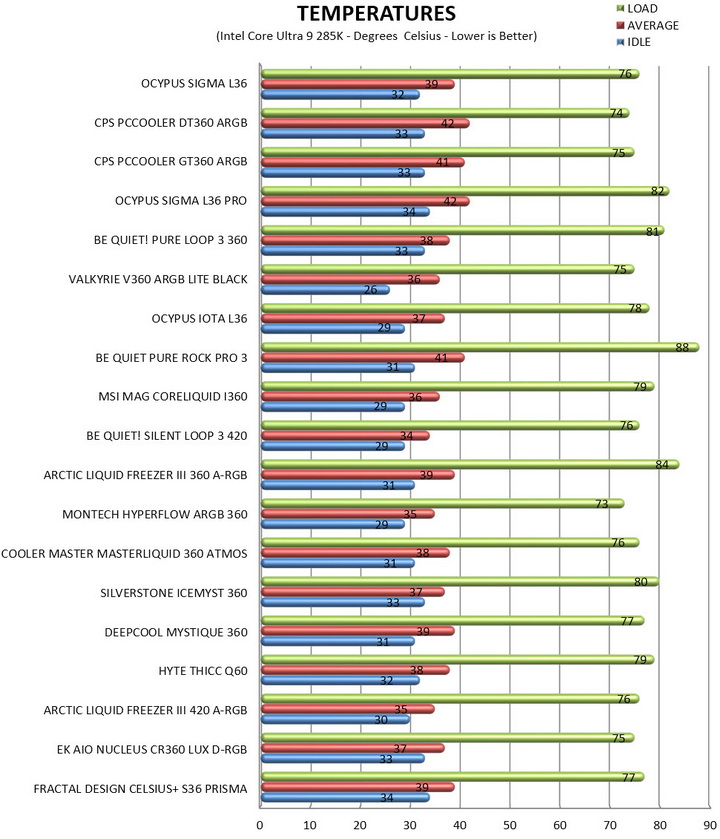
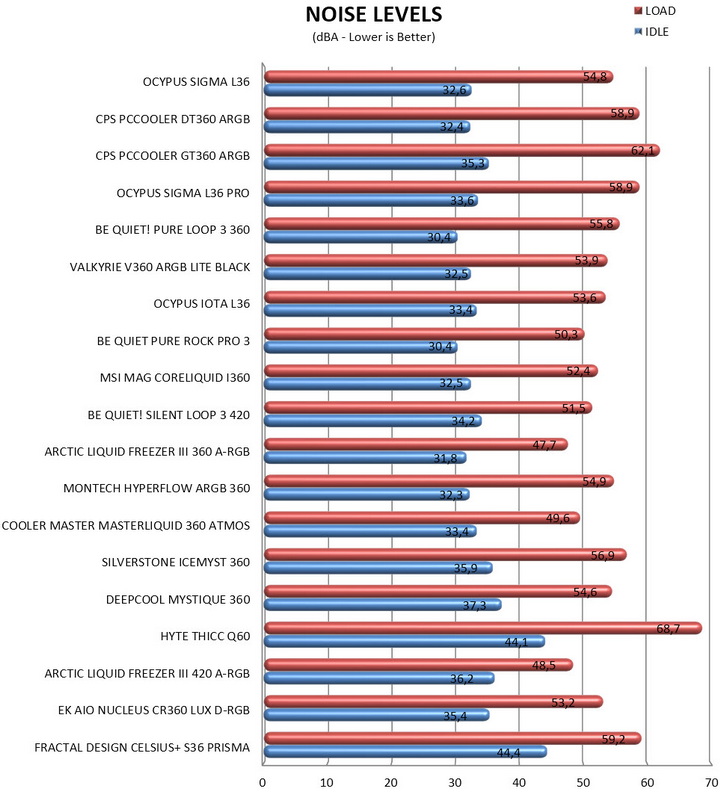
temperatures


thermal 1t

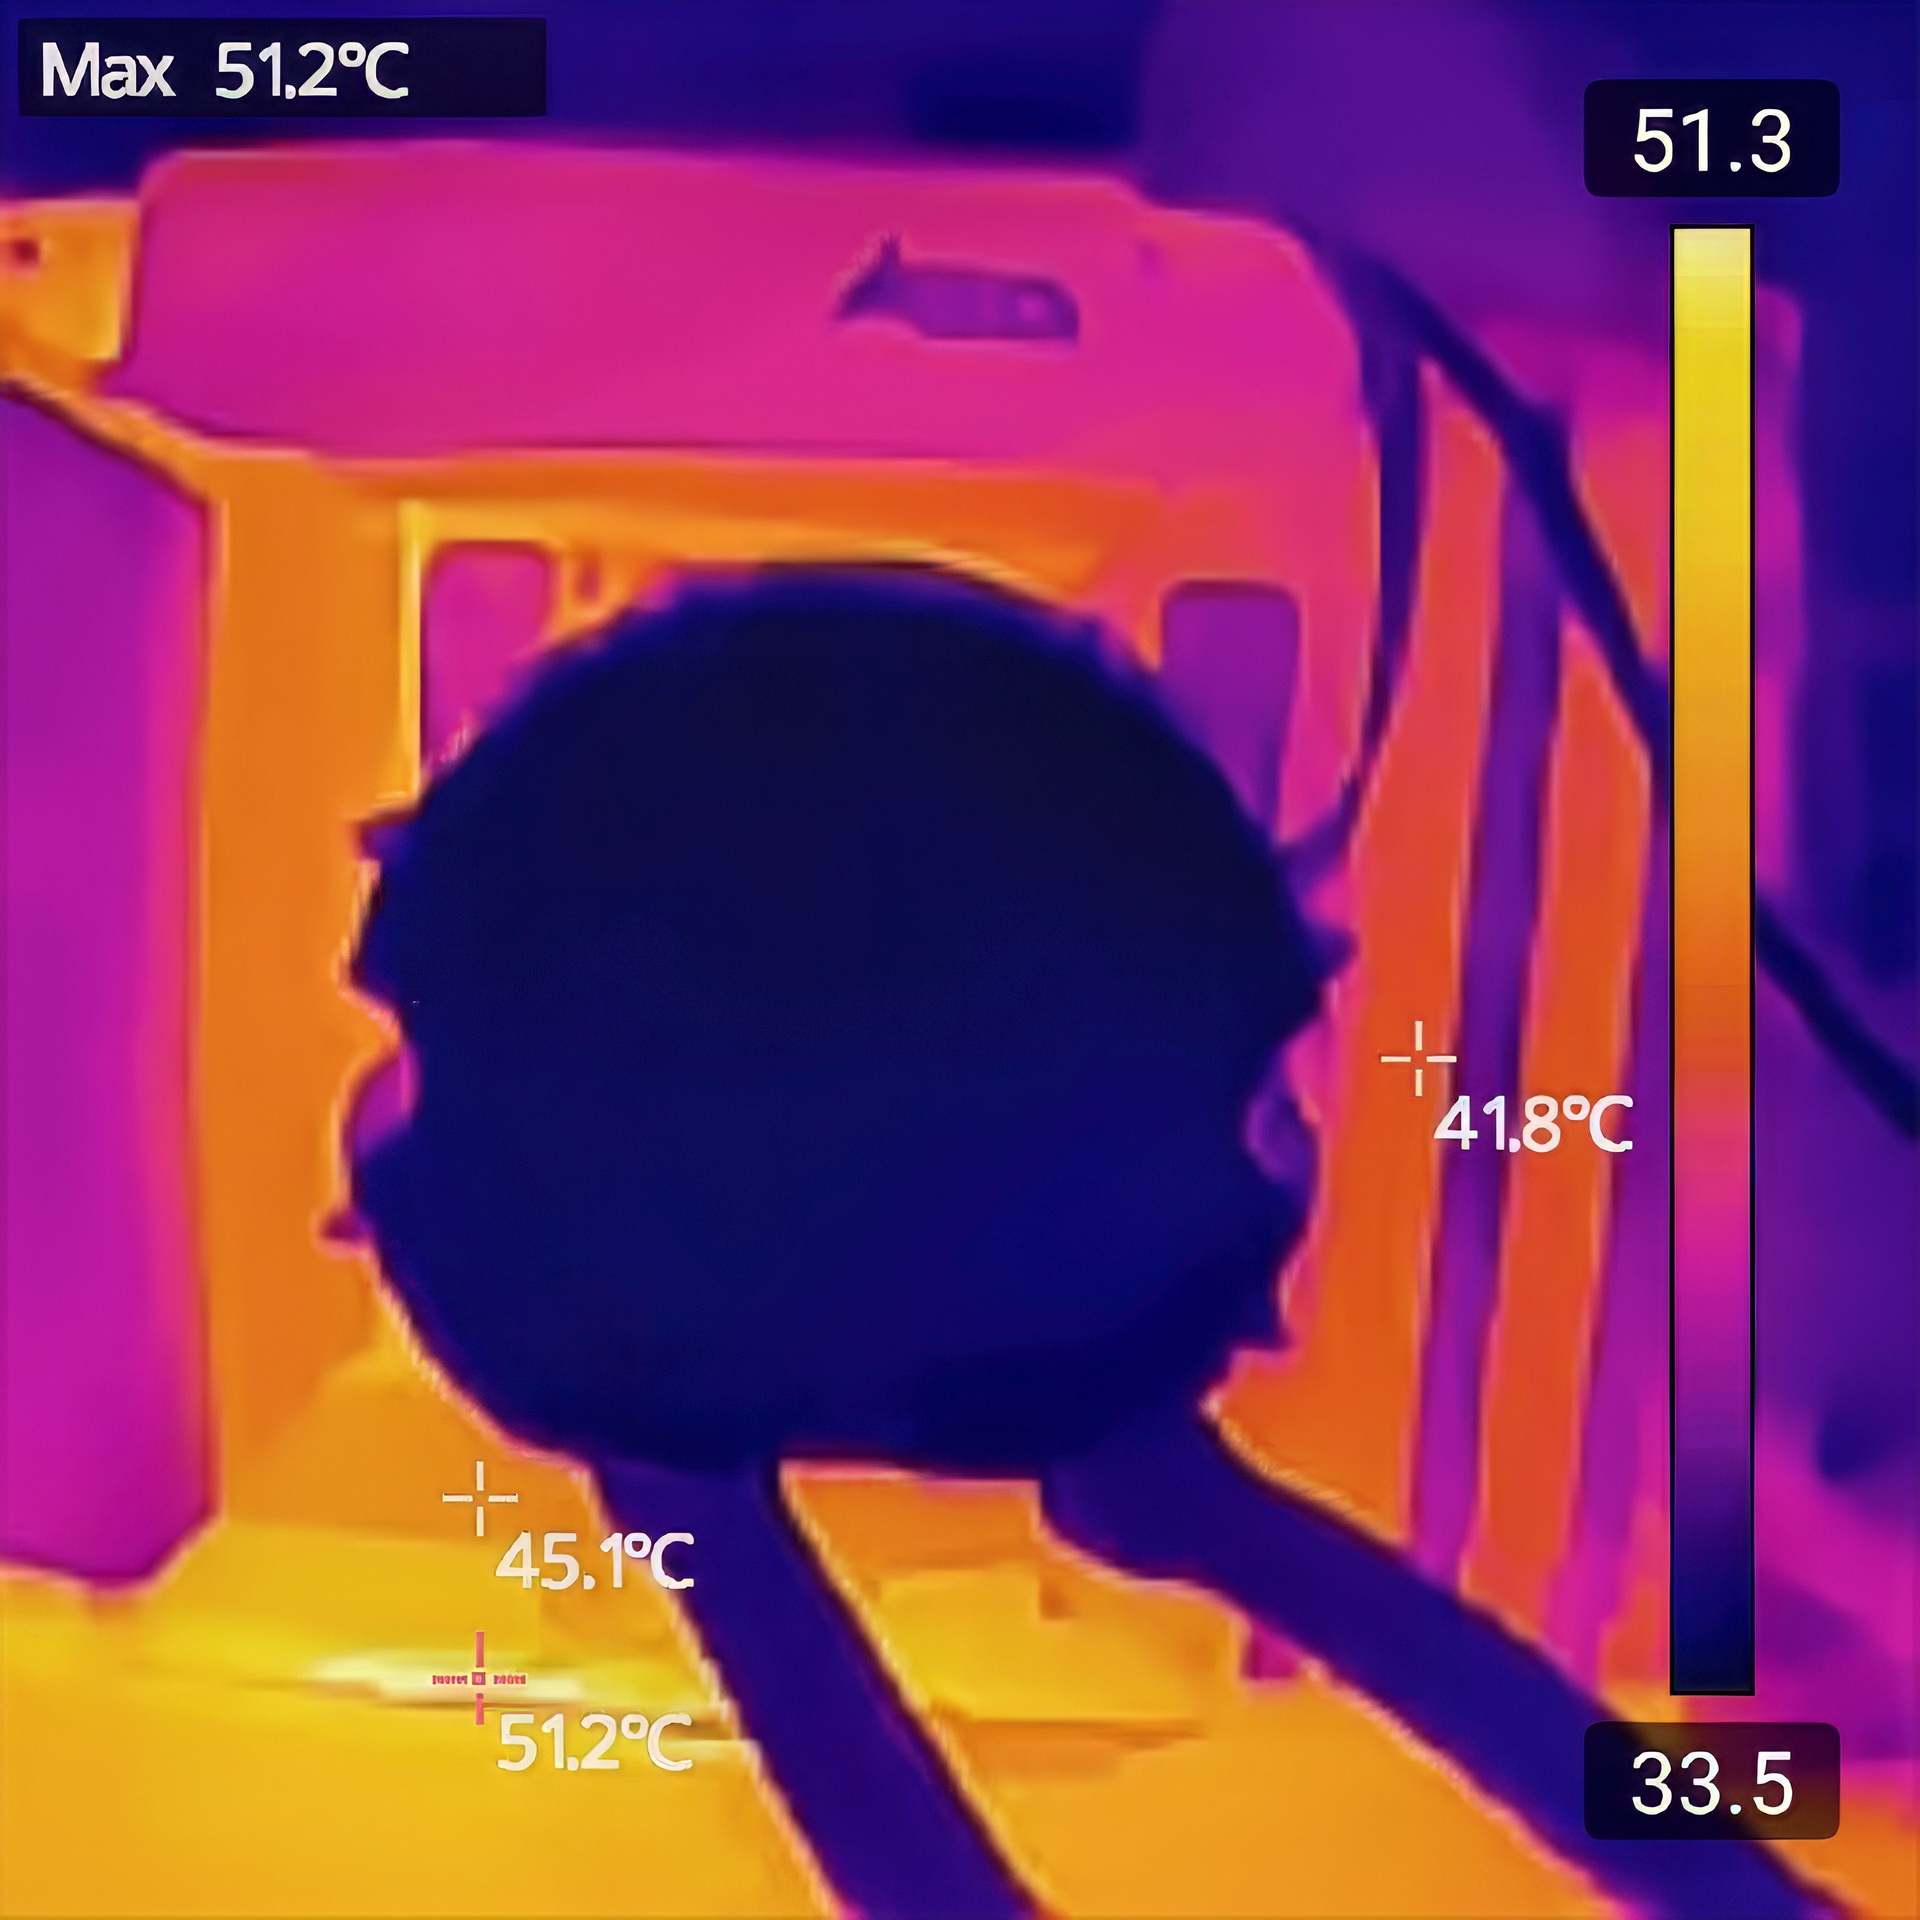
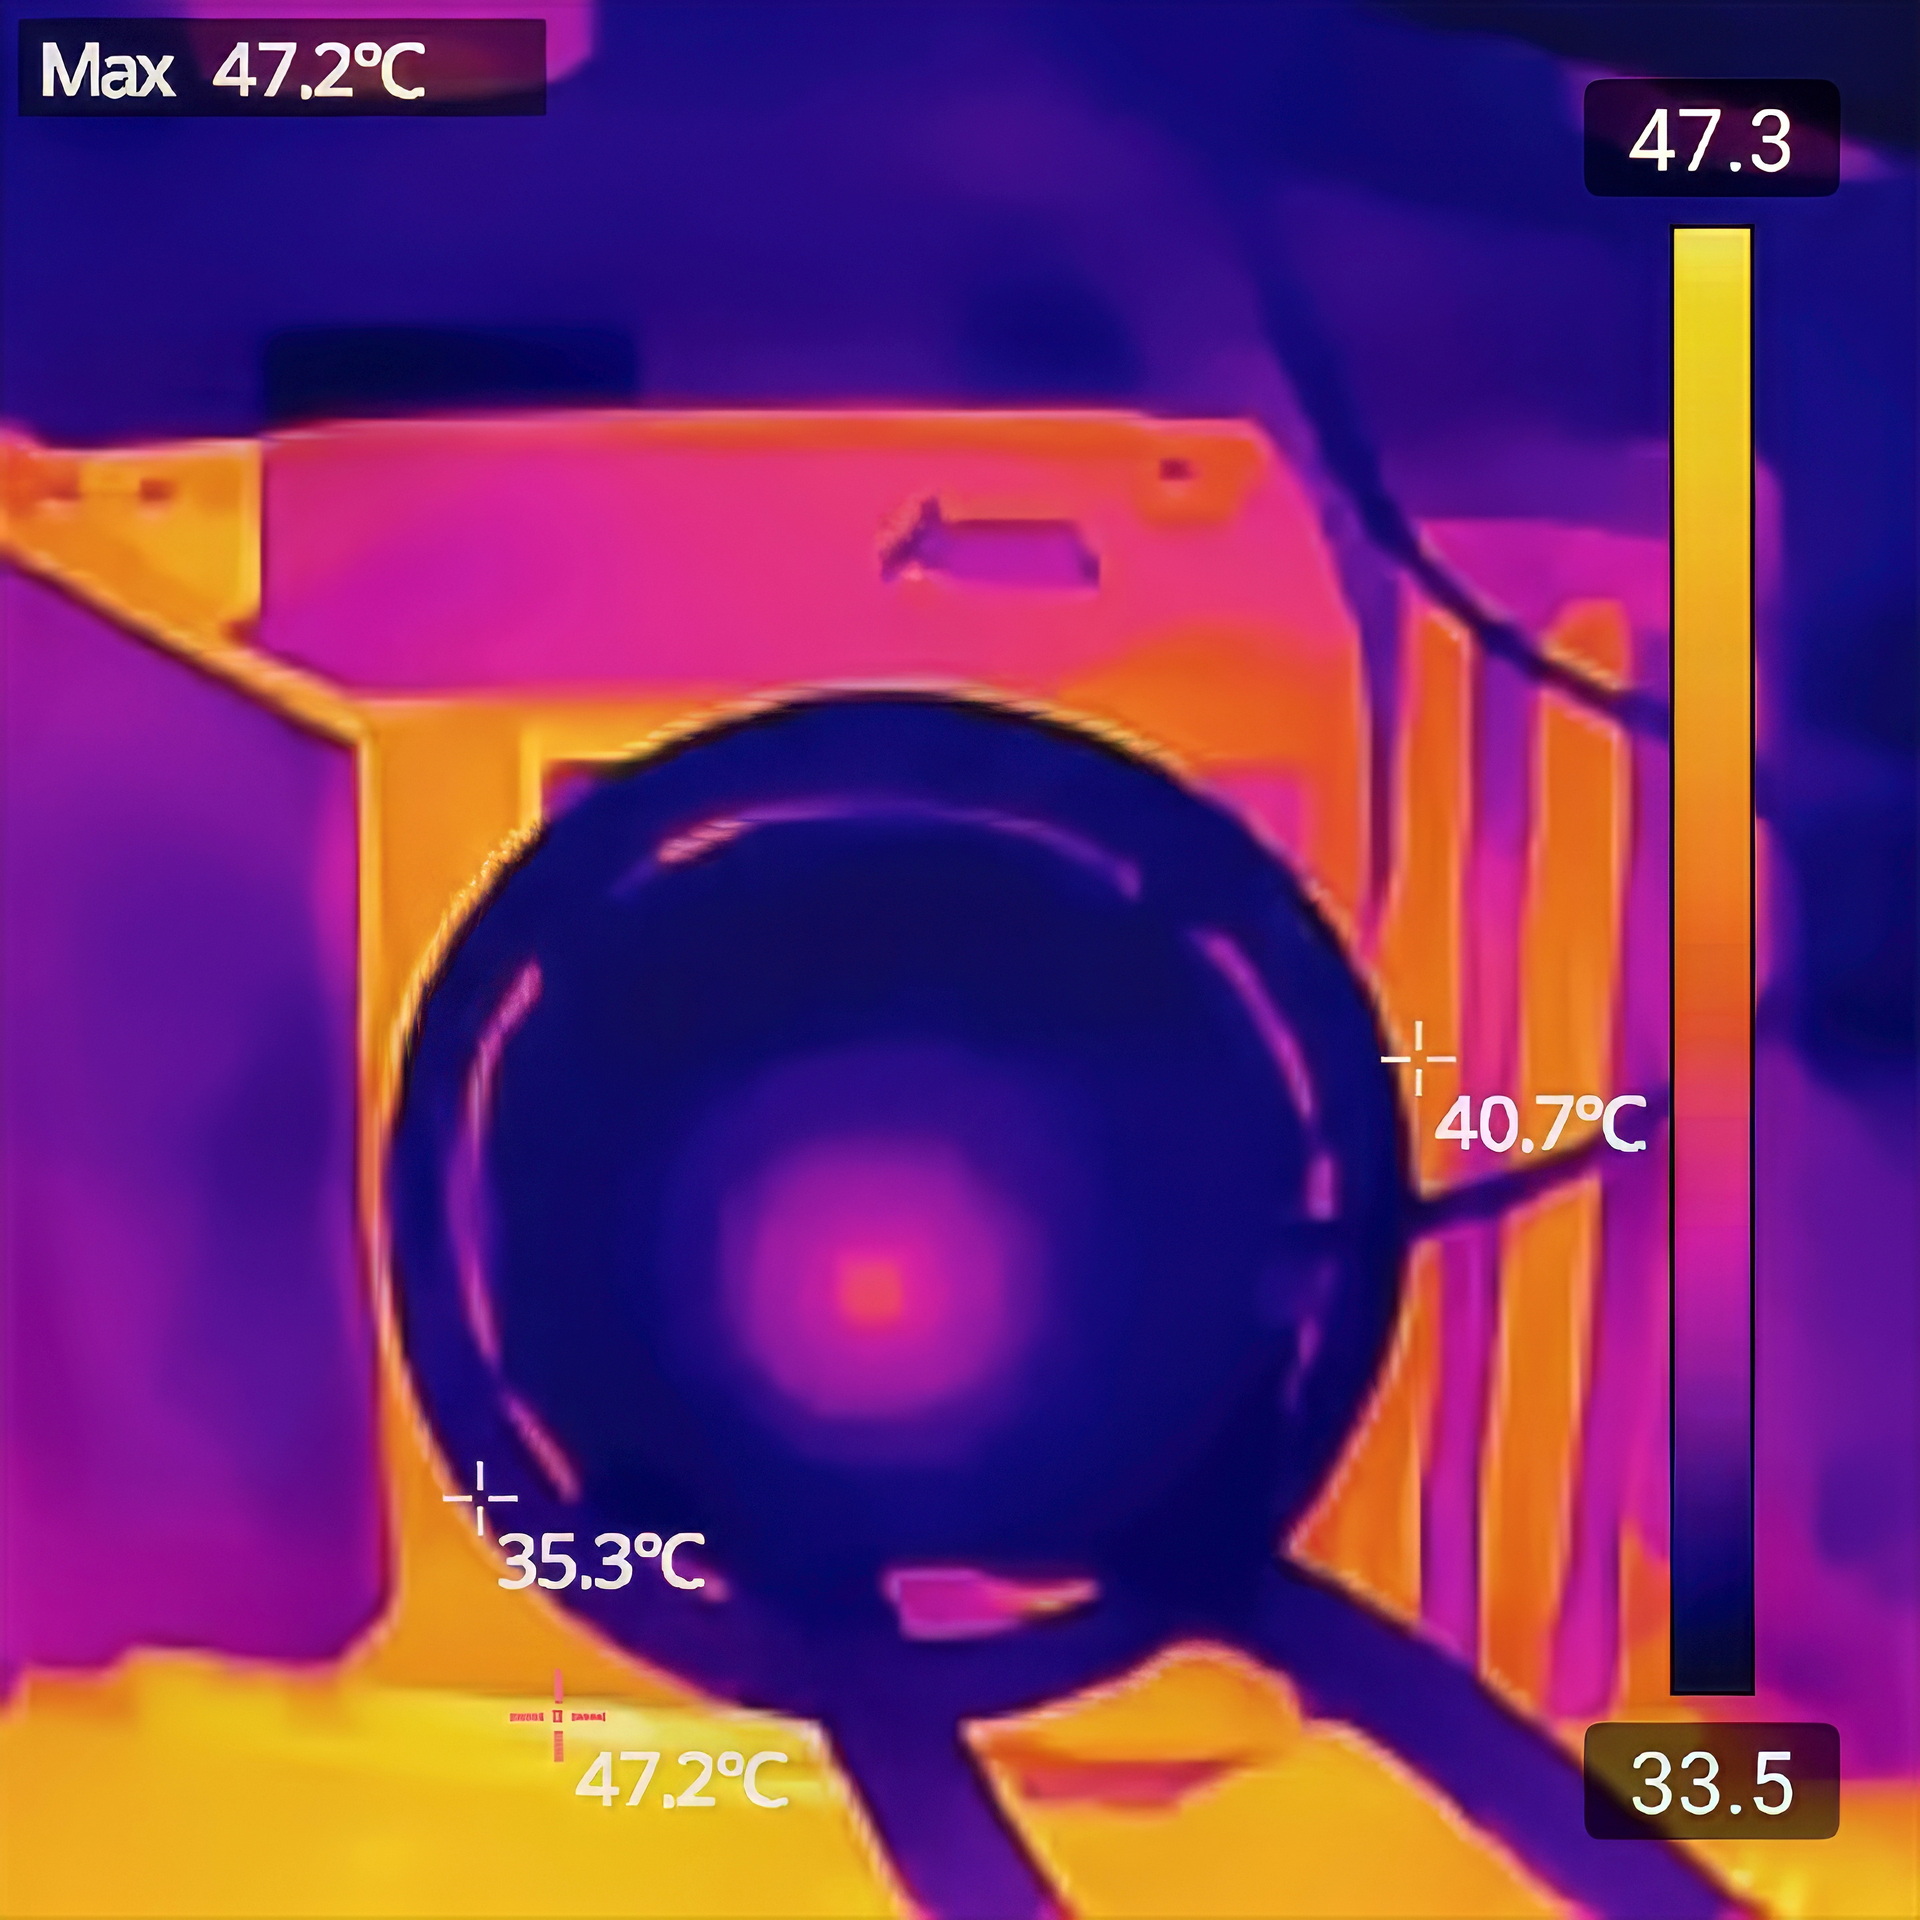
For users wondering whether or not the 80mm auxiliary fan (NL-ACF1) works and just what kind of cooling you can expect around the socket the above thermal images prove it does (don’t expect miracles, still 4 degrees Celsius overall temperature decrease is not bad).


CONCLUSION


noctua nl lc1 42 review b


    The Noctua NL‑LC1‑42 leaves a distinctly premium impression thanks to its exceptional build quality, the refined acoustics of the Emma V2 pump platform, and the remarkably low noise levels delivered by the NF‑A14x25 G2 fans, even when normalized at 40dBA, where its superior cooling efficiency stands out clearly against typical 420mm AIOs. The tuned‑mass damping, multi‑layer pump isolation, and PWM offset fan behavior all contribute to a cooler that feels engineered for long‑term acoustic stability rather than brute‑force airflow while Noctua’s 6‑year warranty reinforces that reliability-first philosophy. The NL-ACF1 80mm auxiliary fan is also a good addition to the NL-LC1 AIO line by Noctua, yes it may not be a game changer but it does help with component and RAM/SSD temperatures around the CPU socket. And while the NL‑LC1‑42’s size, signature color scheme, and high cost may limit its appeal for some builds, these drawbacks fade quickly once you consider what it delivers.


    At the time of my review the NL-LC1-42 AIO cooler by Noctua retails for USD279.95 inside the USA (Amazon.com) and for 291.66Euros inside the EU (Amazon.de) and even though it’s what we’ve all come to expect from a Noctua product it’s also priced significantly higher compared to similar 420mm AIO coolers. Cost aside the NL-LC1-42 delivers as advertised and so for people who are looking the best cooling efficiency and have room for it it’s a one way and since it’s clearly the best AIO liquid cooler to arrive in the lab to date the Platinum Award is in order.

PROS


- Build Quality
- Excellent Cooling Efficiency
- Noise Levels
- Large Coldplate
- Three Mode Pump (quiet/standard/manual)
- Auxiliary 80mm Cooling Fan
- Up to Six 140mm Fans in Push & Pull


CONS


- Size (For Some)
- Price (For Some)
- Color Theme (For Some)


Seagate FireCuda 530R With Heatsink 2TB M.2 NVMe SSD Review

INTRODUCTION


seagate firecuda 530r 2tb review a


    SSDs transformed system performance by removing mechanical limits and delivering instant responsiveness. PCIe Gen3 drives were the first big jump, offering reliable NVMe speeds that still hold up for everyday use. Then PCIe Gen4 SSDs arrived and doubled the available bandwidth, giving users noticeably faster game loading, smoother content‑creation workflows, and stronger sustained performance. They quickly became the practical performance tier-mature controllers, manageable thermals, and speeds that feel genuinely fast in real‑world tasks. PCIe Gen5 SSDs may push headline numbers even higher, but the trade‑offs are hard to ignore, hotter operation, mandatory heatsinks, inconsistent gains in everyday workloads, and pricing that doesn’t always match the real‑world benefit. For most users, PCIe Gen4 remains the smarter balance, fast enough to feel instant, stable enough for long sessions, and affordable enough to fit into mainstream builds without compromise. Sitting right in that sweet spot is Seagate’s FireCuda 530R with Heatsink 2TB, a PCIe Gen4 M.2 NVMe model built for dependable throughput and strong endurance.


    Seagate is a global leader in mass-capacity data storage, having delivered over 4.5 billion terabytes of capacity over four decades. From edge to core to cloud, Seagate builds trust in data by delivering scalable, sustainable, and secure storage solutions. Learn more at www.seagate.com.


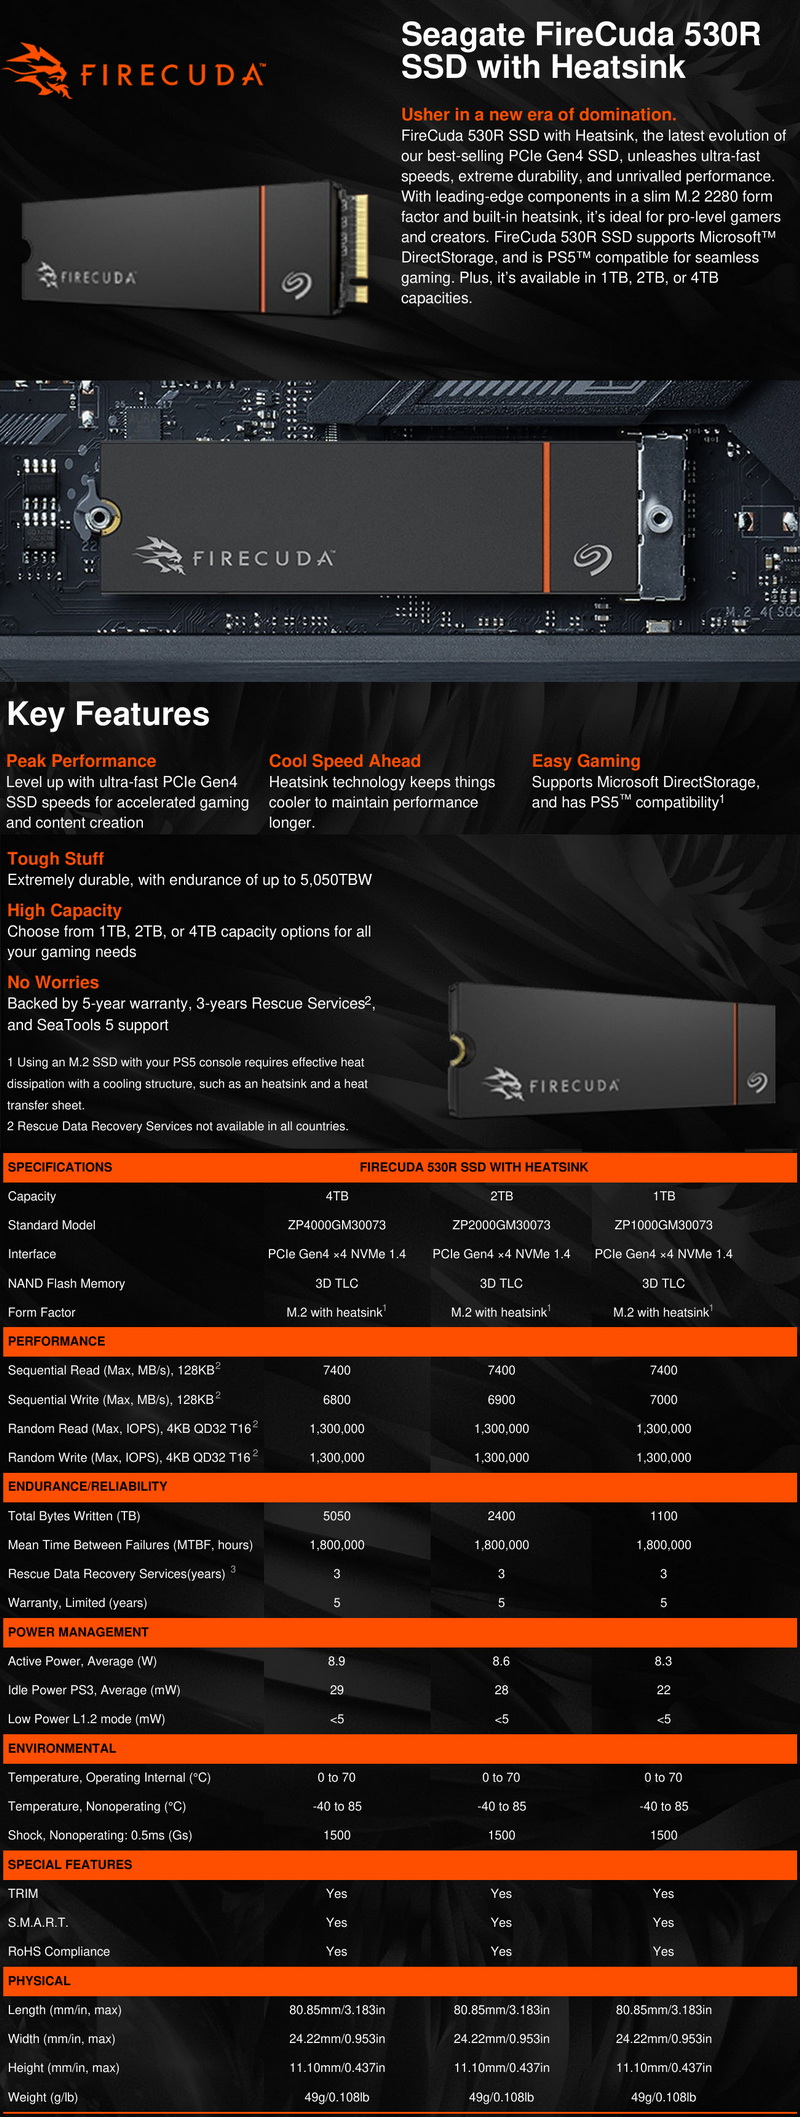
  The FireCuda 530R line of PCIe 4.0 Gen4 SSDs includes models both with and without an aluminum heatsink (PS5 compatible) and in 3 different capacities (1/2/4TB). Under the hood of the FireCuda 530R 2TB variant, we find the 8-channel tri-core (32-bit ARM Cortex R5 CPUs) PS5018-E18 NVMe v1.4 compatible NAND flash controller by PHISON paired with 162-layer 3D TLC NAND flash by Kioxia (BiCS6) and 2GB of DDR4L SDRAM by SK hynix. The PS5018-E18 NAND flash controller by PHISON features their 4th Gen LDPC engine (low-density parity check) along with end-to-end data path protection, wear levelling, thermal throttling (70 degrees Celsius limit), TRIM, bad block management, dynamic range SLC cache and SmartECC (RAID ECC). Finally, as for endurance Seagate reports a TBW of 1100/2400/5050 for the 1/2/4TB models respectively and covers the entire FireCuda 530R line with a 5-year limited warranty.


SPECIFICATIONS AND FEATURES


PACKAGING AND CONTENTS


seagate firecuda 530r 2tb review 1t

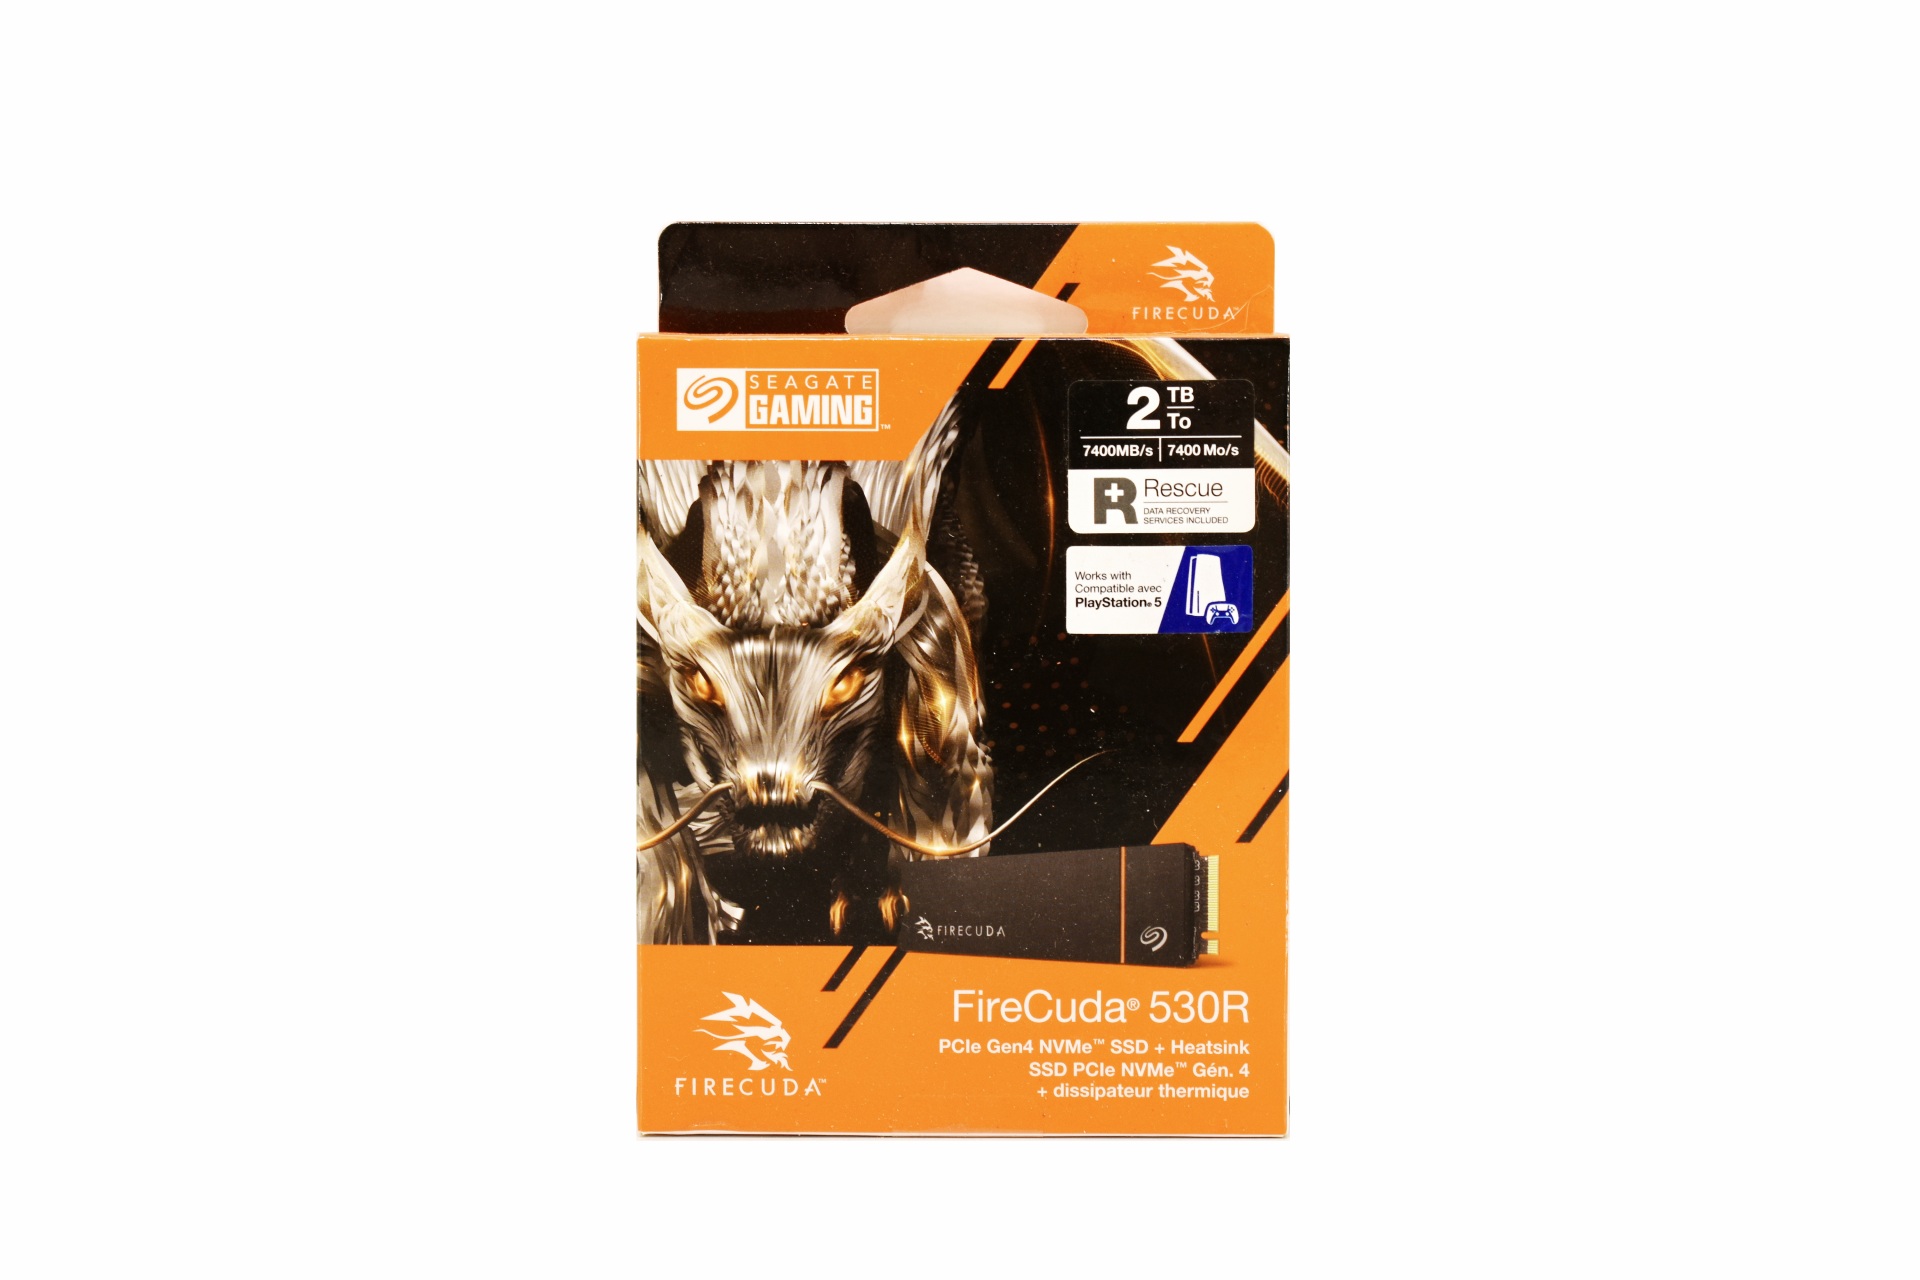
The FireCuda 530R is placed inside a box that has a product picture at the front next to the drawing of an animal, company logo, capacity, performance numbers, PS5 compatibility and the included data recovery service.


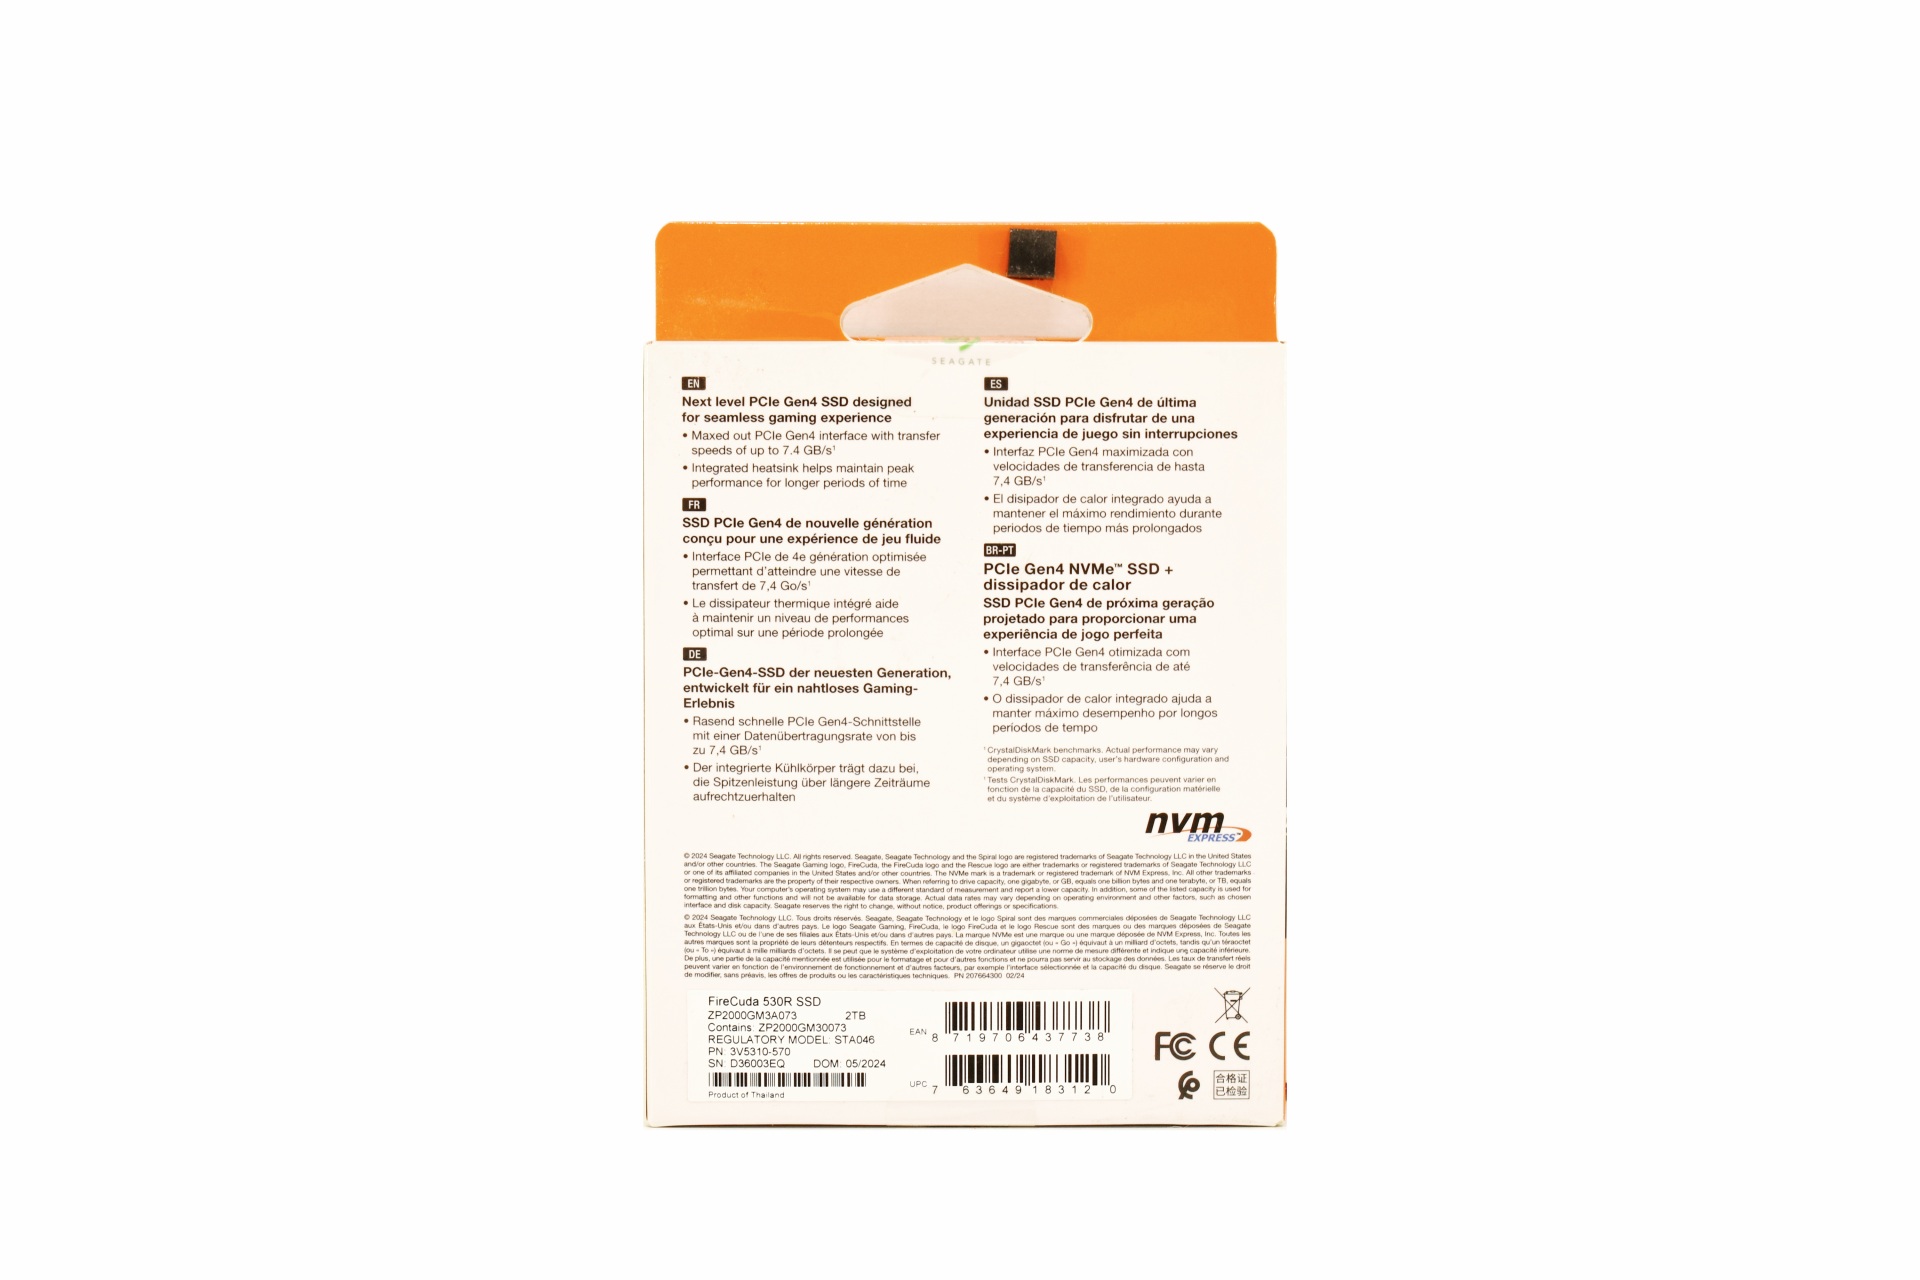
A few words about the product are printed at the rear in 5 languages and just over information about Seagate.


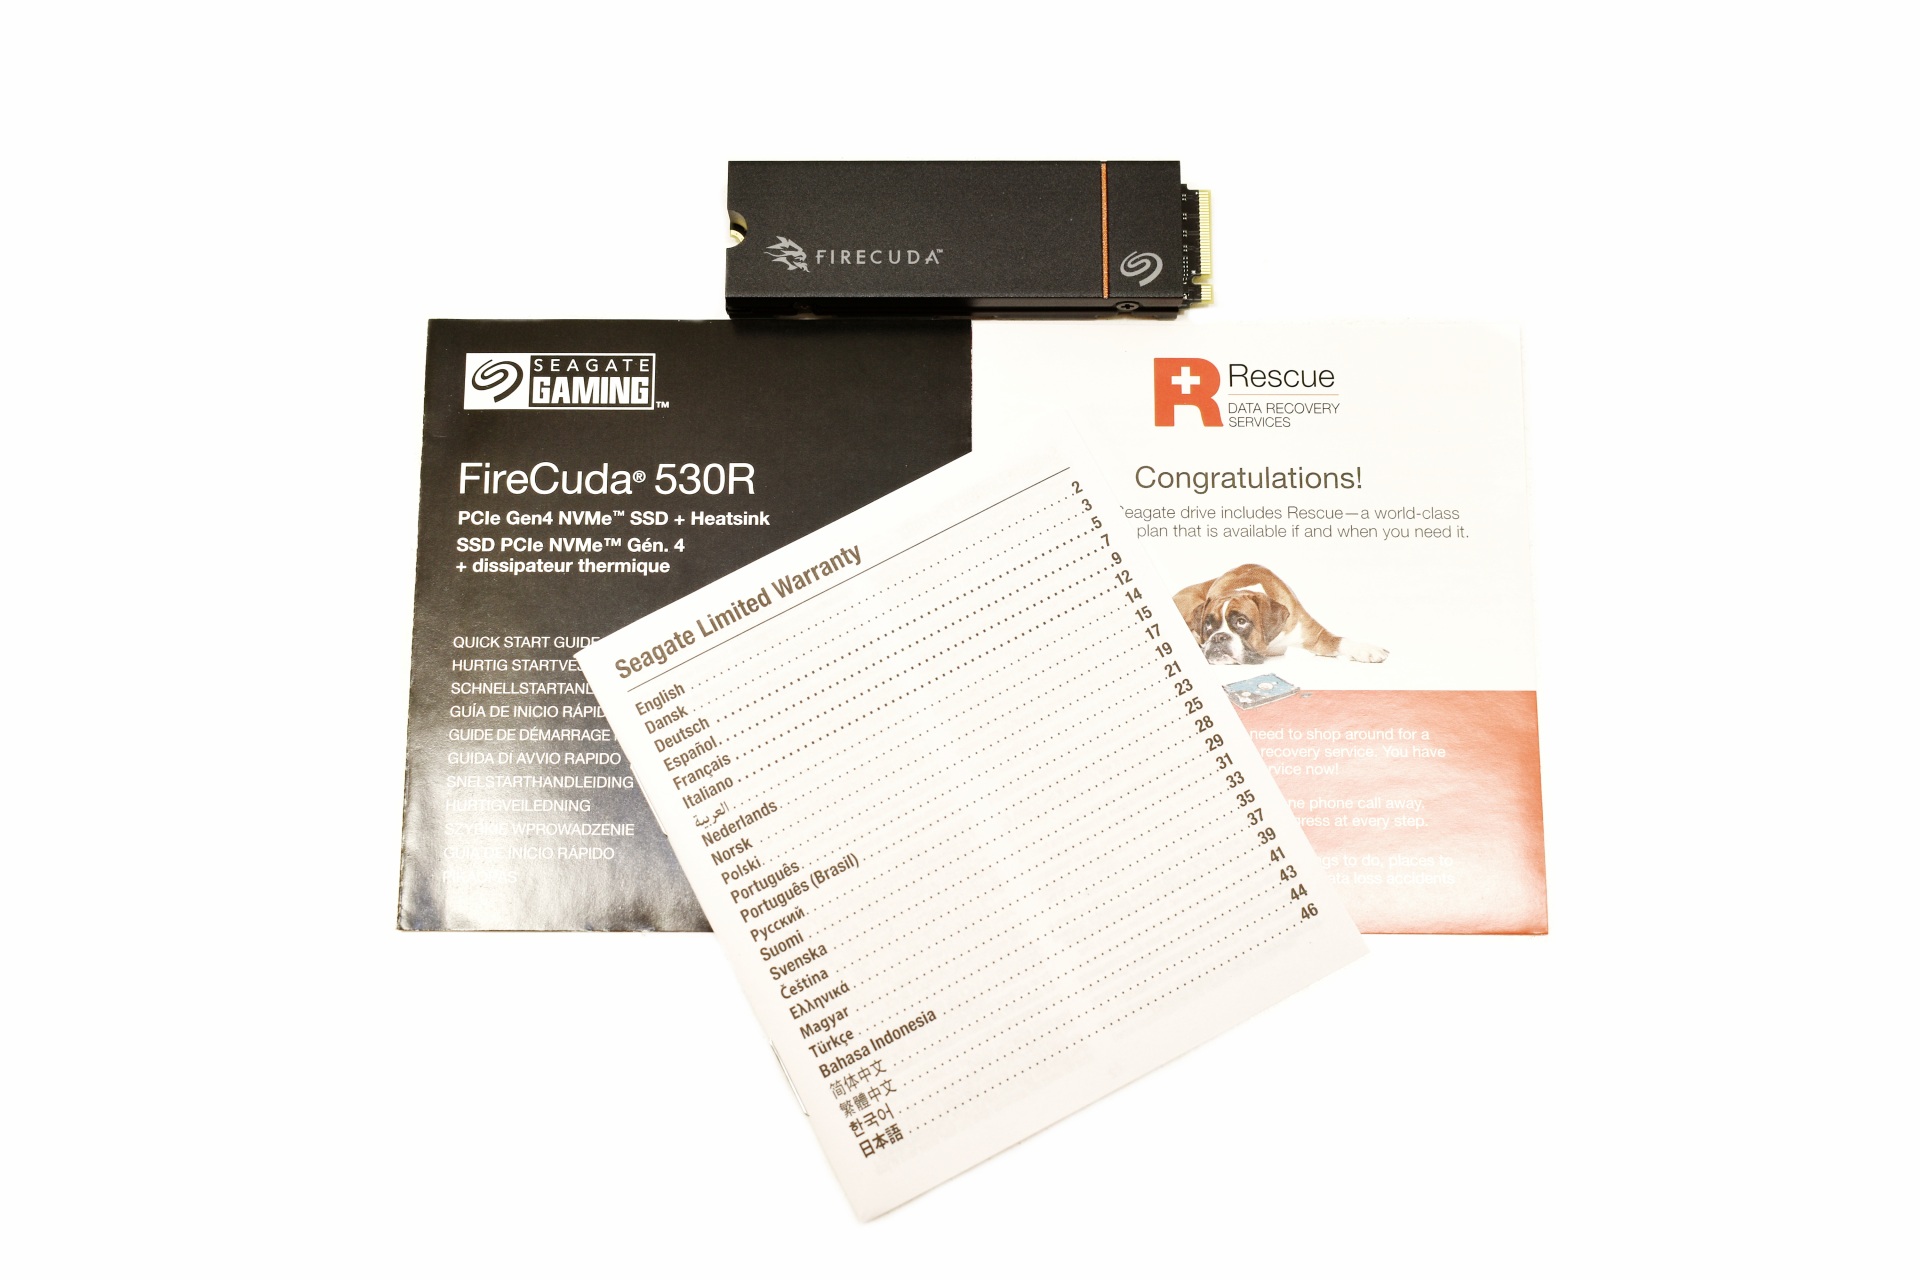
Inside the box Seagate has placed the FireCuda 530R SSD, Rescue Data Recovery Services paper, limited warranty paper and a quick start guide.


THE FIRECUDA 530R WITH HEATSINK 2TB


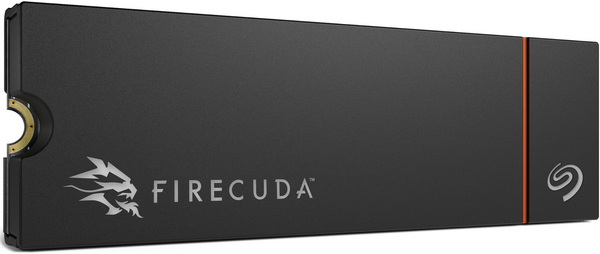
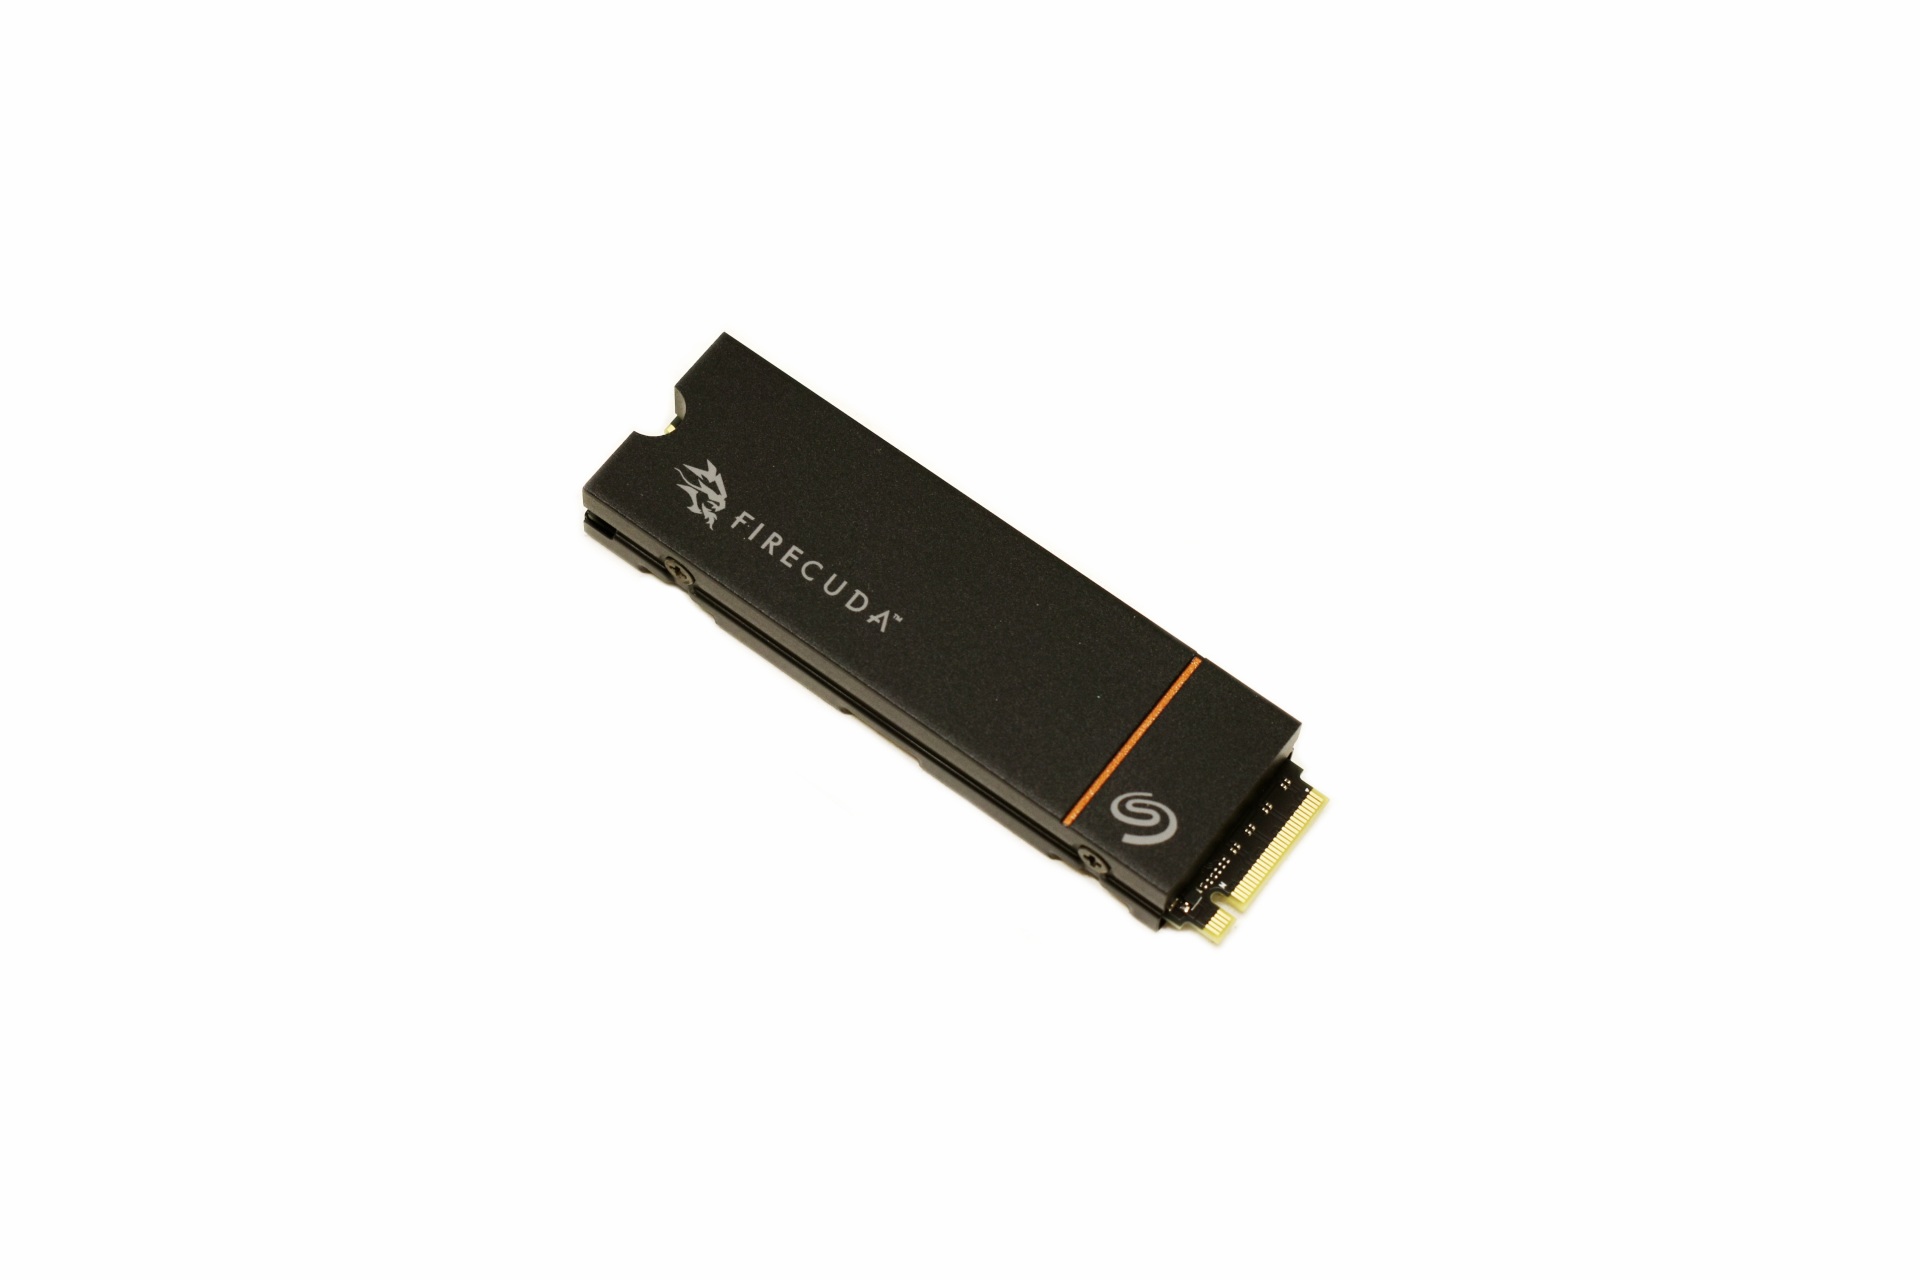
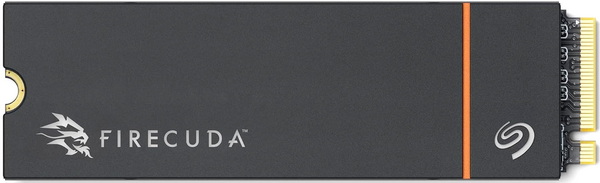
The FireCuda 530R Heatsink edition measures 80.85mm in length, 24.22mm in width and 11.10mm in thickness.


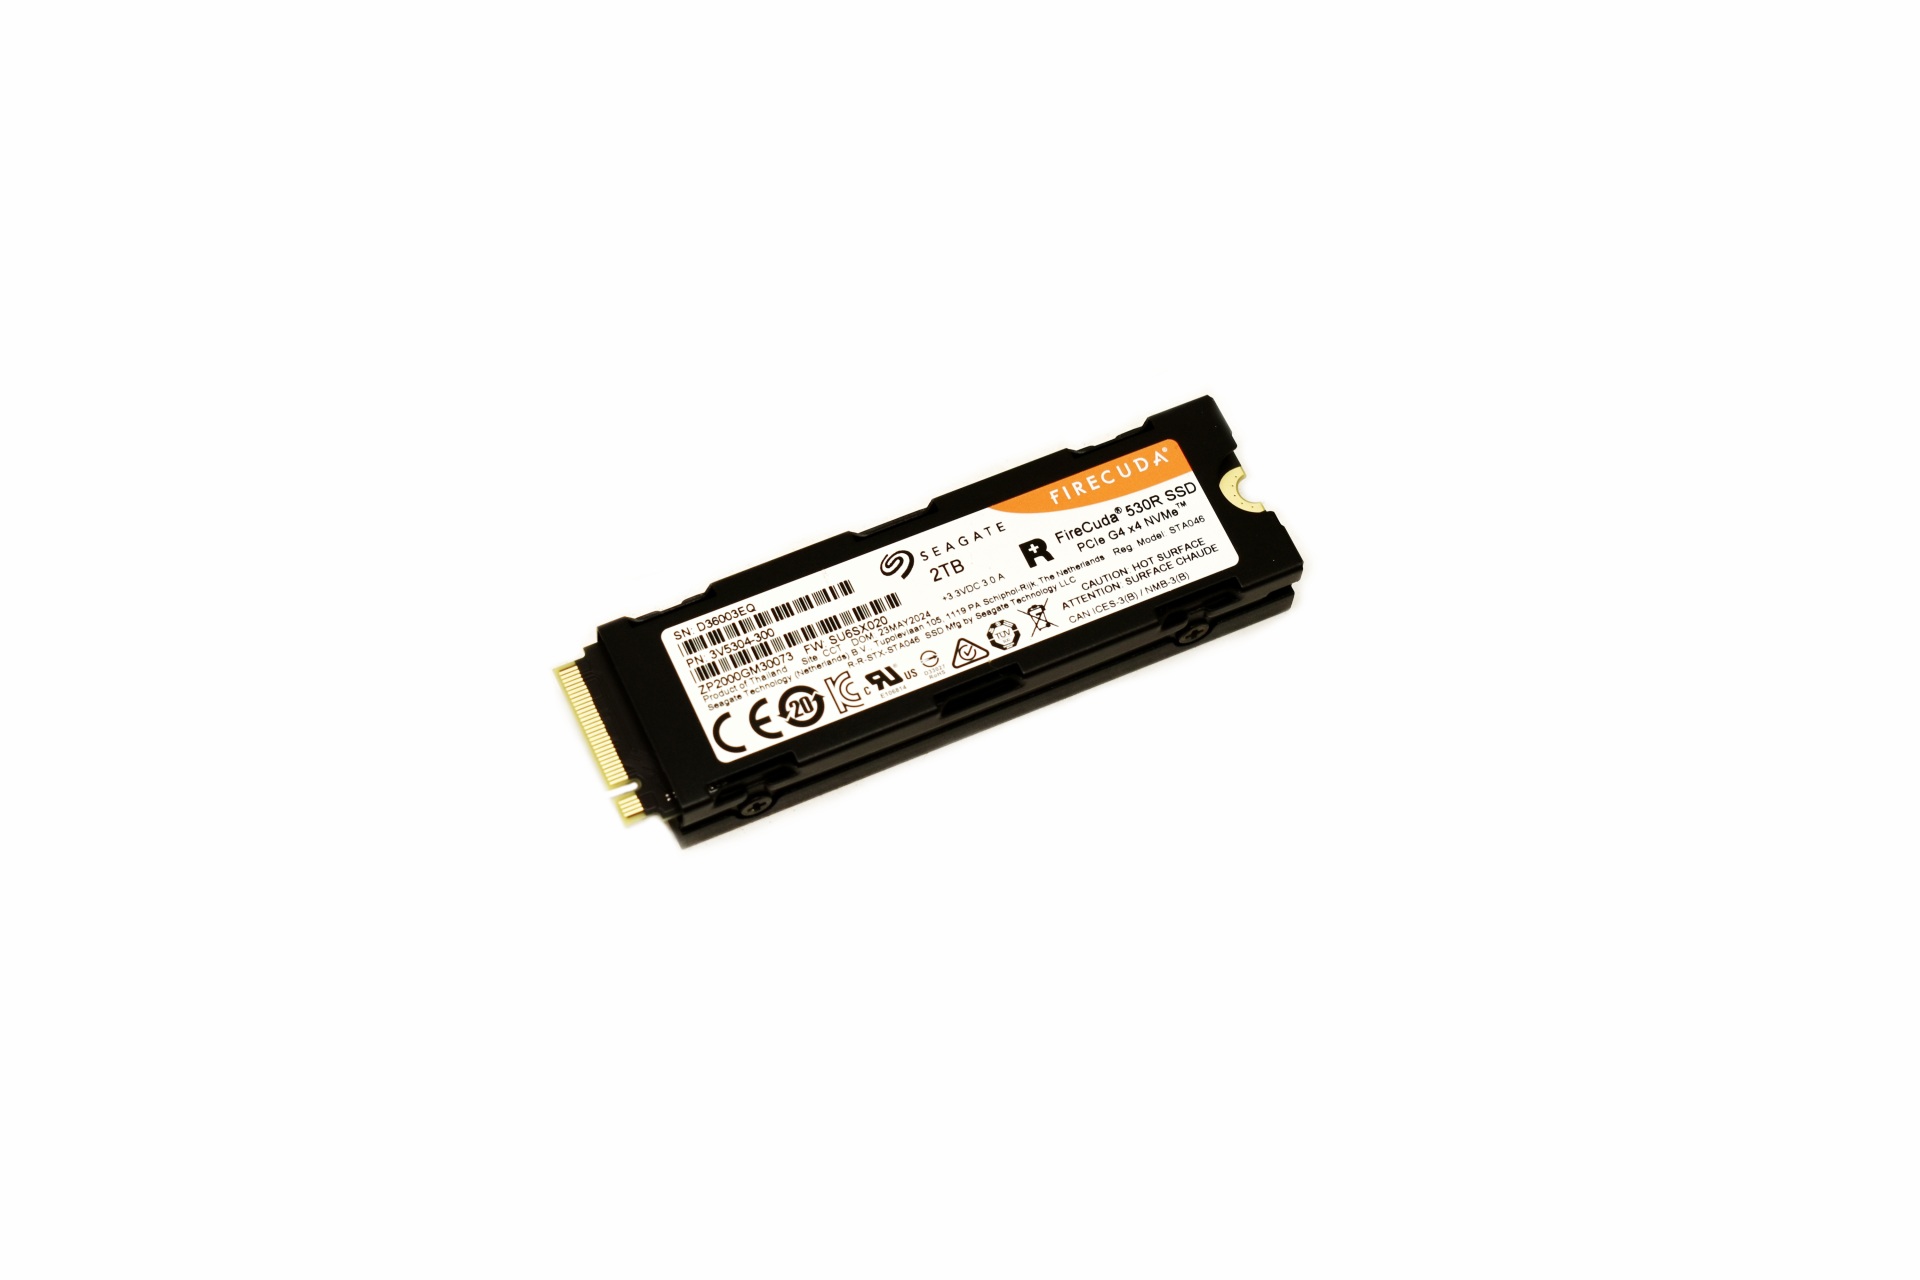
A sticker with the serial number and barcodes along with other details is placed at the base of the heatsink.


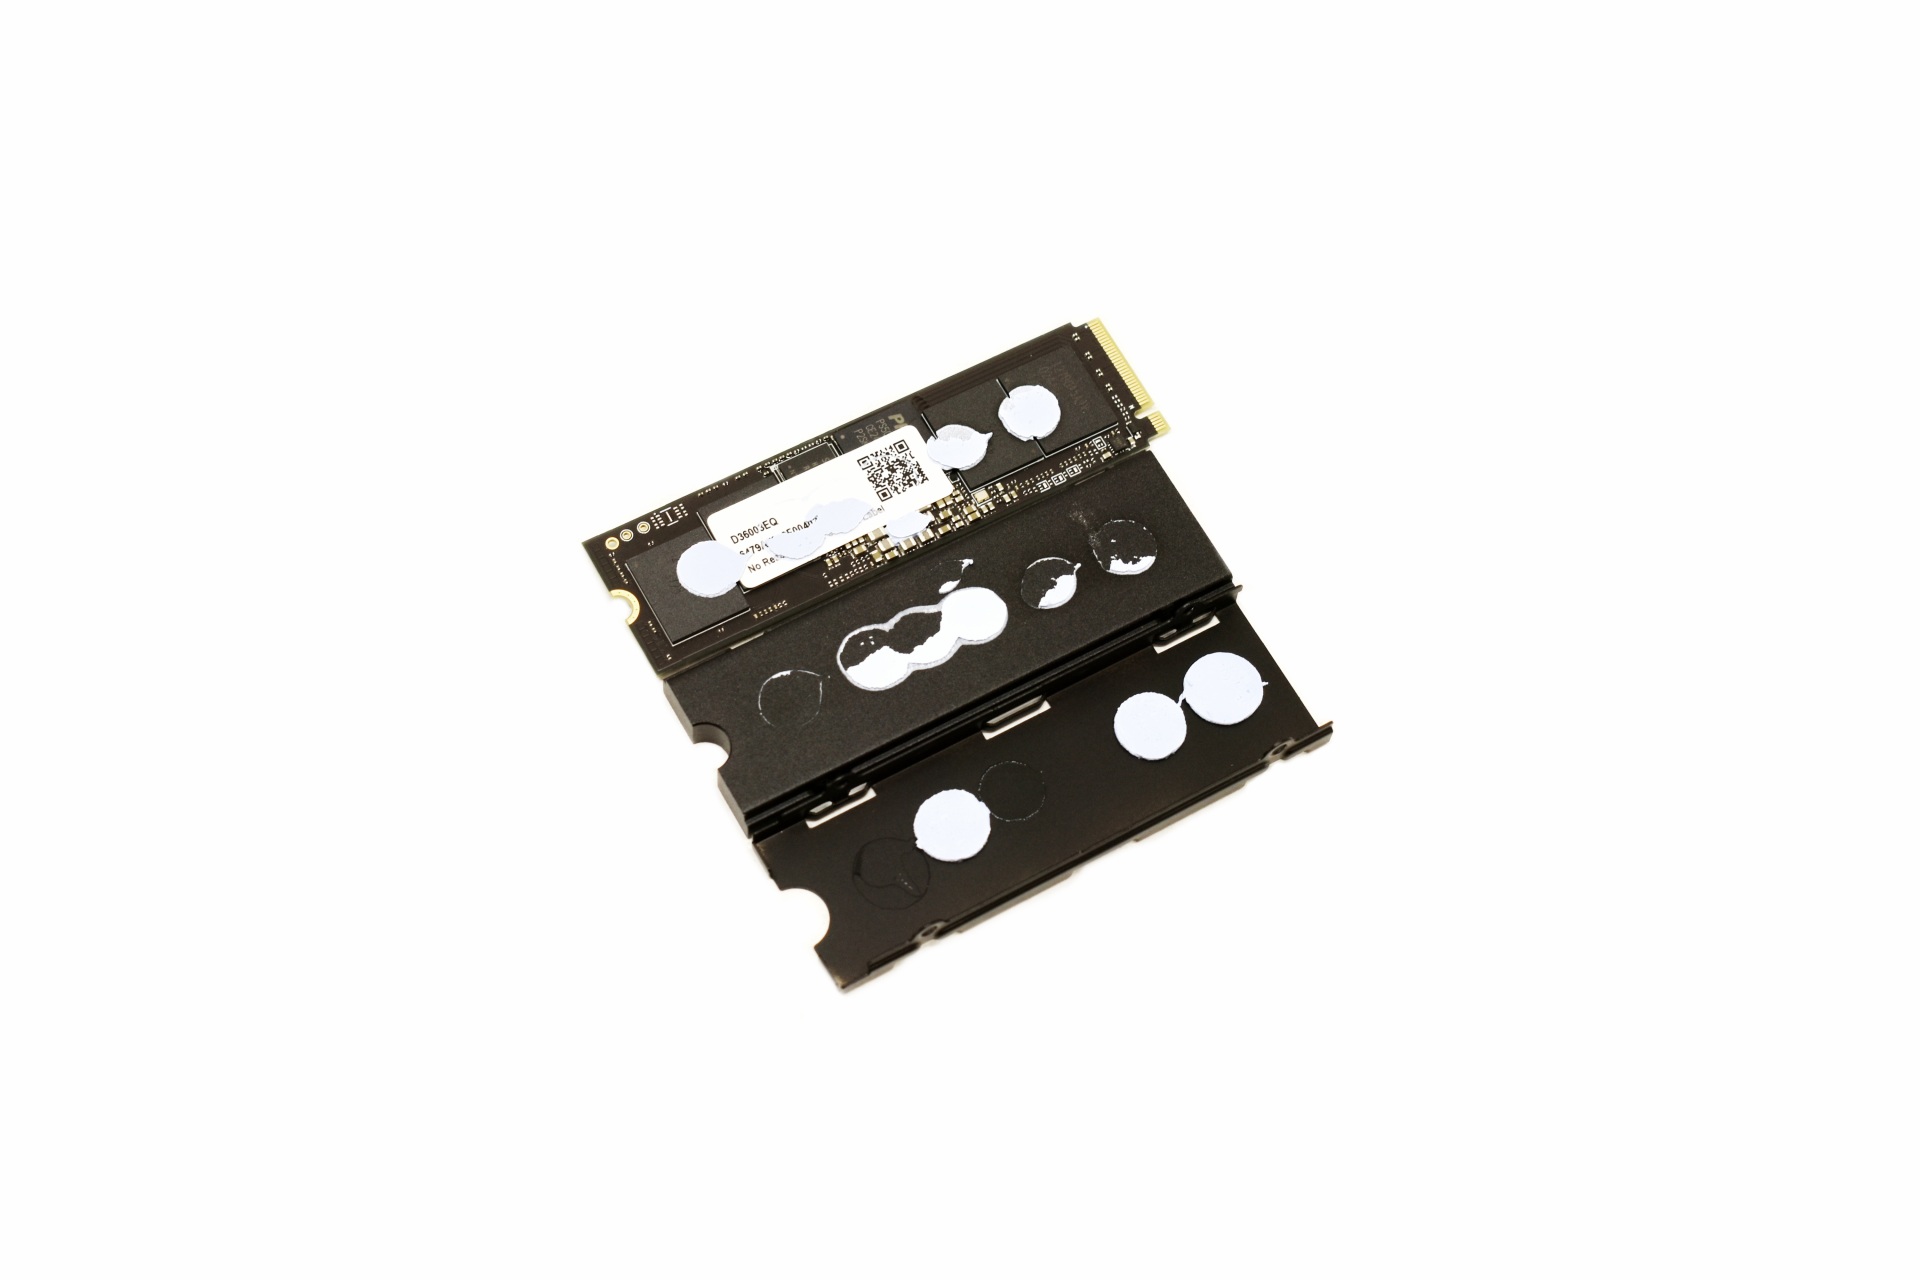
The heatsink is held in place with 4 screws so it's easy to remove.


On the top side we find a 1GB DRAM module by SK Hynix and four Kioxia 162-layer 3D TLC NAND flash modules.


Moving to the other side we find the PS5018-E18 NAND flash controller by Phison, 1GB DRAM module by SK hynix and 4 Kioxia 162-layer 3D TLC NAND flash modules.


SEATOOLS SOFTWARE


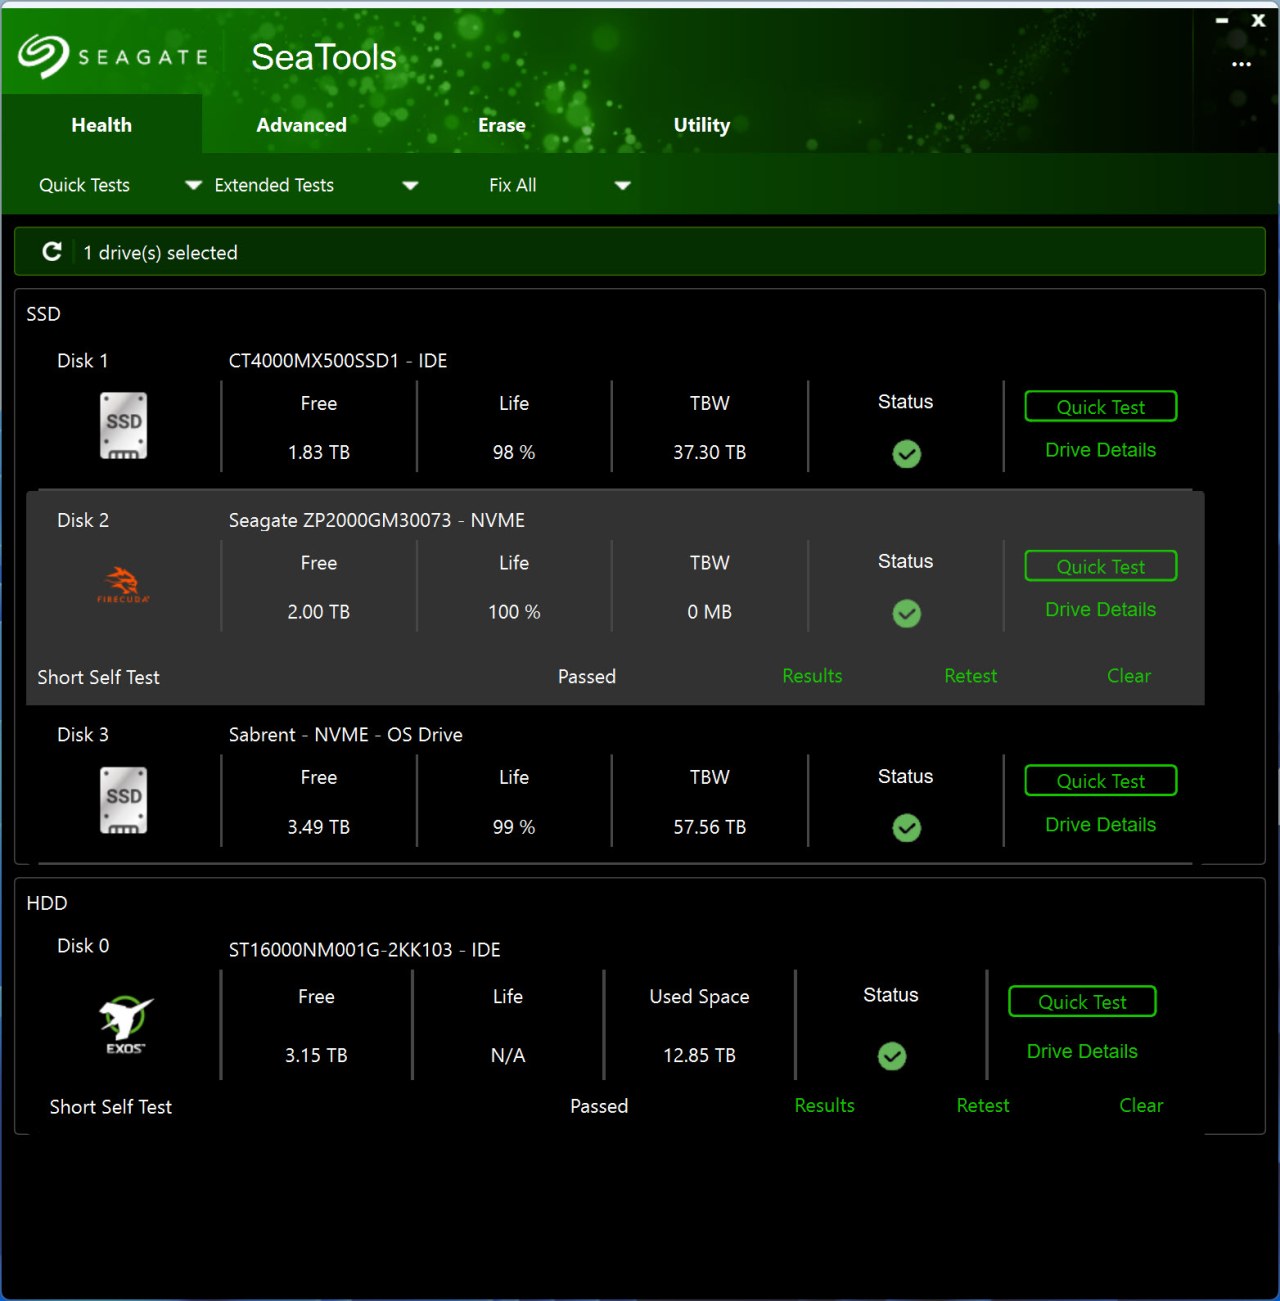
Seagate doesn't have a dedicated software for their SSDs, instead you can use their "unified" SeaTools suite.

seagate seatools 1t

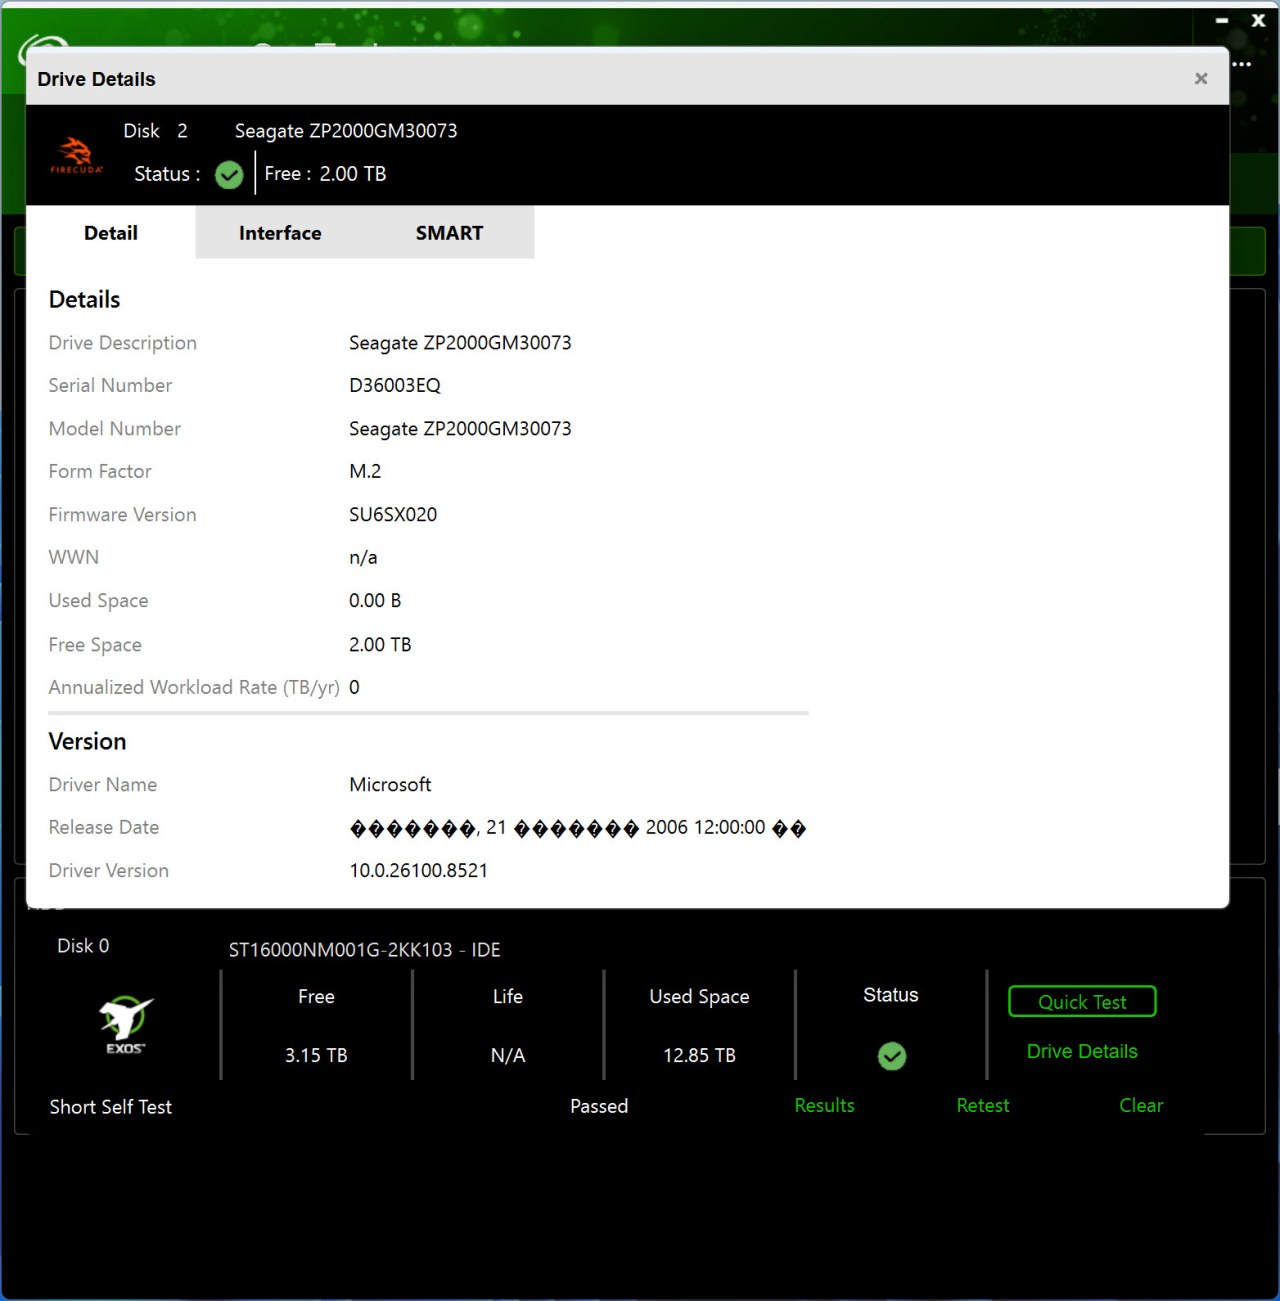
The health tab detects all available drives and allows you to run quick/extended tests and fixes (make sure to only use Seatools with Seagate drives - using it with other models may result in data loss) and check their SMART pages.


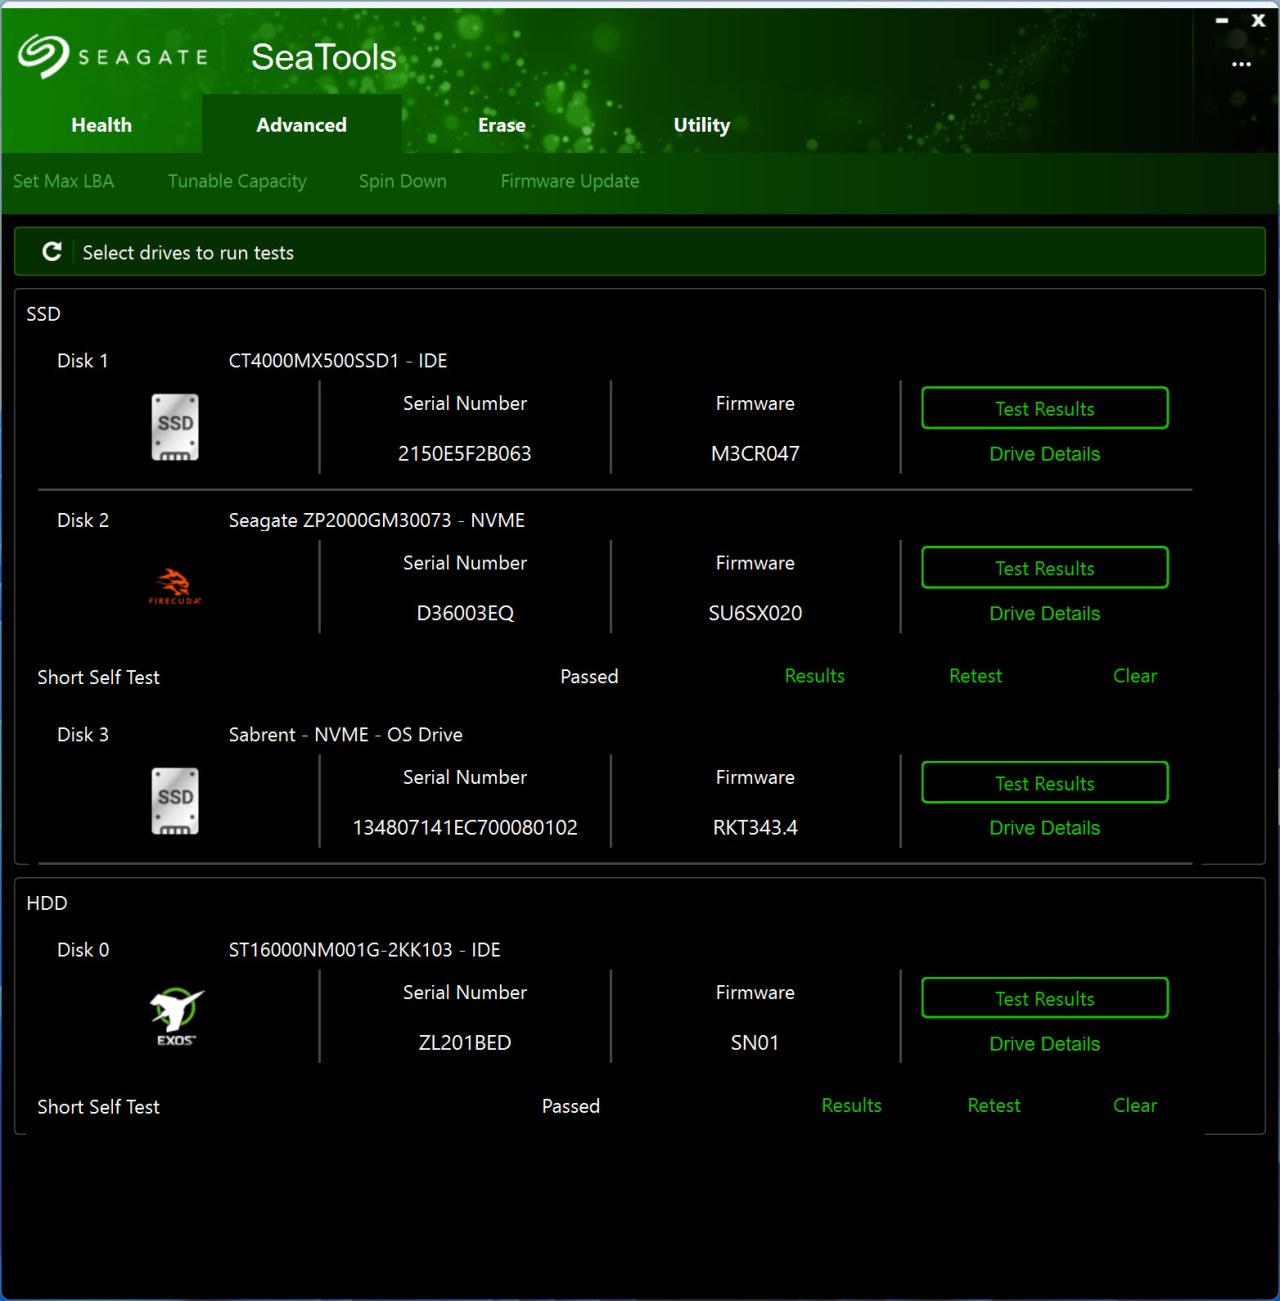
From the Advanced tab you can perform certain drive tweaks (mostly for mechanical models) and firmware updates (manual ones).


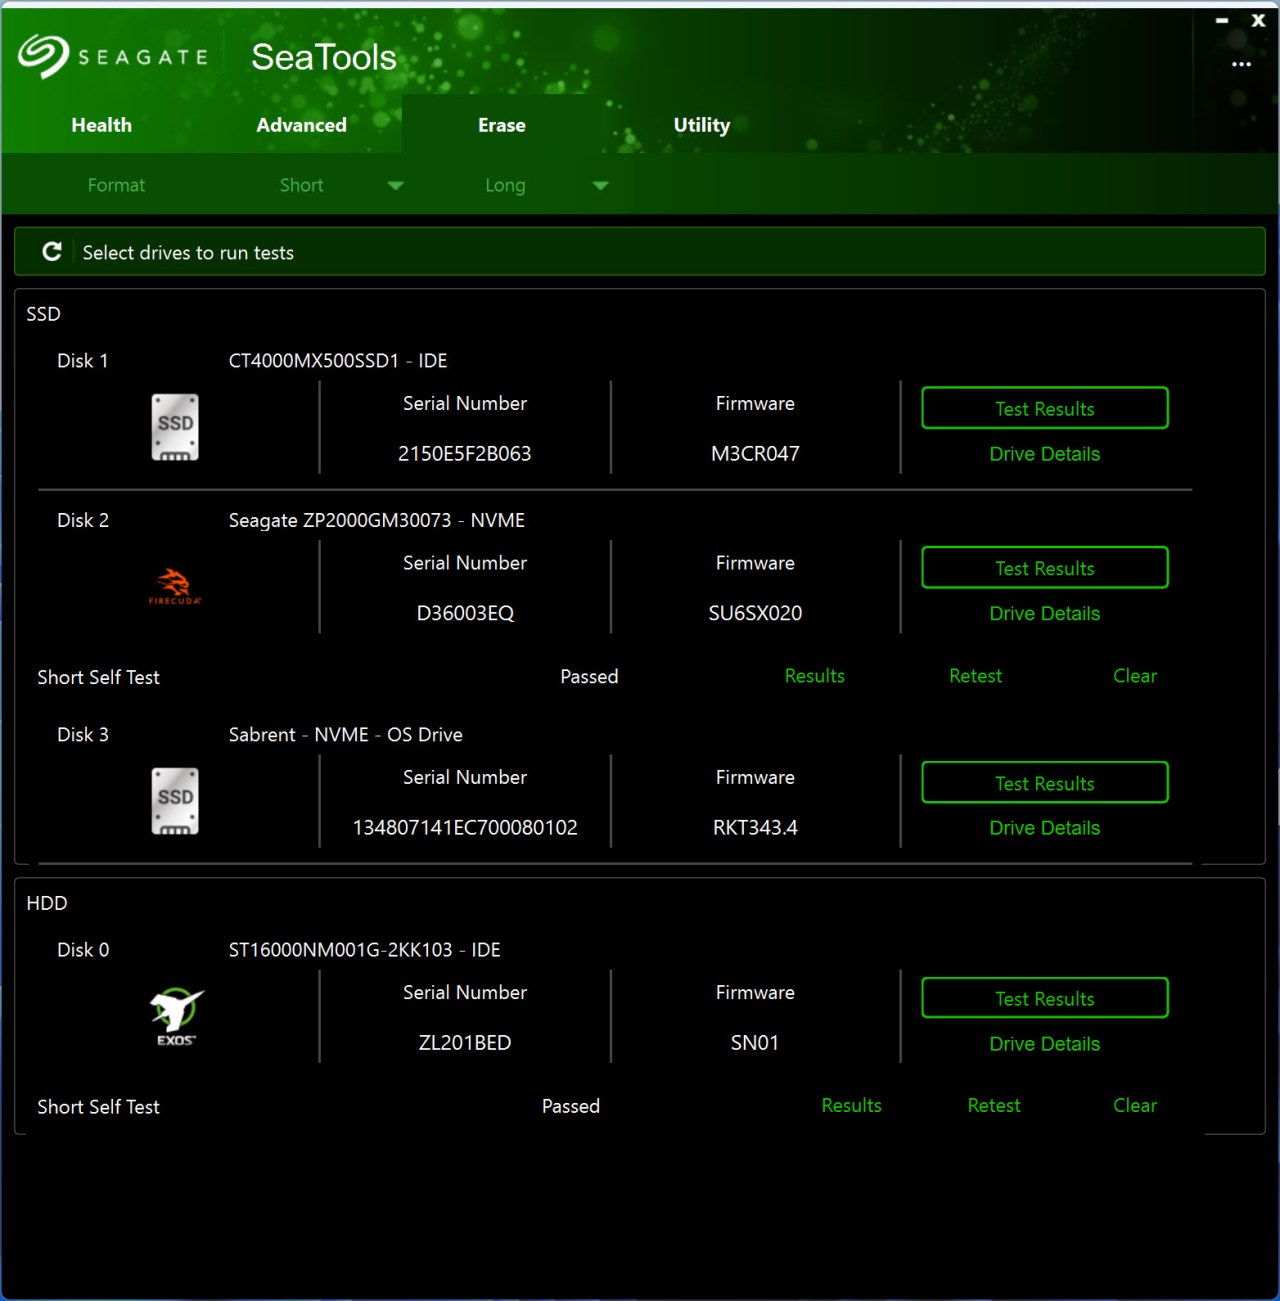
You can also securely erase your drives from the erase tab.


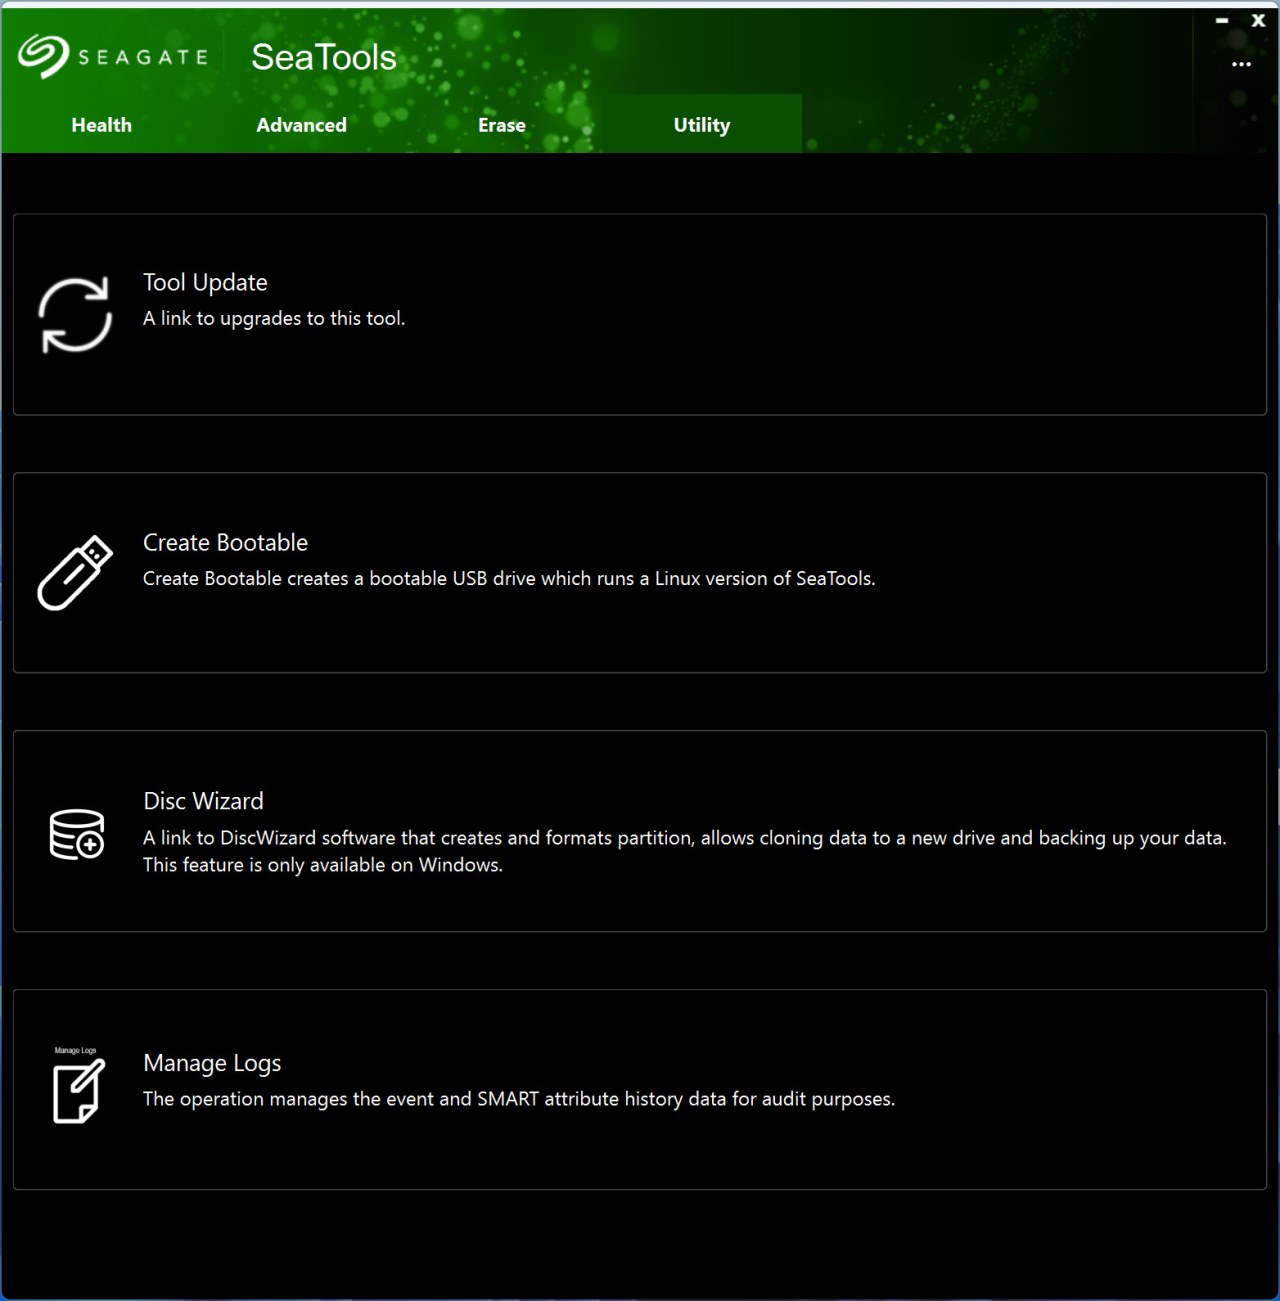
Inside the utility tab Seagate has placed a link from where you can check for updates for their SeaTools software, bootable Seatools feature, link to their Disc Wizard software and logs management.


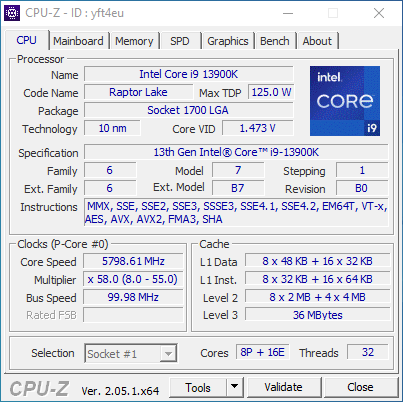
TEST BED


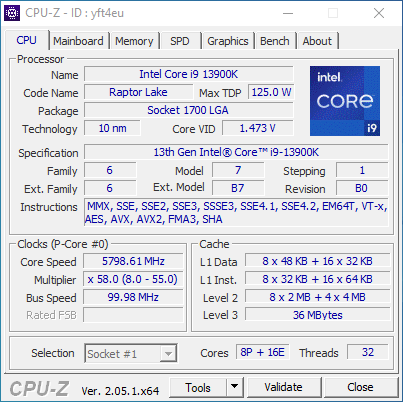
13900k


TESTING METHODOLOGY


   Not long after I first started testing SSDs back in 2008, I concluded that it's almost impossible for any single benchmark suite to accurately measure their performance and that's why in certain benchmark suites we see amazing read/write performance numbers with some drives while in other things are quite different. The reason behind this is that some benchmarking suites are configured to read and write random chunks of data while others read and write constant (sequential) ones. So that's why i always use a very wide selection of benchmarking suites including AIDA64, HD Tach RW, HD Tune Pro, Crystal Disk Mark, Sisoftware Sandra Pro, AS SSD, IOmeter and ATTO. To get the most accurate results each test gets repeated a total of 6 times with the average performance numbers recorded into the charts. Also, as of February 25th, 2015, our results will also include the Storage Networking Industry Association’s (SNIA) IOMeter tests. These tests include a 12 Hour write test used to “simulate” performance degradation over time and a mixed workload test which basically shows what you can expect when using an SSD continuously for roughly two hours. Unfortunately, due to the time required for these tests they get repeated a total of 3 times and not 6 as the above.


   Many people have made inquiries about our charts in the past so once again please do keep in mind that the Charts have the average performance numbers of each drive recorded and not the peak (highest) ones. Also, although every single one of these programs can help potential buyers choose the right drive for their needs you should also remember that from any kind of benchmark up to real world usage the gap is not small (and usually most differences will go unnoticed by most people). All tests were performed in a fresh Windows 10 Pro x64 installation complete with every update up to the date of this review.


* As of January 2025, Gen4 SSDs will be tested on the 13900K/Z790 system while Gen5 SSDs will be tested on the 285K/Z890 system.


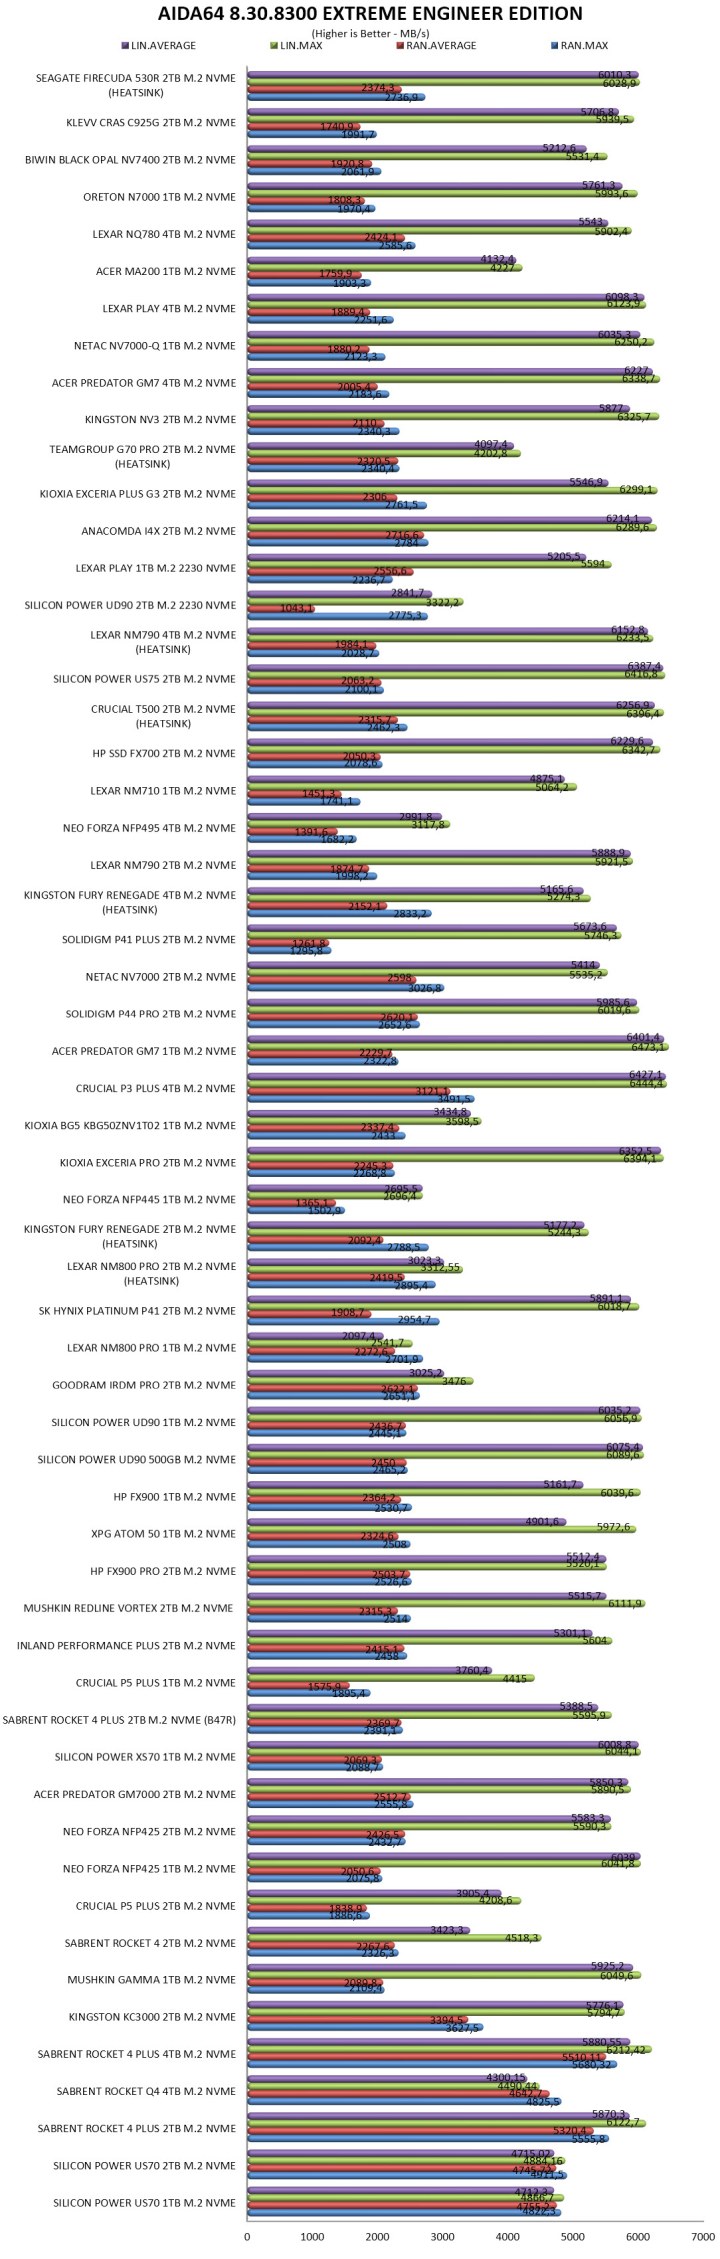
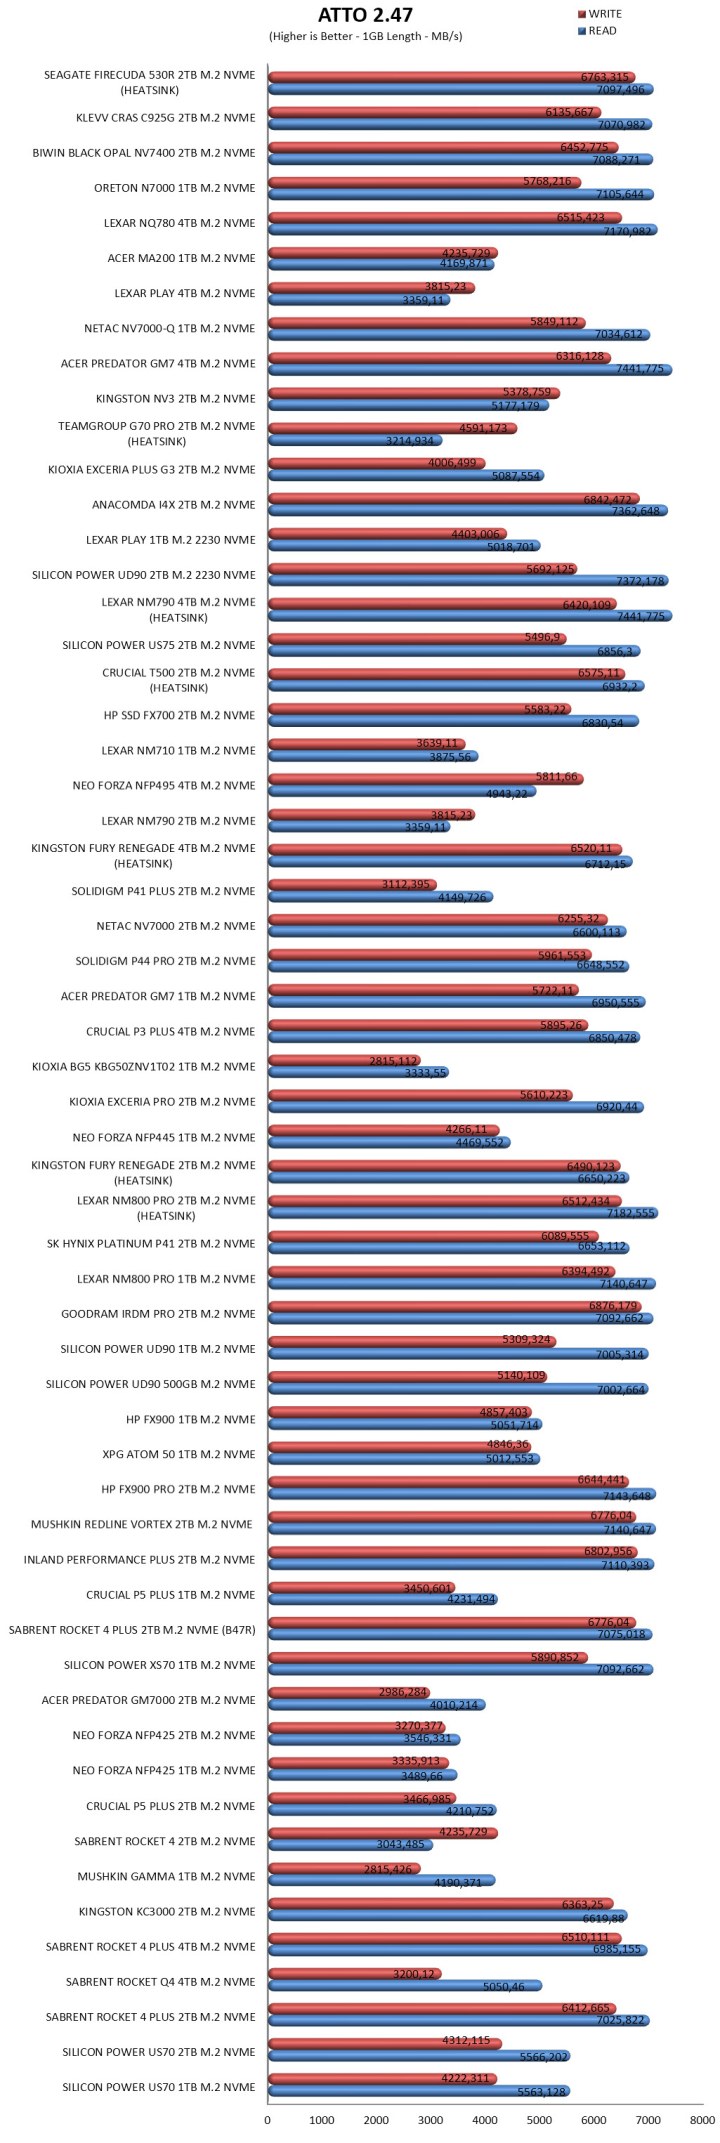
TEST RESULTS - AIDA64 / ATTO


aida64


TEST RESULTS - HD TACH RW / HD TUNE PRO


hdtachrw


TEST RESULTS - SISOFTWARE SANDRA PRO / CRYSTAL DISK MARK


sandra


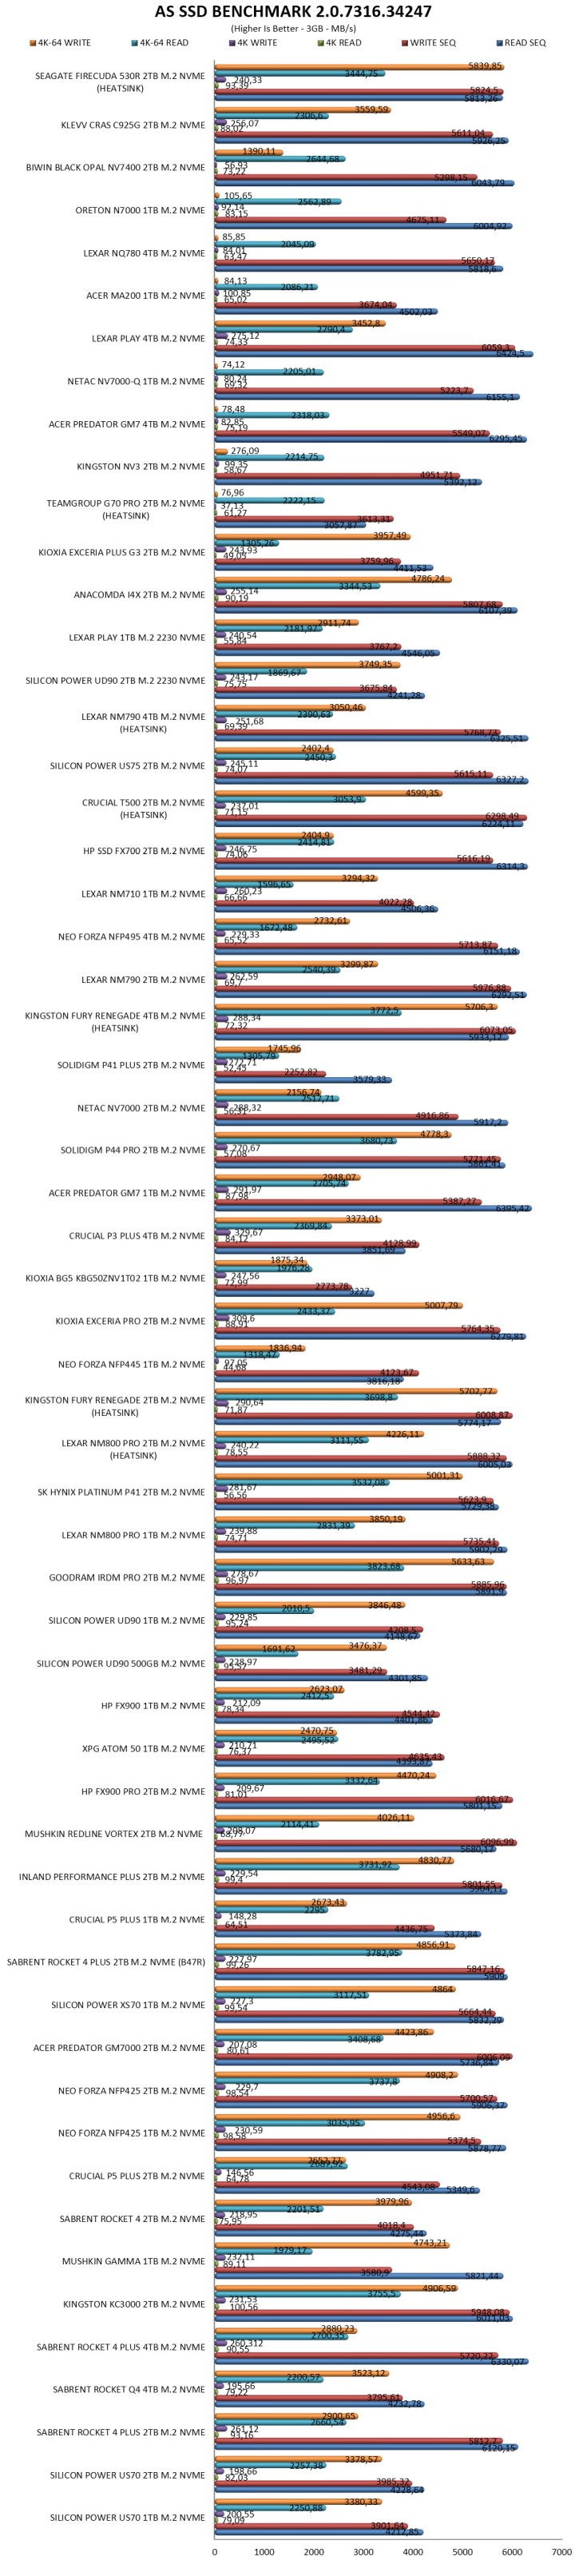
TEST RESULTS - AS SSD / IOMETER


asssd


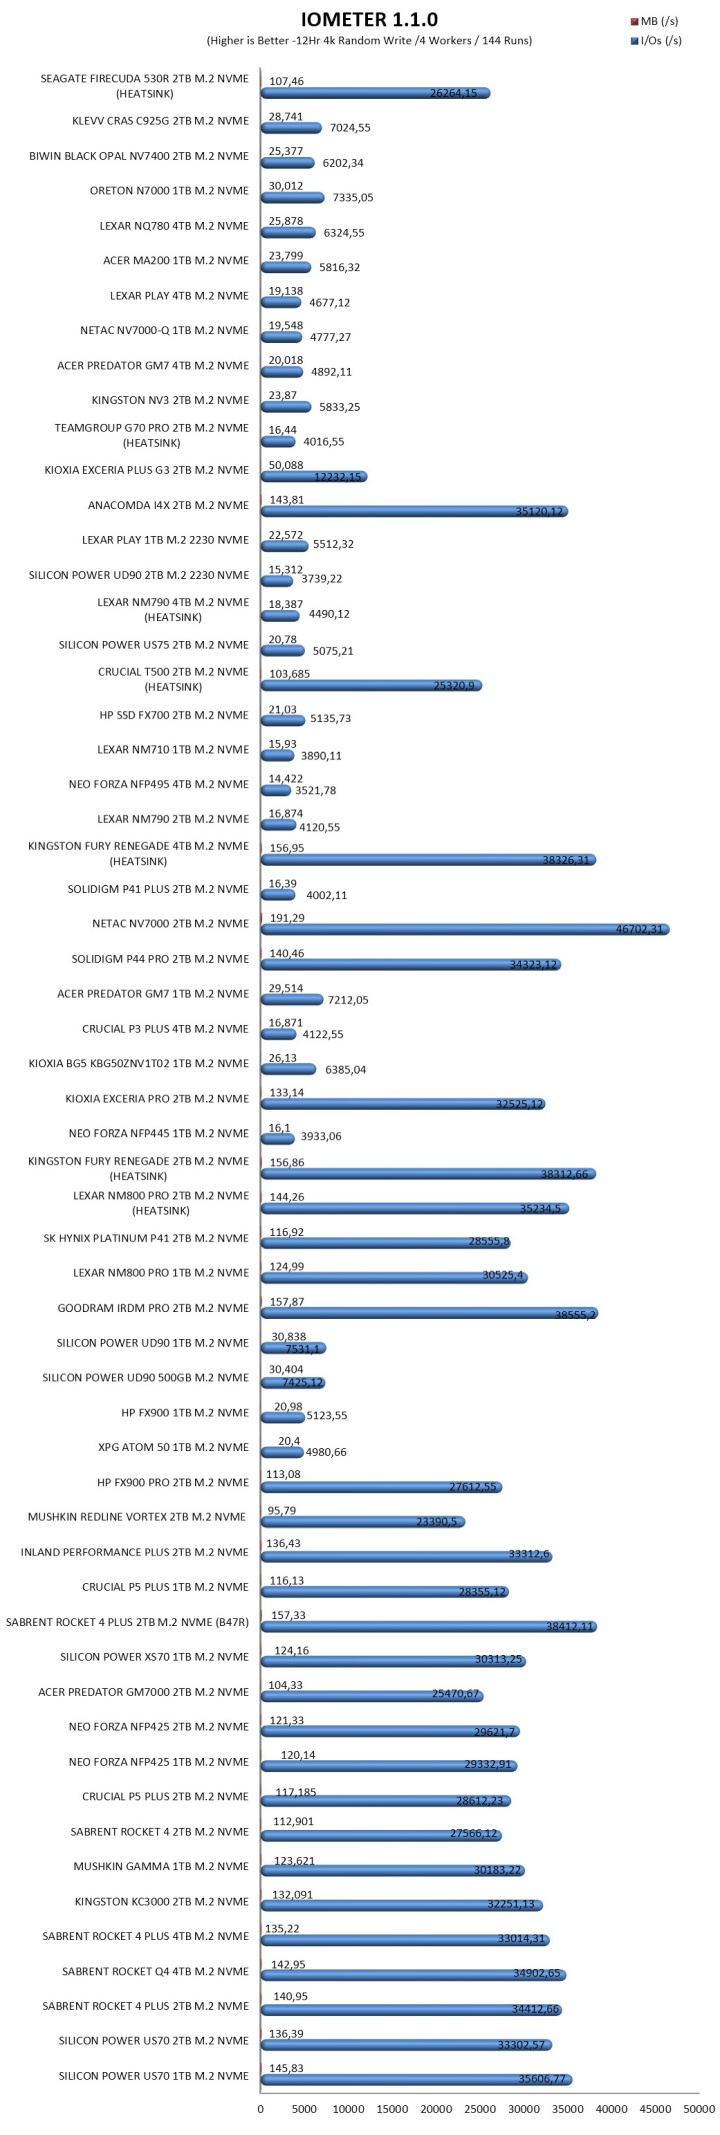
TEST RESULTS - IOMETER SNIA


iometermixed

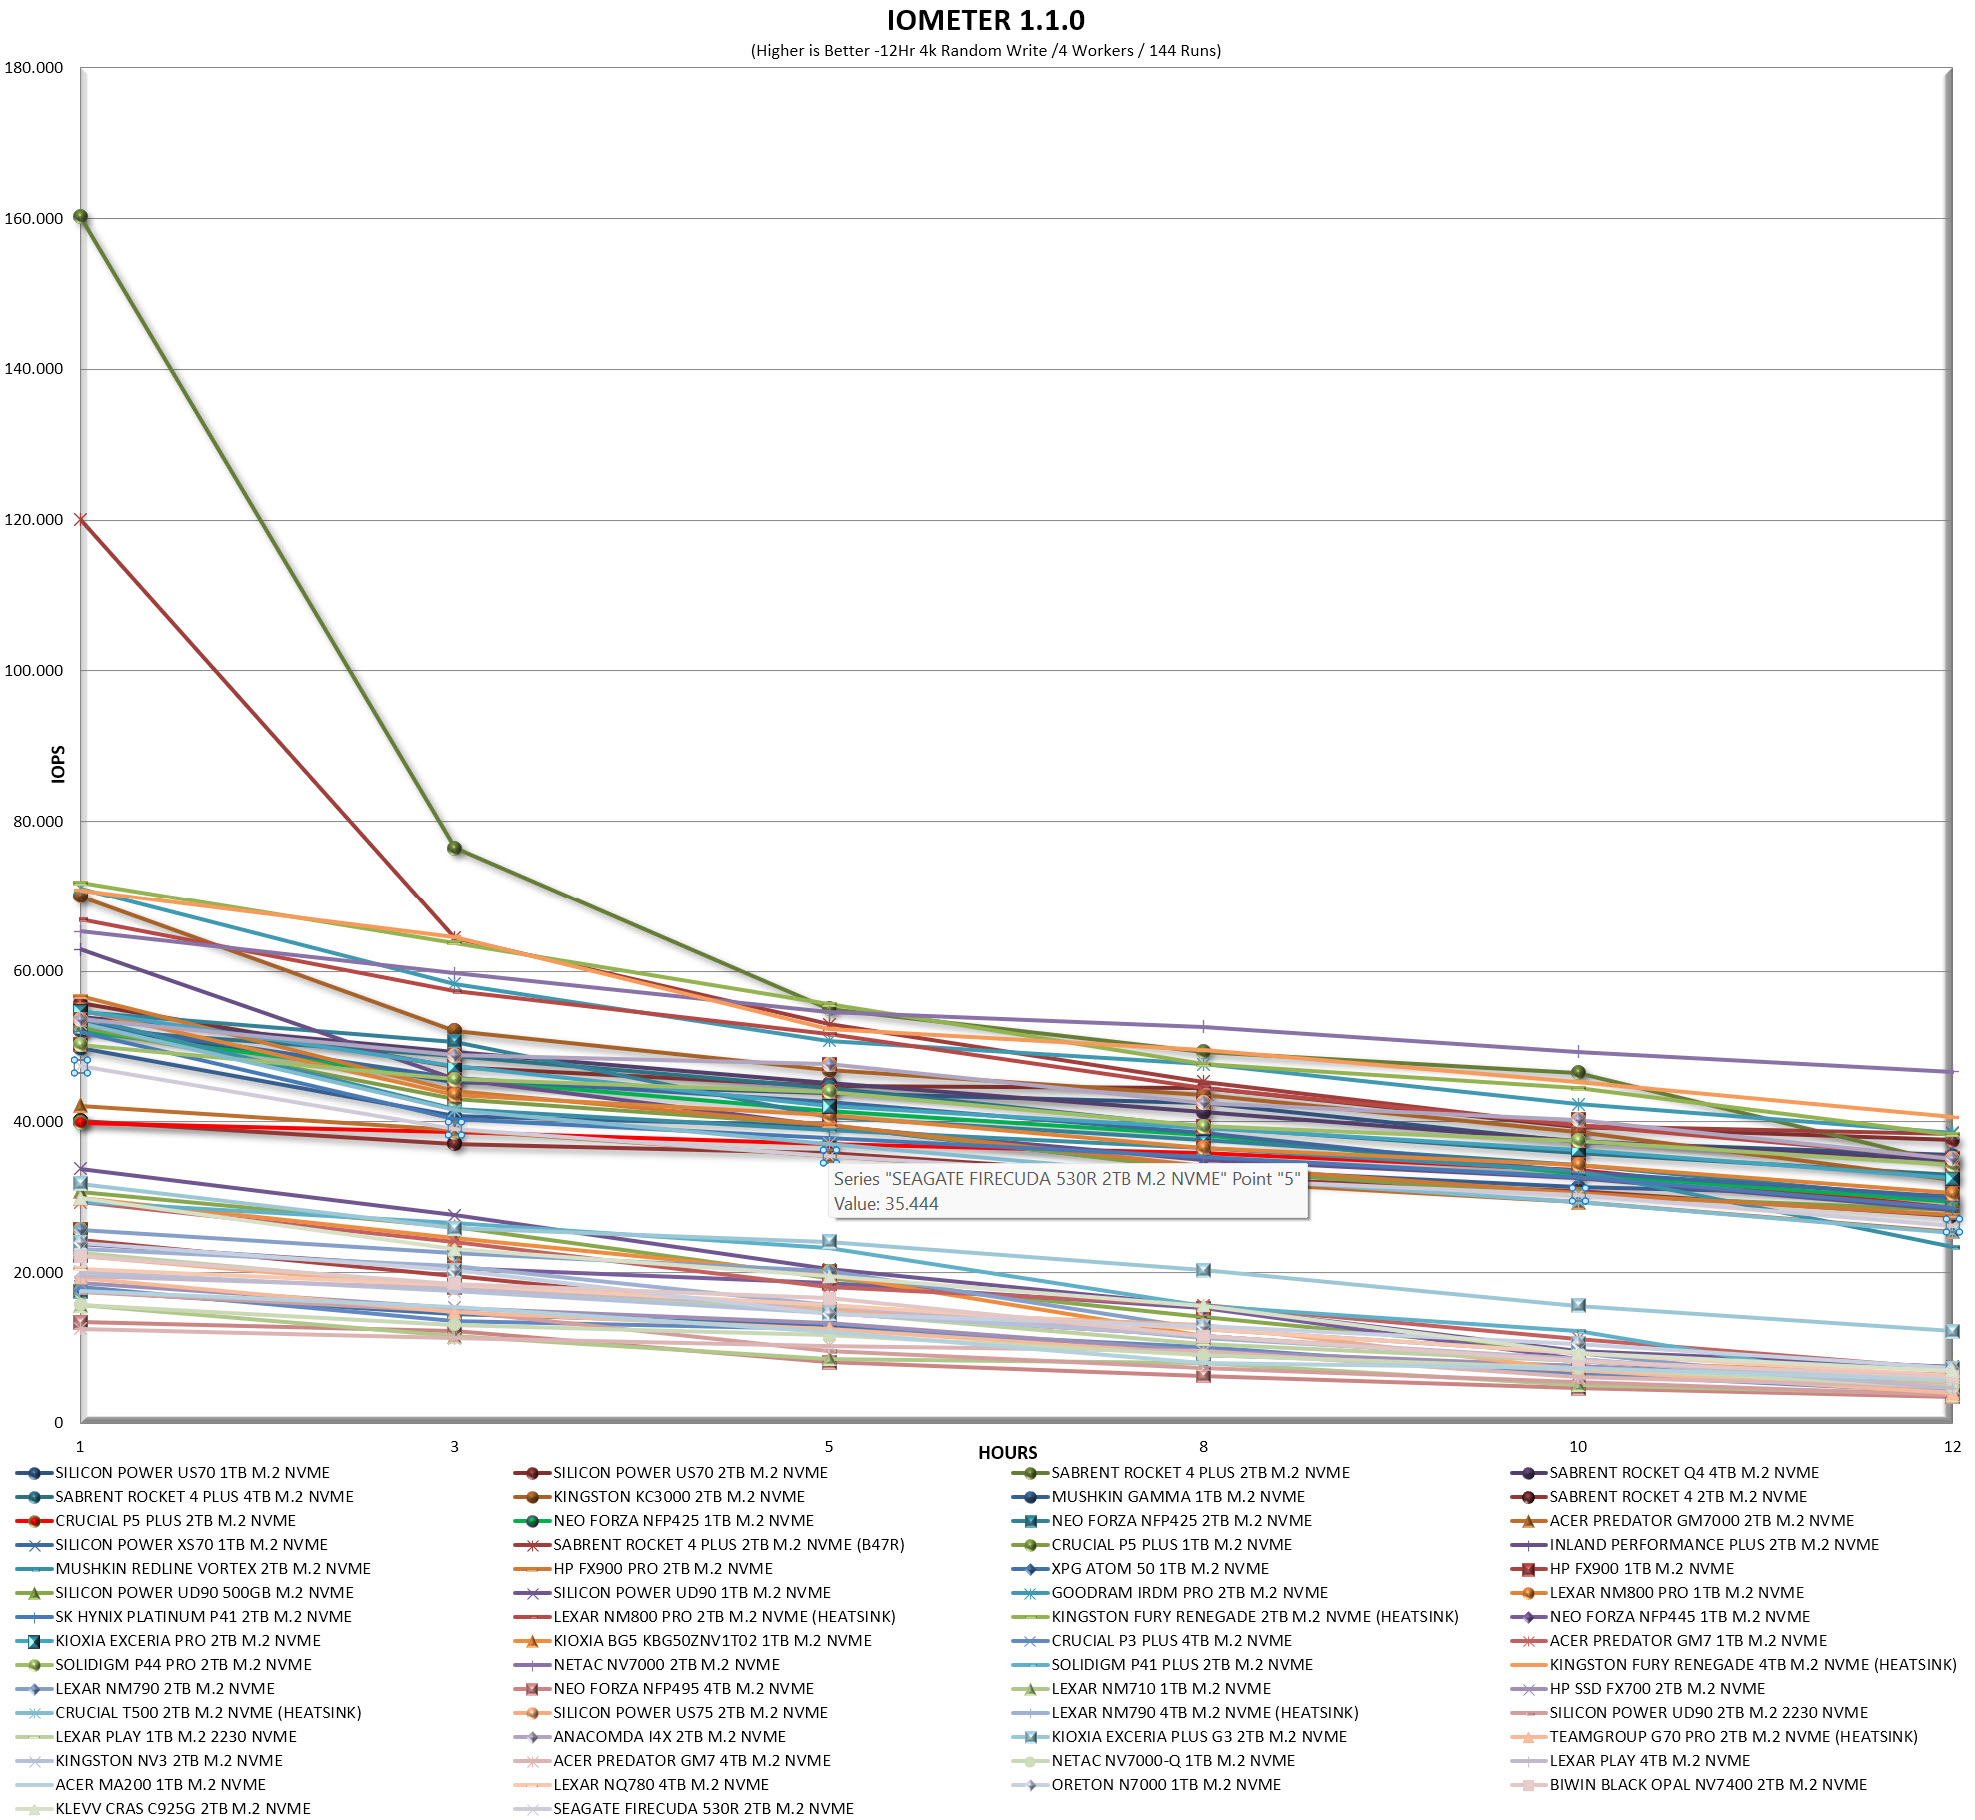
iometer12hrgrapht


CONCLUSION


seagate firecuda 530r 2tb review b


    The Seagate FireCuda 530R delivers exactly what a top‑tier Gen4 SSD should, excellent real‑world speed, stable thermals, and long‑term reliability. At its core is the Phison PS5018‑E18 controller, one of the most proven Gen4 controllers on the market (that unfortunate incident with the Windows update is no longer a concern), known for sustaining high sequential performance without the thermal throttling issues seen in earlier Gen4 designs. Needless to say, both the 2GB SK hynix DRAM and Kioxia’s 162‑layer 3D TLC NAND (BiCS6) help with the drive’s low-latency, consistent performance, strong TBW ratings and long‑term stability. The included low‑profile heatsink keeps temperatures comfortably in check, making the FireCuda 530R a clean, drop‑in upgrade for PS5 users who want fast storage without worrying about thermal overhead. Endurance remains a highlight, with the 2TB model rated for 2400TBW and backed by a 5‑year warranty plus Rescue Data Recovery Services. The drawbacks are practical, there’s no 8TB option for users who need extreme capacity, and while SeaTools works reliably for monitoring but doesn’t offer the deeper tuning, firmware controls, or advanced settings found in competing brand utilities. Even so, the FireCuda 530R by Seagate stands as one of the strongest Gen4 offerings available, combining high‑end components with dependable thermals and endurance.


    At around USD499.99 inside the USA (Amazon.com) and for 218.62Euros inside the EU (Amazon.de) the 2TB capacity of the FireCuda 530R with heatsink by Seagate is priced well, at least on this side of the Atlantic. Leaving cost out of the equation the FireCuda 530R with heatsink Gen4 SSD by Seagate delivers on everything from speed and endurance to low temperatures, PS5 compatibility and even probably the best all-around warranty and for that it deserves the Golden Award.

PROS


- Excellent Gen4 Performance
- Heatsink Version (PS5 Compatible)
- Endurance (2400TBW)
- 5 Year Limited Warranty & Rescue Data Recovery Services
- Price (EU)


CONS


- Price (USA)
- Only Up To 4TB


Ocypus Sigma L36 ARGB AIO Liquid Cooler Review

INTRODUCTION


ocypus sigma l36 rgb review a


    AIO liquid coolers have become essential for today’s high‑power CPUs, where sustained workloads routinely push thermal output beyond what traditional air coolers can manage. Even robust 360mm units eventually reach a point where the processor’s aggressive power draw becomes the limiting factor, not the cooler itself. In this environment, radiator efficiency, pump acoustics, and fan tuning define real‑world performance and the Sigma L36 ARGB by Ocypus fits neatly into this category.


    Our core mission is to create ideal products for gamers, and this goes beyond distinctive design, it involves meeting the authentic needs of gamers and crafting a more thoughtful user experience.


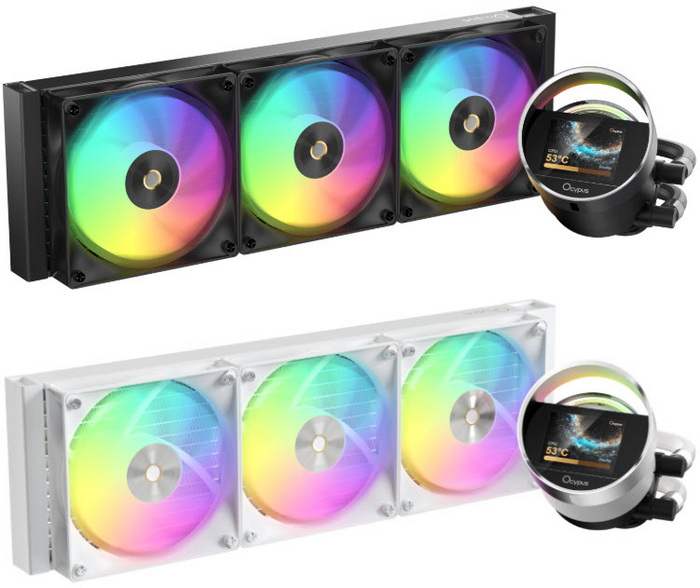
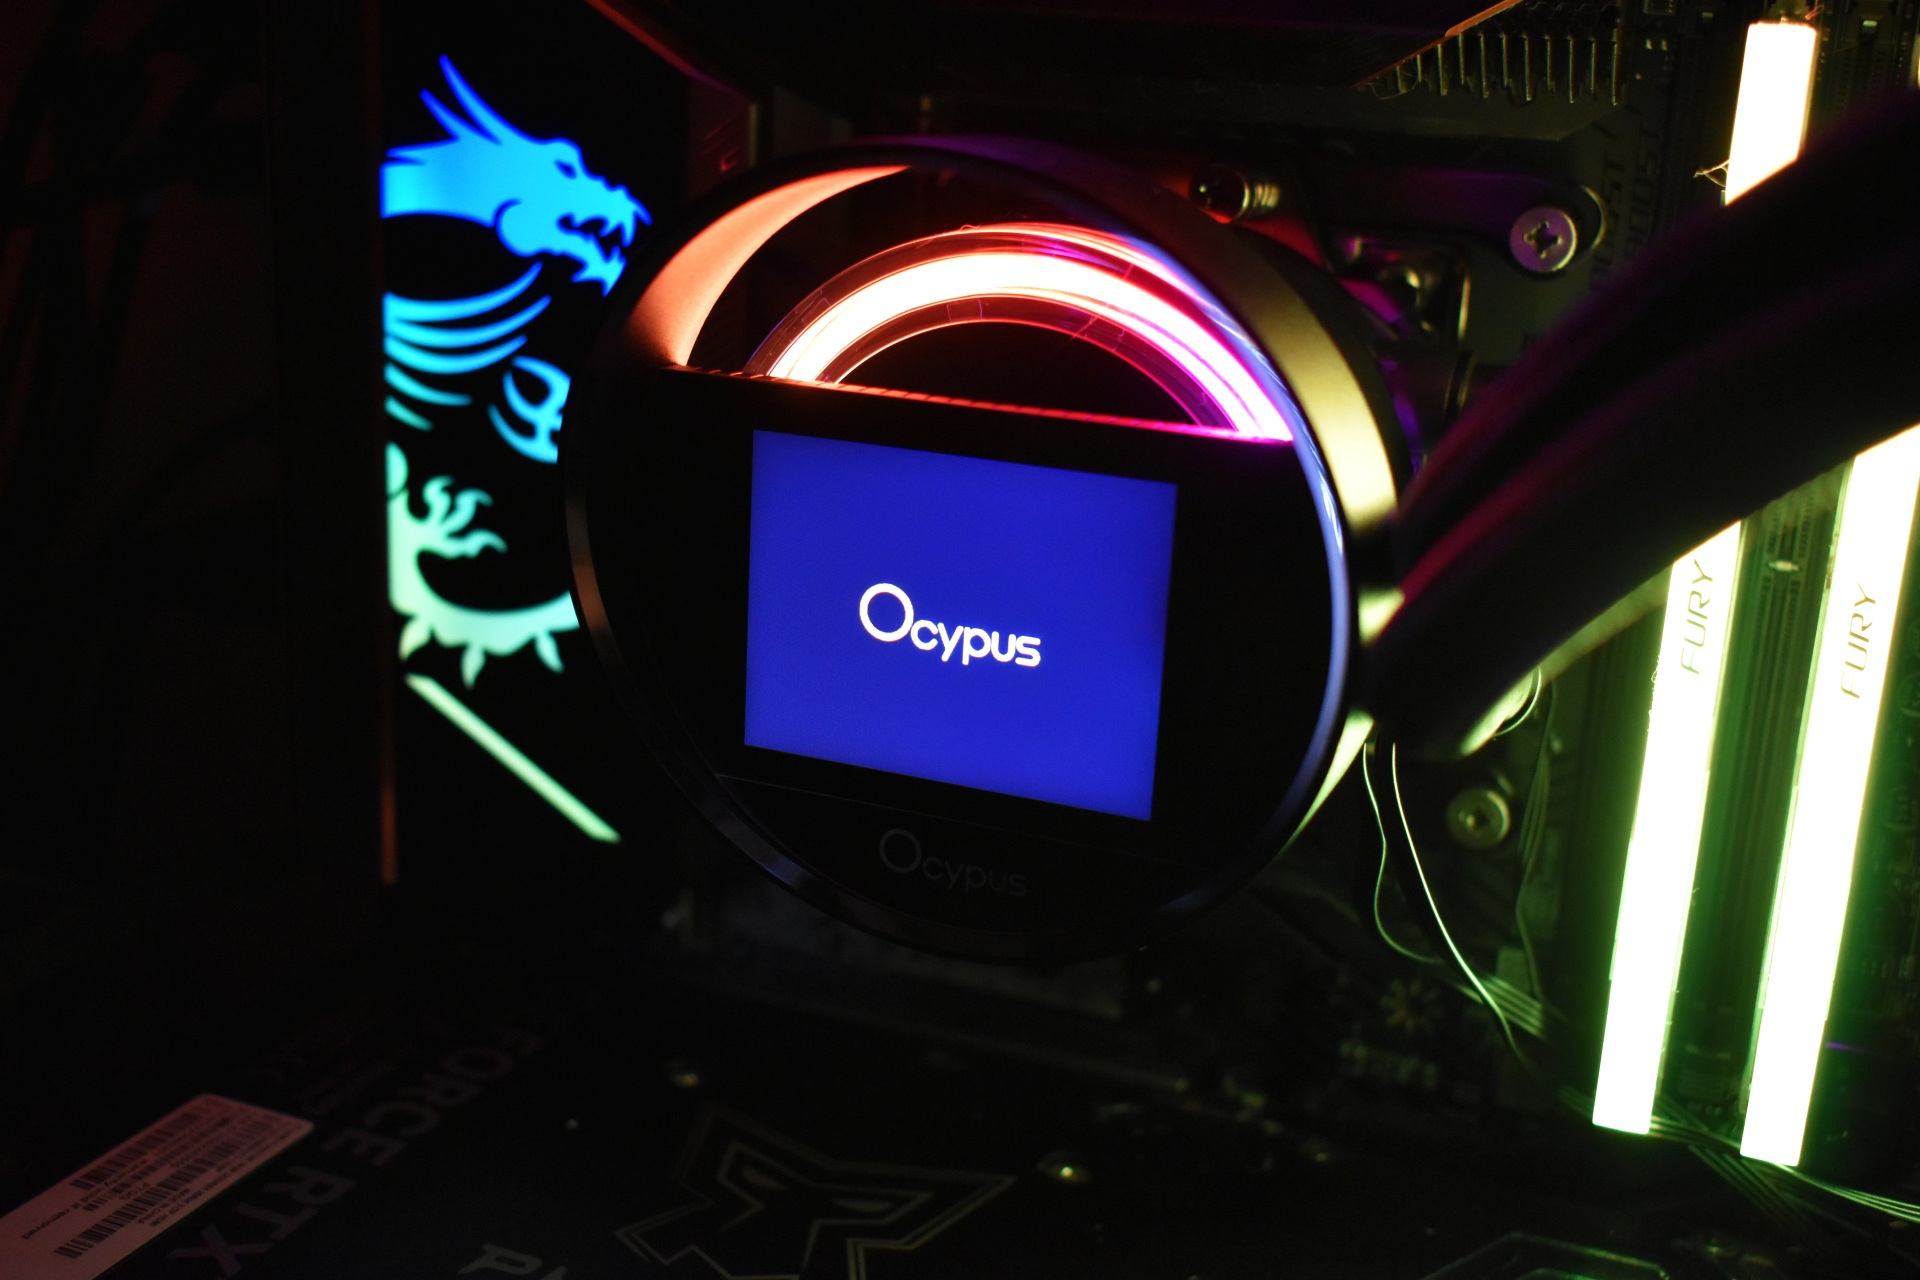
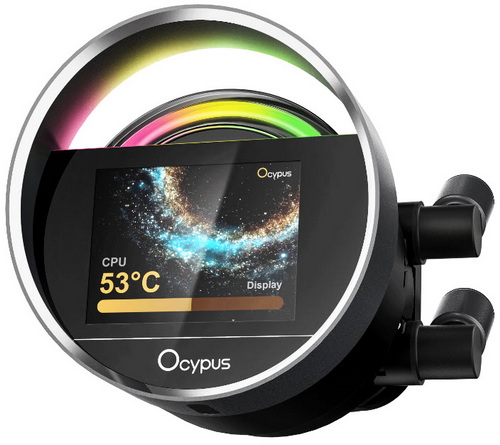
    The Sigma L36 ARGB is built as a flagship‑style 360mm AIO (300W TDP) that blends cooling performance with a strong visual identity. Ocypus frames it as “craftsmanship reimagined,” and the design leans heavily into that idea, the pump housing integrates a 2.4" IPS display (320×240px) surrounded by a uniform ARGB ring, giving the cooler a futuristic, pixel‑driven aesthetic rather than the usual rectangular LCD block. The 397x120x27mm aluminum radiator follows a clean, minimalist layout, while the ARGB implementation across the 120mm ARGB fans (2000RPM/73CFM/4.3mmH₂O/29dBA) and 3-phase, 6-pole ceramic pump (3100 RPM ±10%, 27dBA) is tuned for uniform diffusion rather than harsh hotspots. Available in both BK (black) and WH (white) variants, the Sigma L36 ARGB positions itself as a premium visual centerpiece for high‑end builds, pairing its design language with the expected 360mm thermal capacity for modern CPUs.


SPECIFICATIONS AND FEATURES


PACKAGING AND CONTENTS


ocypus sigma l36 rgb review 1t

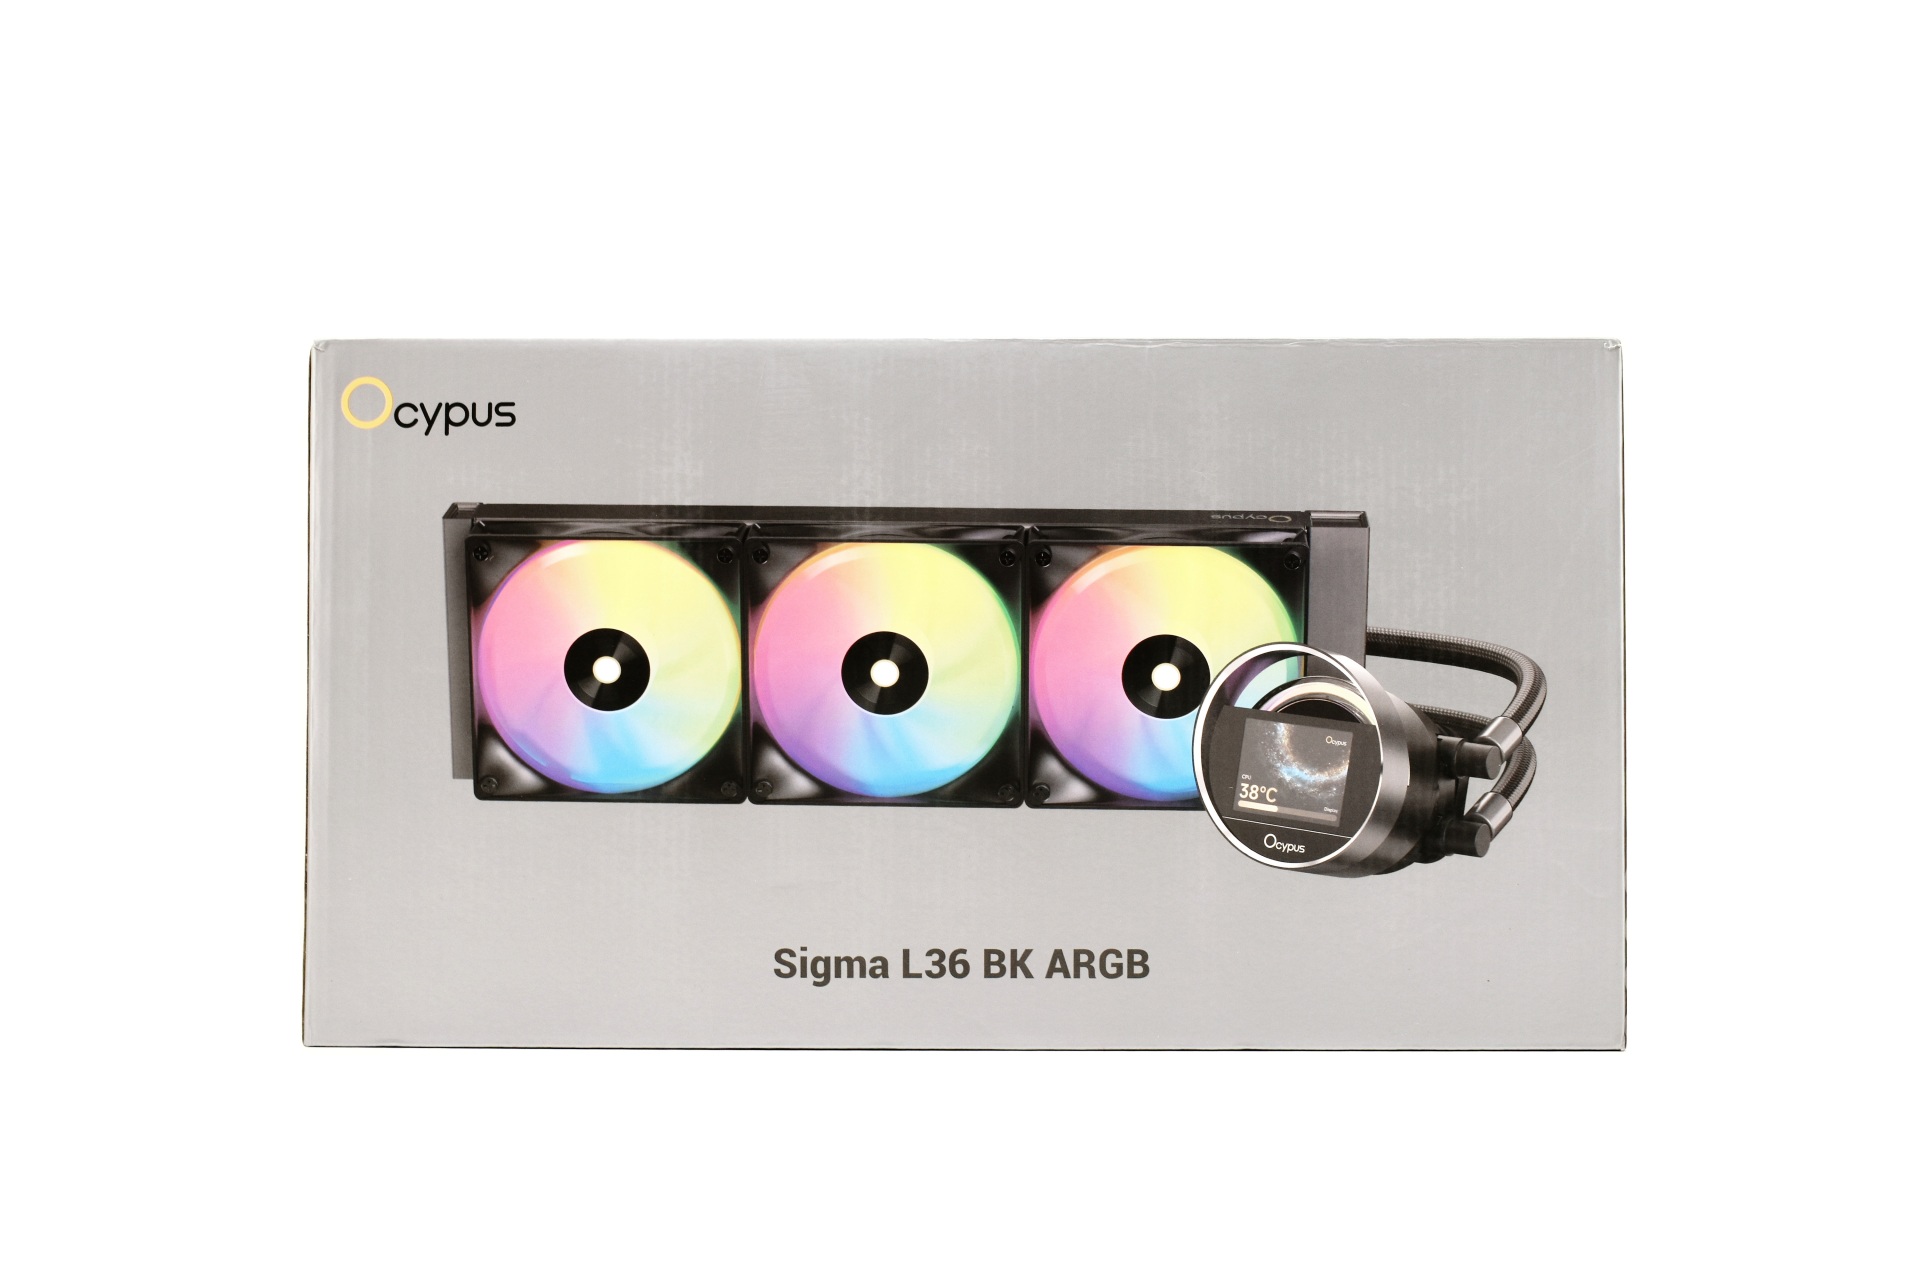
Ocypus packs the Sigma L36 inside a silver box the front of which is taken by a large product picture and their logo.


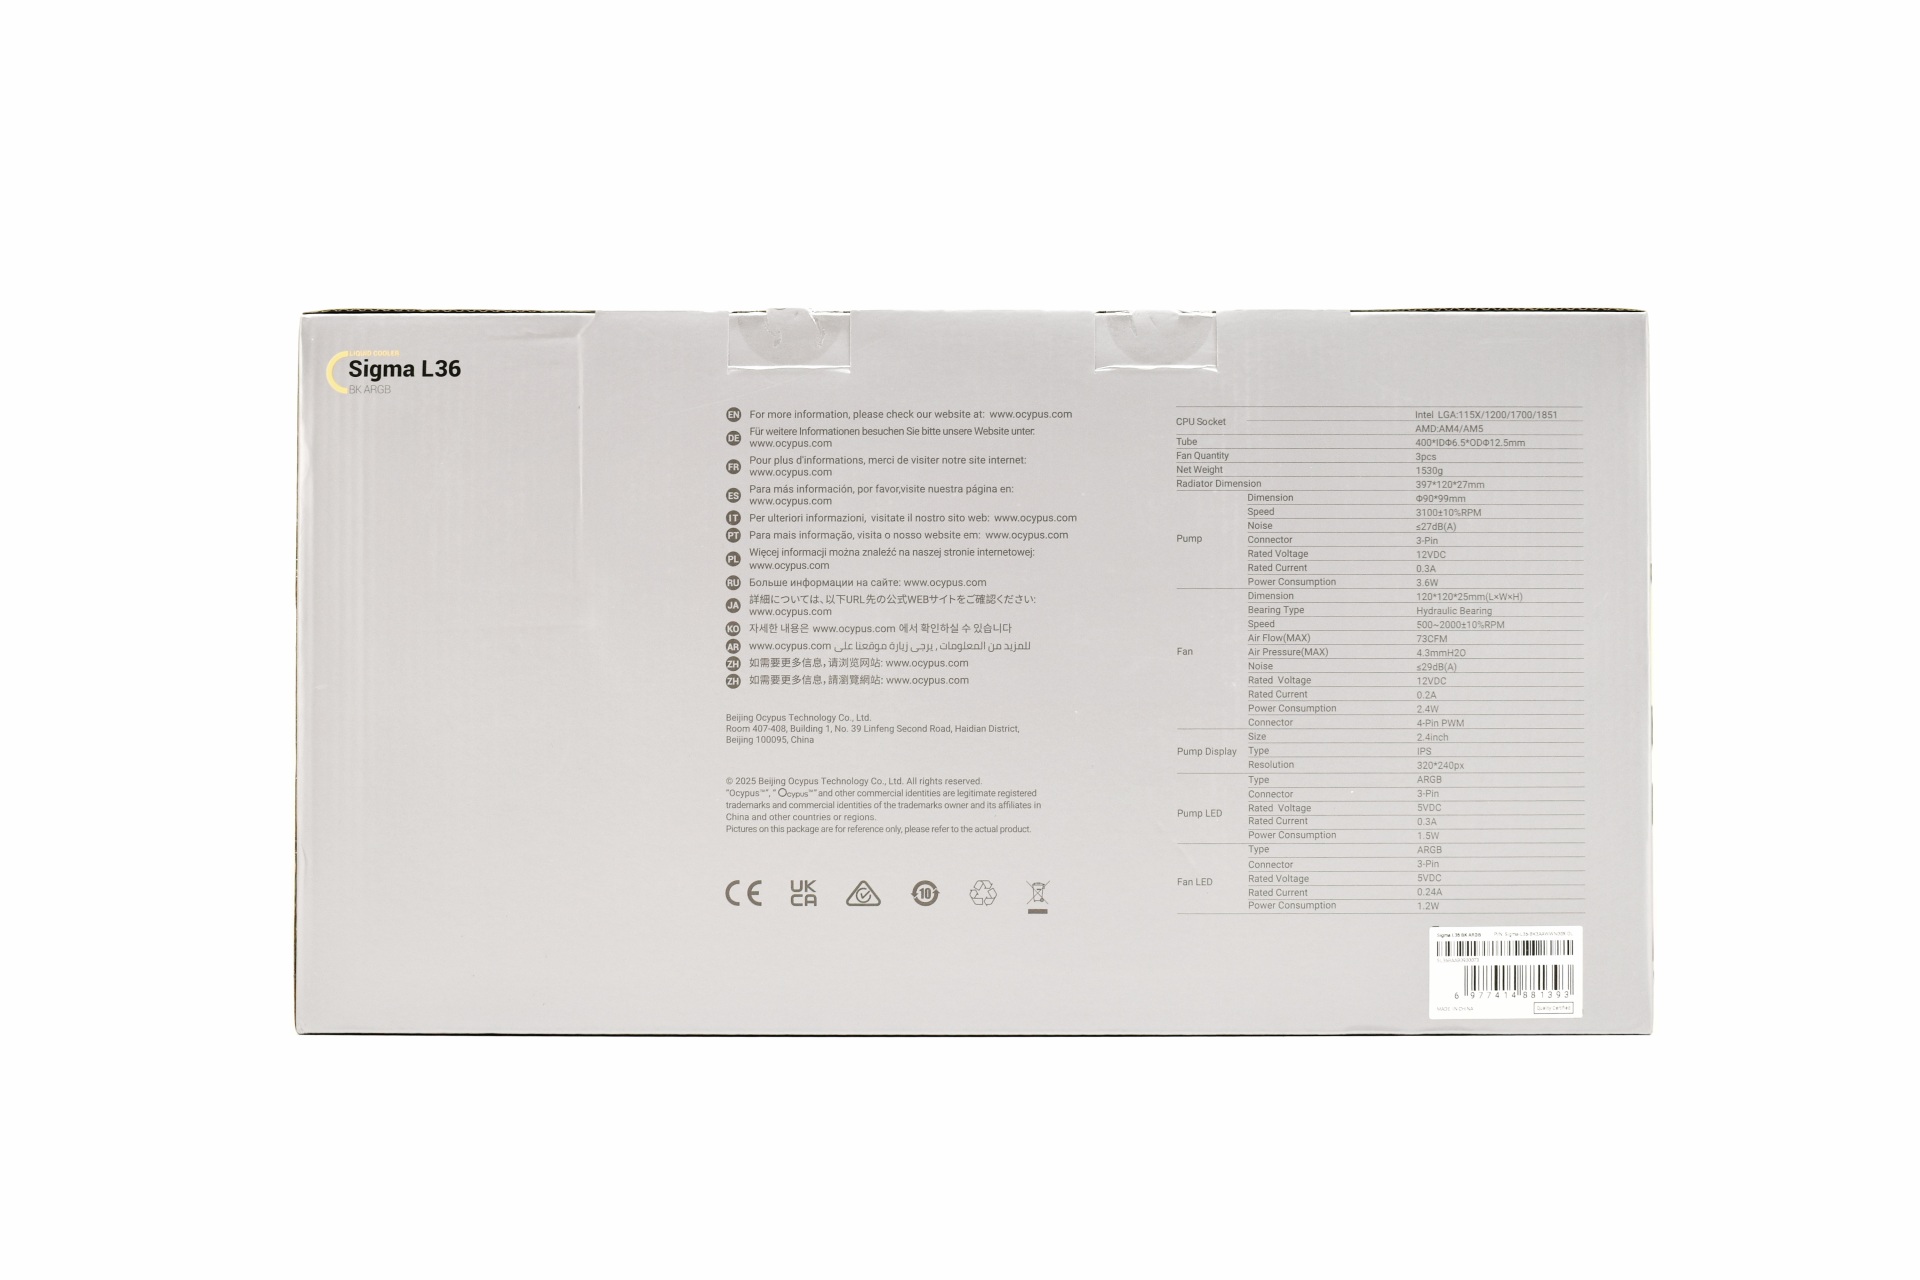
The product specifications are printed at the rear of the box.


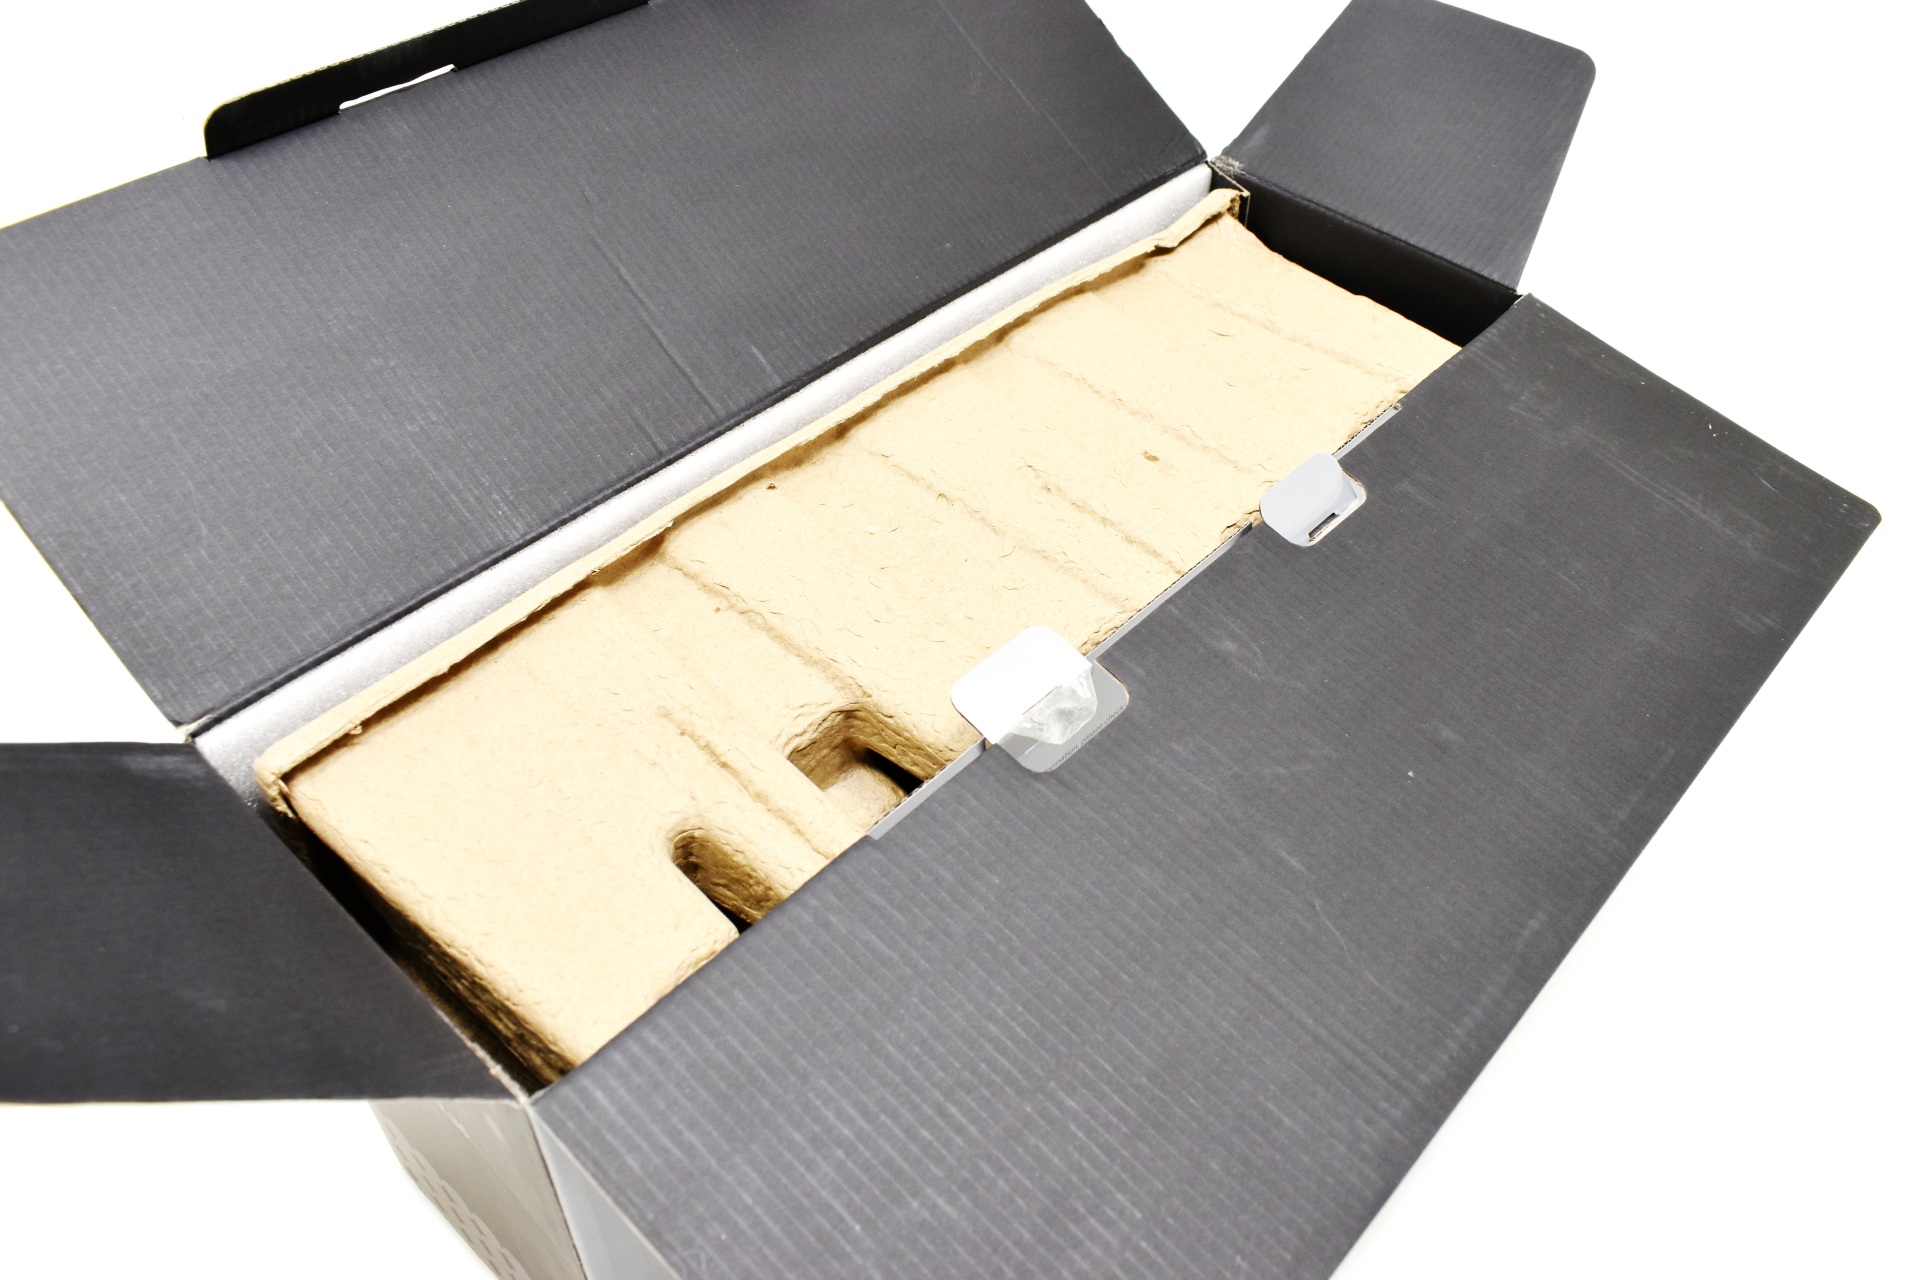
Typically, the AIO is placed inside a formed piece of cardboard.


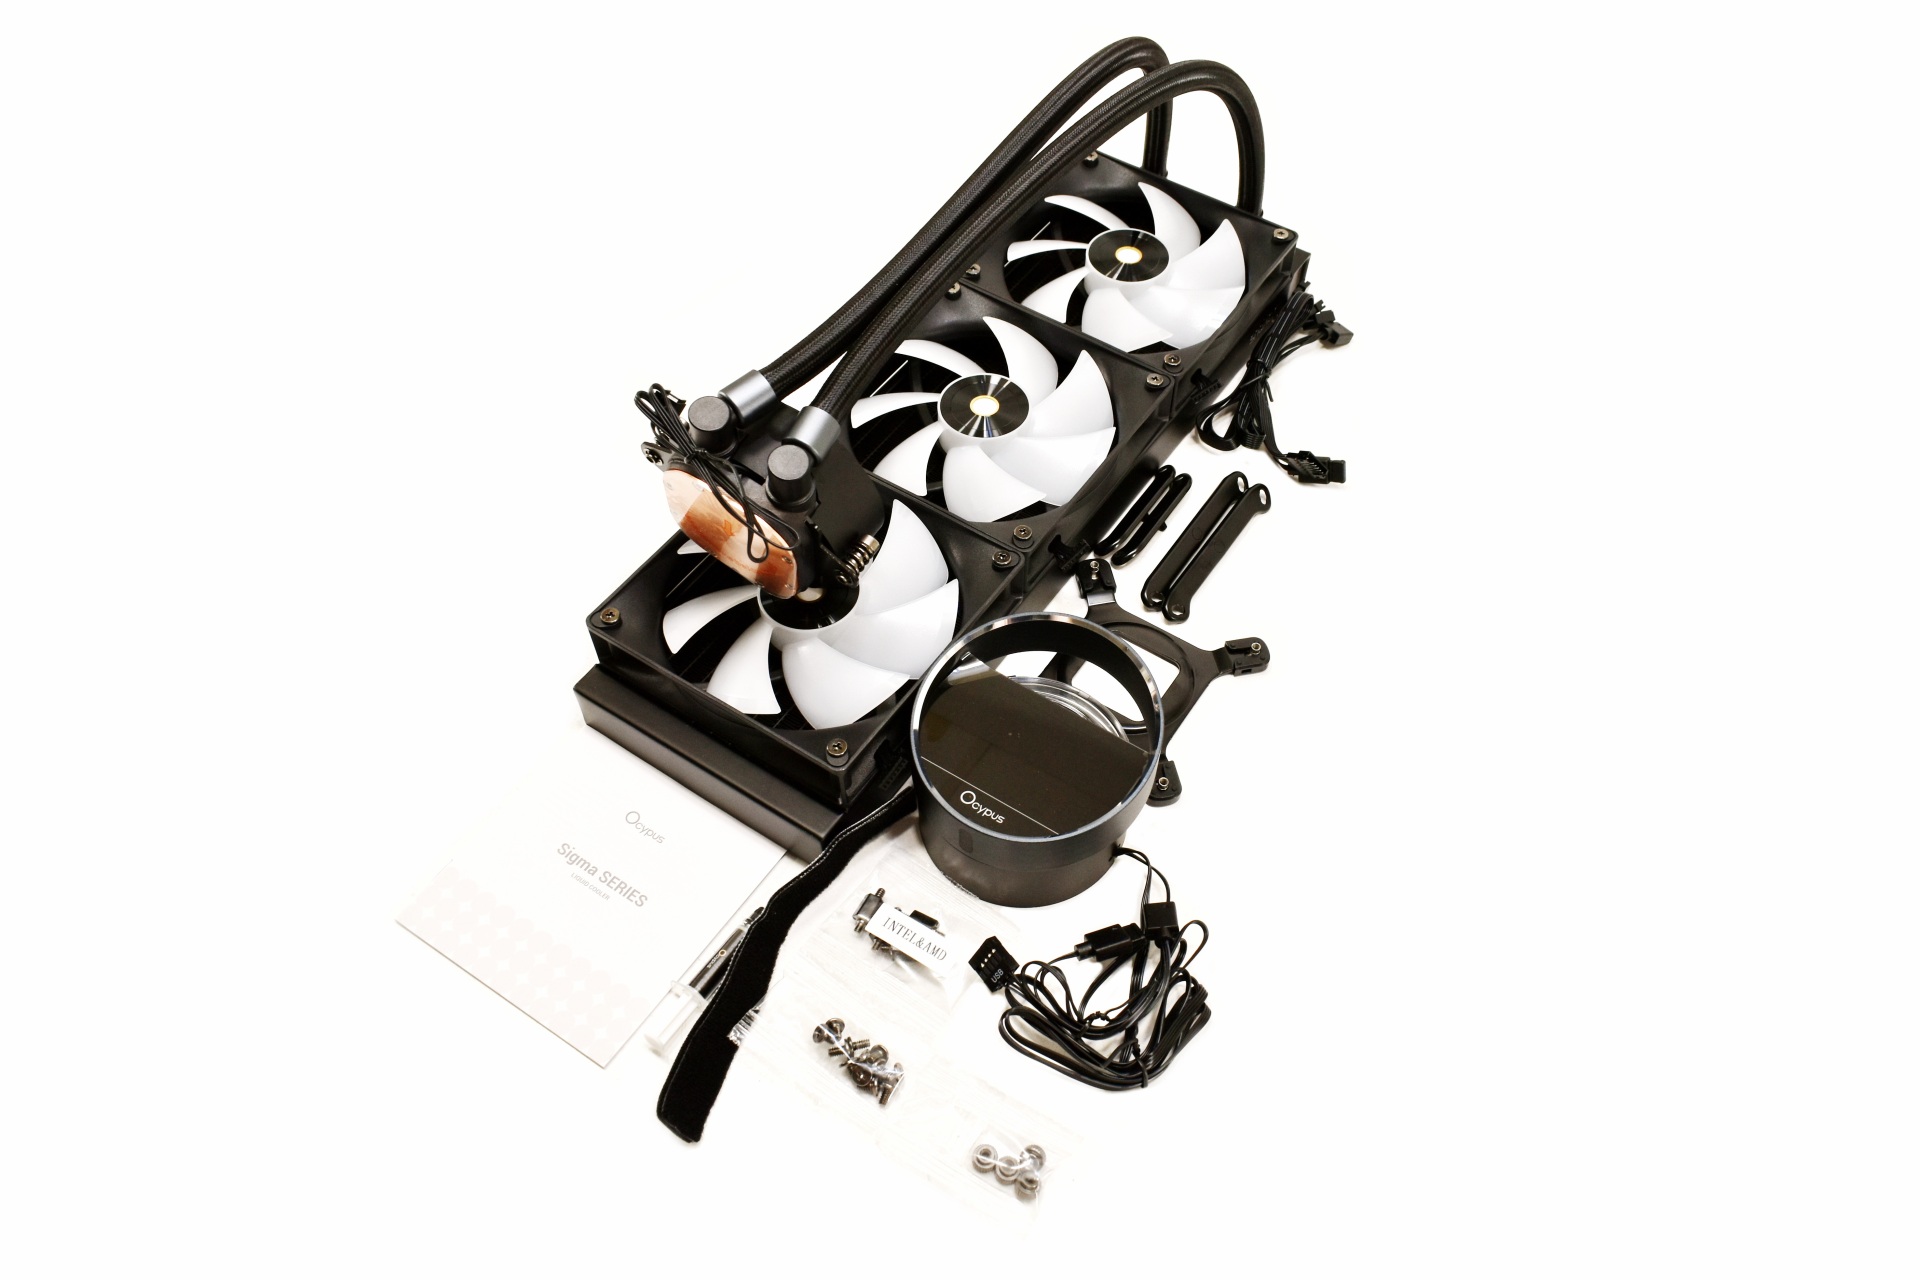
Along with the Sigma L36 and its three 120mm ARGB fans (pre-mounted) inside the box you'll also find the magnetically attached 2.4" IPS display, thermal paste tube, small 3-pin extension cable, backplate and all the necessary bits to install the AIO onto LGA 1150/1151/1155/1200/1700/1851 and AMD AM4/AM5 motherboards.


THE SIGMA L36 ARGB


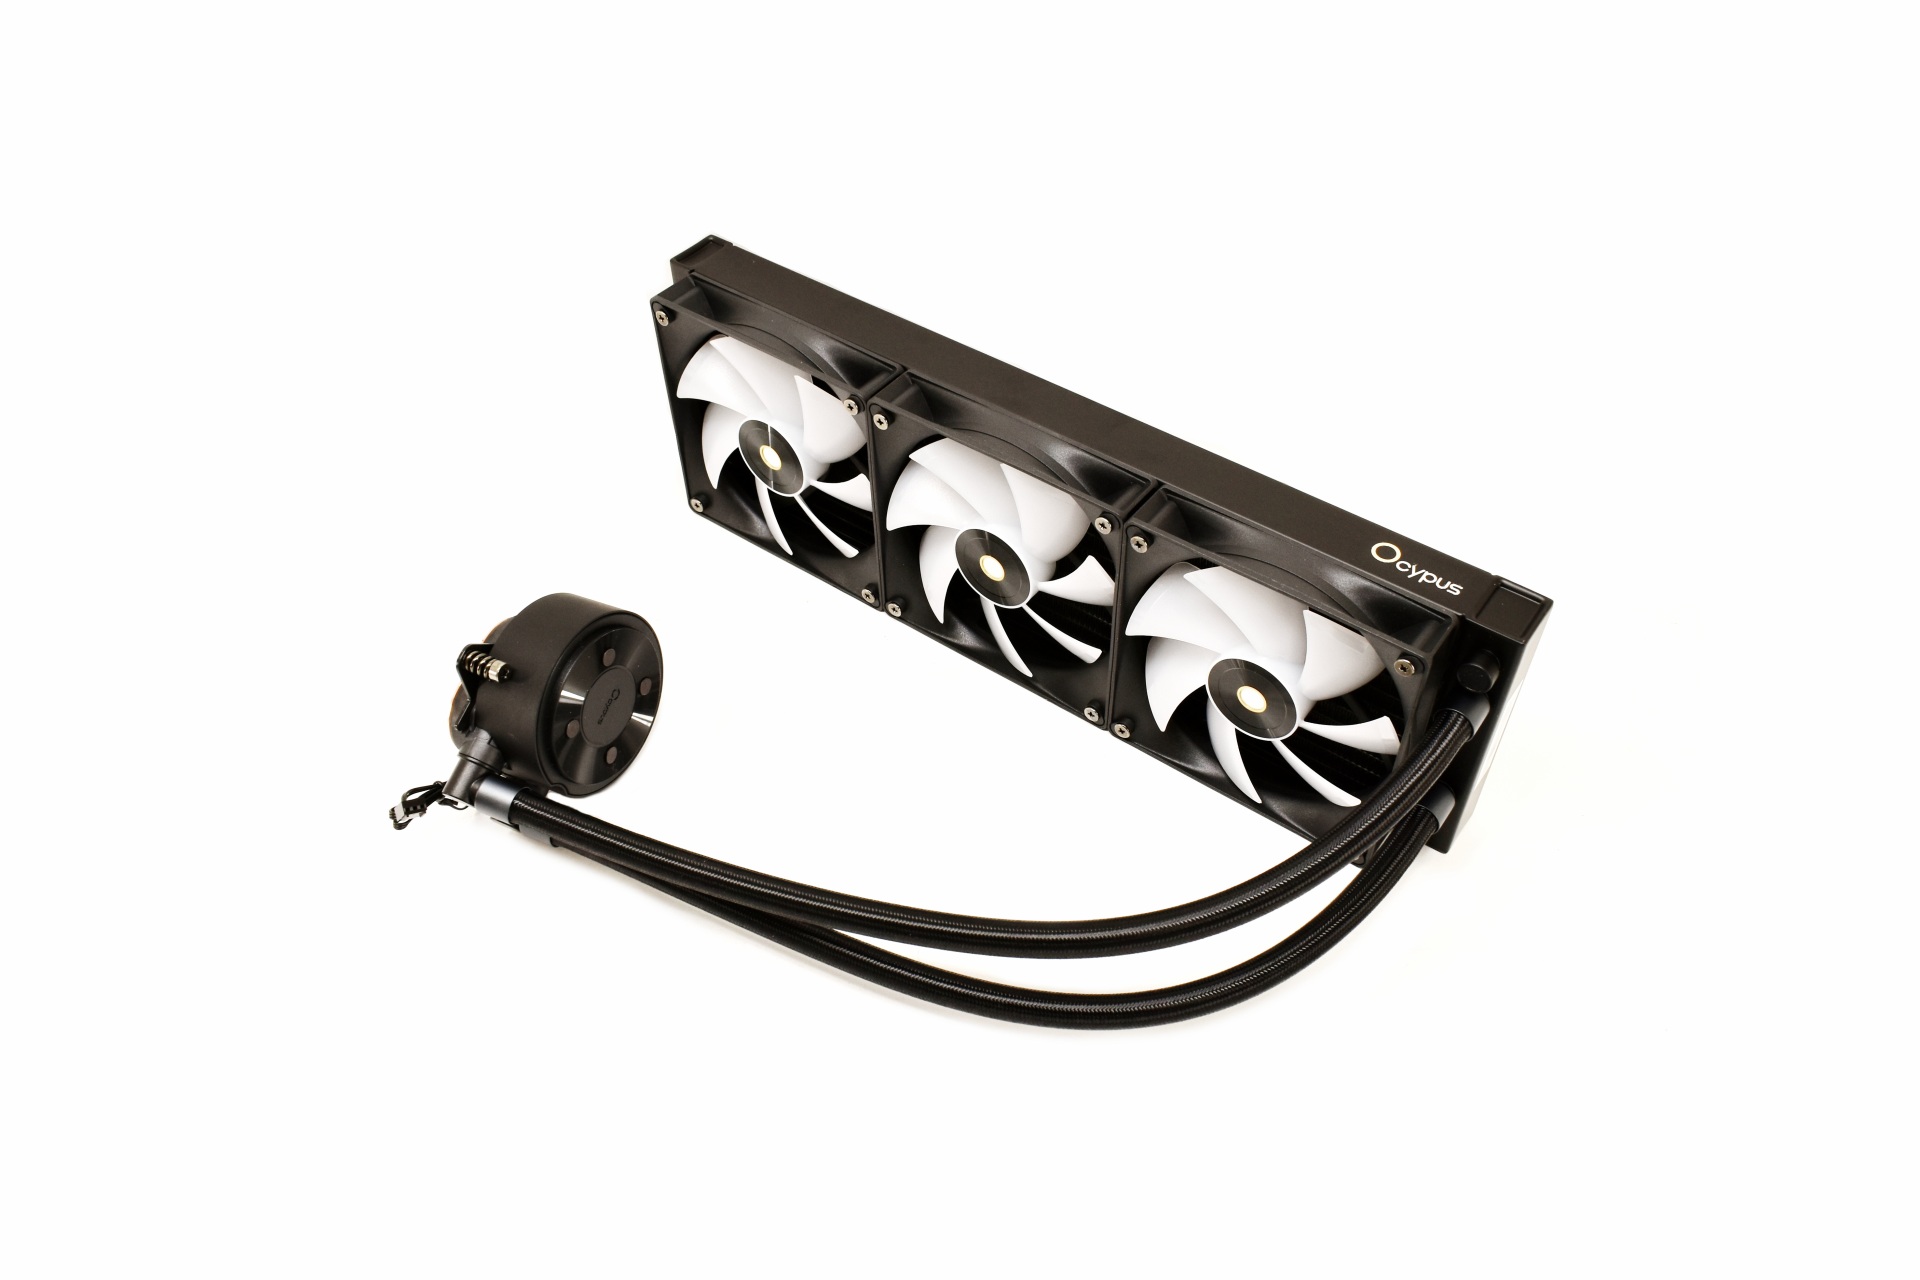
Just like with the L36 Pro the Sigma L36 ARGB doesn't stand out without its IPS screen attached.


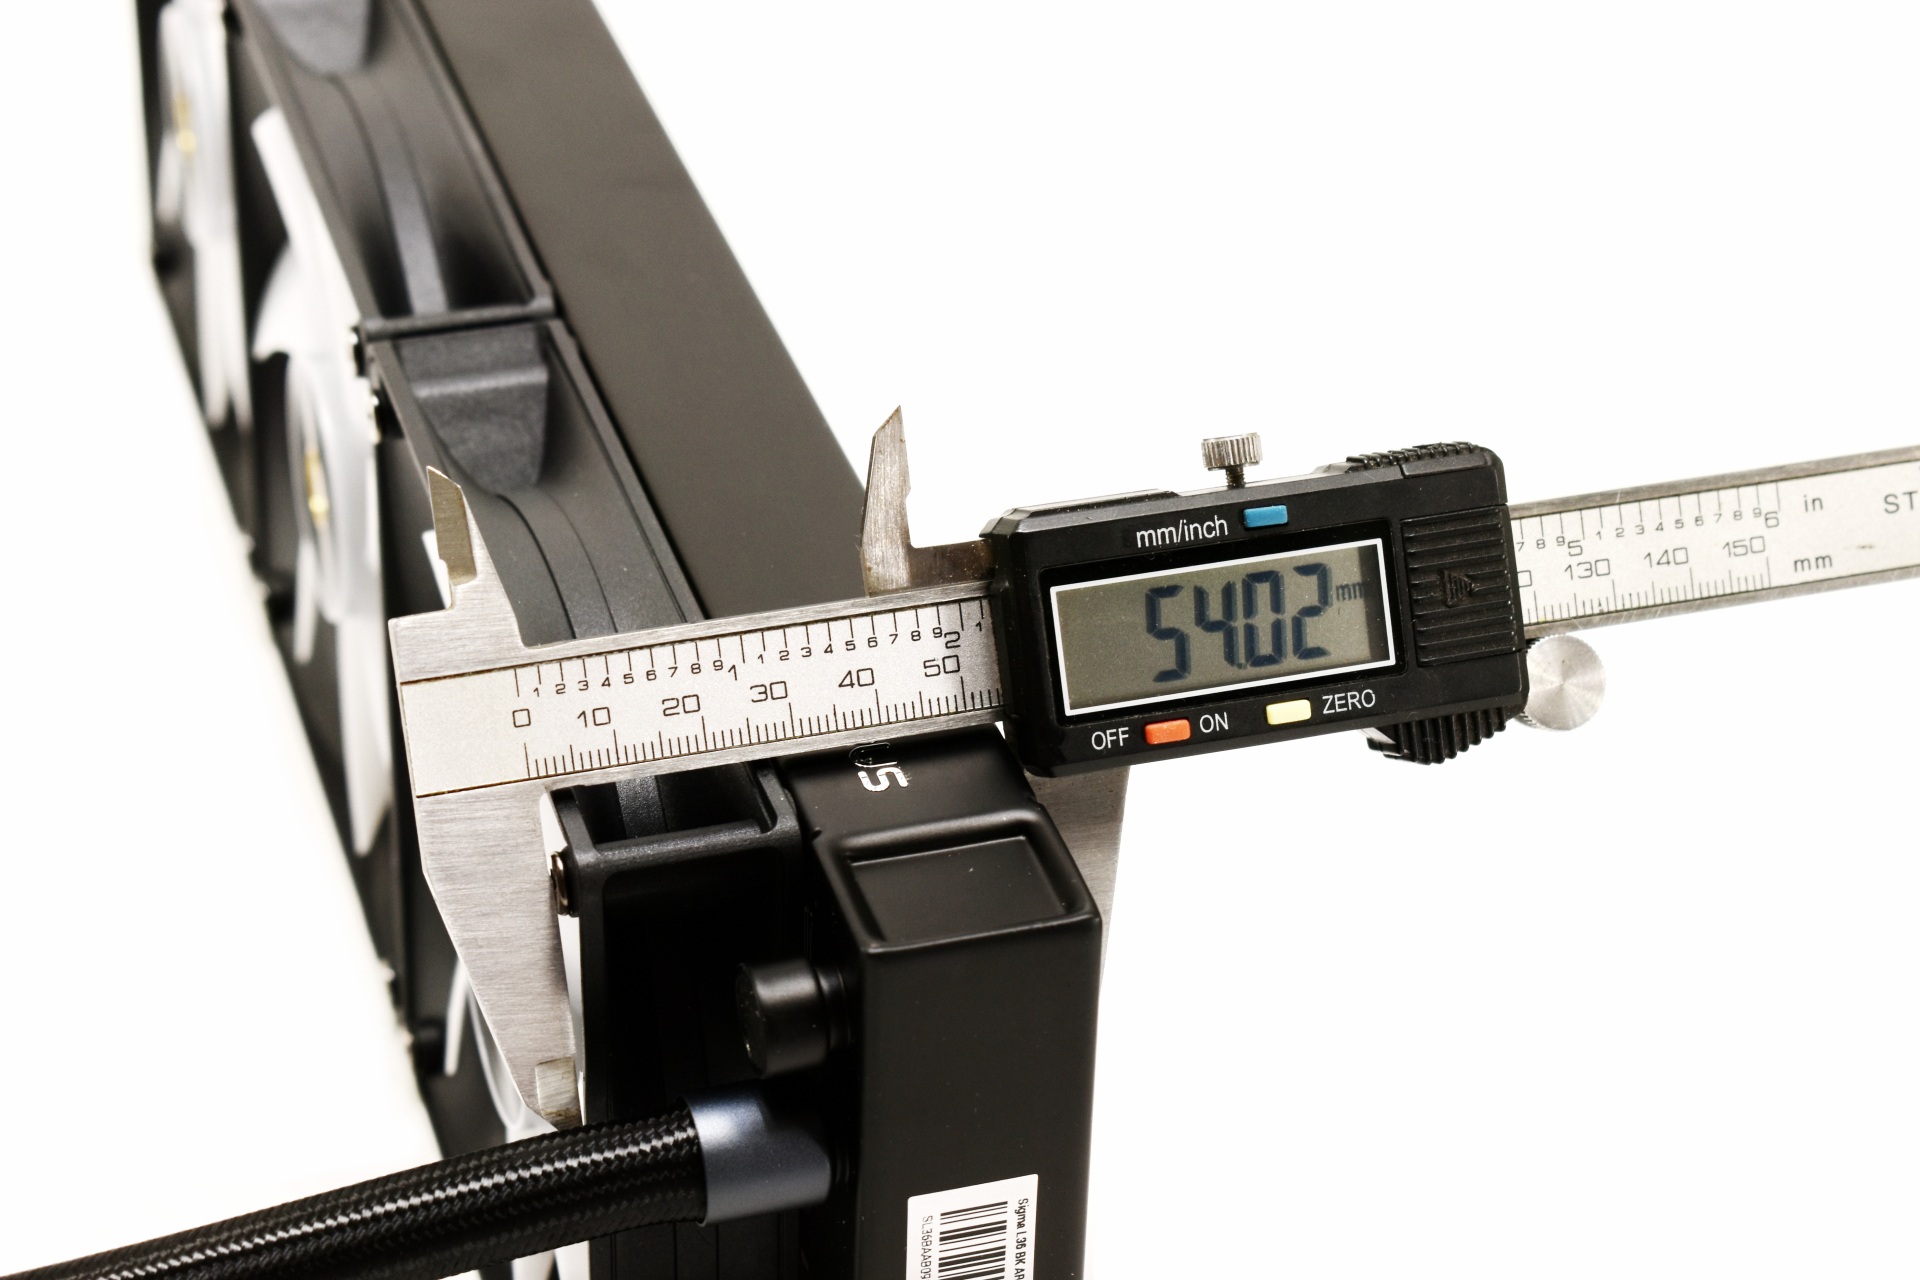
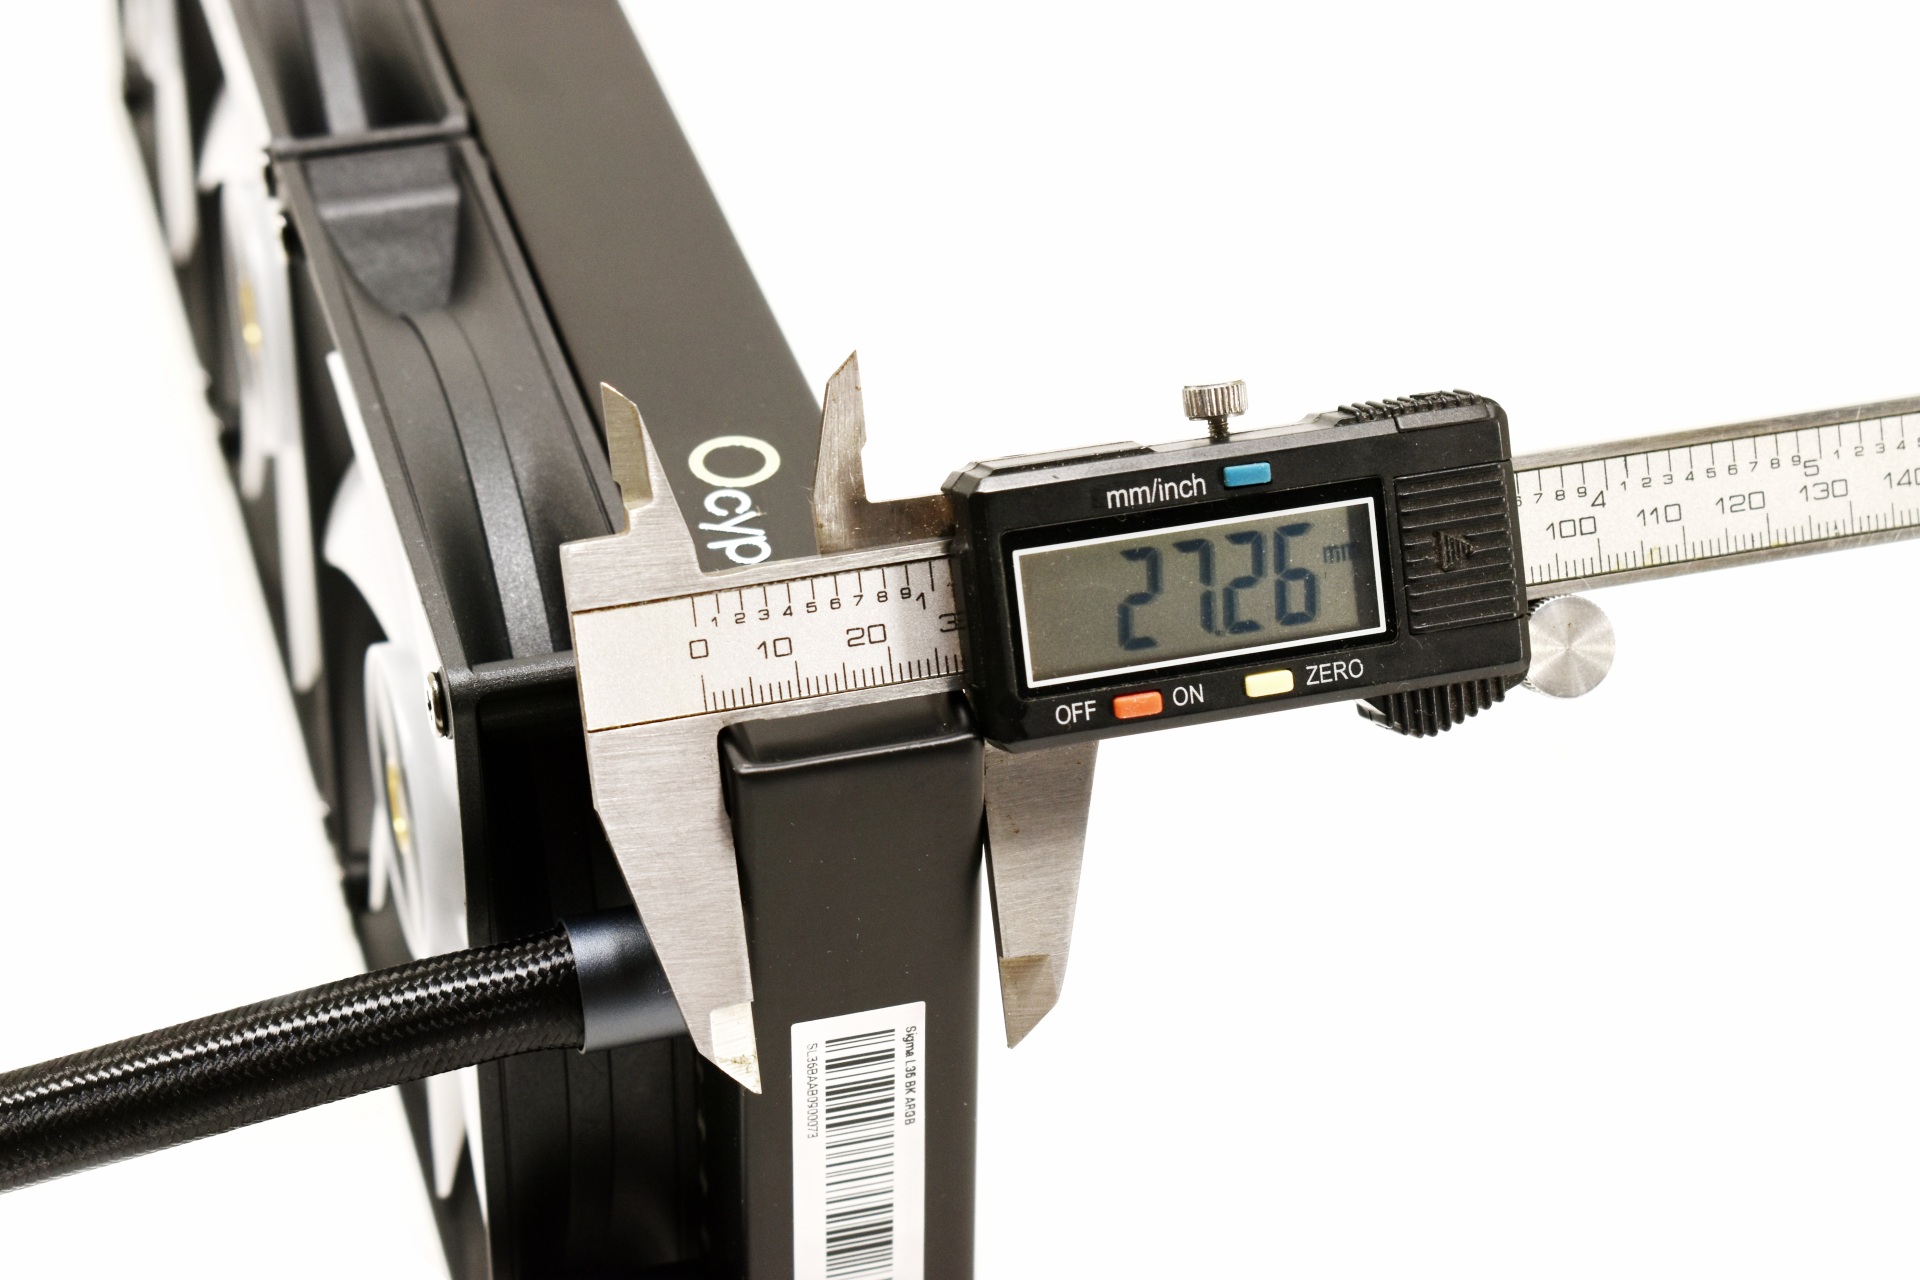
The 397mm long aluminum radiator measures around 27mm in thickness without the fans and 54mm with them.


FPI count for the specific radiator is 20.


Ocypus has equipped the Sigma L36 with 400mm long tubes which should be sufficient for most cases.


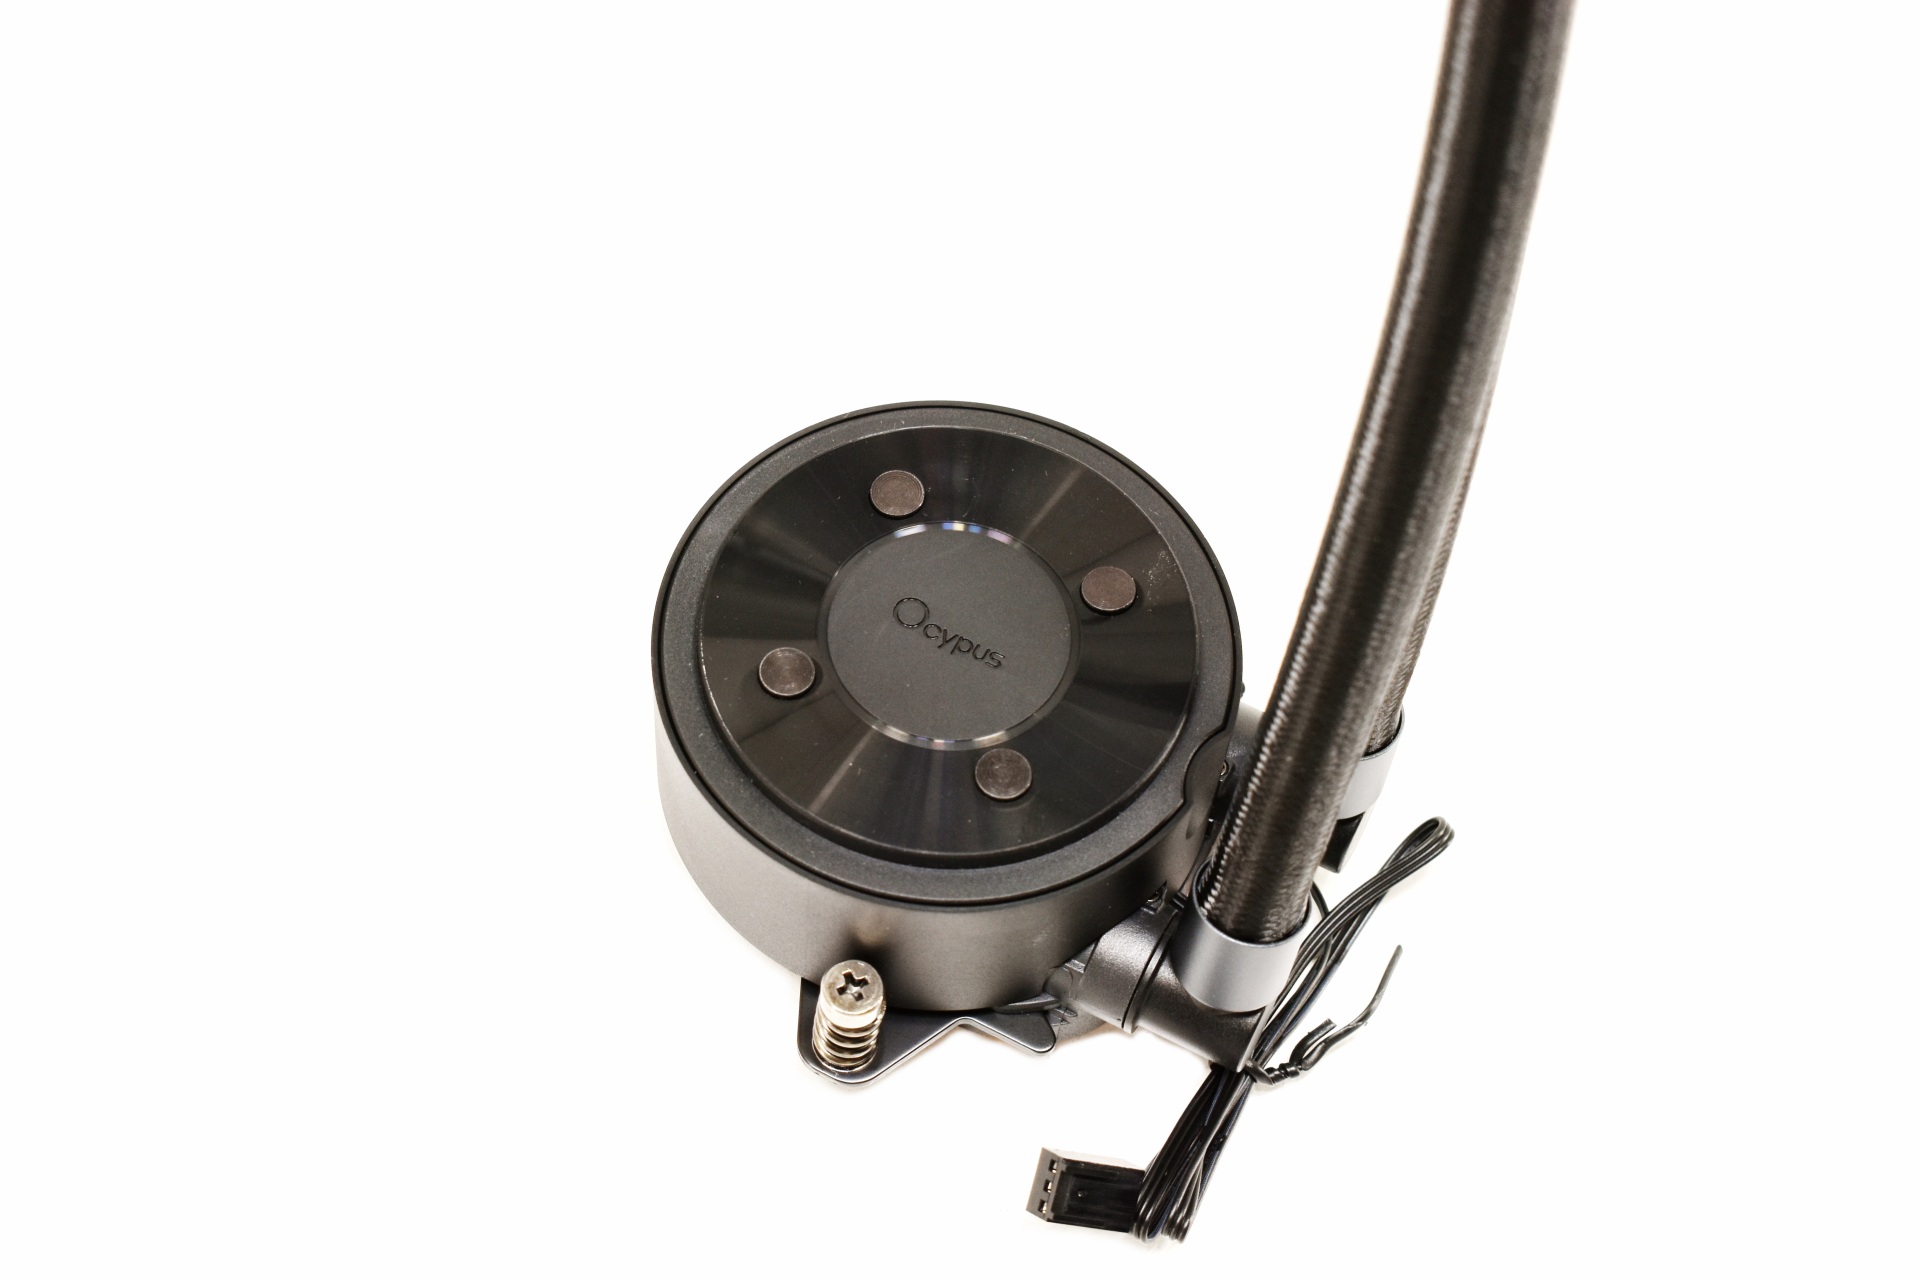
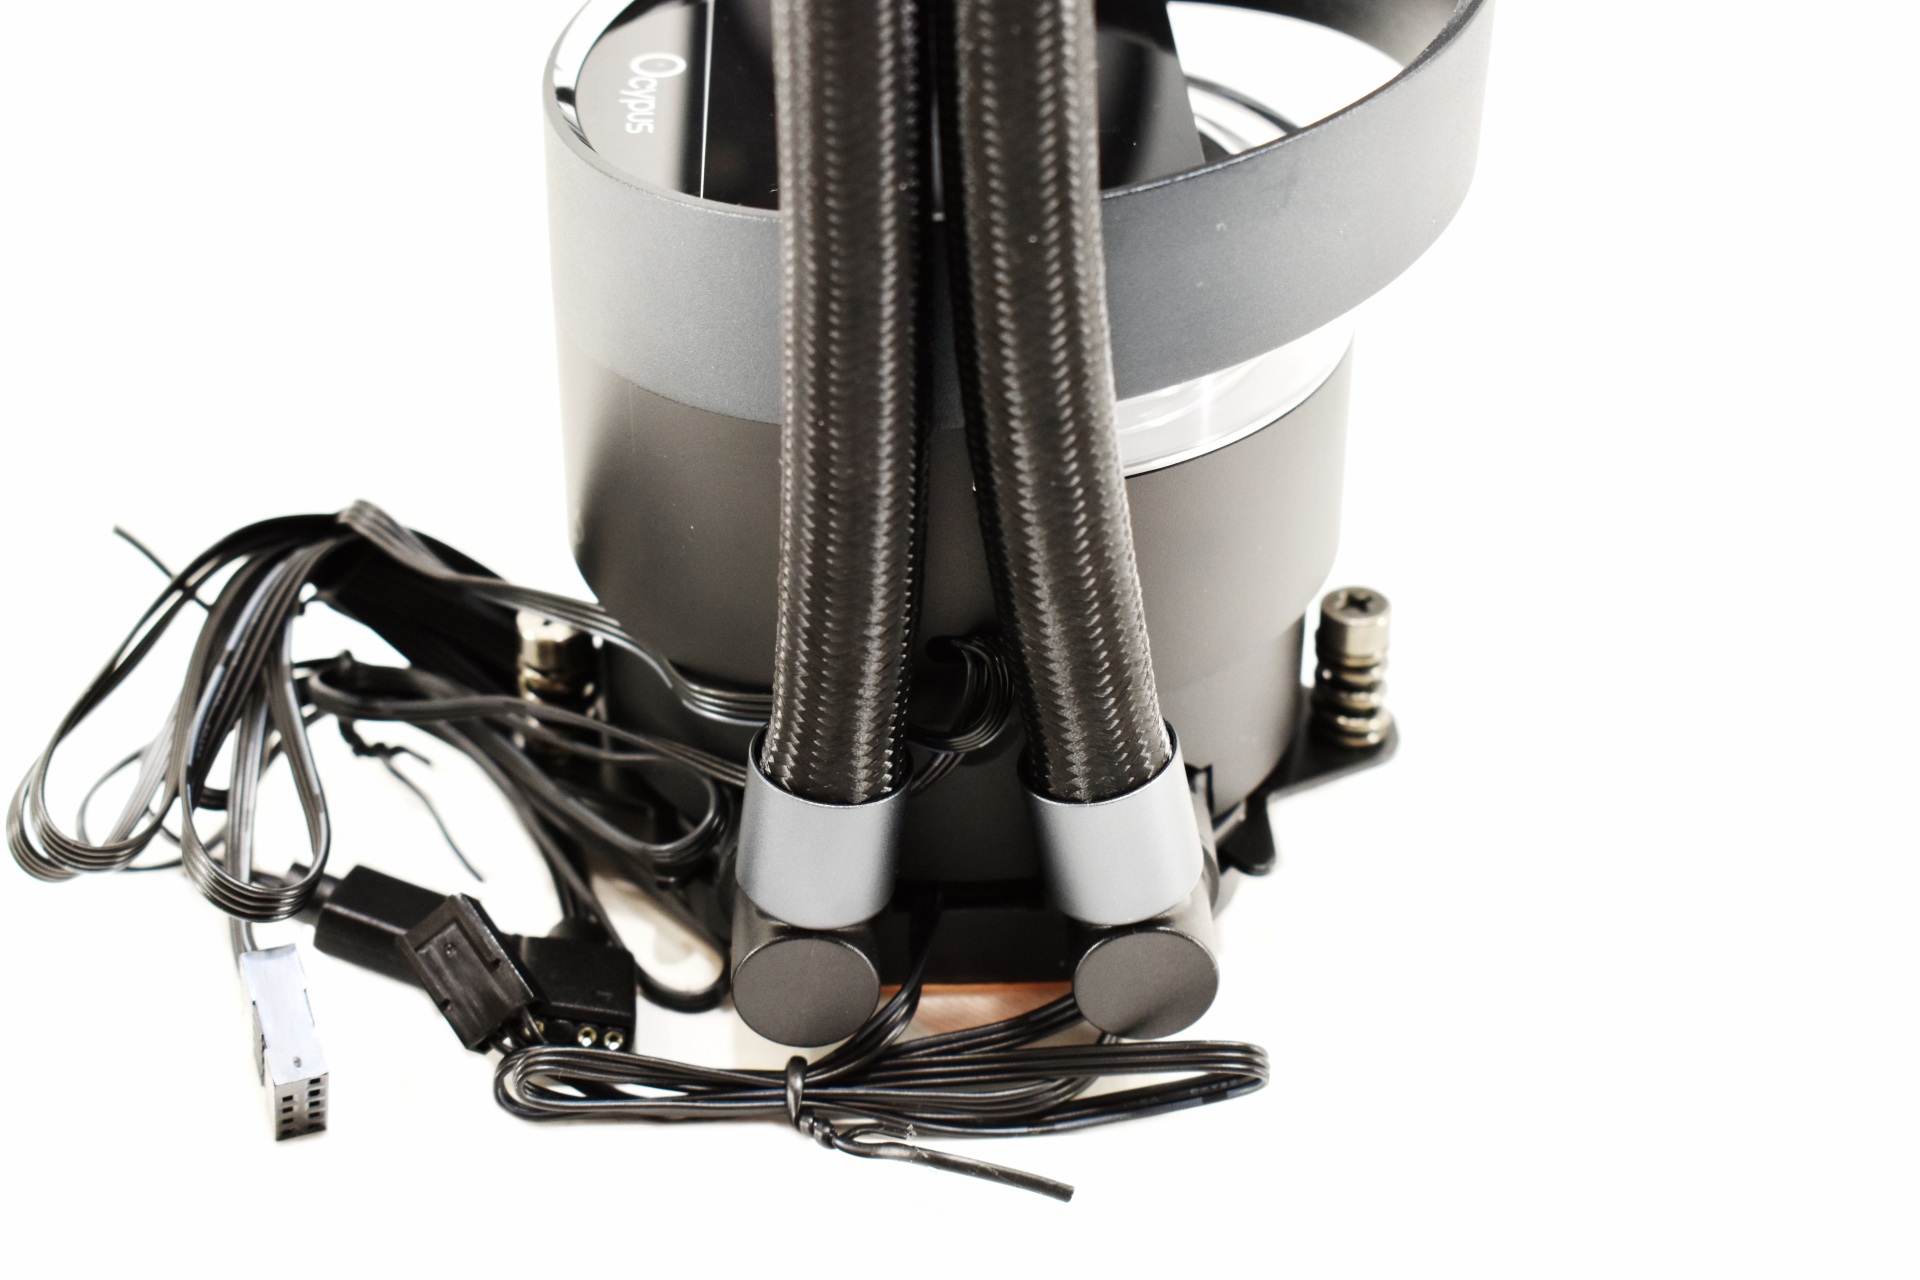
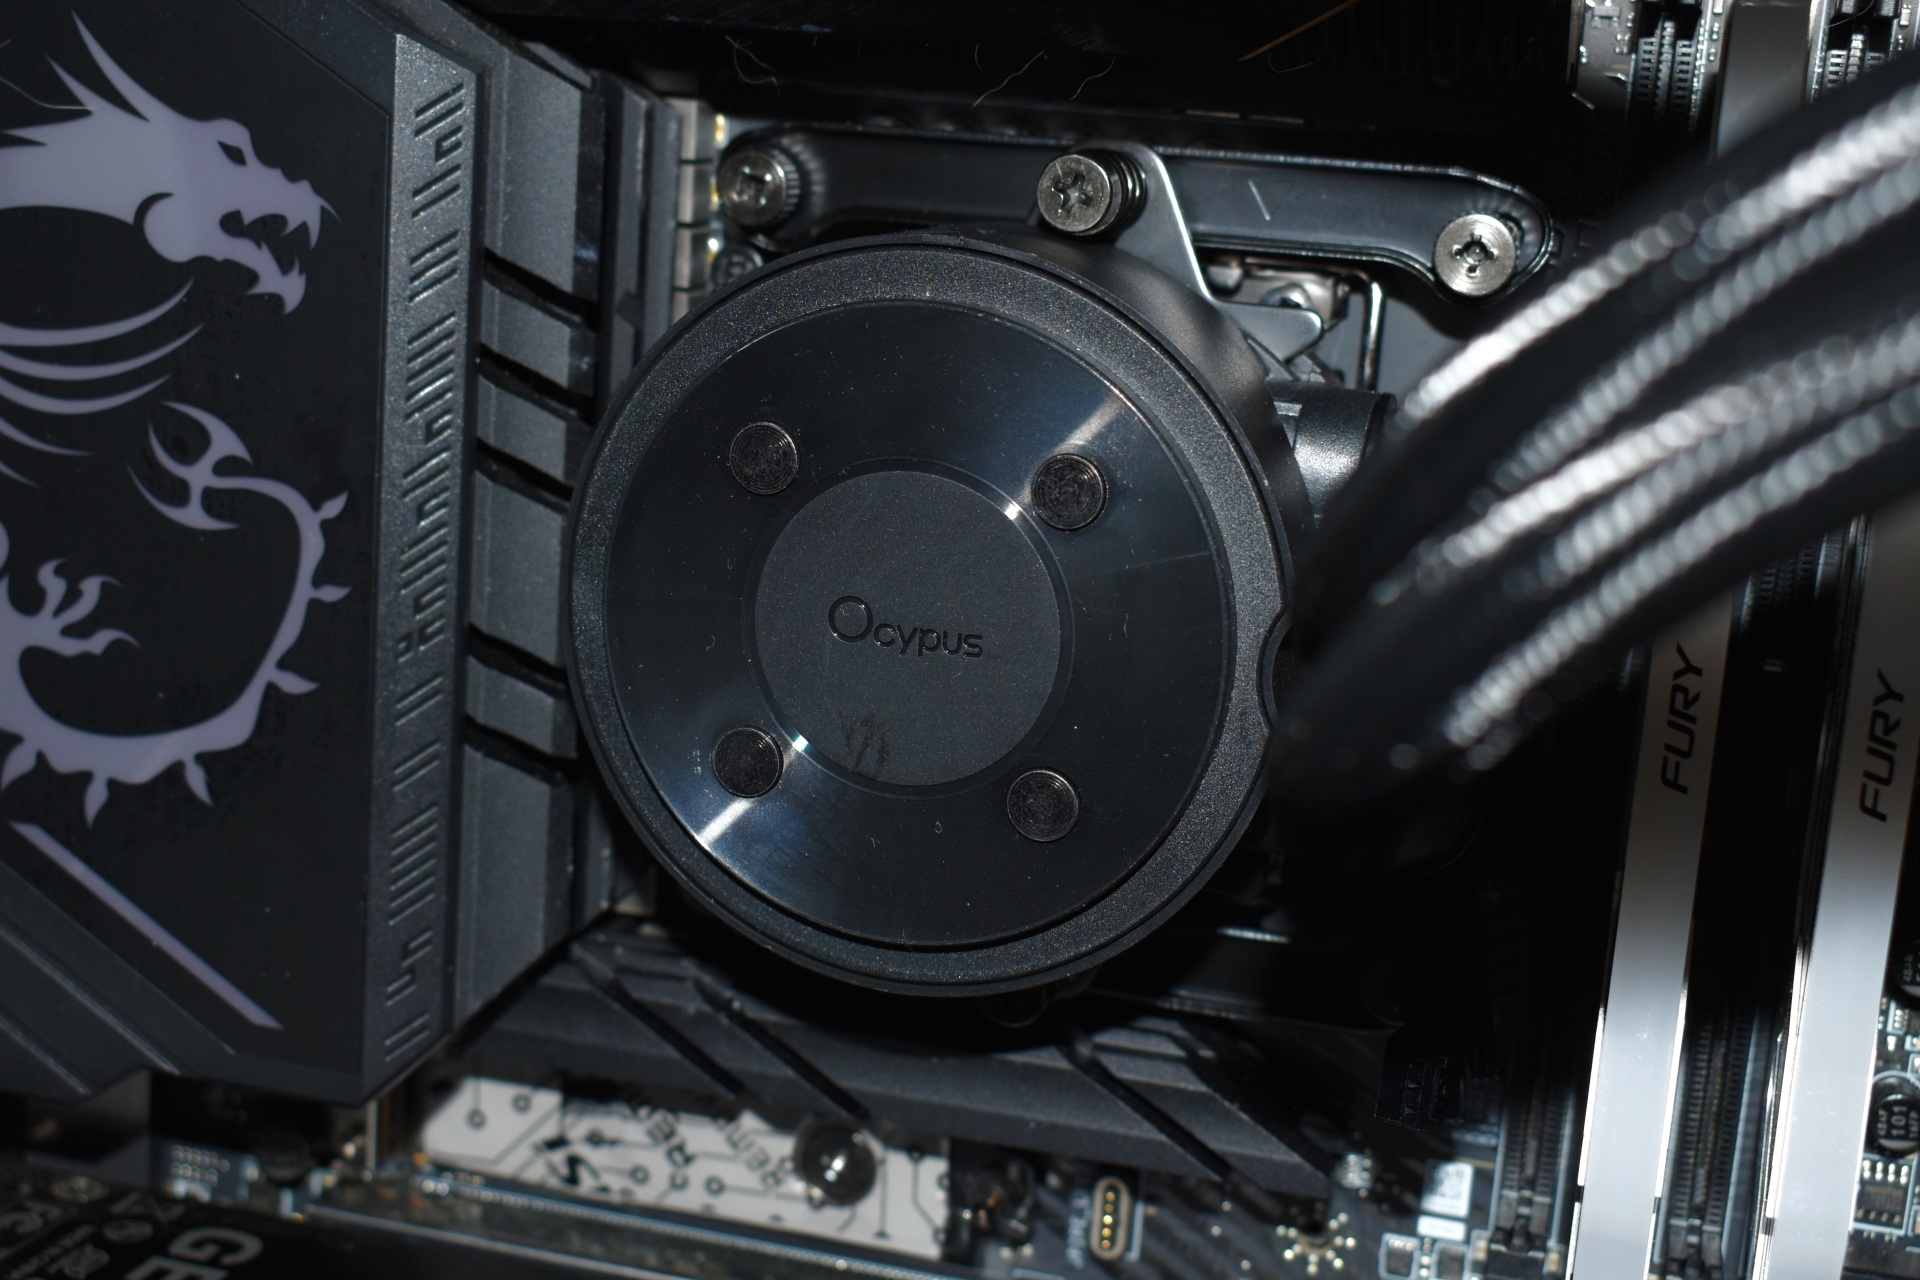
The company name is placed on top of the pump along with 4 round metal pieces.


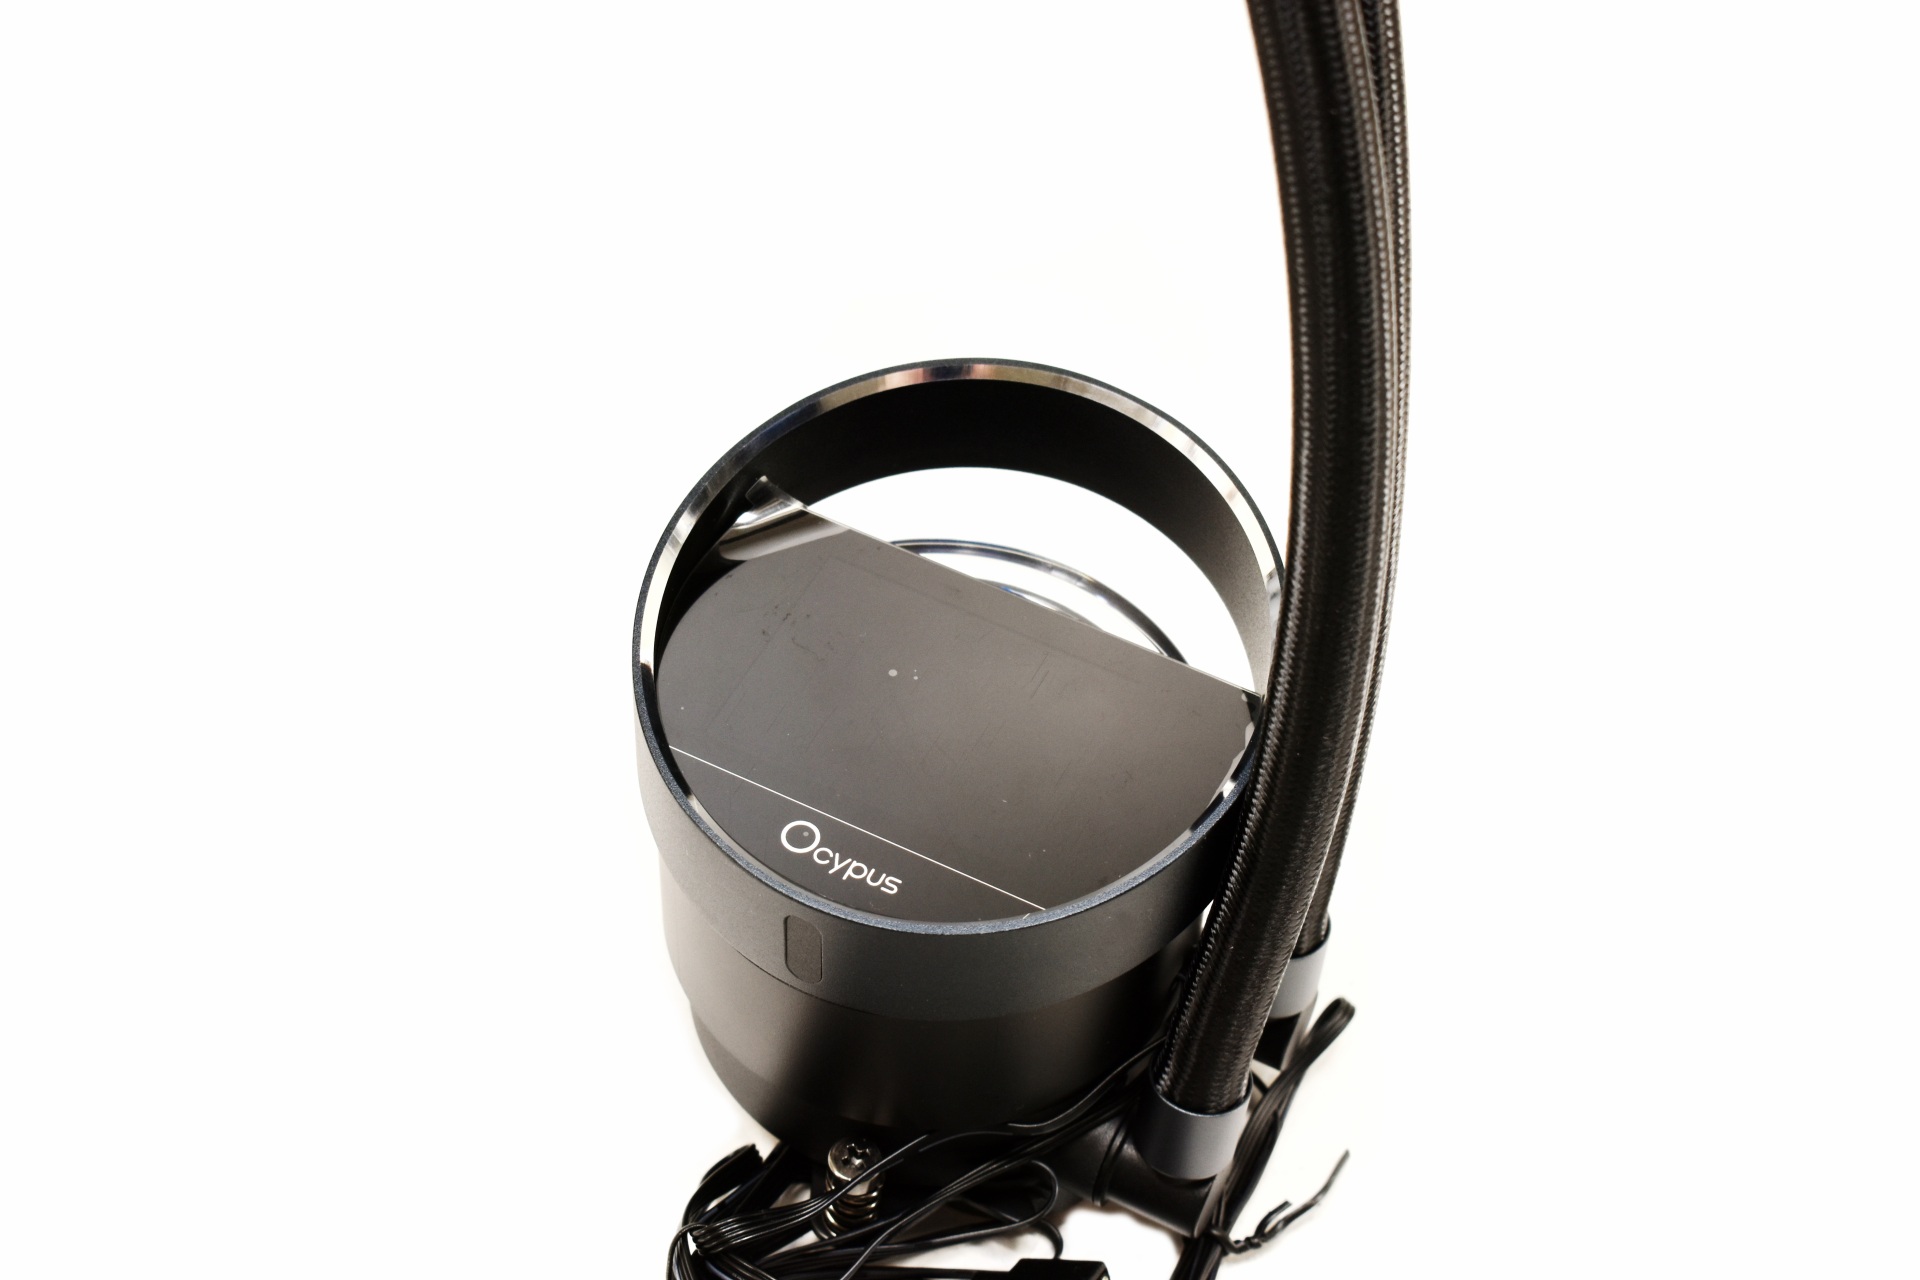
Once again, the magnetically attached IPS display is very convenient and again you can use the AIO even without attaching it.


Typically, the tubes can rotate up to slightly over 90 degrees from the base.


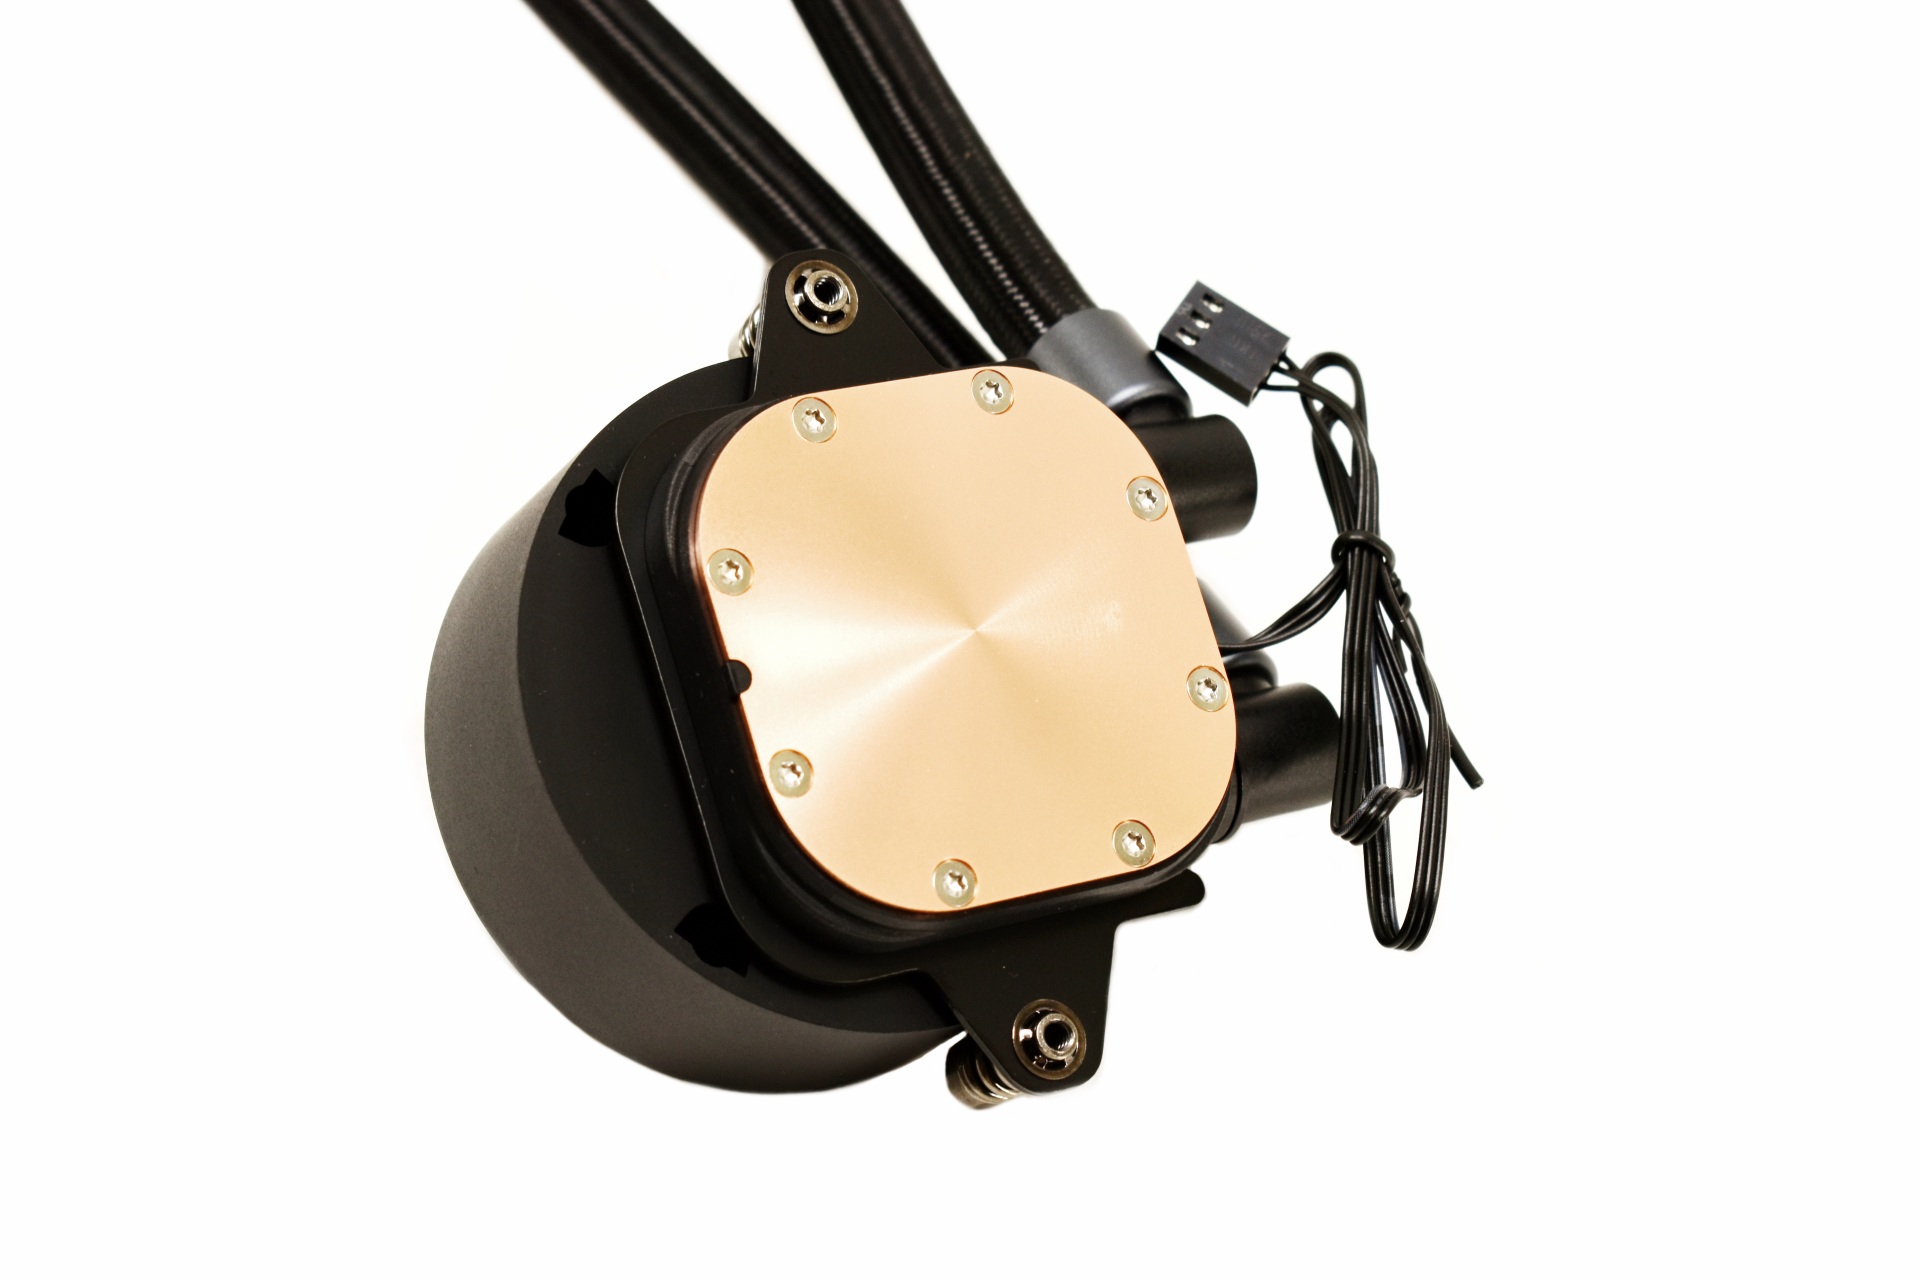
The L36 ARGB has a smaller Copper base compared to the L36 Pro and well, depending on the CPU that may actually be a good thing.


INSTALLATION


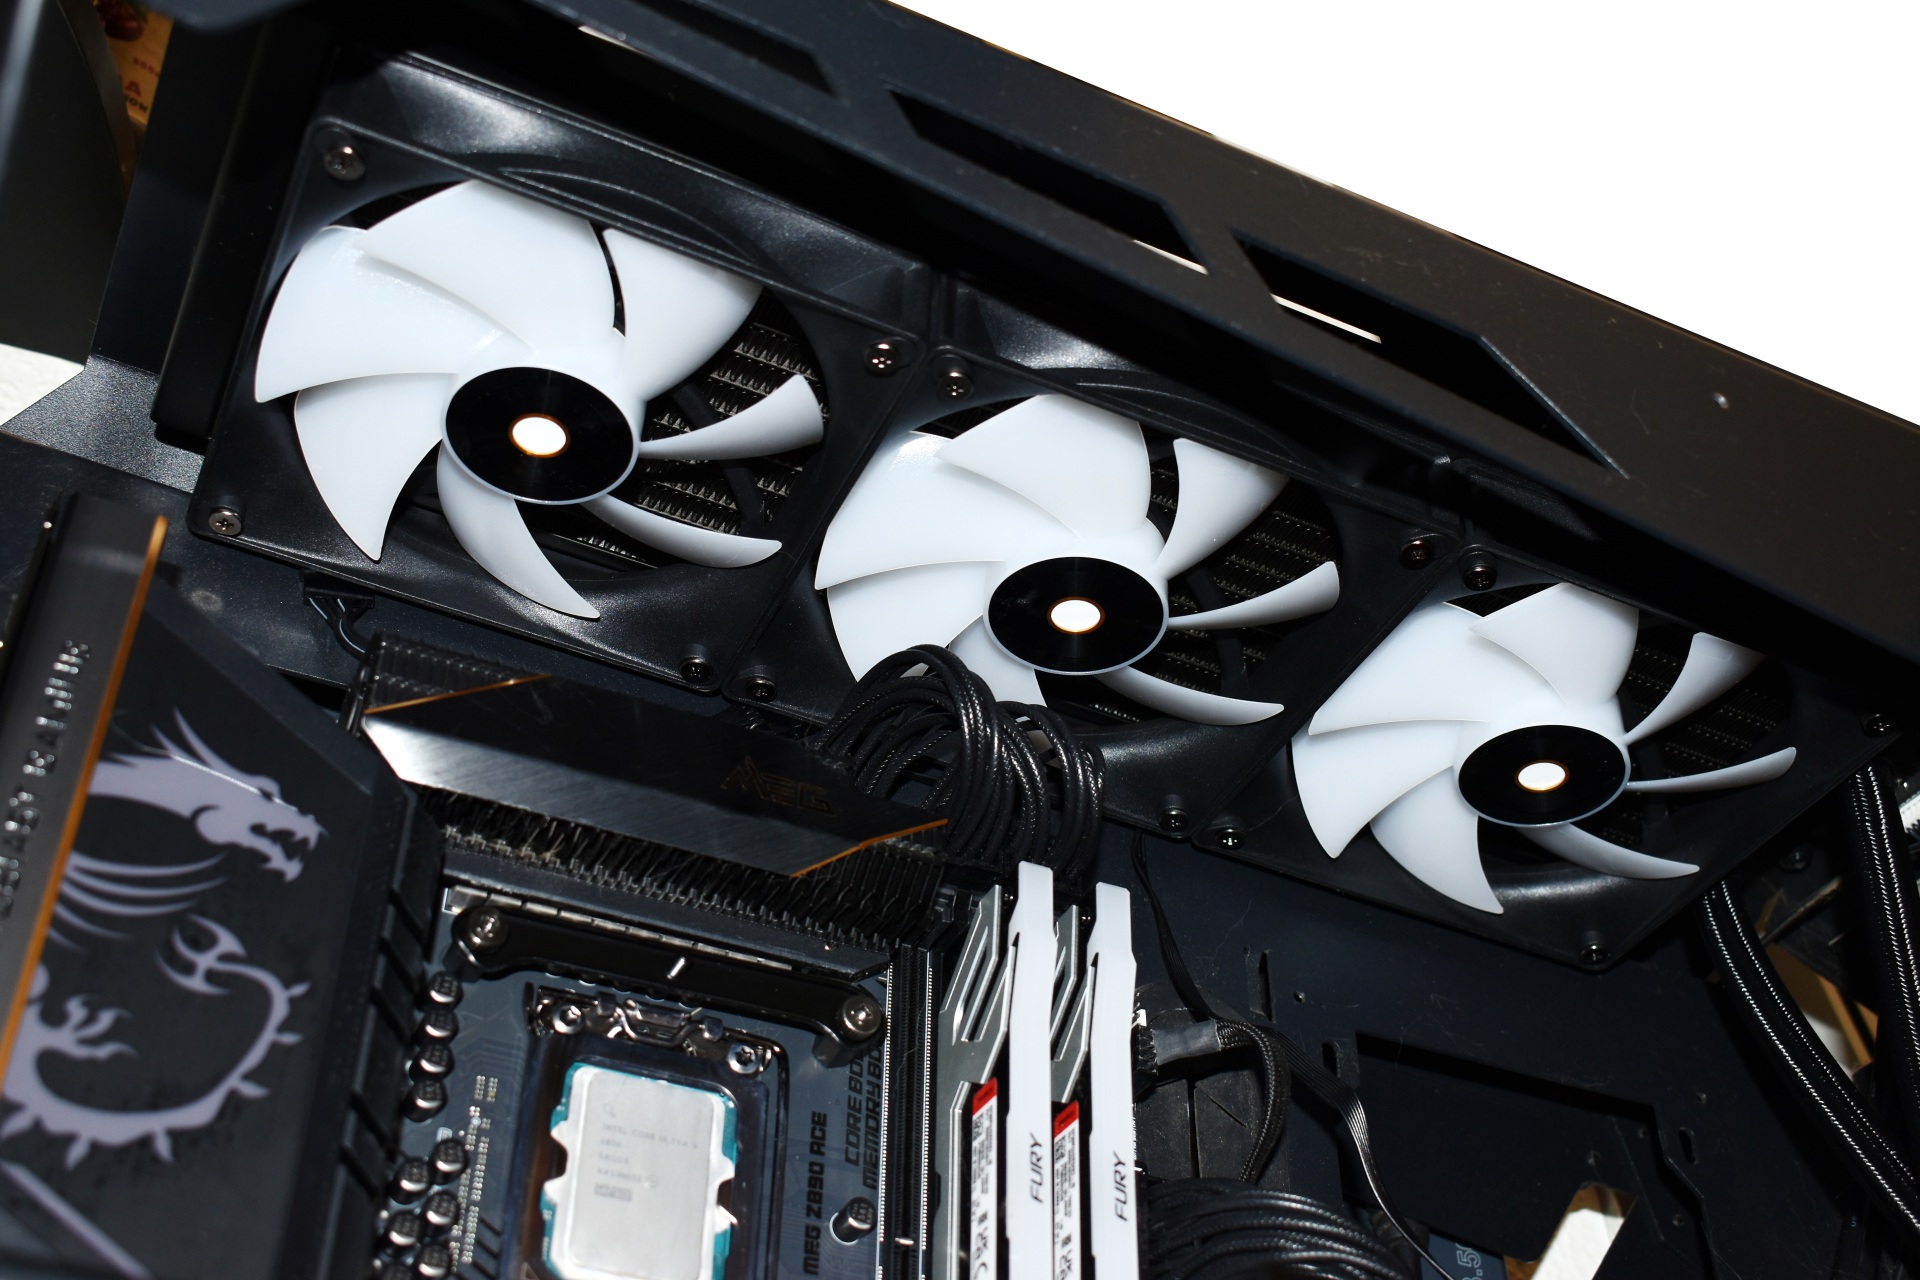
Let's begin by mounting the radiator on top as always.


After the radiator you will need to place the backplate at the rear, place the plastic standoffs on the inside side and secure the metal brackets with the thumbscrews.


Next is mounting the base as seen above.


Final step of course is to attach the IPS display and connect it with a motherboard USB and ARGB headers (as usual a short clip is available on TikTok and YouTube).


OCYPUS DISPLAY SOFTWARE


You can download and install the Ocypus Display software for control of the screen on the Sigma L36 ARGB.

display software 1t

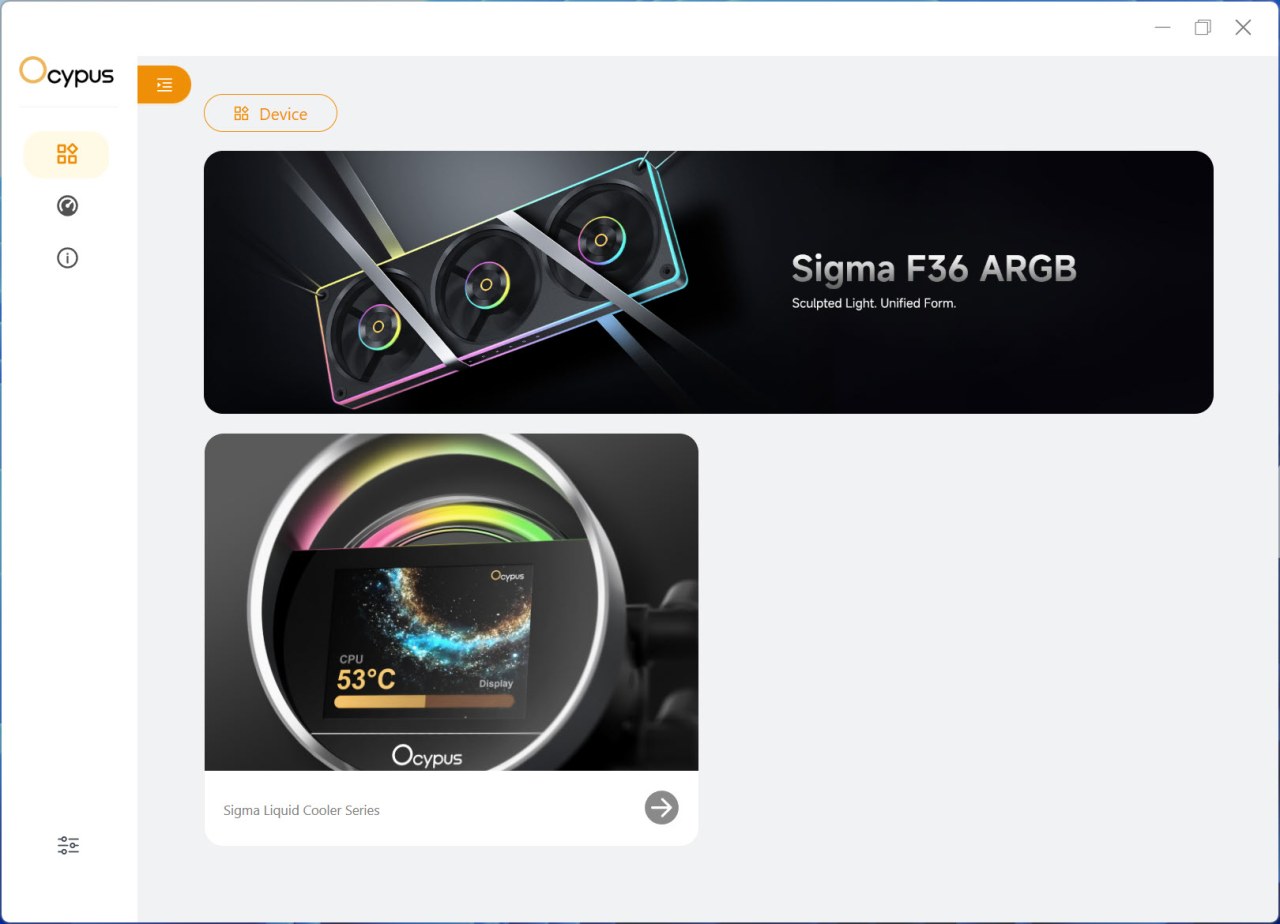
The main tab shows connected devices and advertises the latest products by Ocypus.


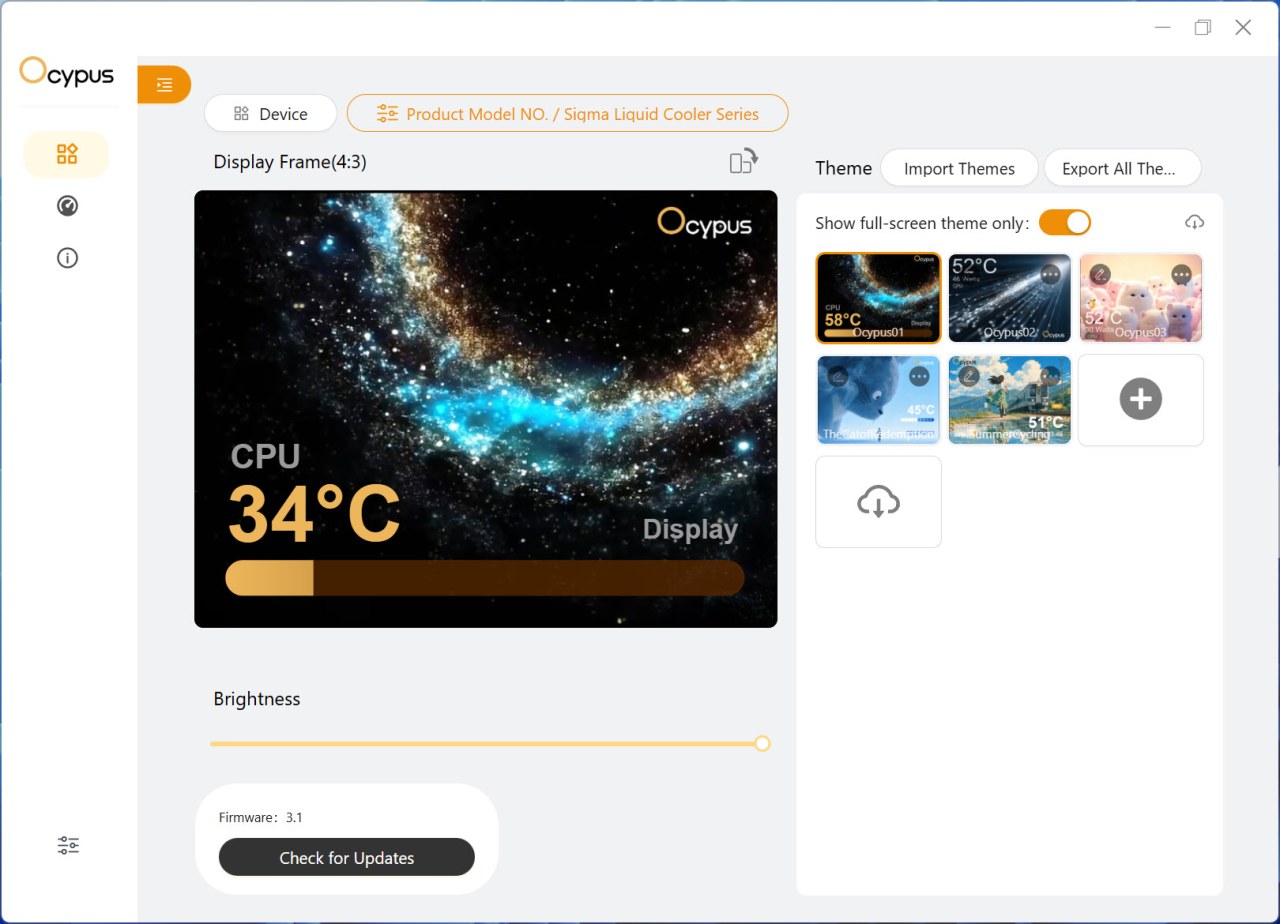
From the device tab you can adjust the brightness level, check for firmware updates, choose one of the 5 full screen animations and load your very own.


 themest

There’s a total of 23 available screens available from Ocypus.


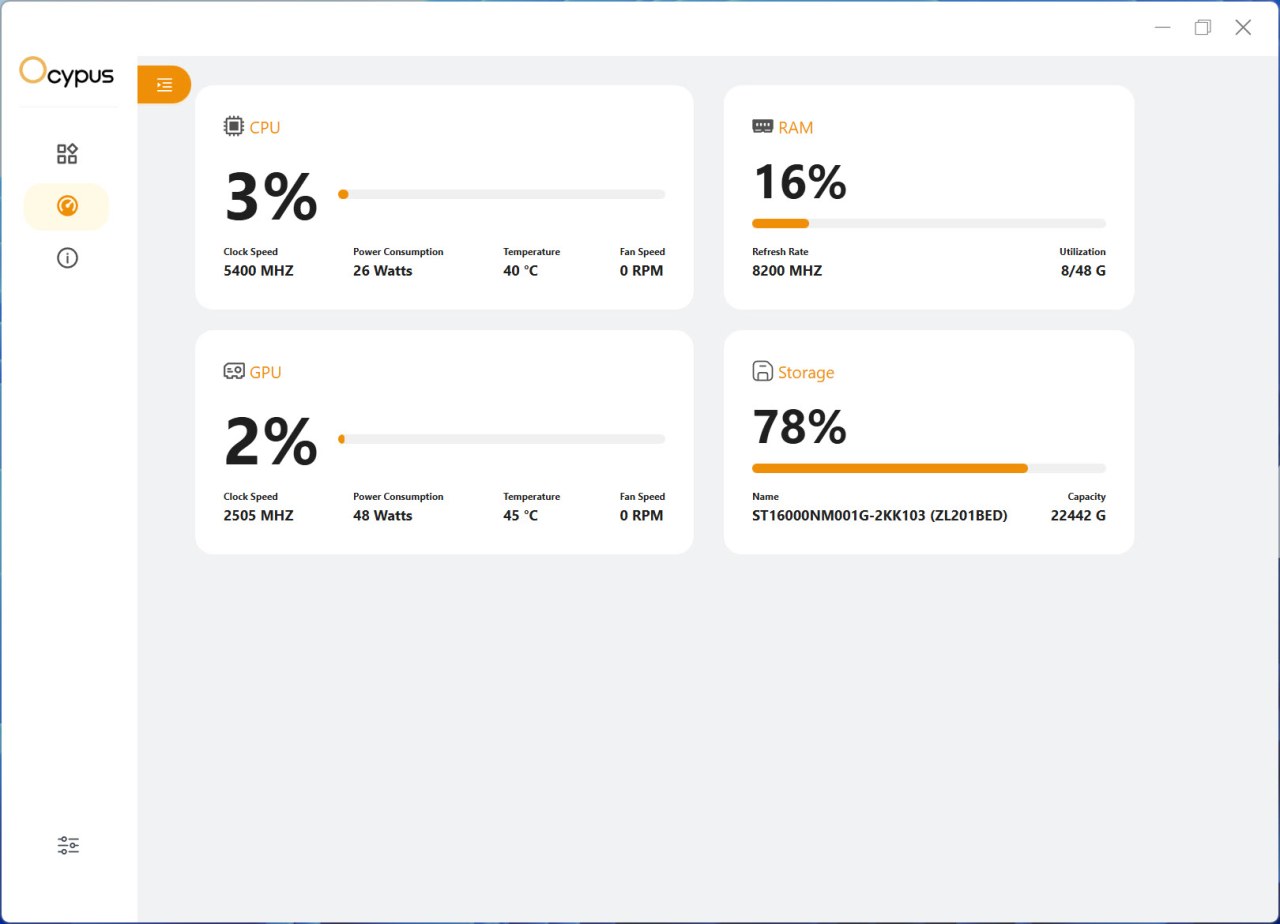
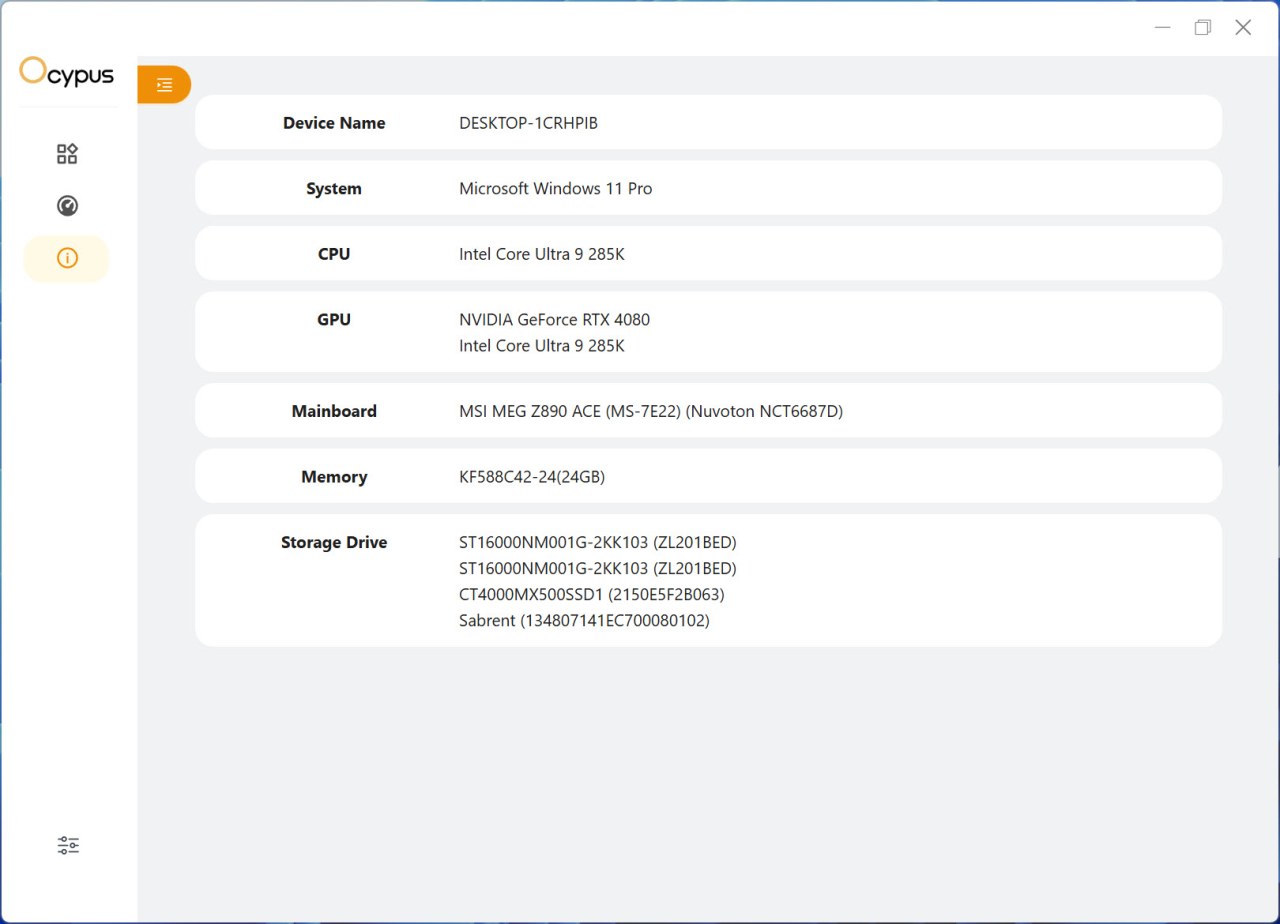
The software also offers system monitor and information tabs.


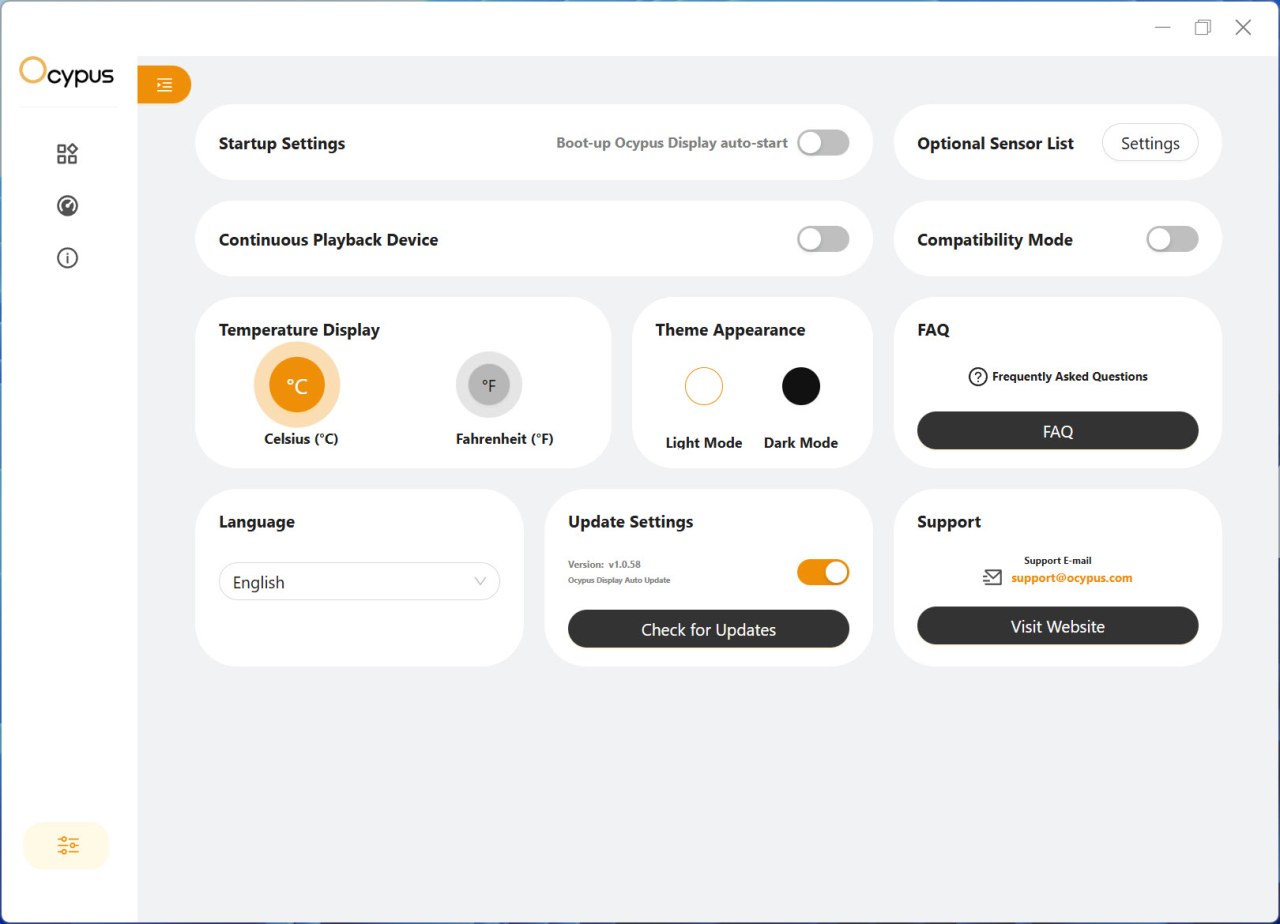
From the settings tab allows the end user to change between Celsius and Fahrenheit, change the appearance of the software (dark/light) check for updates, enable compatibility and continuous playback modes and have the software load at boot.


TEST BED


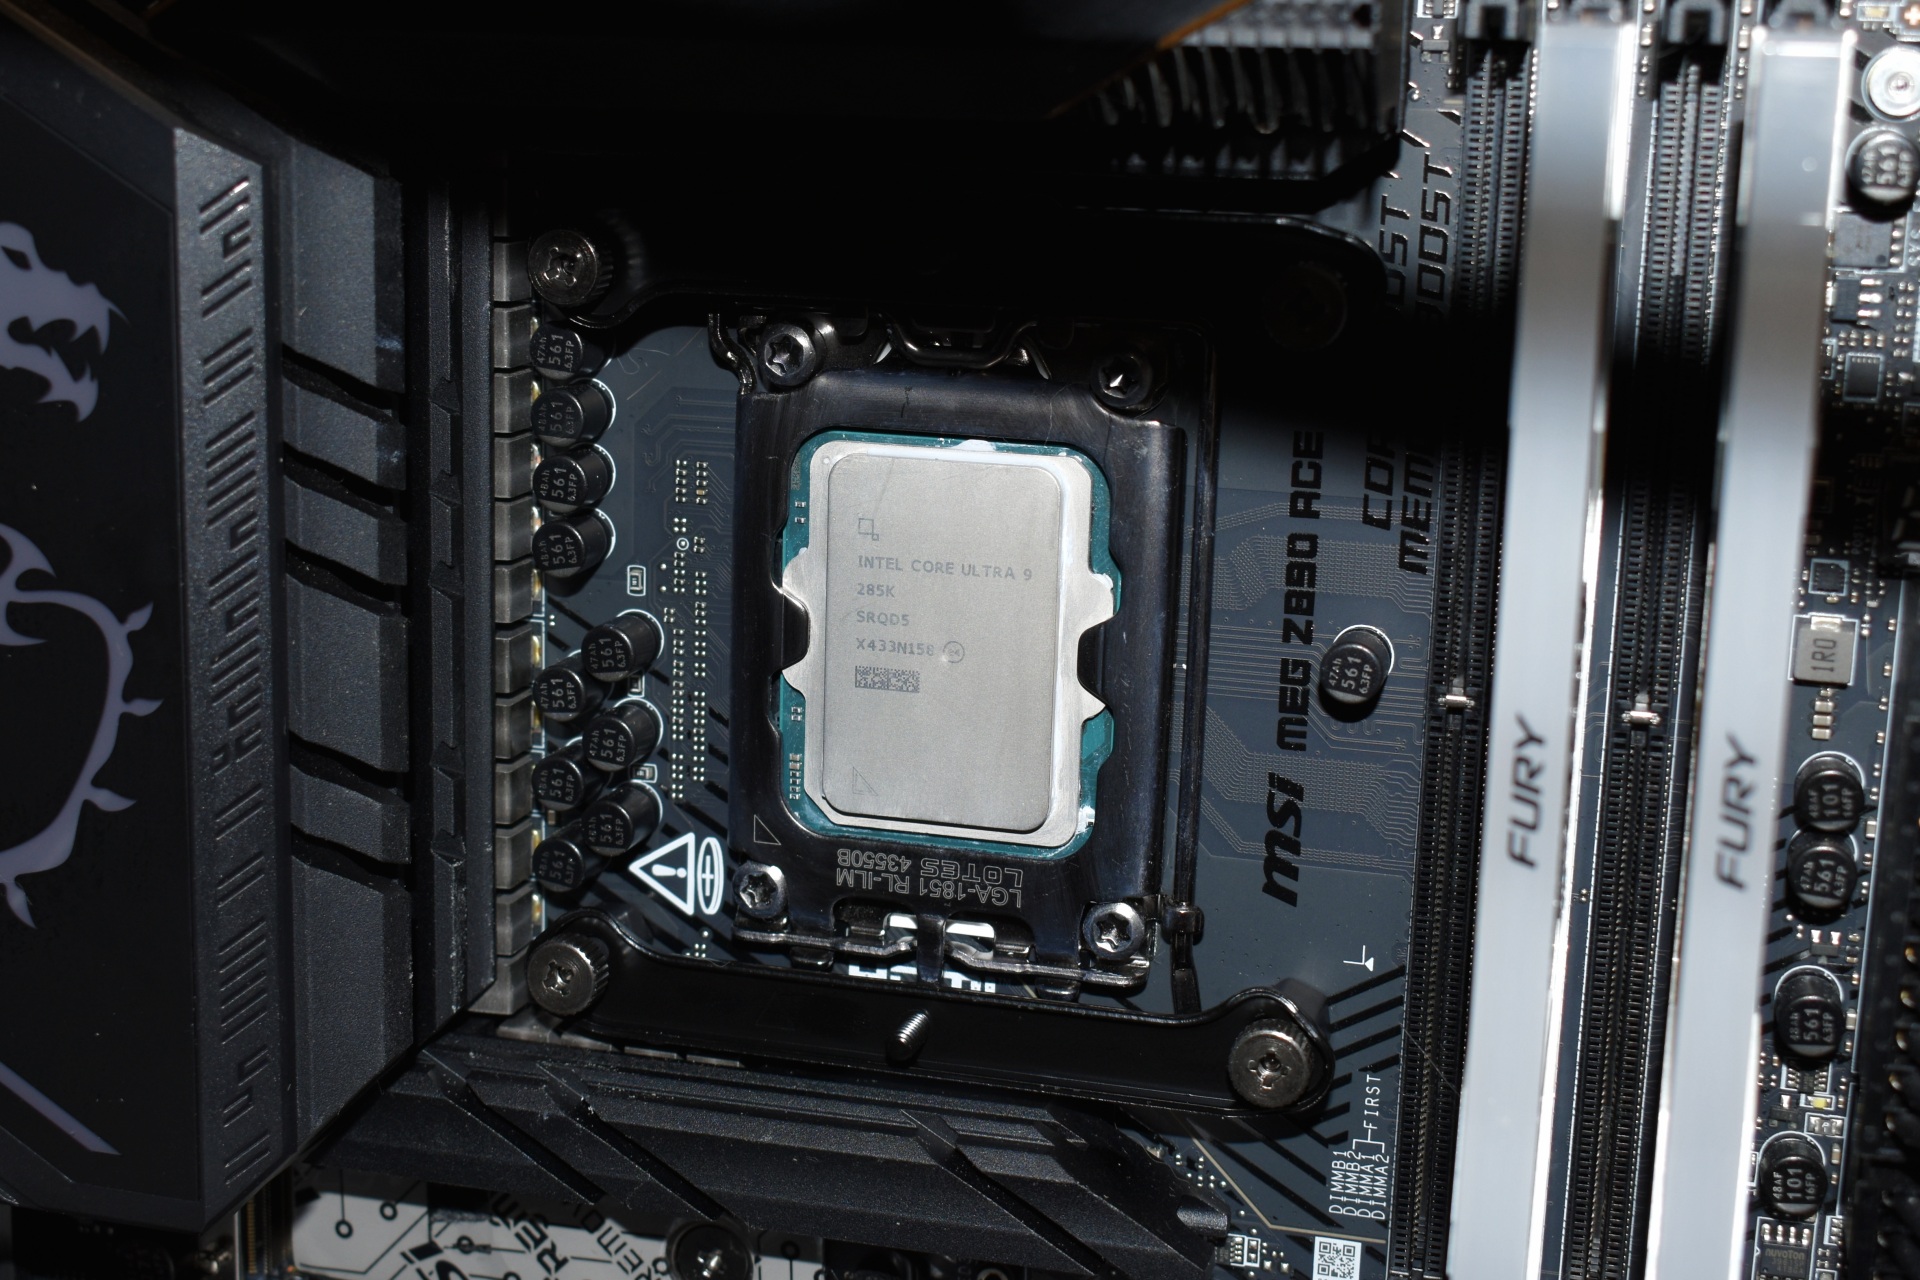
285k


TESTING METHODOLOGY


   Testing complete water-cooling kits or individual radiators is no different than testing CPU Coolers and since we want all of you to be able to compare similar products, we created new and separate charts (you can still cross-compare results however since we are using the same test rig). So once again single (120/140mm) watercooling solutions are tested with the radiator mounted at the rear of our test rig while dual/triple/quad (240/260/280/360/420/480/560mm) solutions with the radiator mounted at the top. For the dBA tests complete water cooling kits or radiators with bundled fans are measured both while on idle mode or with the fan controller in the minimum setting and while on extreme load or with the fan controller all the way to the highest possible setting (PWM fans do that on their own without our intervention). Every single test takes place in a temperature-controlled room of 23 degrees Celsius Ambient Temp with the help of two AC units placed diagonally inside the room and as for thermal paste I’m using the NT-H2 by Noctua. Finally, much like when testing CPU Coolers, it's very important to point out that just because a water-cooling kit (or an AIO) outperforms another when tested with our test rig (when we test complete water-cooling kits) that does not necessarily mean that the same performance differences will apply 100% for other CPU models and in other situations (such as different ambient temps and system configurations).


     To successfully record the load temperatures, we use the latest OCCT application for around 6-10 minutes to push the processor to its limits and after that is done and the temperatures are recorded, we wait for about 10-20 minutes for the CPU to cool down and record idle temperatures. This is done to allow time for the thermal conductive material to achieve the optimal performance level. Same procedure is then repeated with the Passmark BurnIn Test as a failsafe just in case the OCCT results are wrong. This procedure takes a lot more time than the usual peltier/thermometer tests, but this way not only can we deliver real world results to our readers based on real CPUs, but we can also triple check the results using a variety of programs. Last but not least the temperatures were recorded using the latest version of AIDA64 while noise level tests (when fans exist in the bundle) are performed using a high precision ExTech HD600 Decibel Meter placed about 10-15cm above the radiator. Still although the same testing procedure applies to all units do take into consideration that unlike the official numbers which are measured in special noise isolated labs with just the fans here, we also have both the rest of the cooler and the rest of the system (although all system fans are turned off when recording noise levels).


* Since some manufacturers have ceased support for the Intel LGA 2011-3 platform, for such coolers, I’ll be using the Ryzen 7900X / ASRock X670E test rig.
** After high demand since September 2024, I’ll be including average temperatures in my AMD Ryzen 9 7900Χ/Χ670Ε charts (under light load such as Internet browsing and Office use).
*** Since November 2024 I swapped test systems with the Intel Core Ultra 285K (same methodology as with the AMD Ryzen 9 7900X).


TEST RESULTS


temperatures


CONCLUSION


ocypus sigma l36 rgb review b


    The Ocypus Sigma L36 ARGB wraps up as a cooler that confidently delivers on the fundamentals, excellent cooling efficiency, low noise output, and a distinctive, premium aesthetic built around its circular 2.4" IPS display and clean ARGB diffusion. In real‑world use, it behaves exactly like a well‑engineered 360 mm AIO should, stable under sustained load, quiet even when the pump is running at full tilt, and visually refined enough to become a centerpiece in both black and white builds. What stands out most is how balanced it feels, the pump’s three‑phase six‑pole motor stays smooth, the fans maintain strong airflow without becoming harsh, and the radiator’s layout avoids the turbulence issues that plague more aggressively tuned designs. Now as to the reason the L36 outperformed its more advanced brother, the L36 Pro, well, the Pro’s higher fin density and more complex impeller design are probably to blame. As for downsides, the Sigma L36 ARGB doesn’t present any meaningful functional flaws. If anything, the only minor nitpick comes from the nature of its design since the IPS display isn’t the largest, brightest or highest‑resolution panel in the category.


    With a current price set at around USD140 inside the USA (no EU availability) the Sigma L36 ARGB AIO by Ocypus is priced well (more or less). Unfortunately, the fact that availability on this side of the Atlantic is limited at best is a serious issue but it is what it is. Overall, the Sigma L36 ARGB delivers on everything that makes a good AIO and that’s why it gets the Golden Award.

PROS


- Build Quality
- Very Good Cooling Efficiency
- 2.4” IPS Display (320x240p)
- ARGB Lighting (Motherboard Sync Compatible)
- Motherboard Compatibility
- Up to Six 120mm Fans in Push & Pull
- Available In Black & White Colors


CONS


- EU Availability


IQUNIX EV63 Dark Knight Hall Effect Keyboard Review

INTRODUCTION


iqunix ev63 review a

    For gamers, the keyboard has become as important as the mouse, a core part of the setup that can influence reaction time, movement precision, and overall comfort during long sessions. Mechanical switches remain the backbone of the gaming world thanks to their reliable feel and predictable travel, but the rise of magnetic hall switches has introduced a new level of customization, adjustable actuation, analog input for smoother control, and near‑instant reset for rapid key cycling. These features matter when you’re juggling movement keys, tapping abilities, or trying to maintain rhythm in competitive play. IQUNIX’s EV63 Dark Knight Magnetic Switch Keyboard leans into that modern expectation, offering a compact footprint and Magnetic X Ultra switches designed to deliver both speed and consistency.


    Founded in 2014, IQUNIX merges aesthetics with technology to create timeless desktop tech products. The brand aims to create desktop tech products that provide aesthetic pleasure and embody timeless design for users. Known for the award-winning ZX-1 ITX PC case, IQUNIX gained further acclaim in 2022 with a limited-edition keyboard collaboration with The Little Prince. Currently, IQUNIX offers high-quality, visually stunning keyboards and peripherals, continuously pushing the boundaries of design to meet users' functional and aesthetic needs.


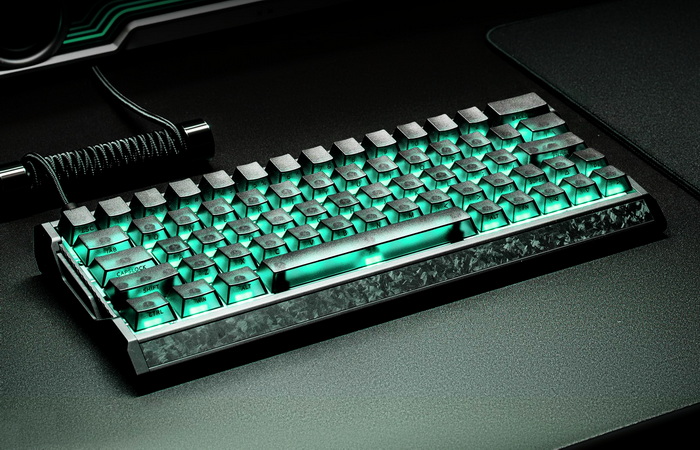
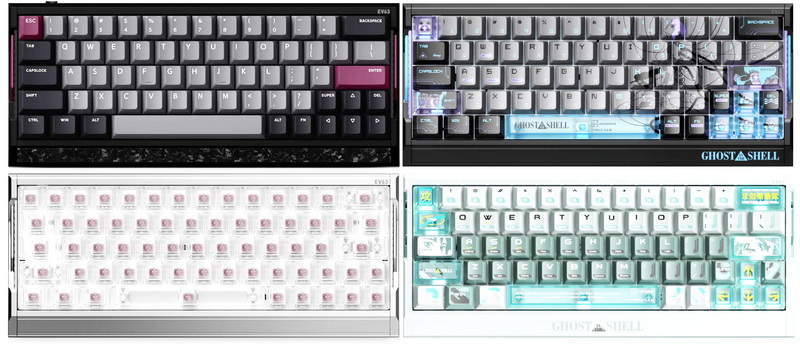
    IQUNIX’s EV63 is currently available in 5 color combinations (violet, dark knight, silver knight, ghost in the shell cyber blue and shell core) and is a compact, wired‑only 63‑key Hall effect gaming keyboard built around their proprietary Magnetic X Pro and Ultra switches and a very premium chassis. The board uses a CNC‑machined aluminum case paired with a forged carbon fiber front housing, giving it a dense 1206g weight, a contoured front edge for wrist comfort, and a visually unique, shimmering texture on each unit. Under the hood, you get 3rd gen rail‑to‑rail Hall sensors with a 400% wider voltage range for cleaner signal resolution, plus IQUNIX’s M.A.T. 2.0 (Magnetic Auto‑Tune) algorithm, which dynamically stabilizes performance during long, high‑pressure sessions. Actuation is fully adjustable per key, with a 0.01mm precision and a range up to 3.5mm on the Dark Knight variant, backed by a 480MHz MCU, native 8kHz polling, 16kHz scanning, and quoted input latency as low as 0.125ms with full‑link response under 0.5ms. The EV63 supports hot‑swap, N‑key rollover, south‑facing LEDs, full remapping via web‑based EV Software V3, and advanced functions like Rapid Trigger, Dynamic Keystroke (DKS), Rappy Snappy (RS), Mod Tap, Toggle Keys, and enhanced SOCD handling tuned for FPS titles such as Valorant and CS:GO. On the Dark Knight specifically, you get frosted translucent PC keycaps over an aluminum plate, with a tray‑mount internal structure, Poron foams and PET sheets for noise filtering and a more focused, “esport” sound profile, all set at a fixed 6° typing angle and covered by a 1‑year warranty.


SPECIFICATIONS AND FEATURES


PACKAGING AND CONTENTS


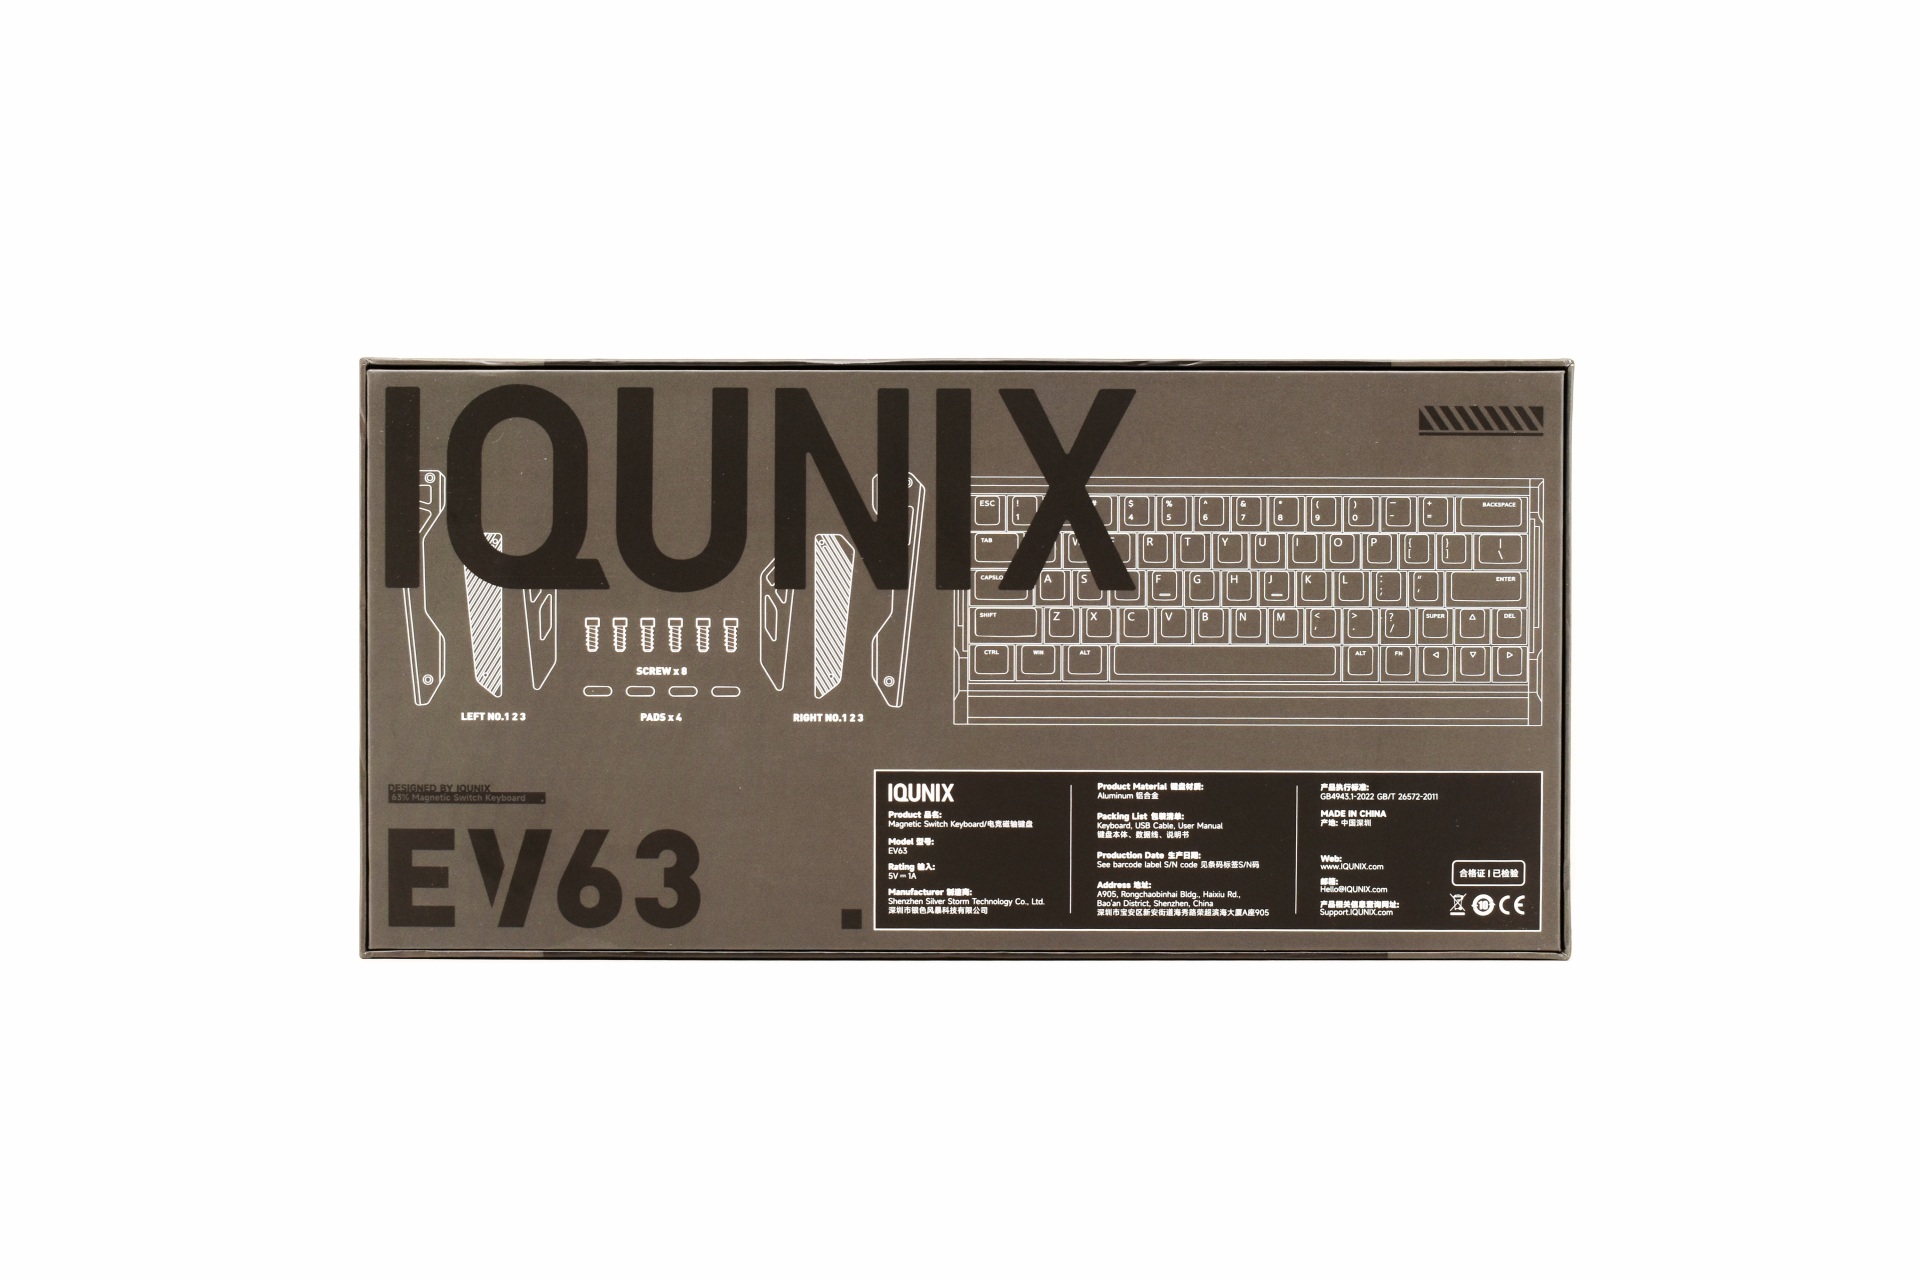
As always, the front features a product picture and the company logo.


Several drawings showcasing the contents of the bundle (keyboard parts even though the keyboard is pre-assembled) along with details about the manufacturer are all printed at the rear.


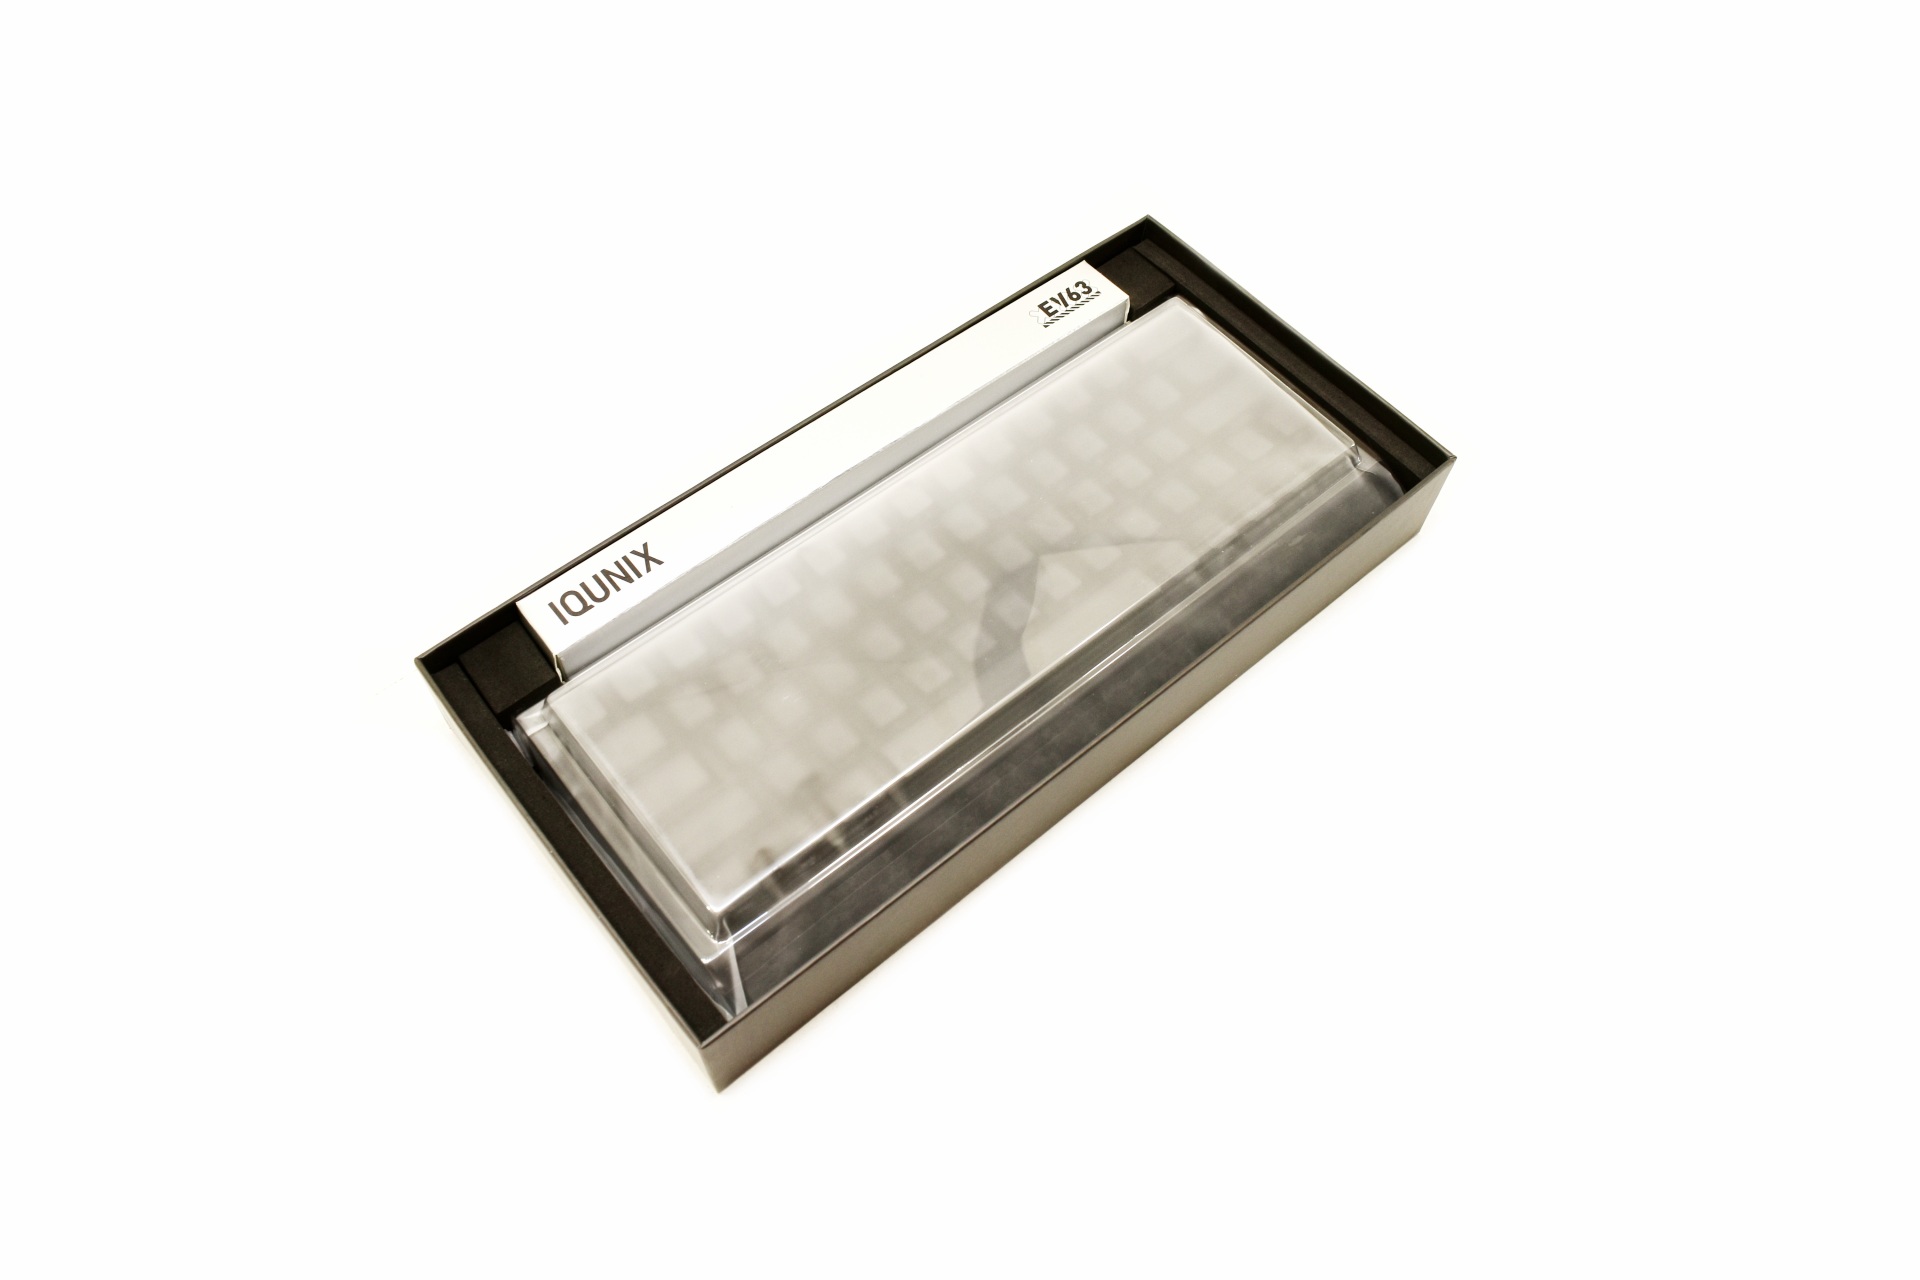
The keyboard is wrapped inside a synthetic cover and has a clear plastic cover over it (wish all manufacturers had that, great for keeping your keyboard clean).


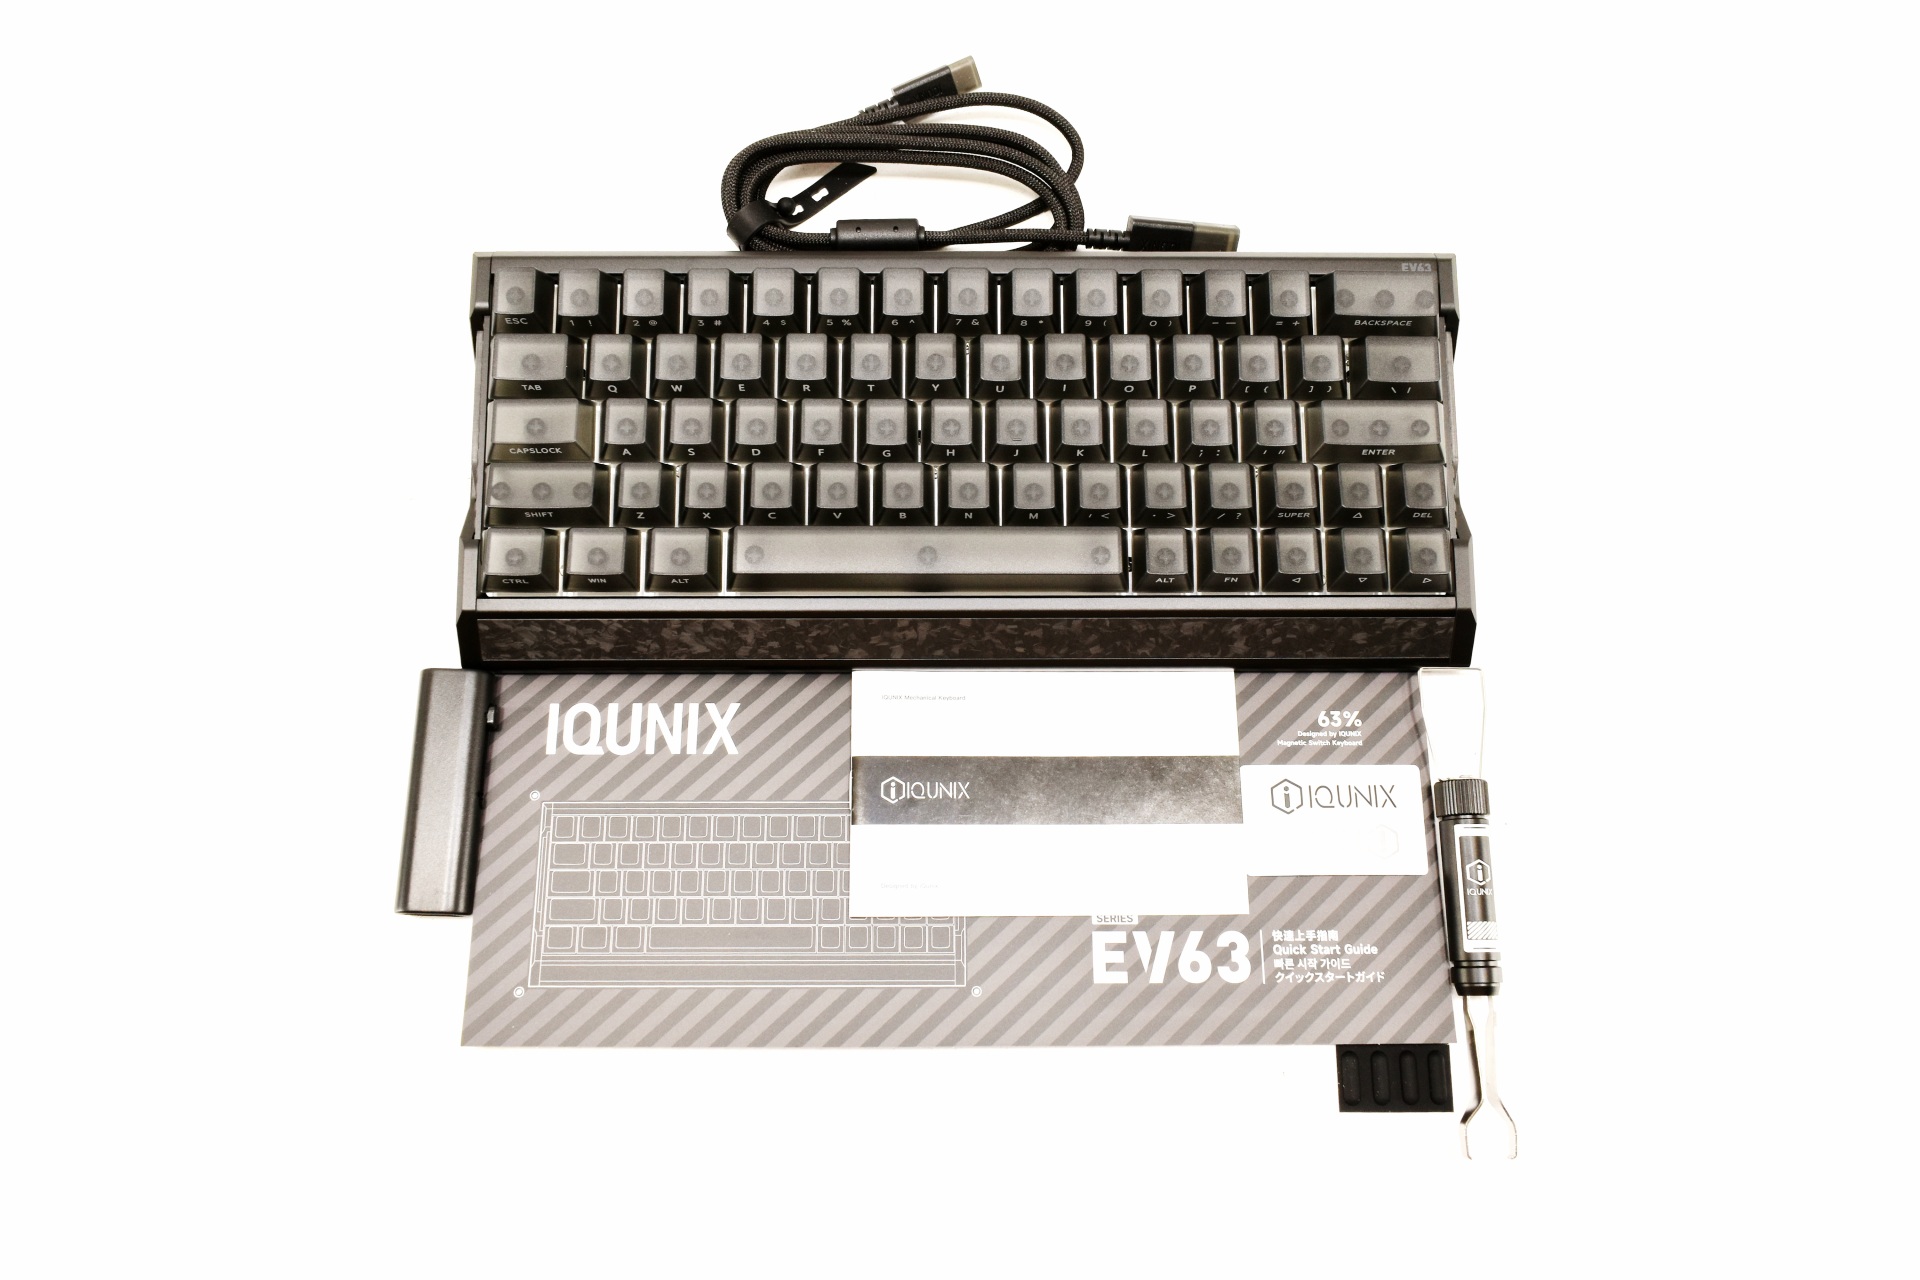
Inside the box you'll find the EV63 Dark Knight, detachable USB-C to USB-A cable, keycap and switch remover, 4 rubber feet, cleaning brush, quick start guide and the user manual.


THE EV63 DARK KNIGHT


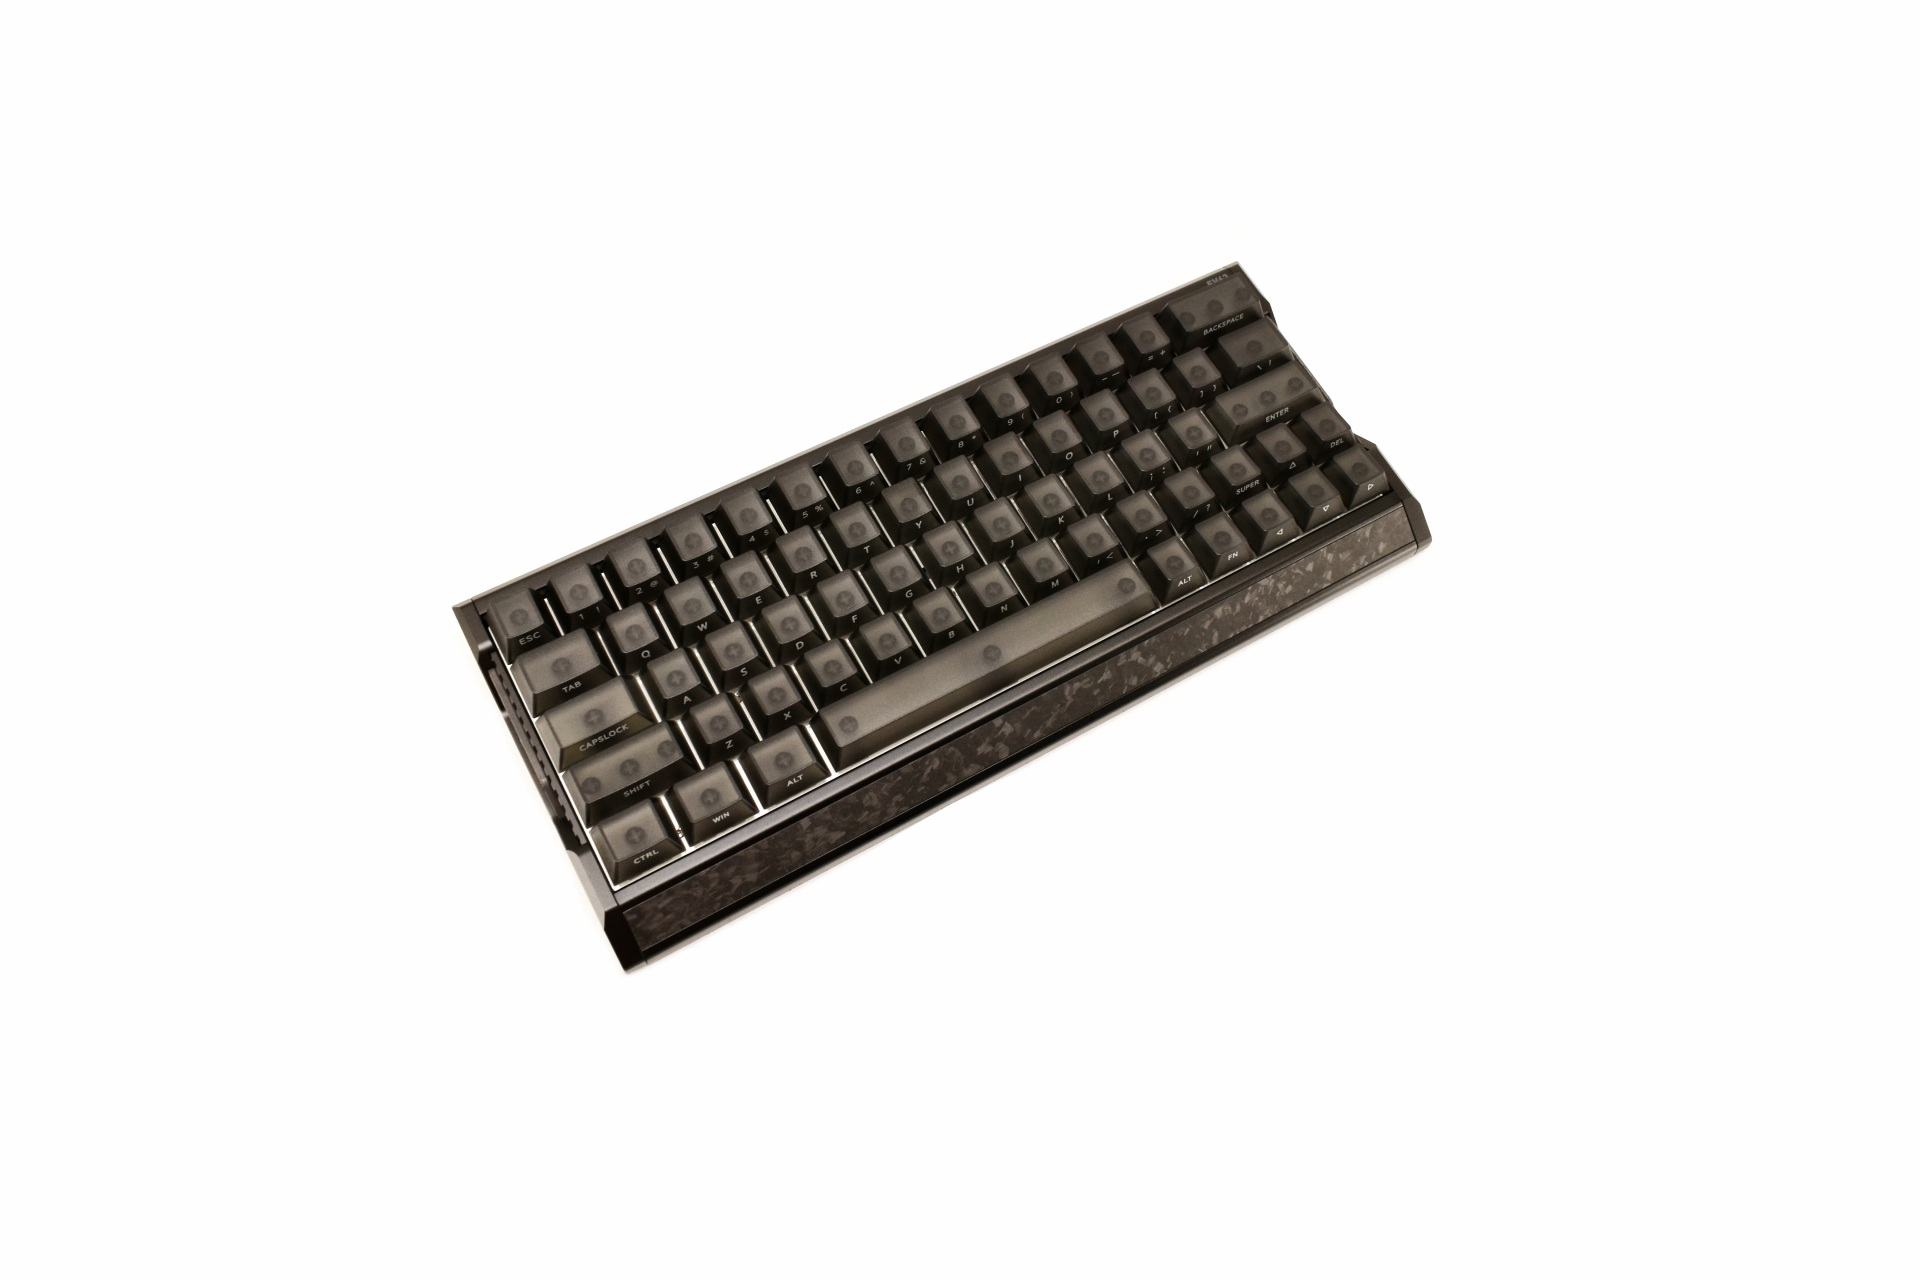
The 1.2Kg heavy EV63 measures 30.1cm in length, 12.6 in width and 3.9cm in thickness (highest point).


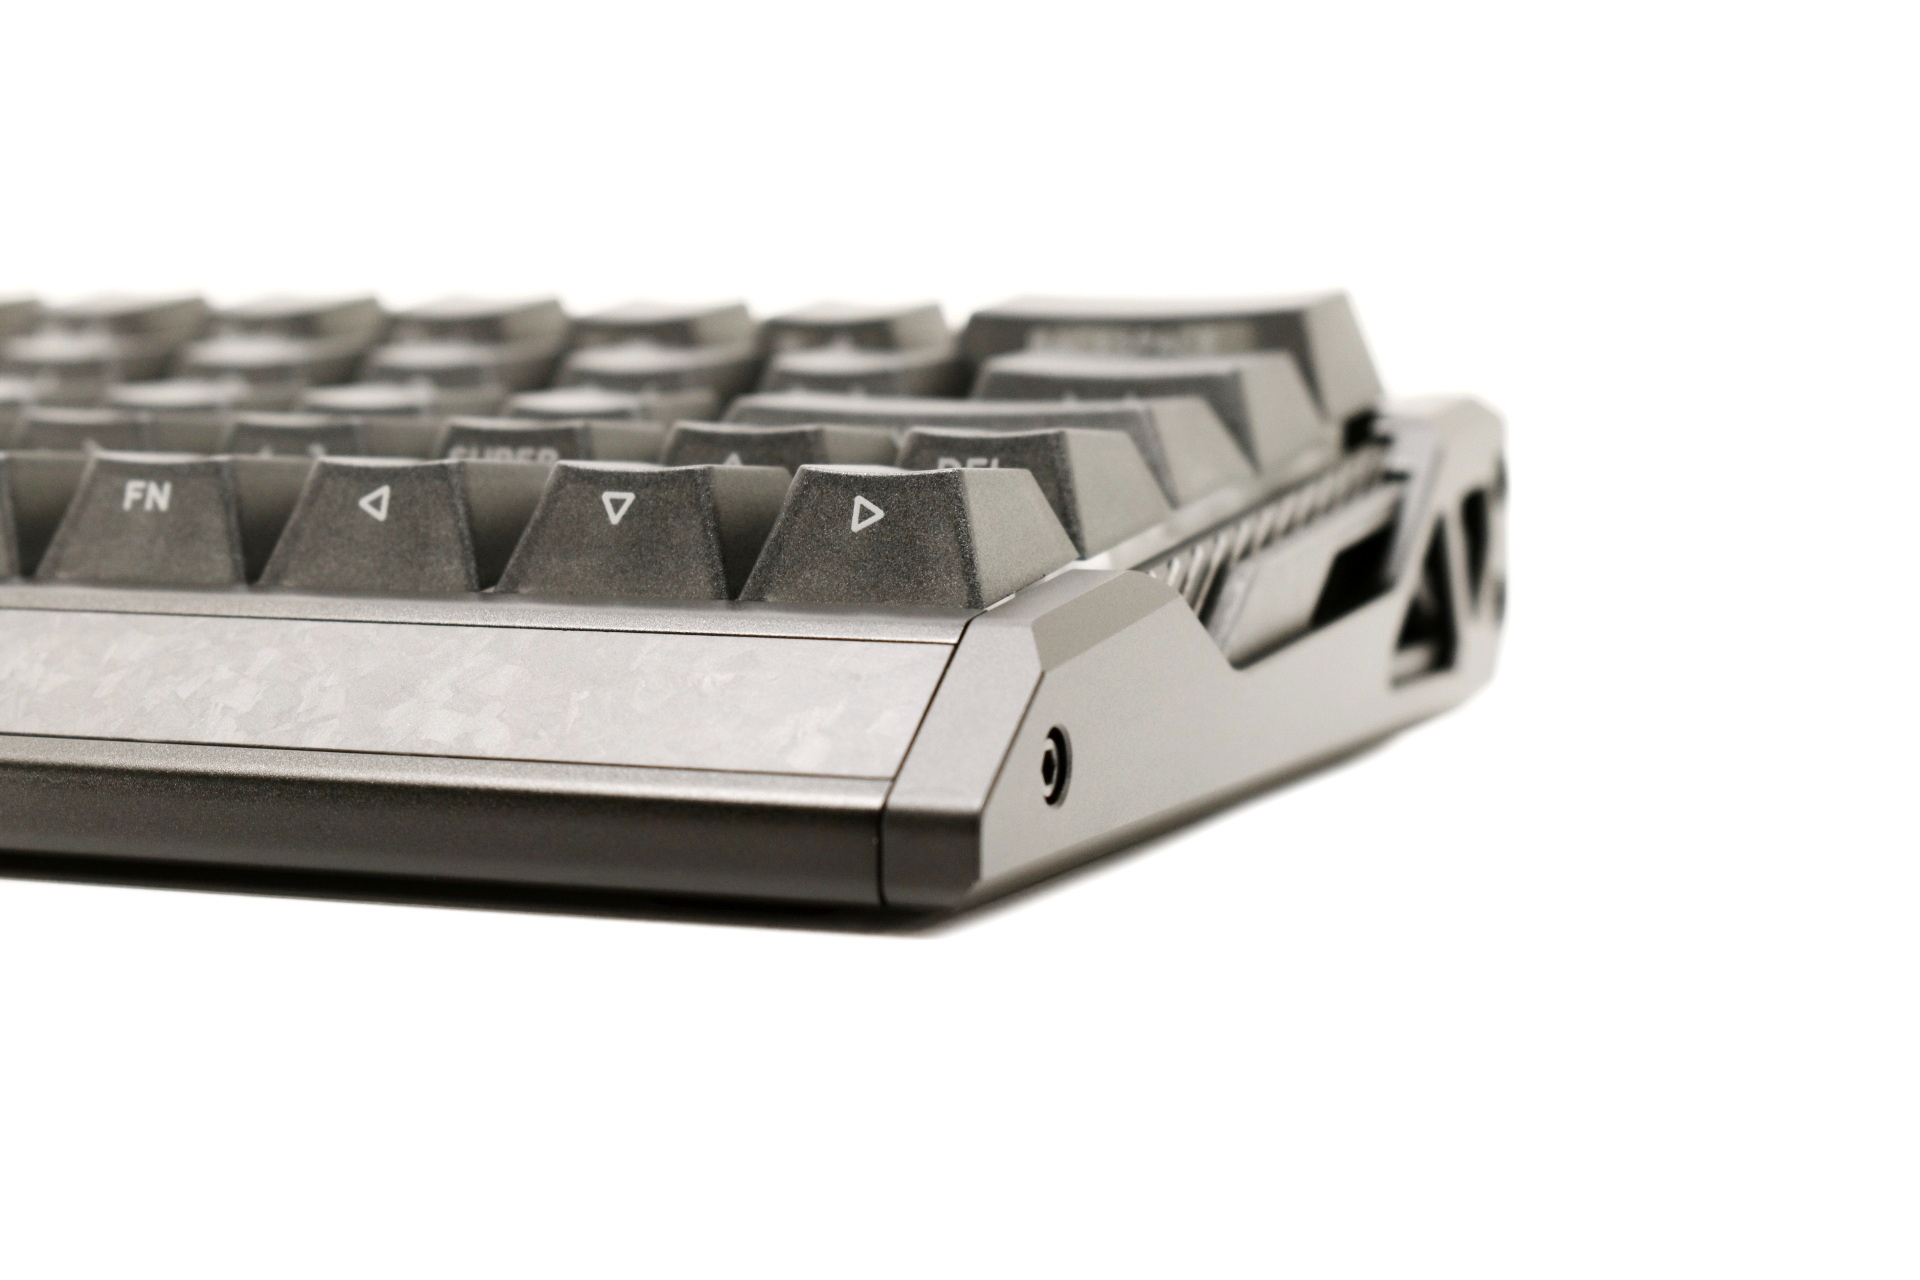
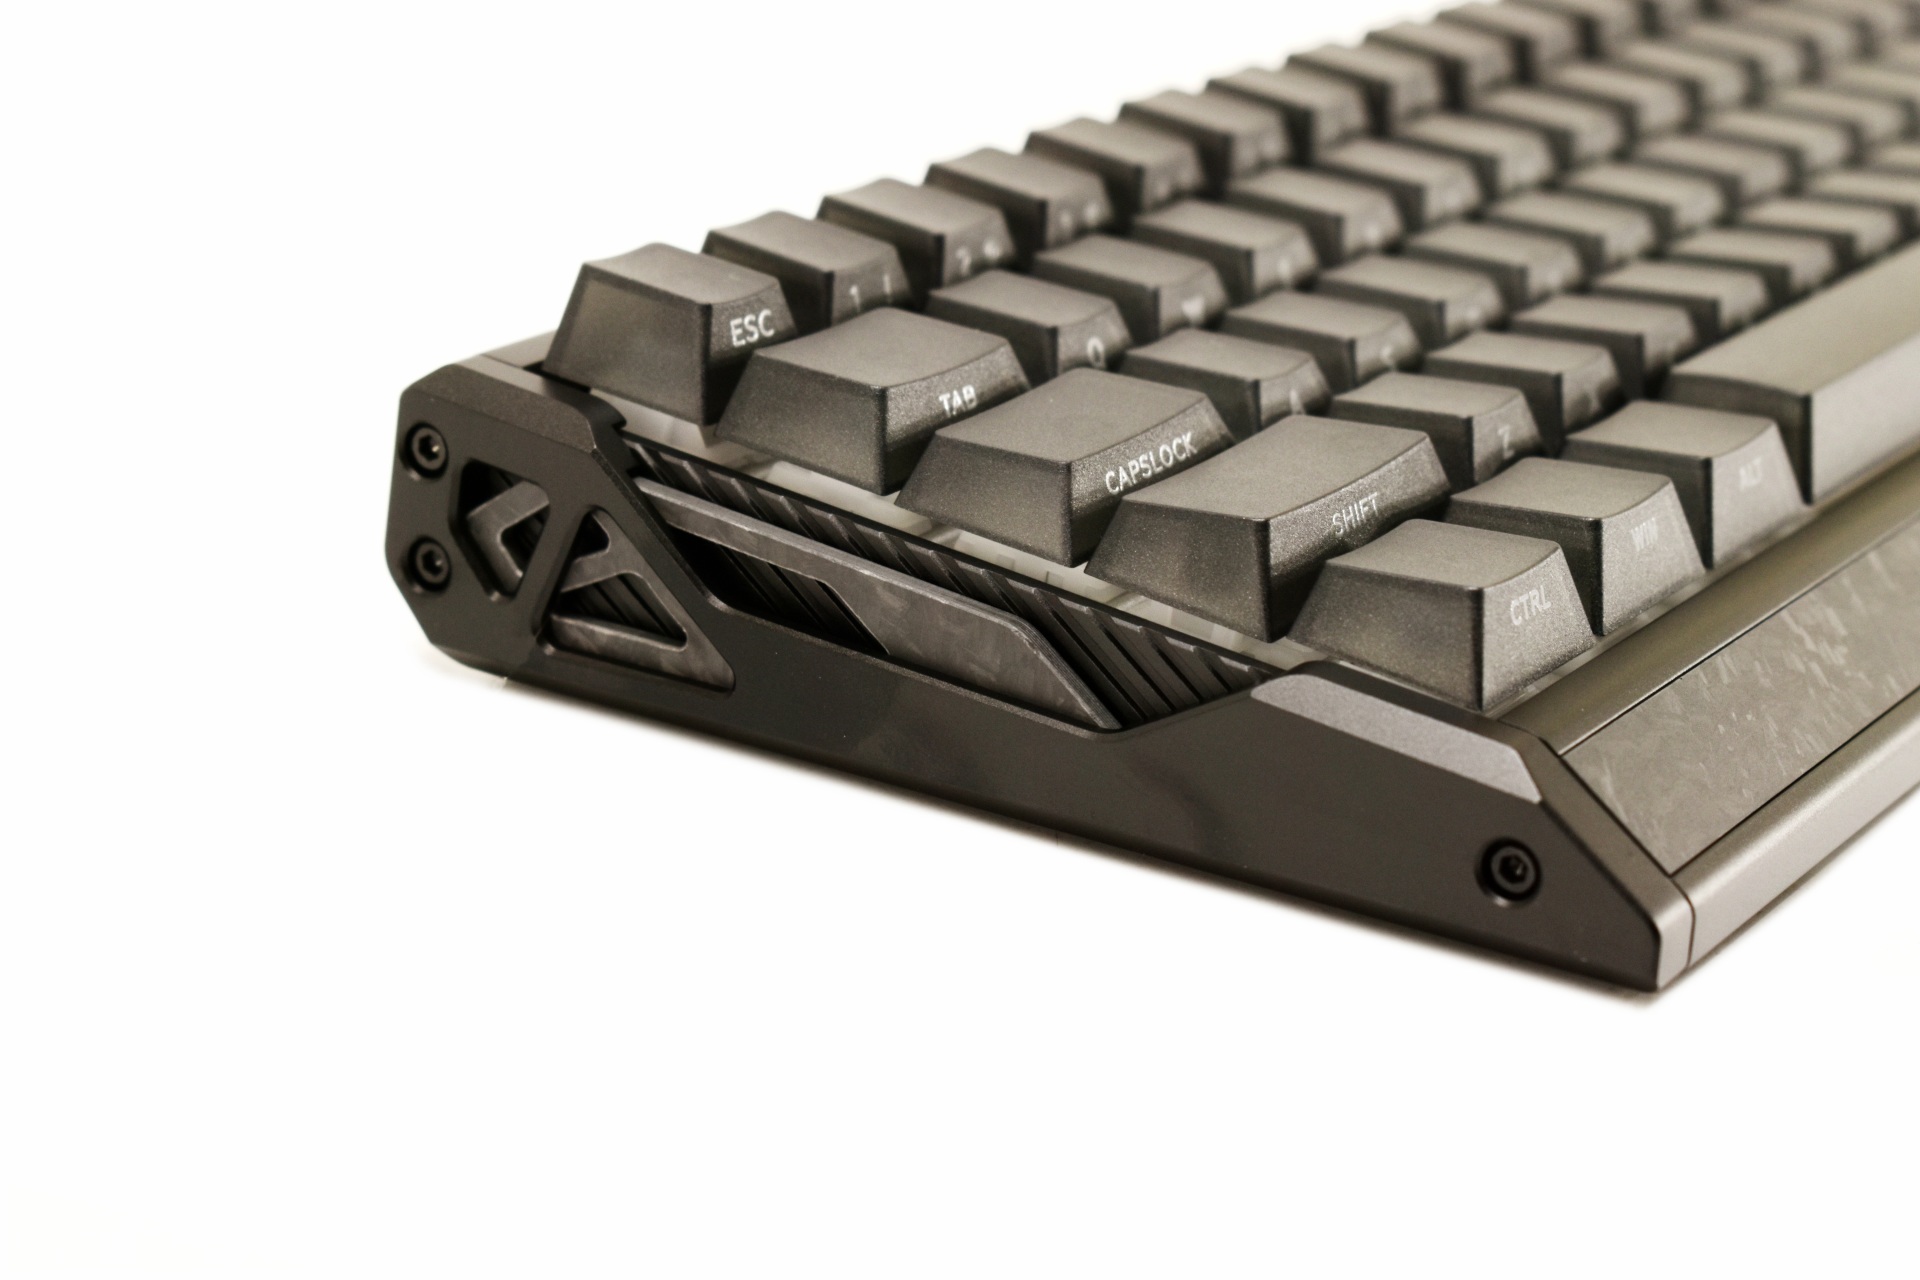
IQUNIX has also followed the floating keys design for the EV63.


This keyboard is among the most robust models I've used to date.


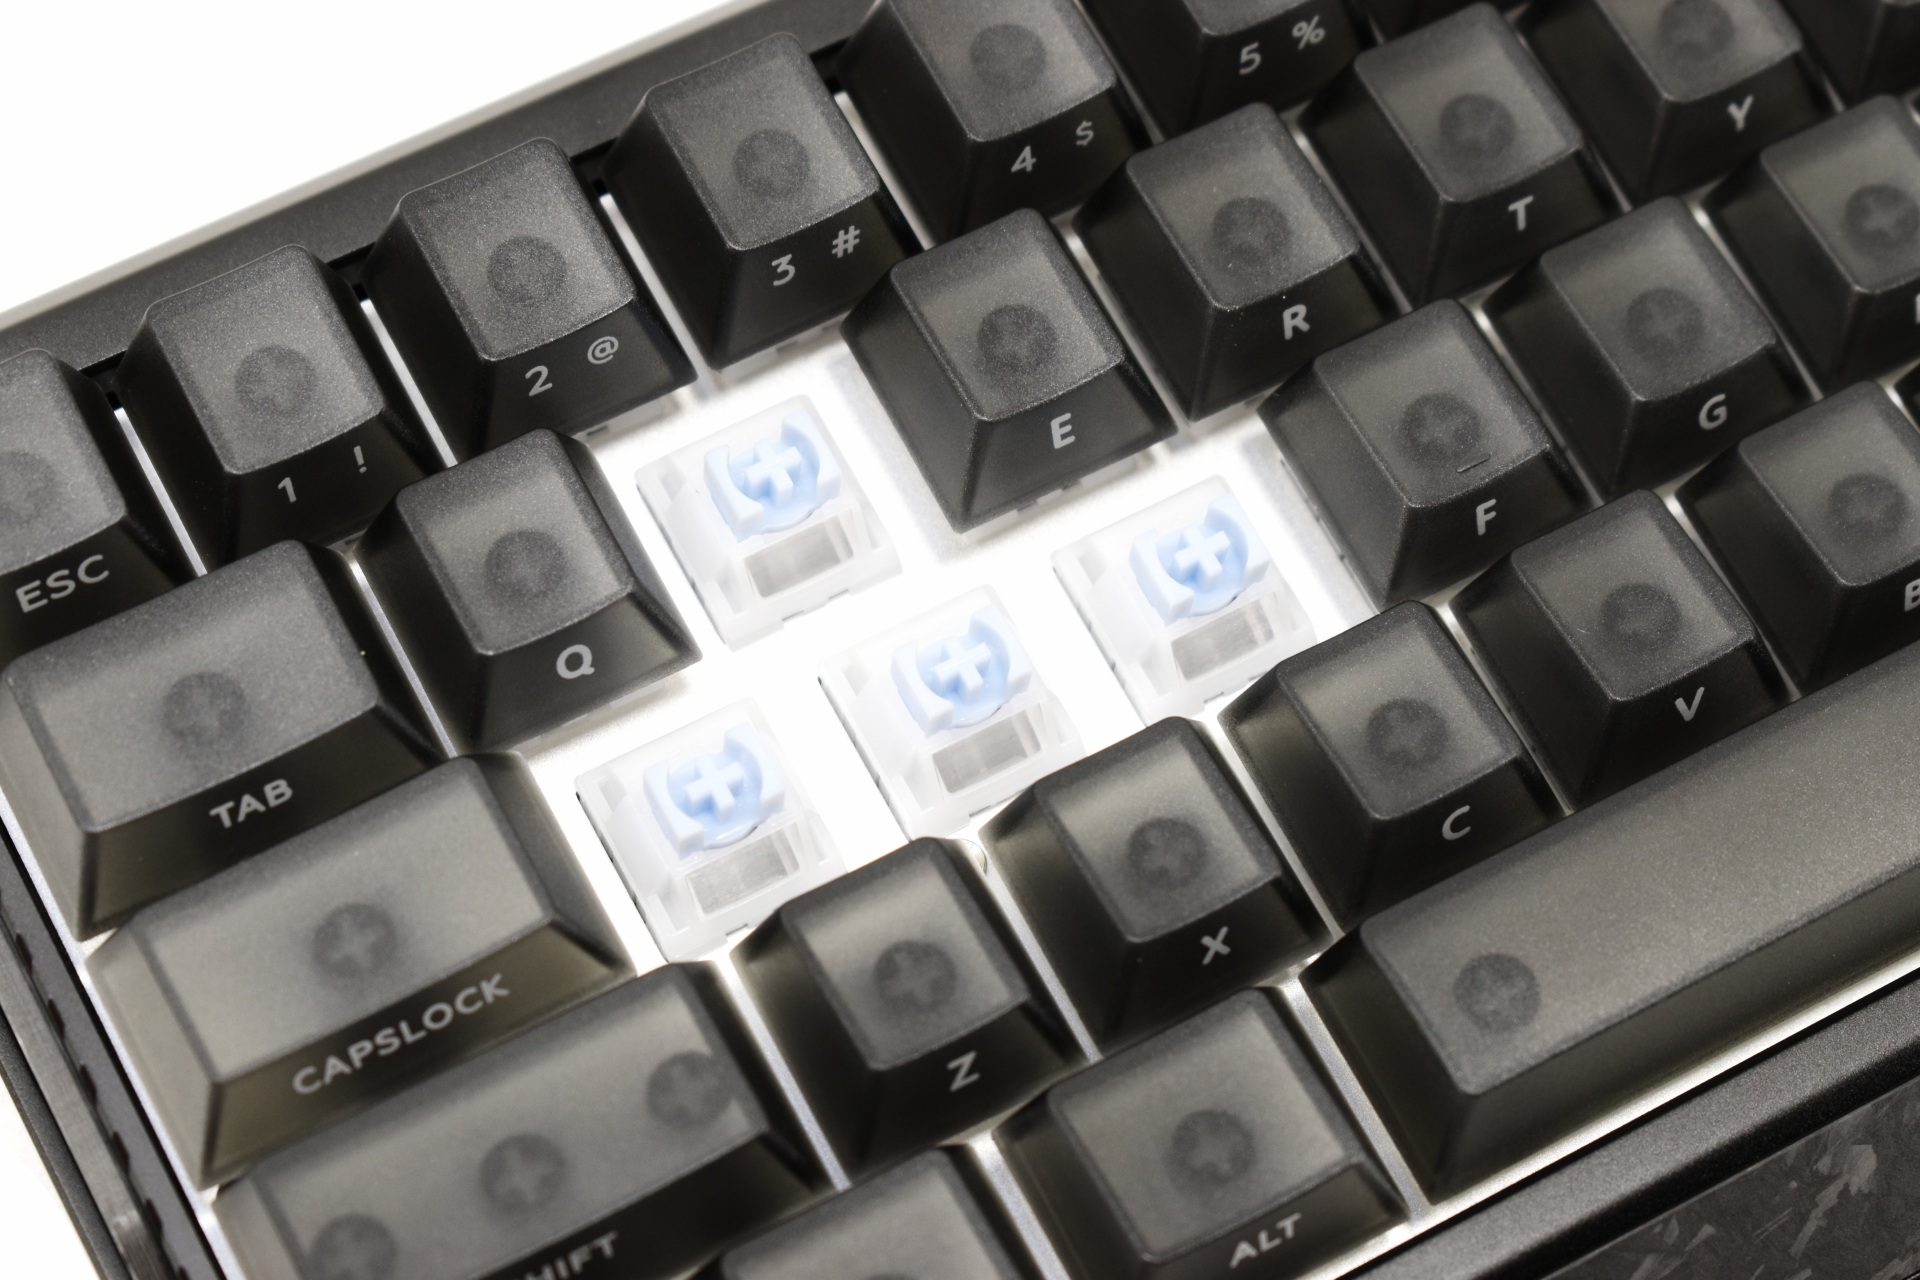
Here you can see the Magnetic X Ultra switches this particular model comes with.


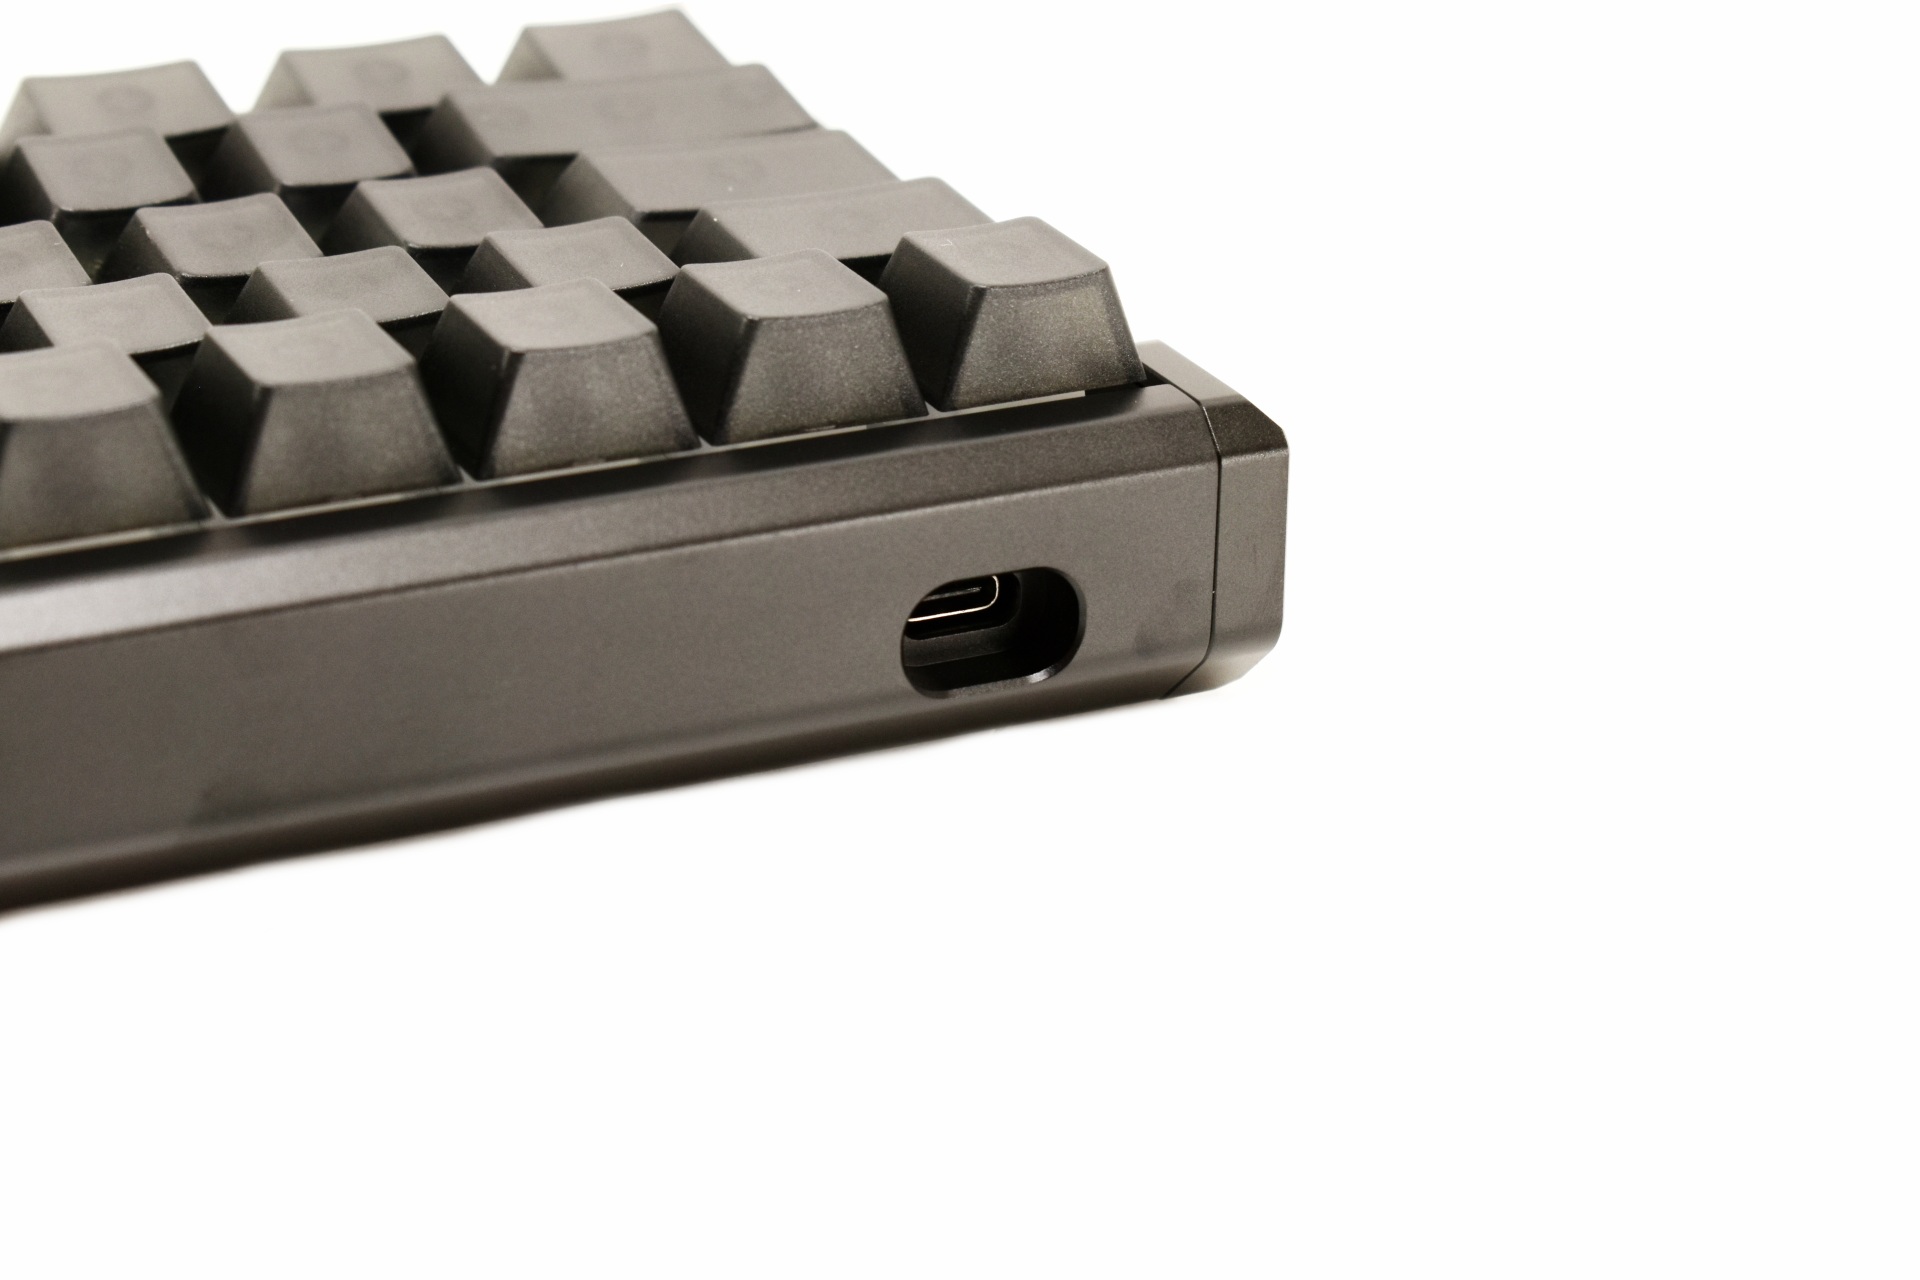
The USB-C port is located at the far-left side of the front.


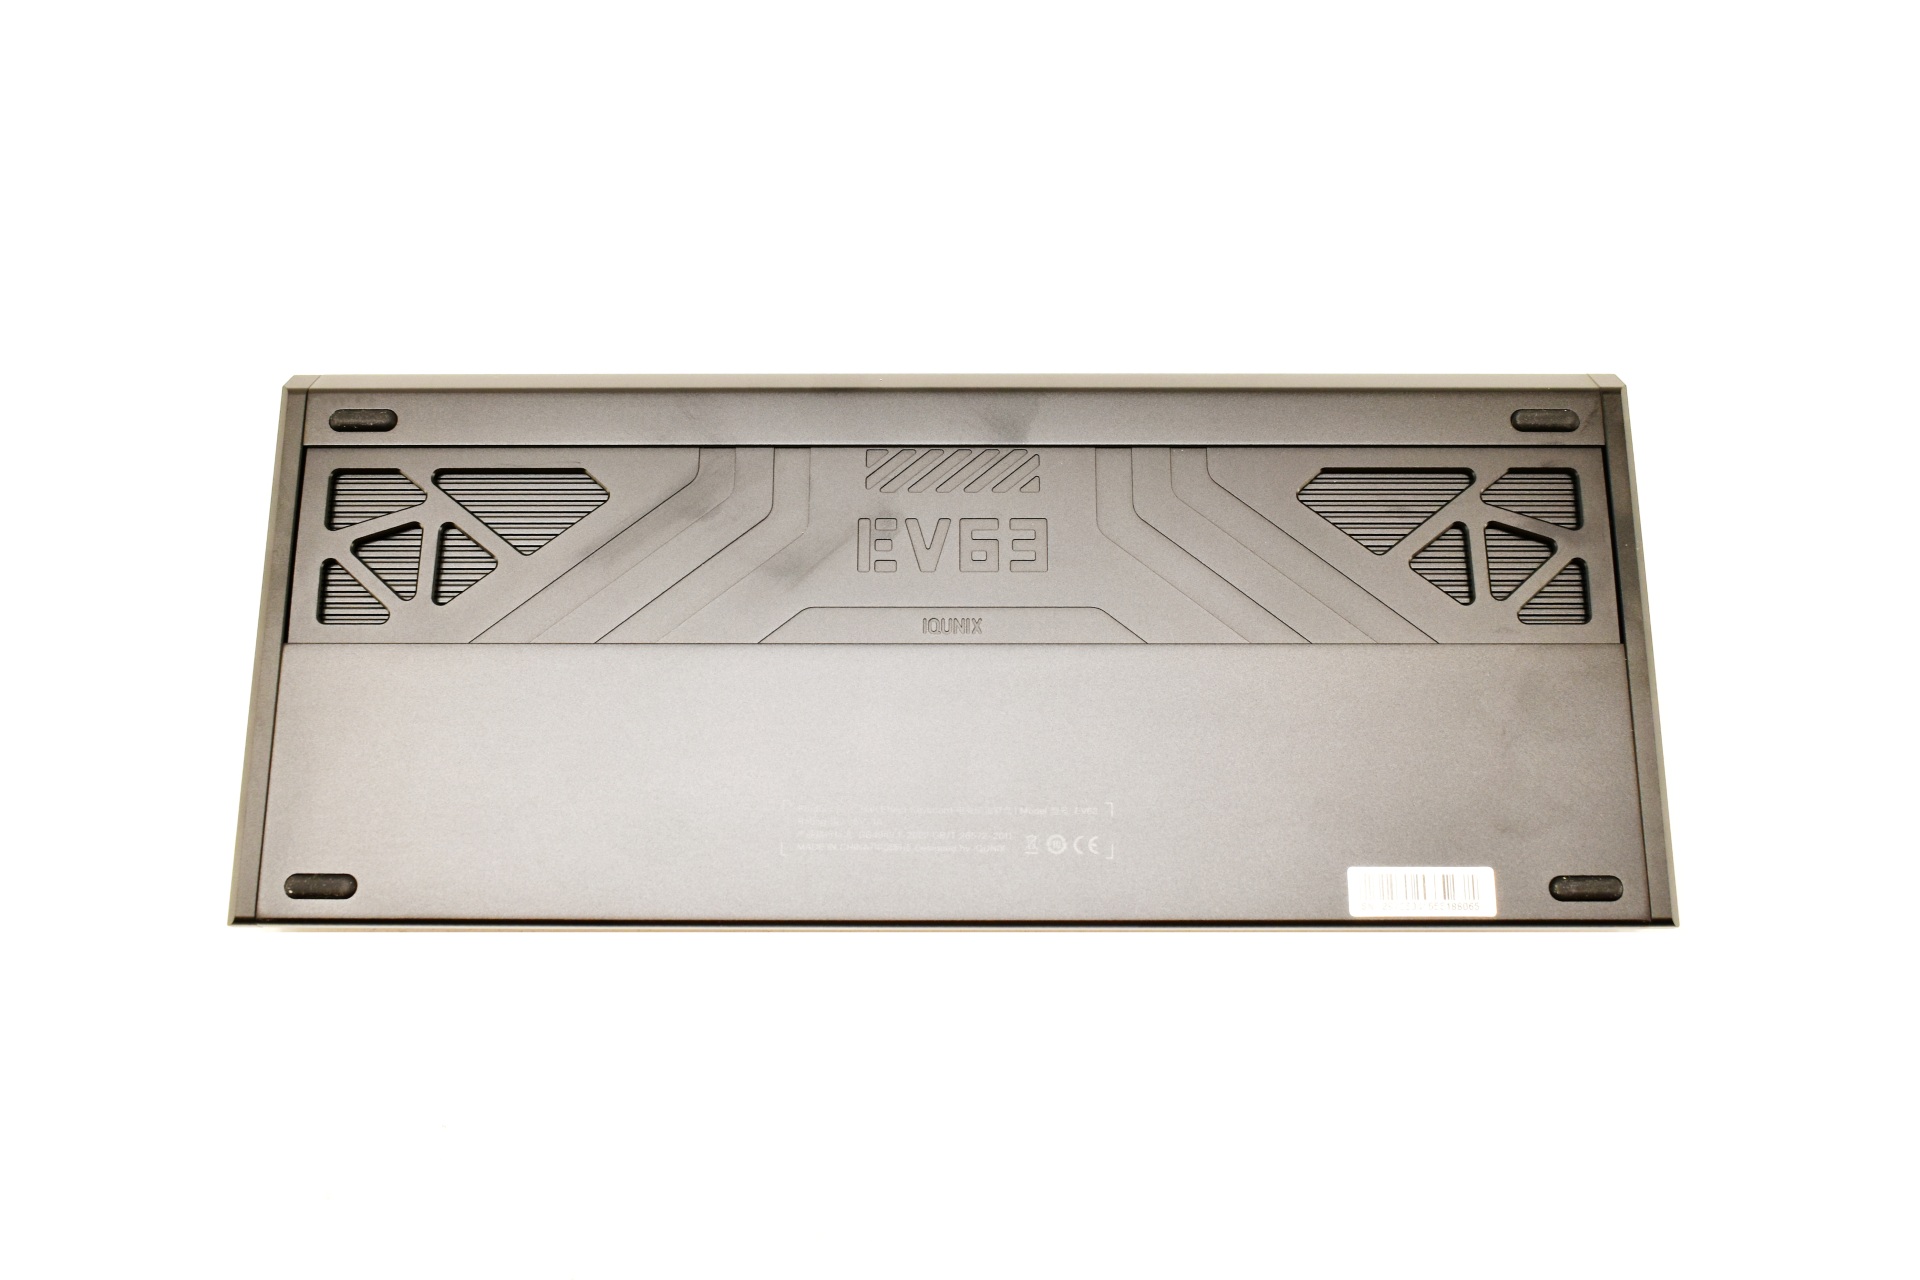
Taking a look at the base of the EV63 we see that it sits on 4 rubber feet (no adjustable feet/height adjusters).


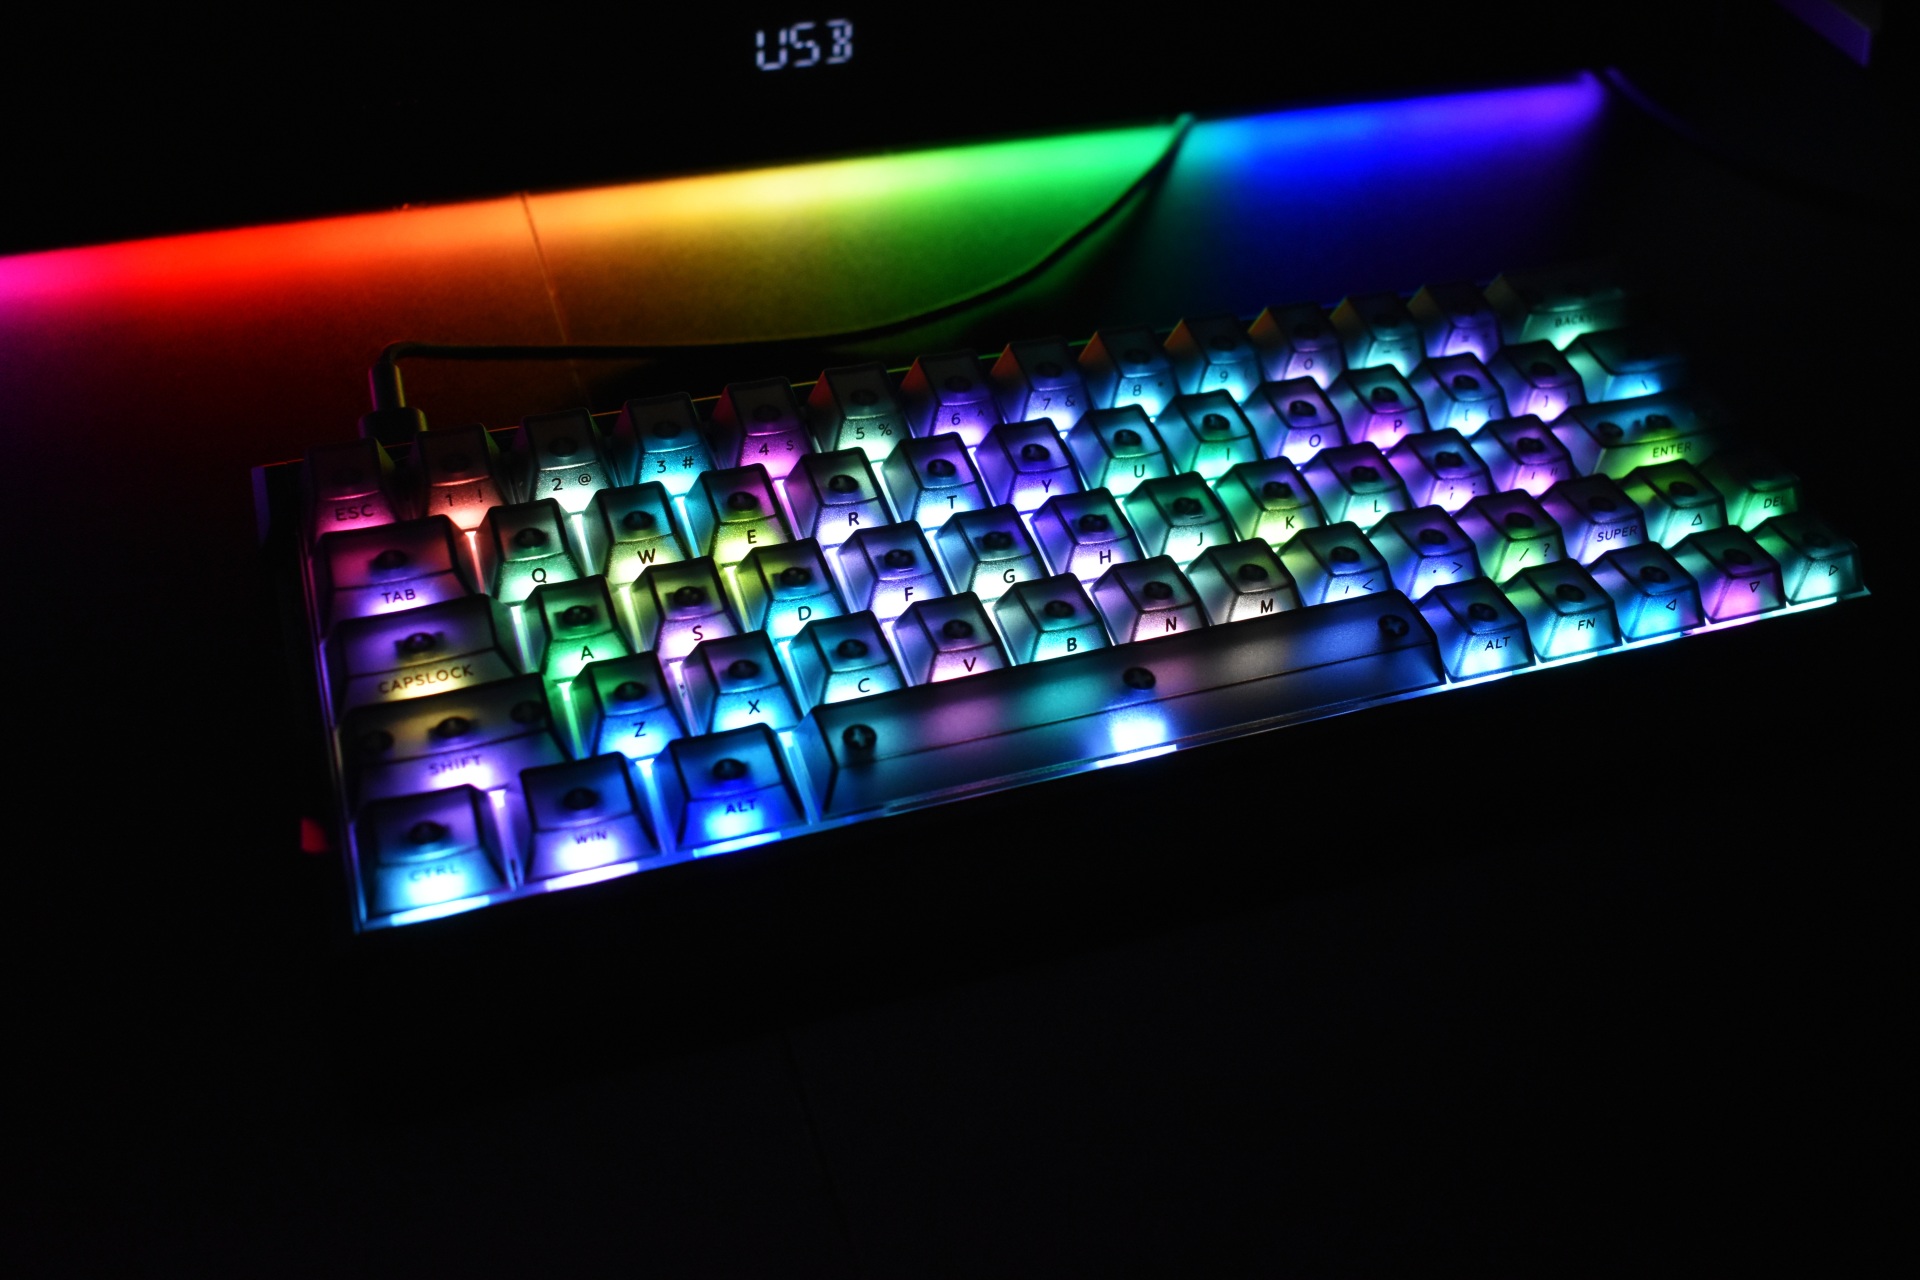
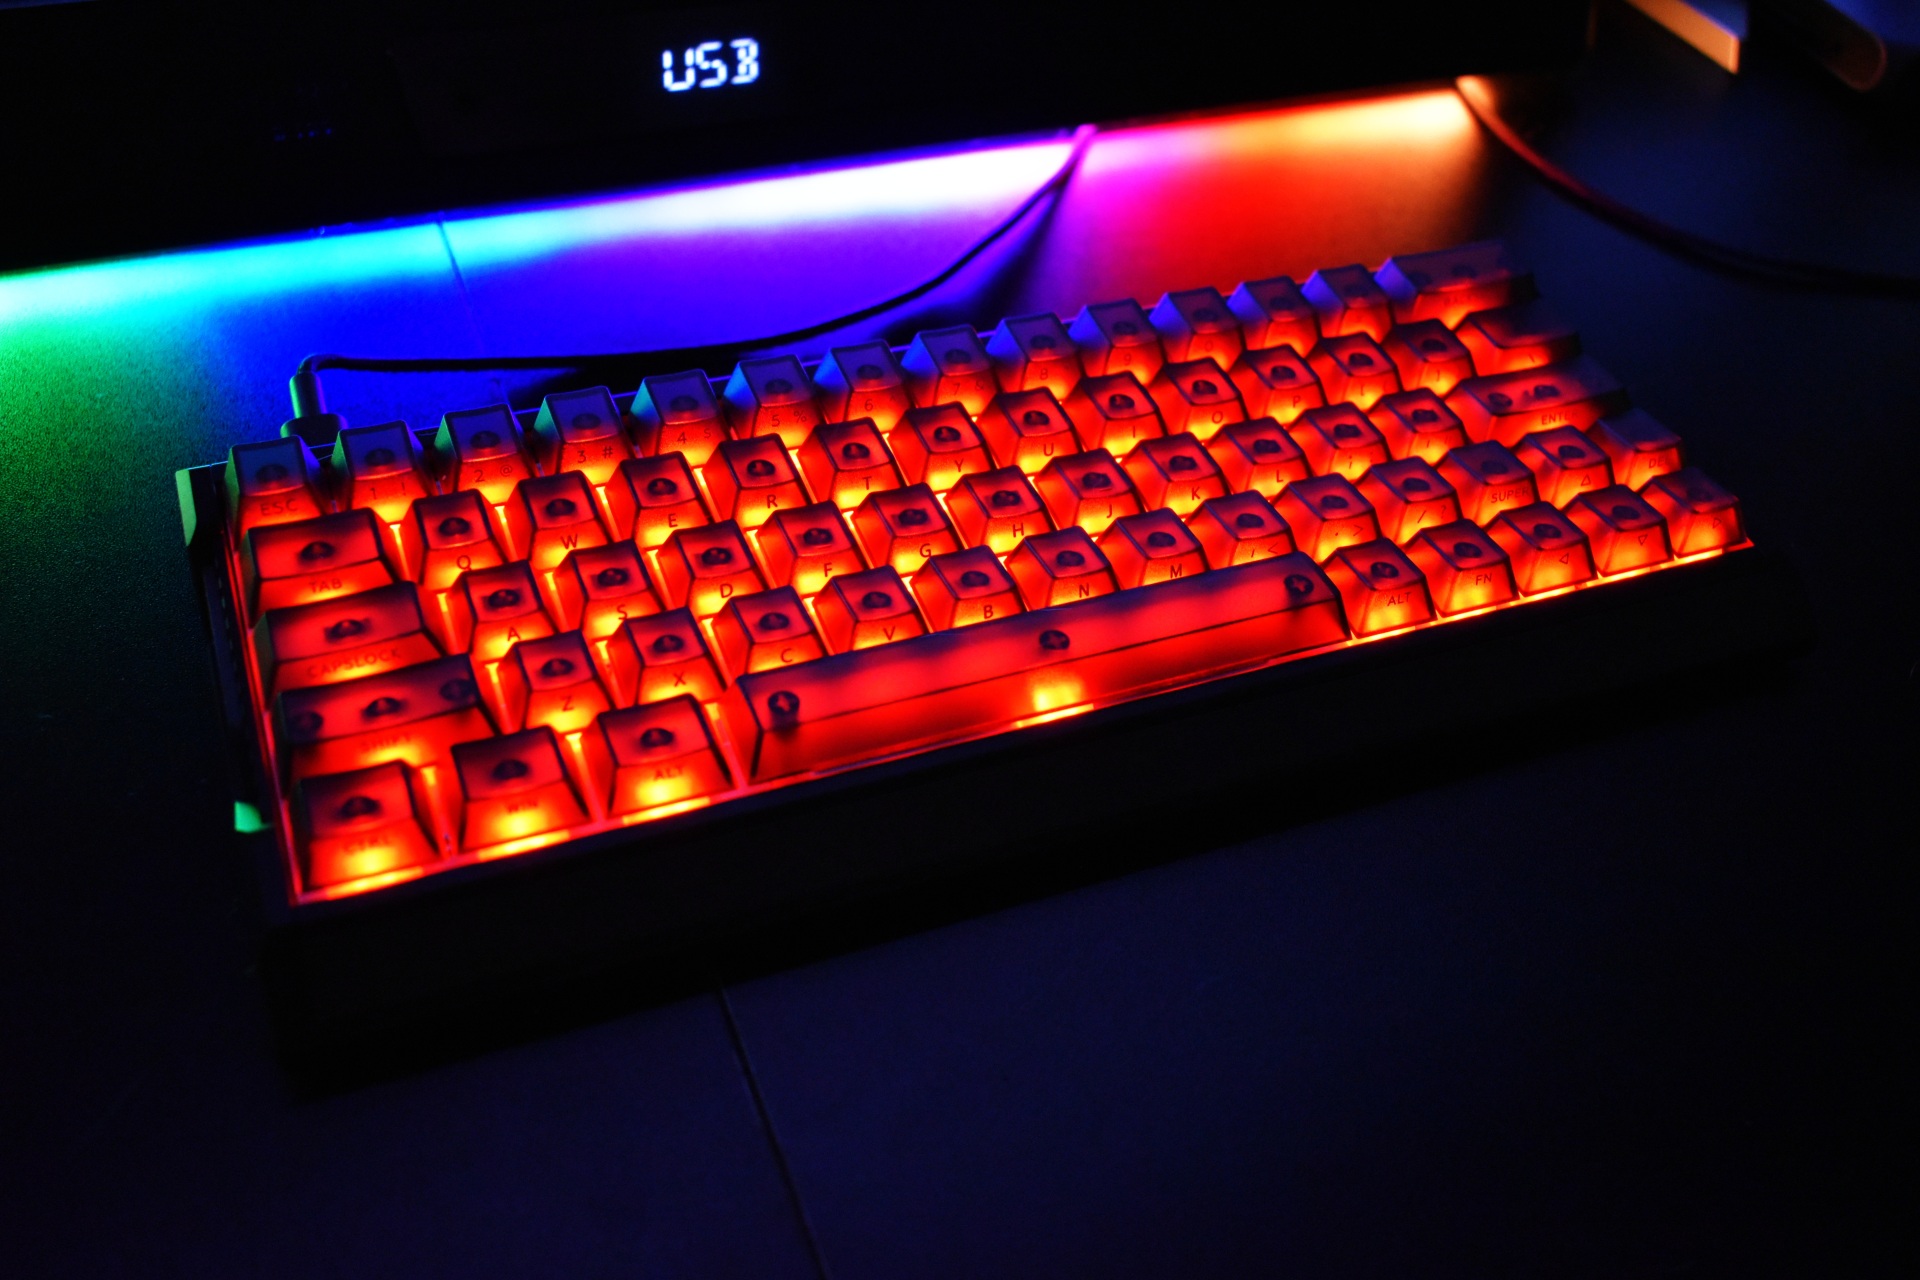
The frosted translucent PC keycaps look great and also allow the end user to easily see what's written on them (although that also depends on angle).


As usual there's a short clip available showcasing the RGB lighting of the keyboard both on YouTube and TikTok.


EV SOFTWARE V3


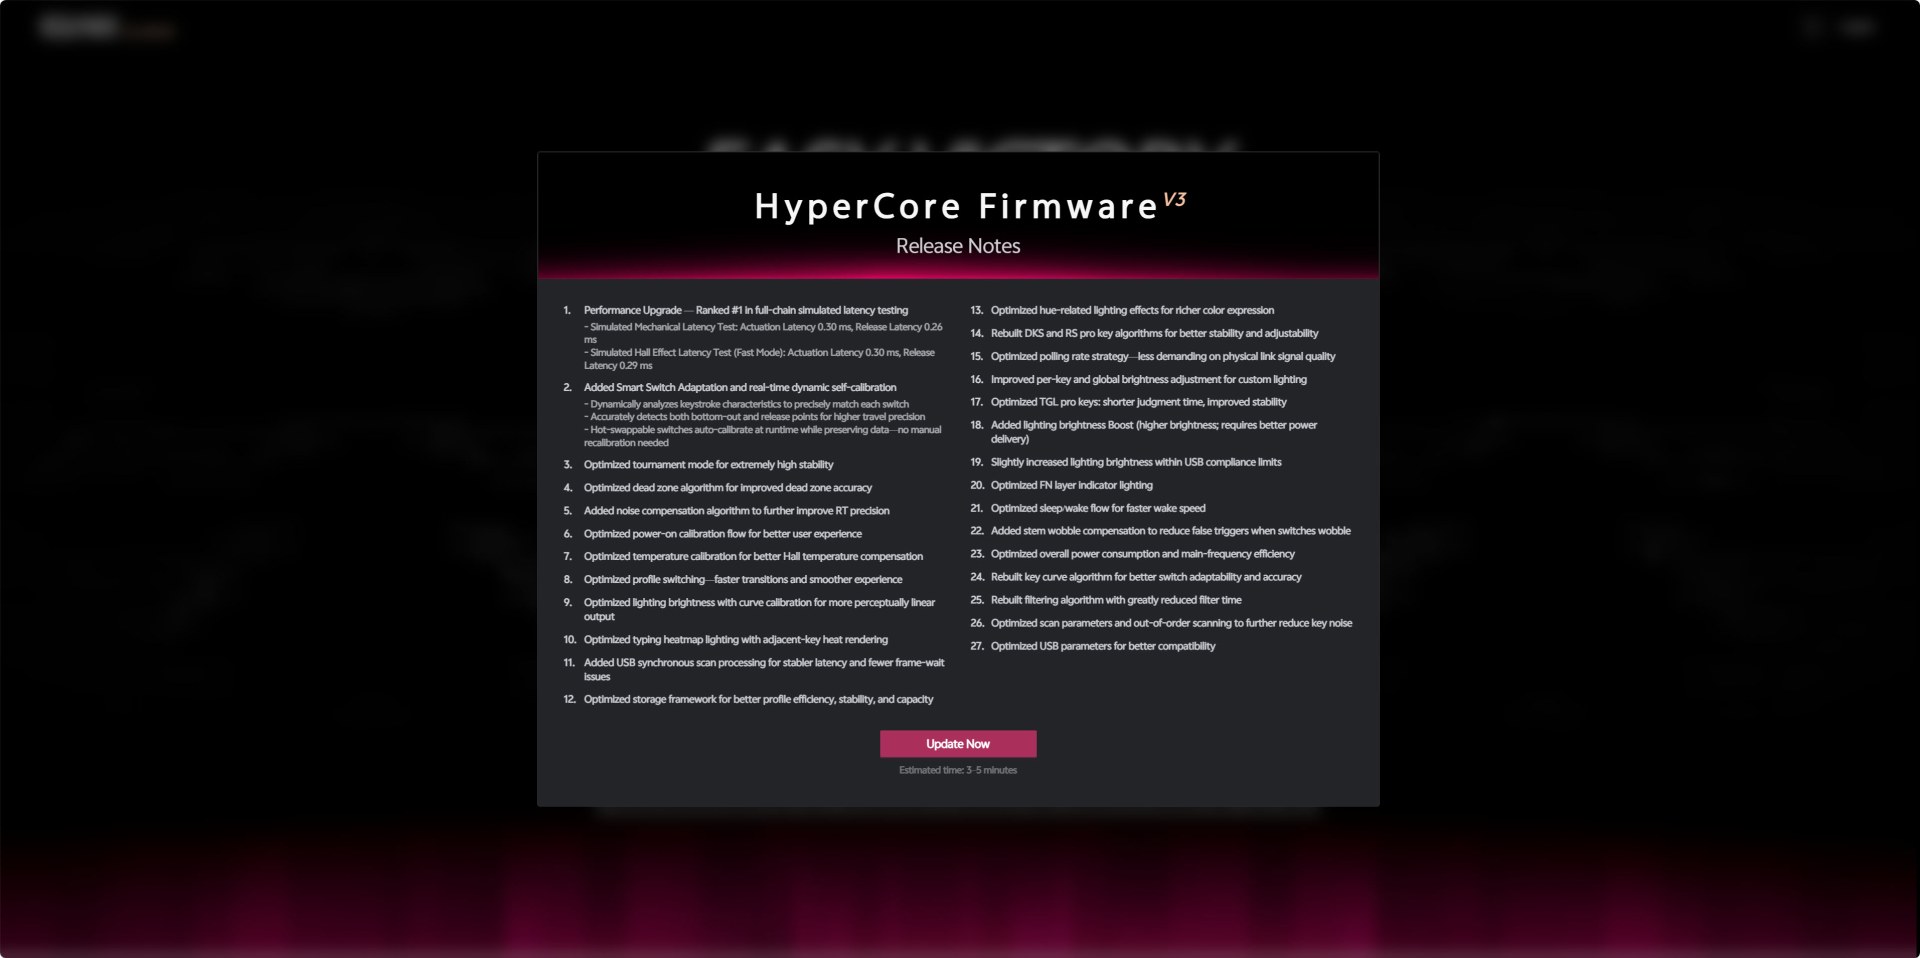
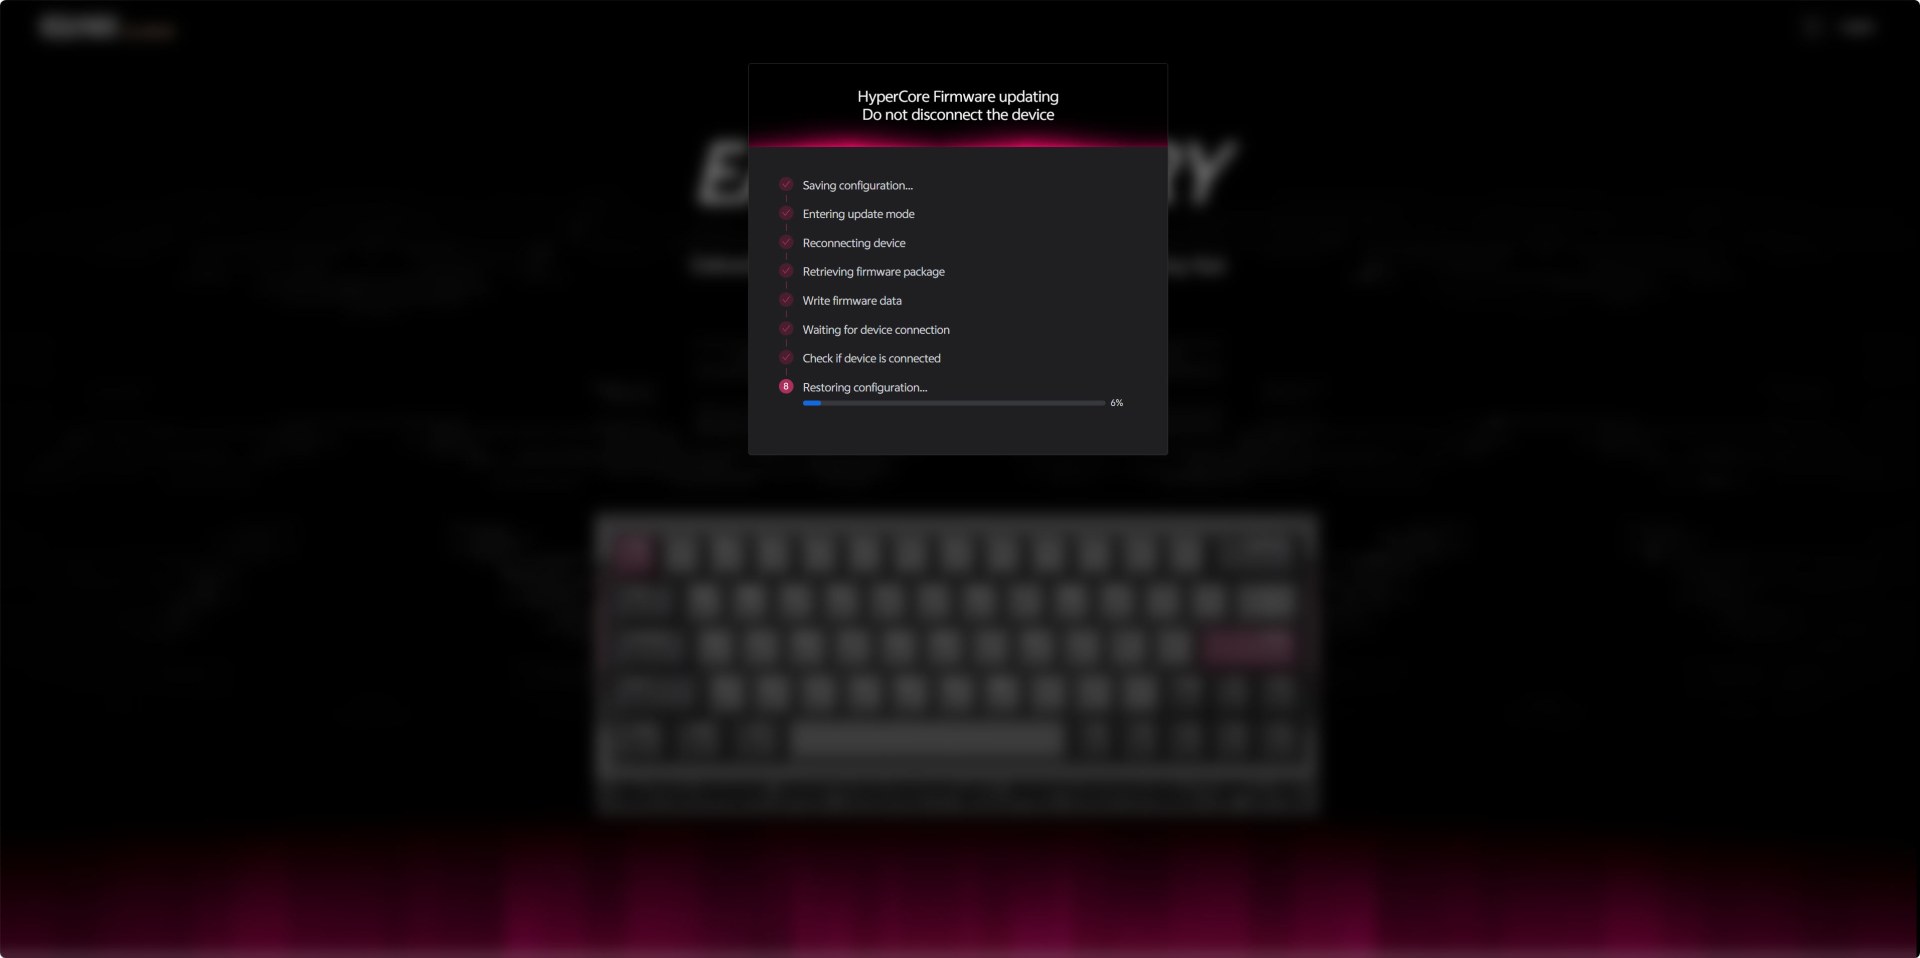
Once you access the web interface it will check for available updates as seen above.


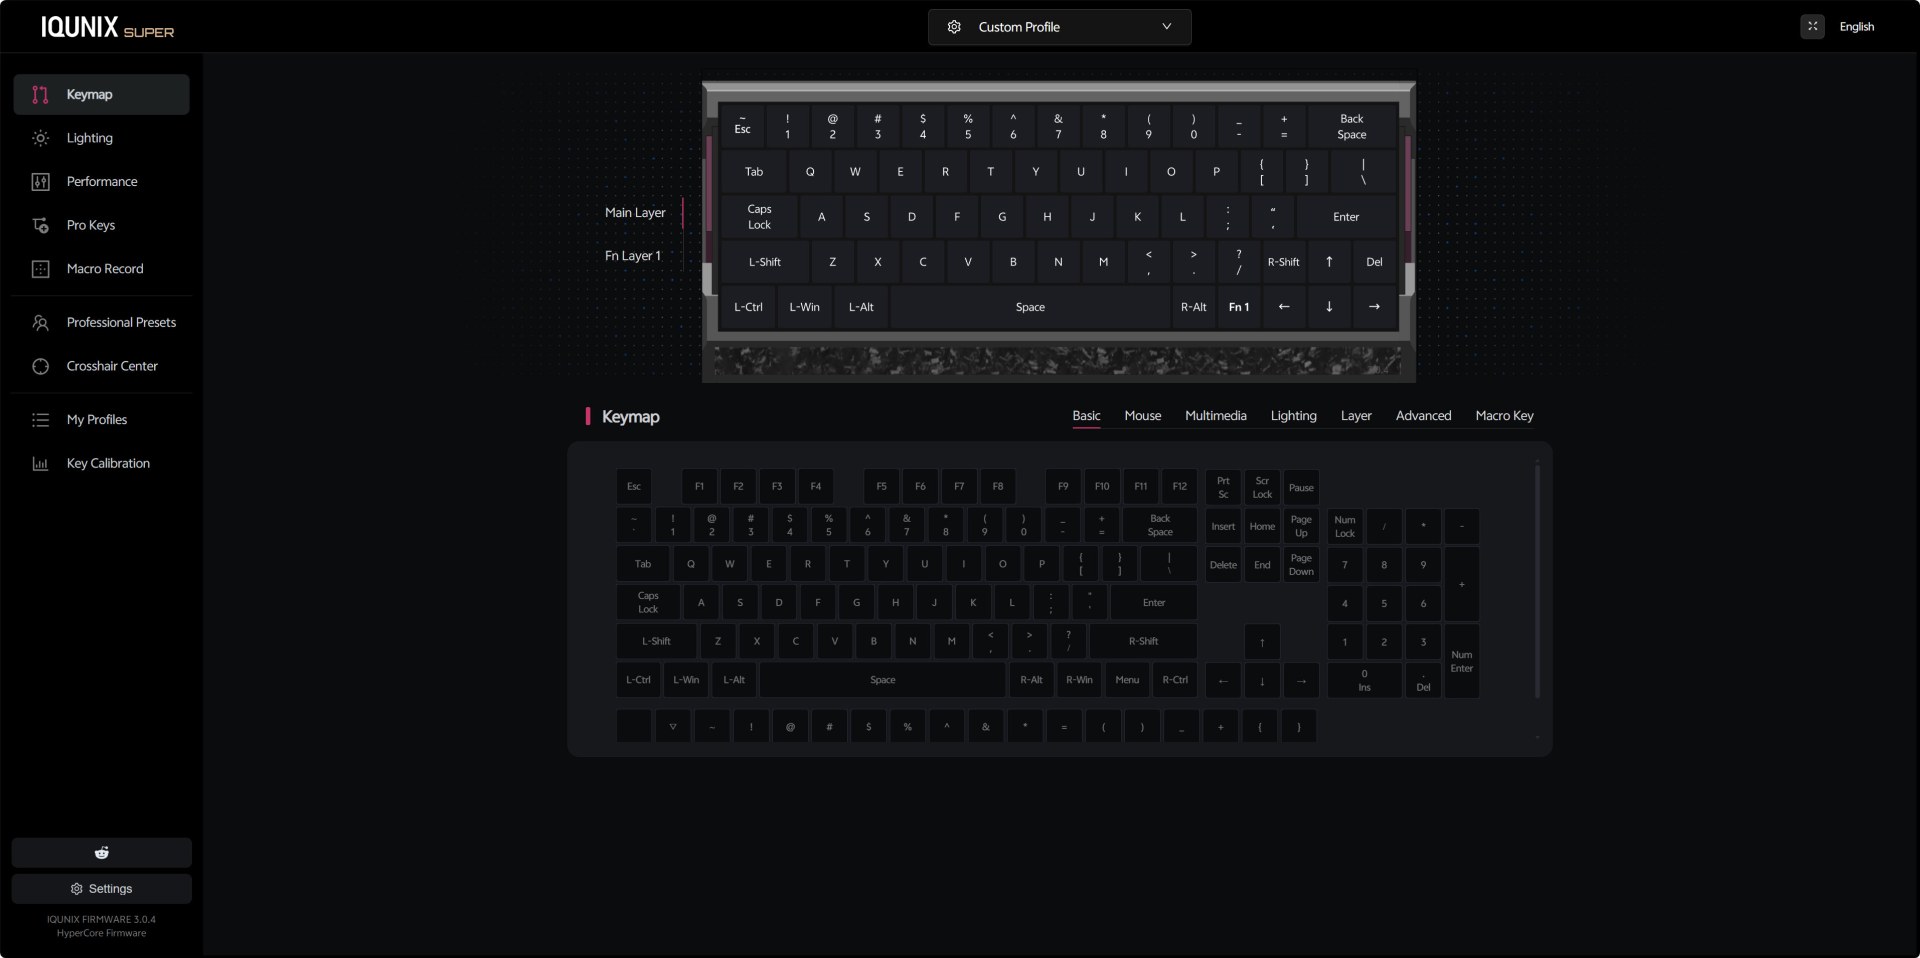
The Keymap section gives you a full visual representation of the EV63’s main and Fn layers. You can remap any key to basic functions, mouse actions, multimedia controls, lighting toggles, additional layers, or even macro triggers.


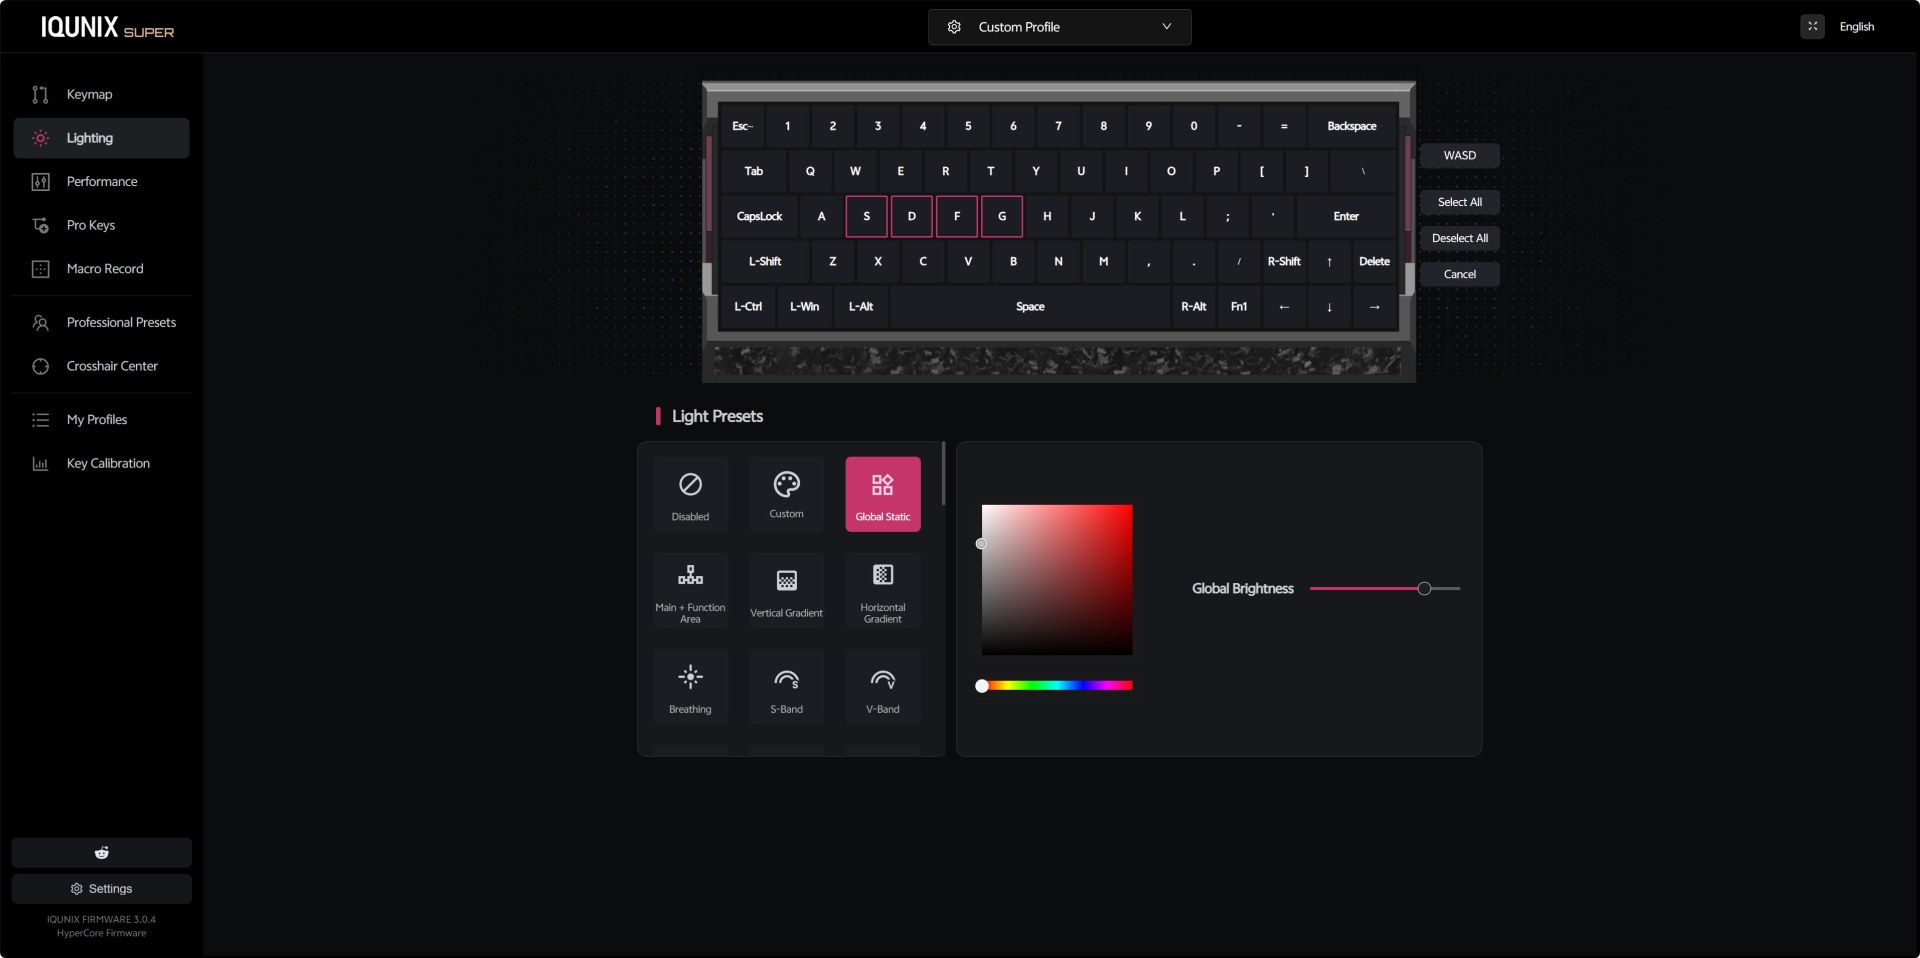
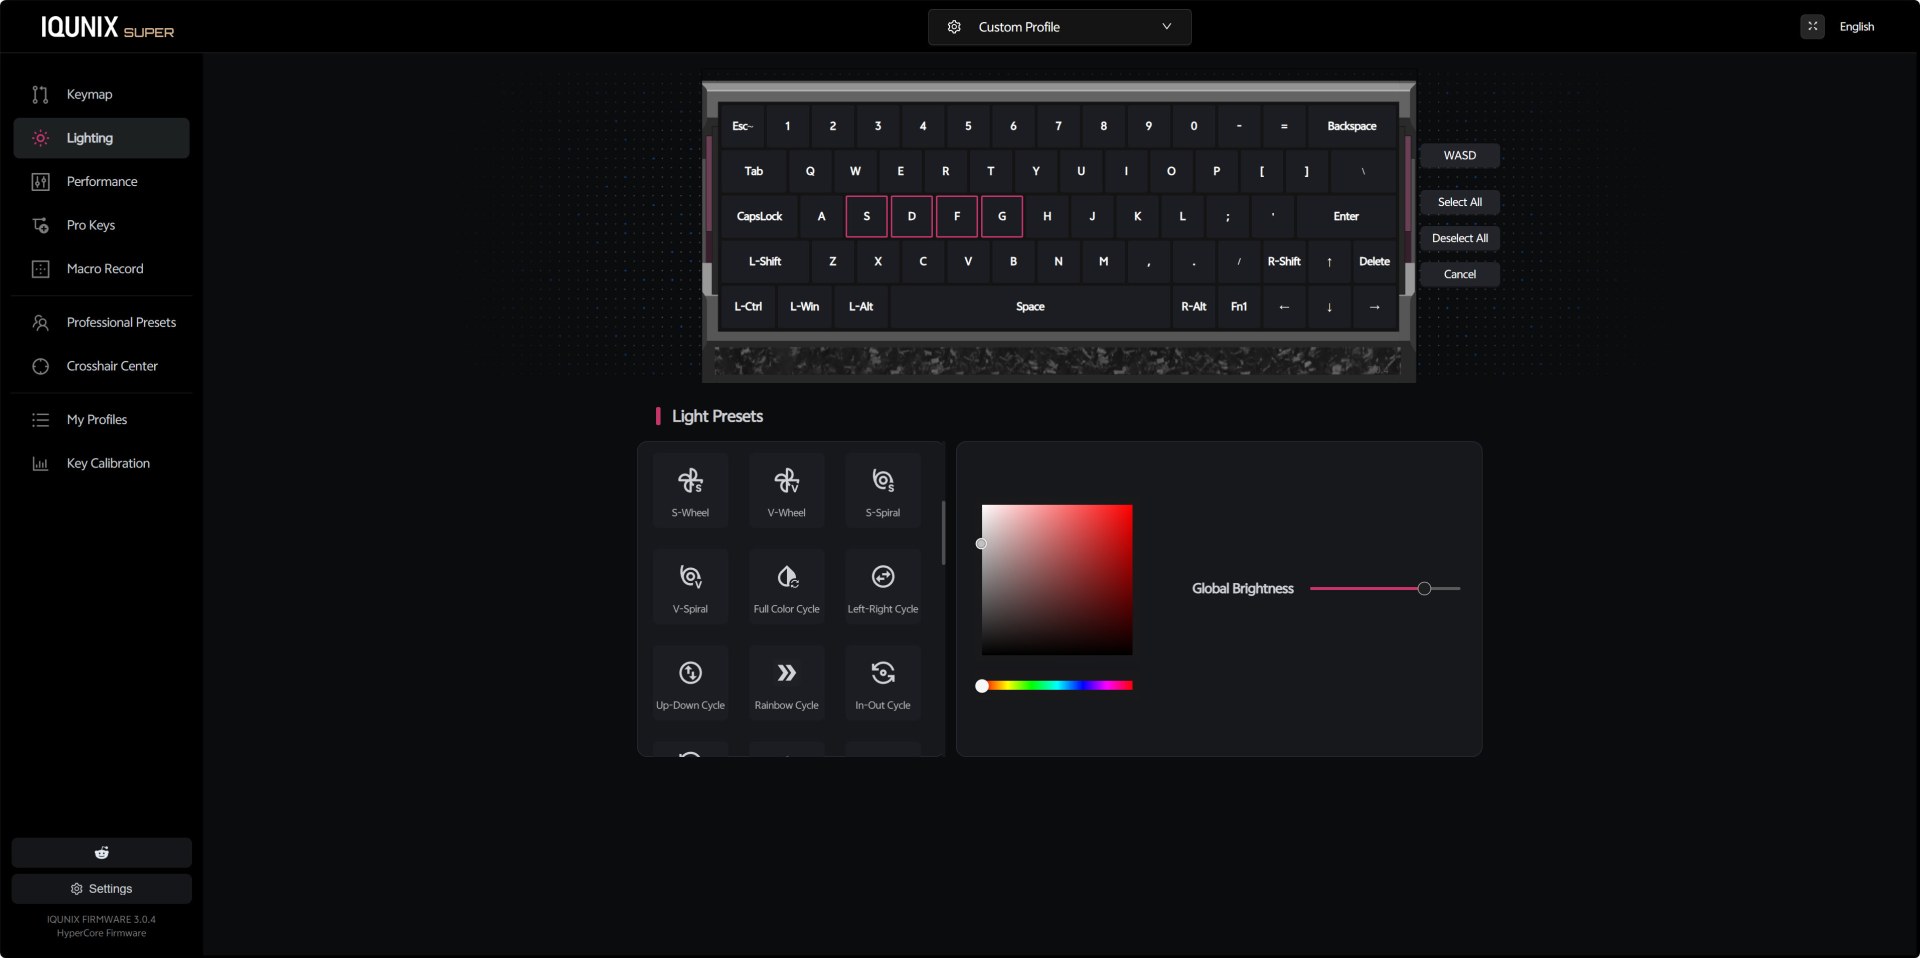
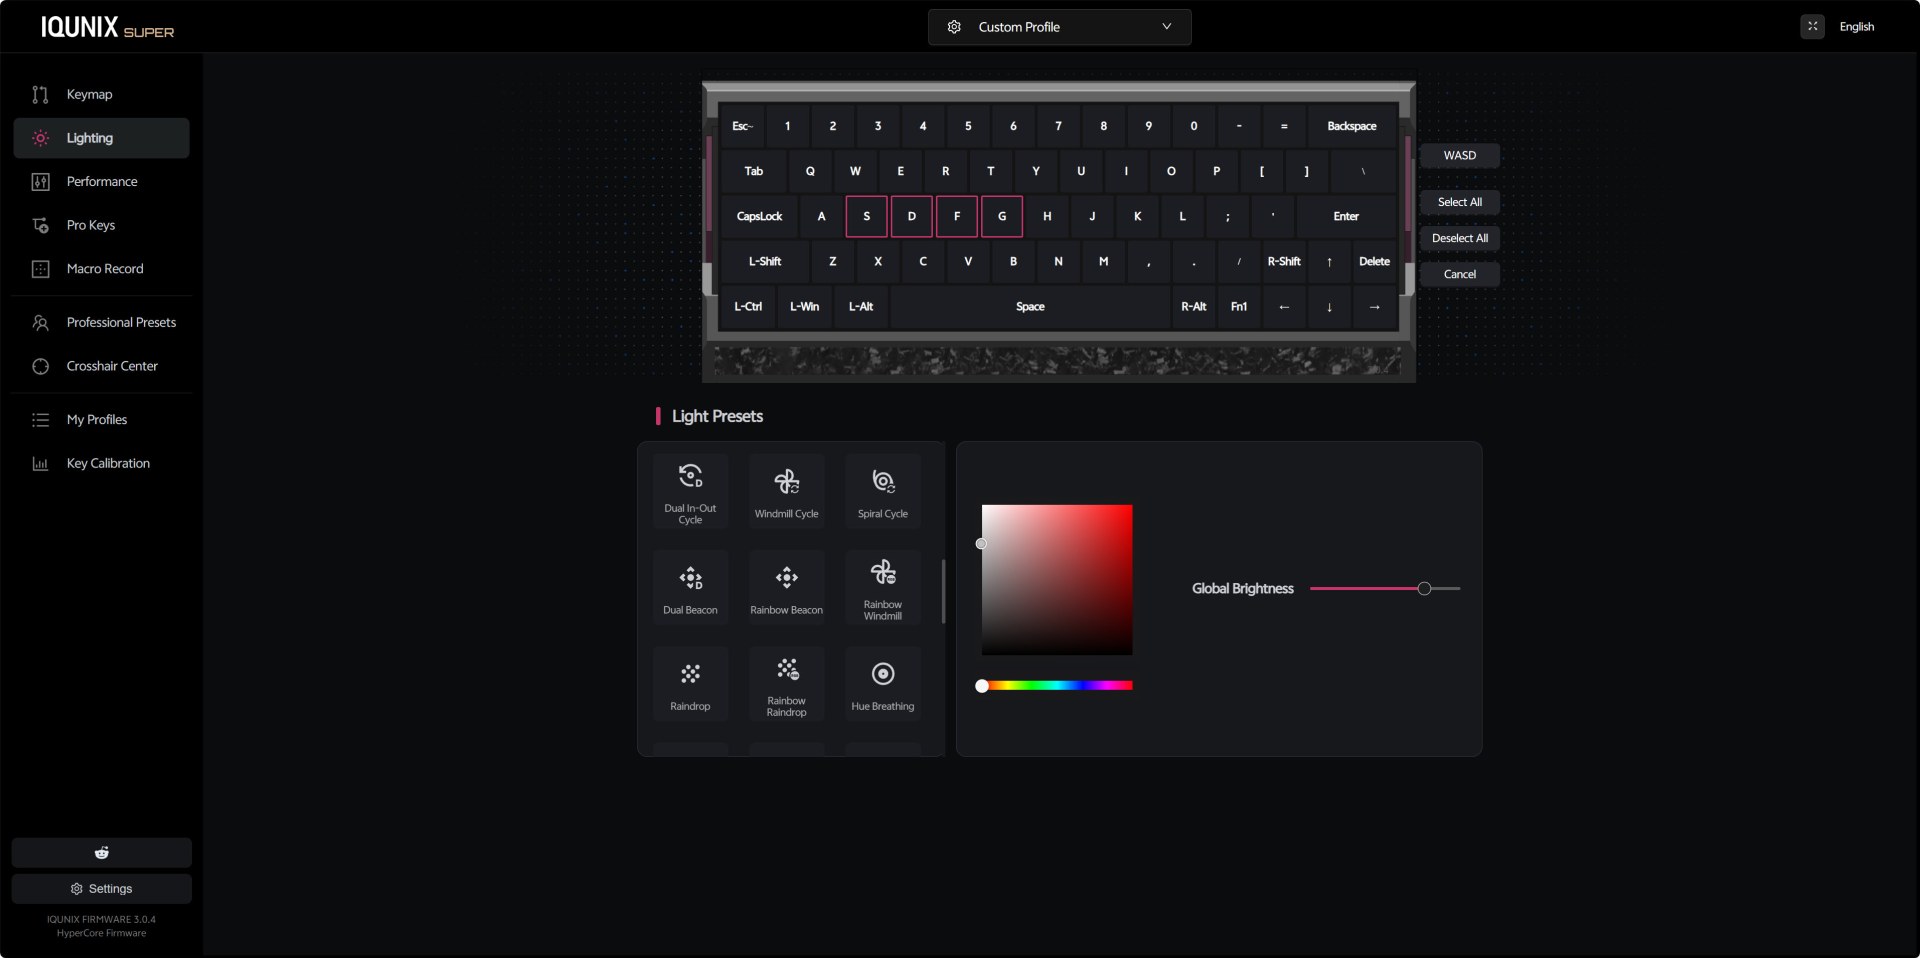
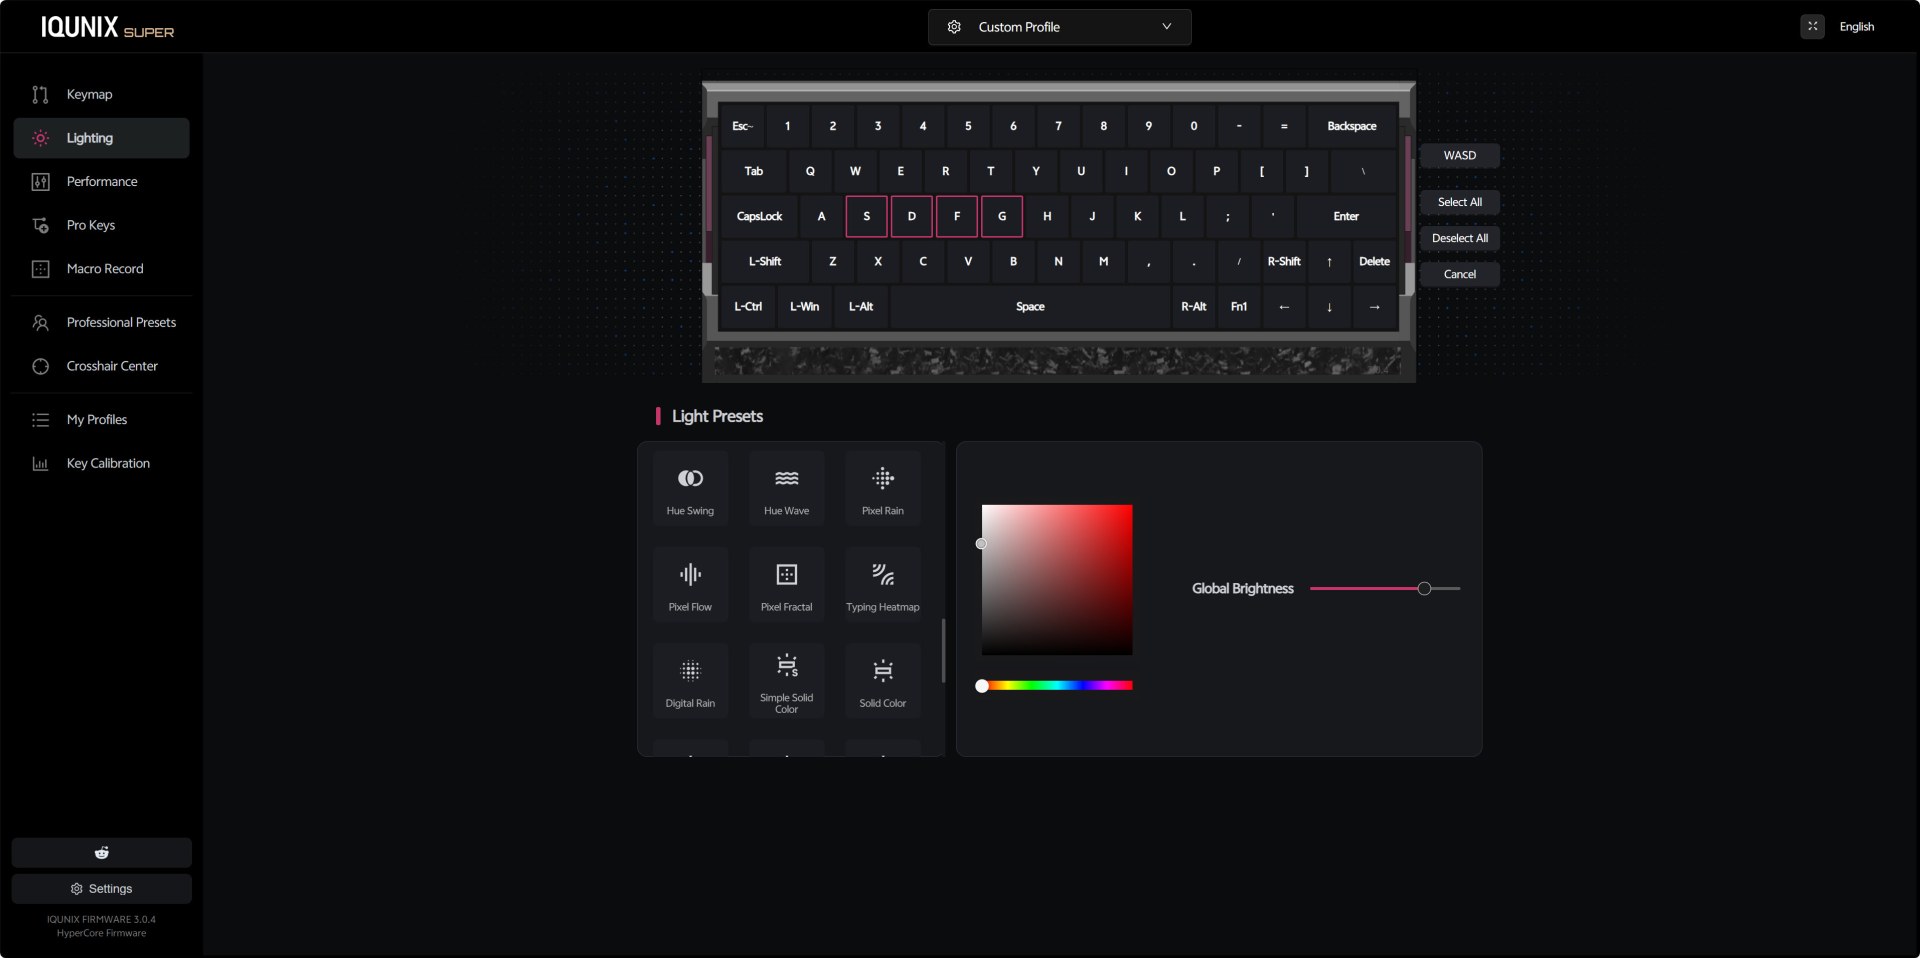
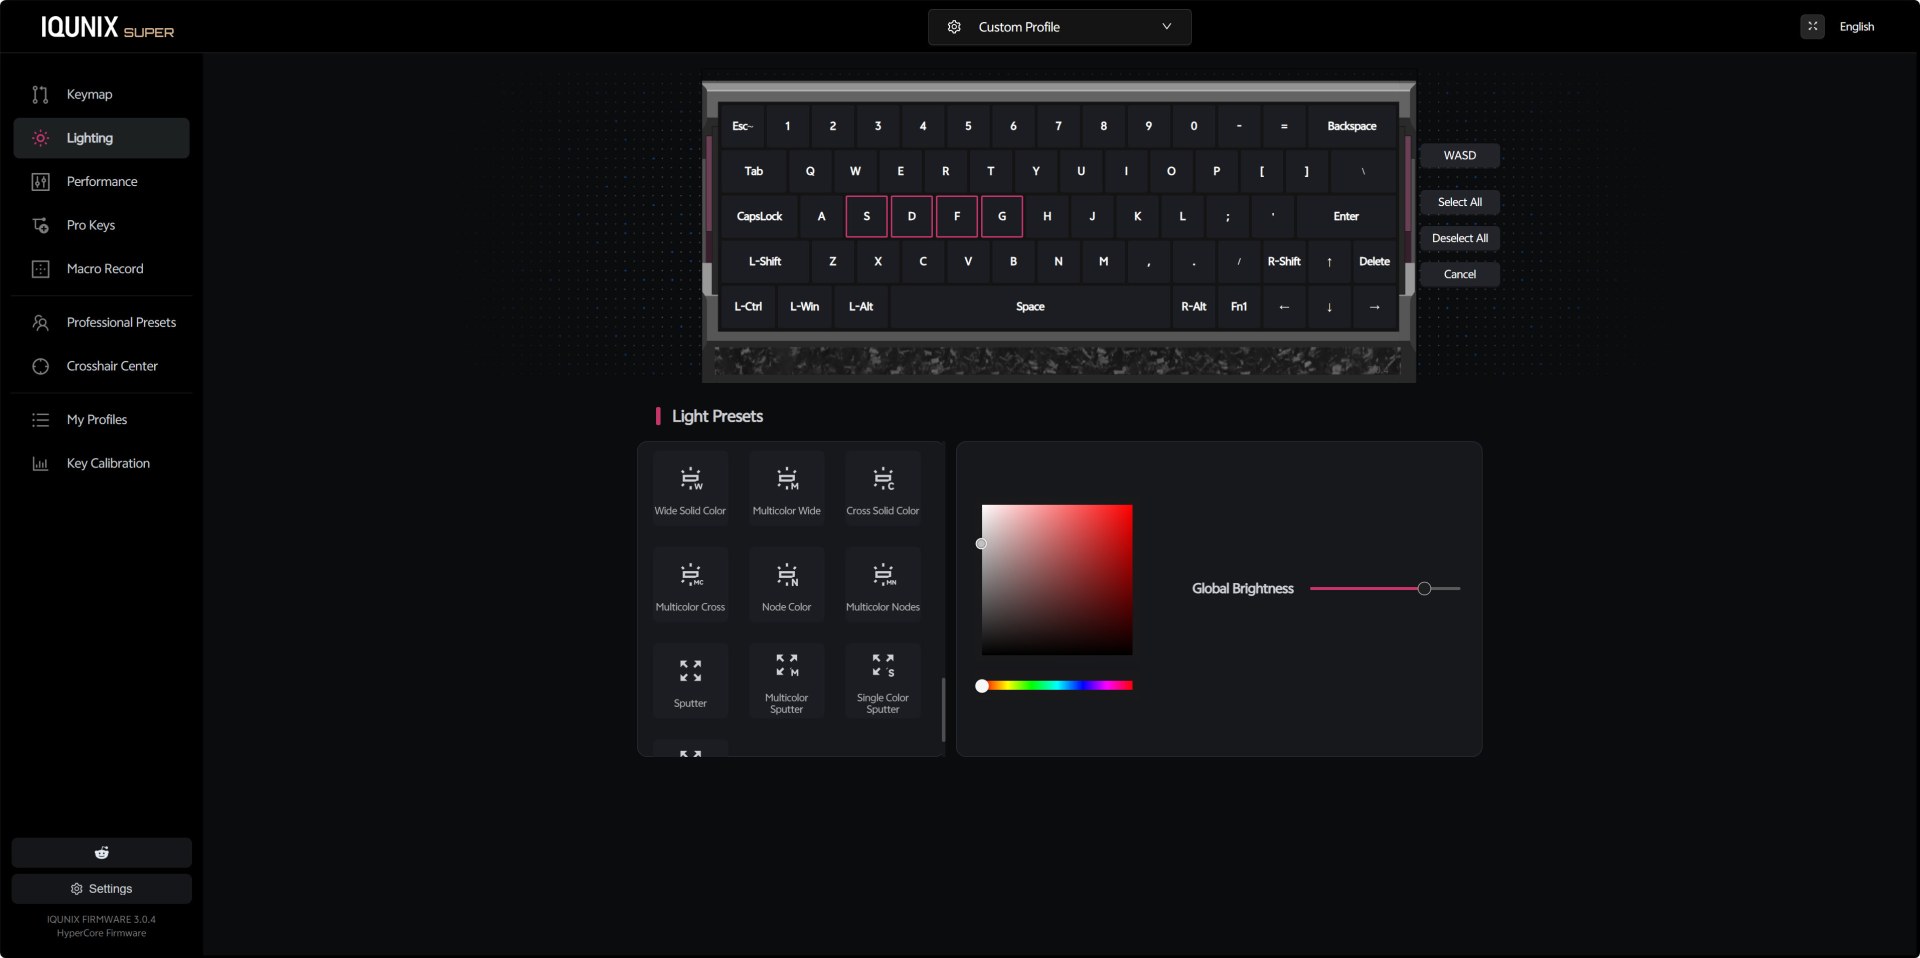
The lighting panel offers a wide range of presets (46 in total although not all are applicable to the EV63), from simple static colors to gradients, breathing modes, and directional effects. The color picker on the right is responsive and intuitive, letting you dial in exact hues and saturation levels, while the brightness slider gives you full control over intensity.


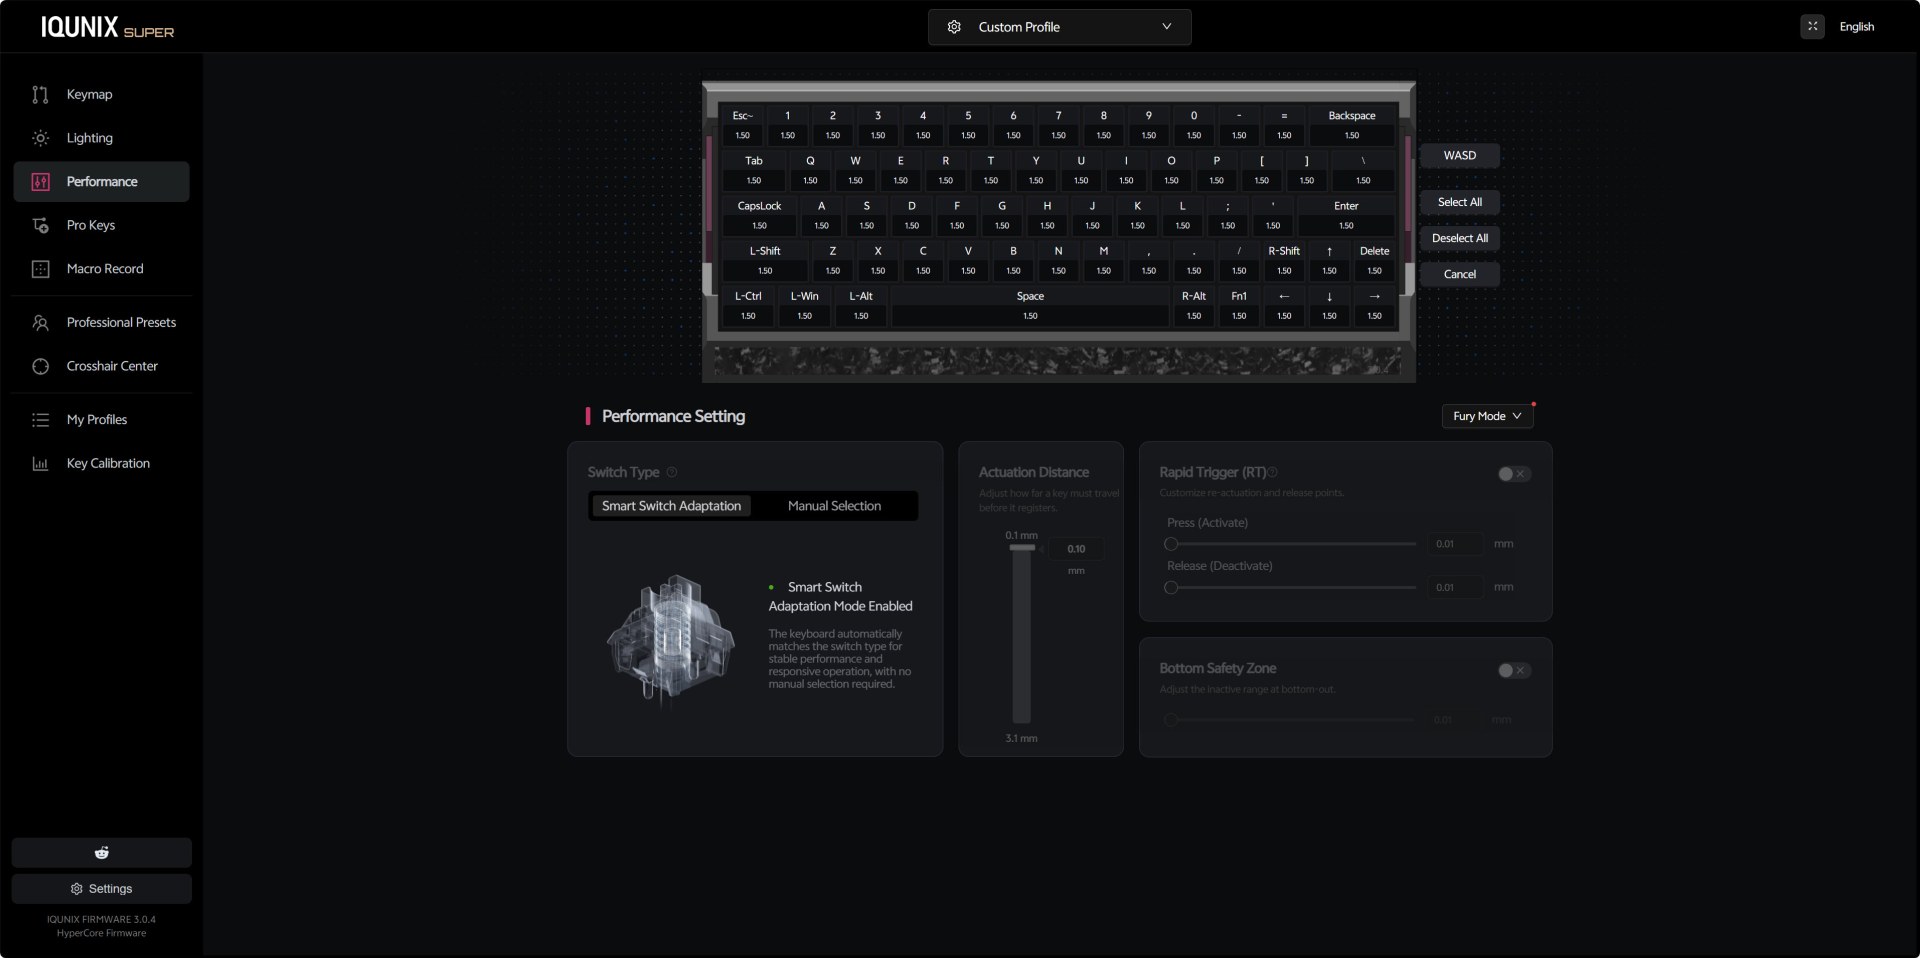
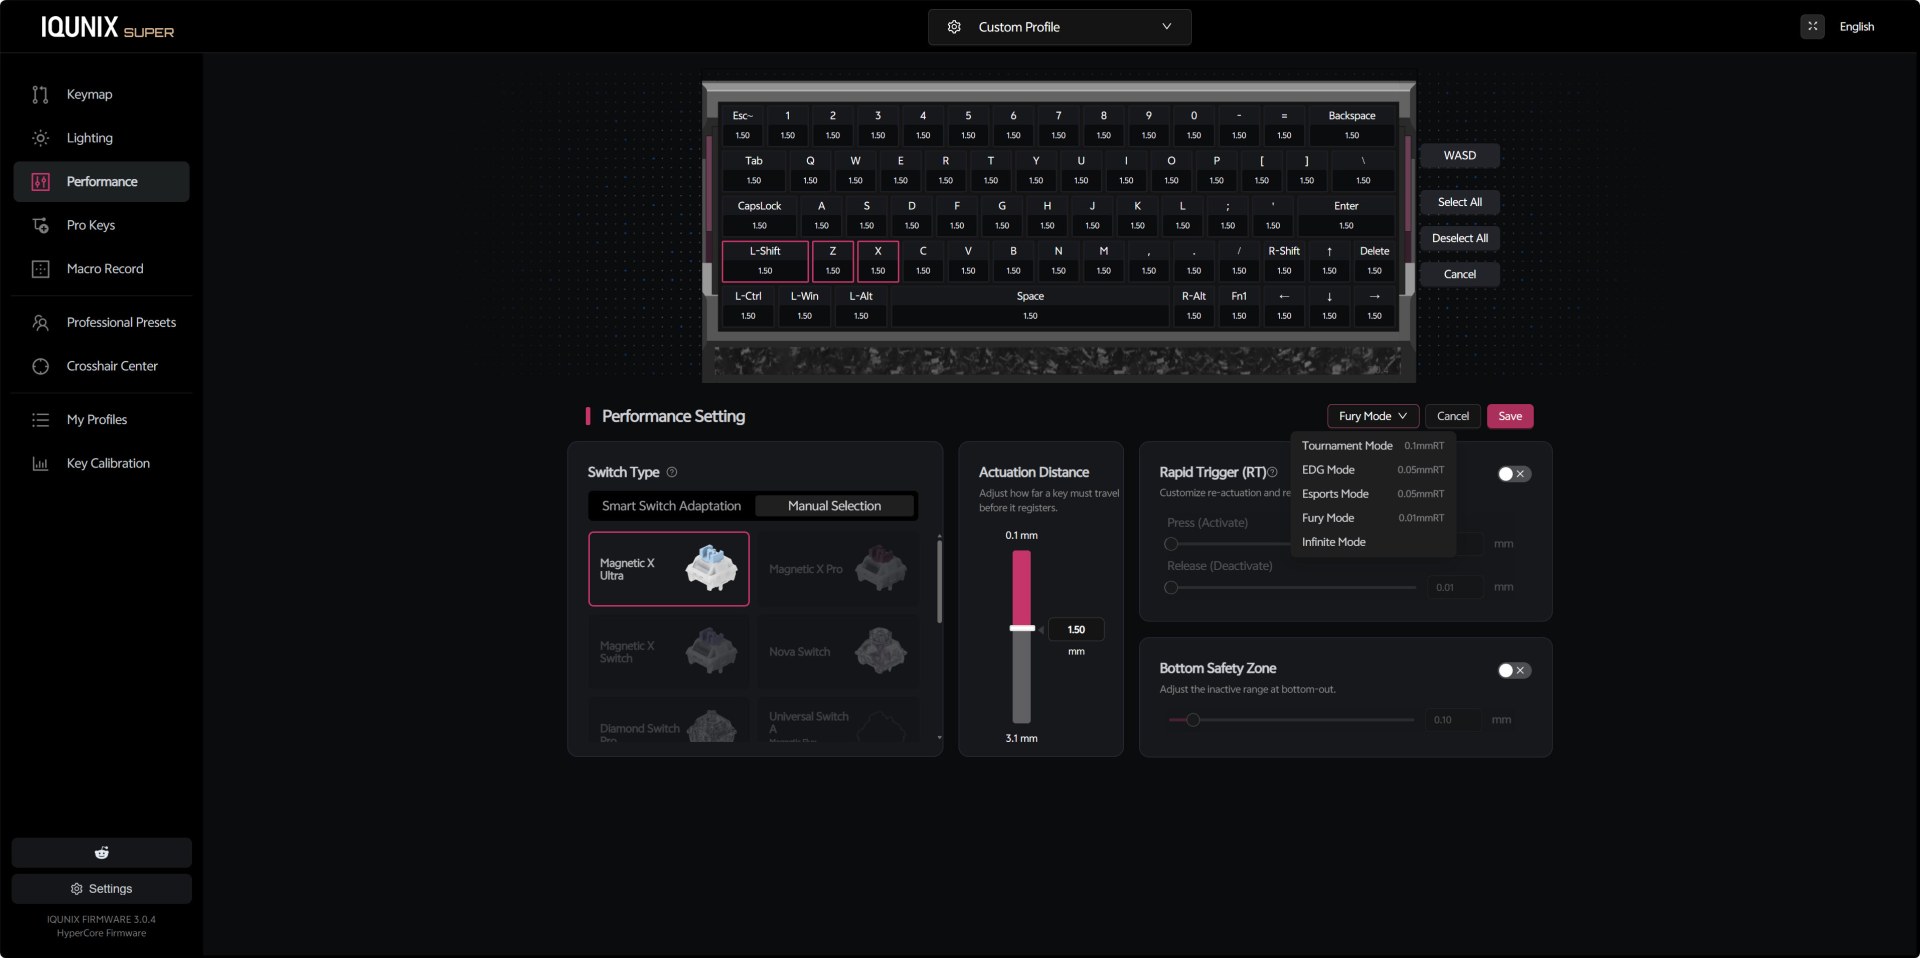
From the performance panel you can switch between Smart Switch Adaptation and Manual Magnetic X modes giving you direct control over actuation distance and Rapid Trigger behavior. You get a full per‑key actuation map, all set to 1.50mm by default. The actuation slider lets you adjust responsiveness from 0.1mm to 3.1mm, and the Bottom Safety Zone toggle helps prevent accidental re‑triggers at bottom‑out. The dropdown for Fury Mode includes multiple presets, Tournament, EDG, Esports, Fury, Infinite, each adjusting how quickly keys reset after being pressed.


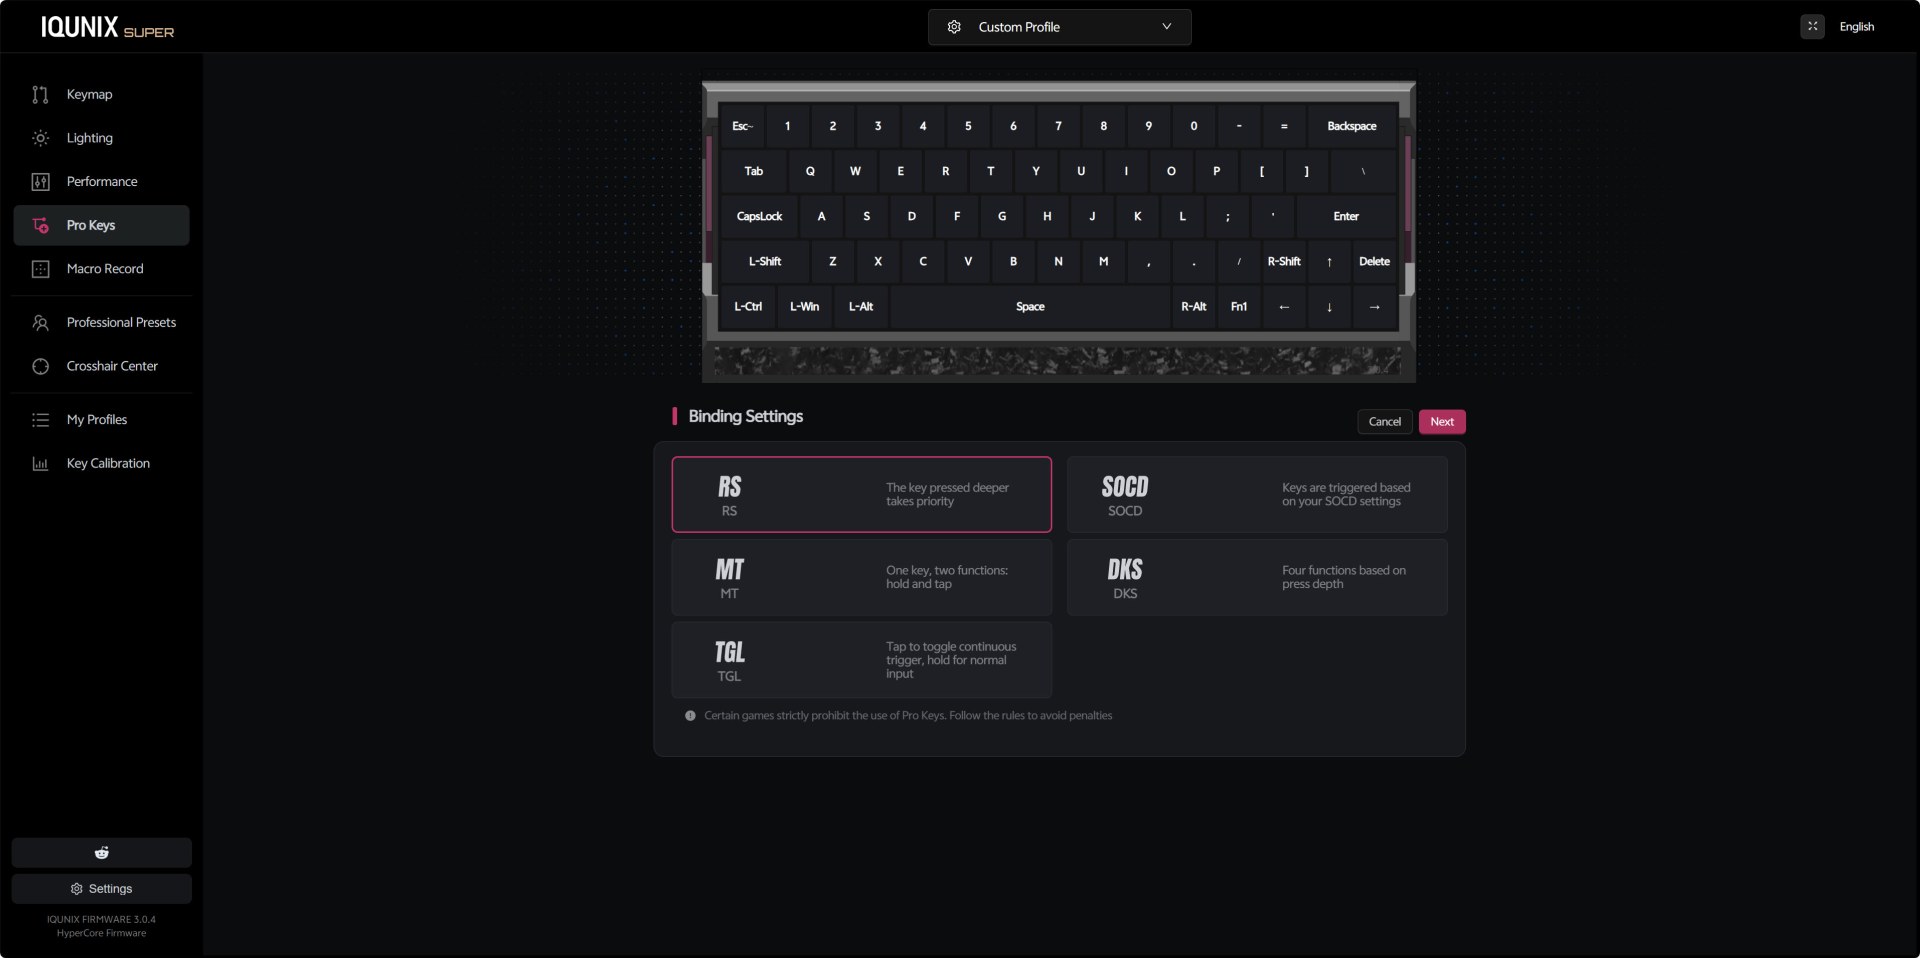
The Pro Keys section is where IQUNIX packs its most advanced input behaviors. You can assign RS (depth priority), SOCD cleaning, Mod Tap dual‑function keys, DKS four‑function depth keys, and toggle‑based continuous inputs.


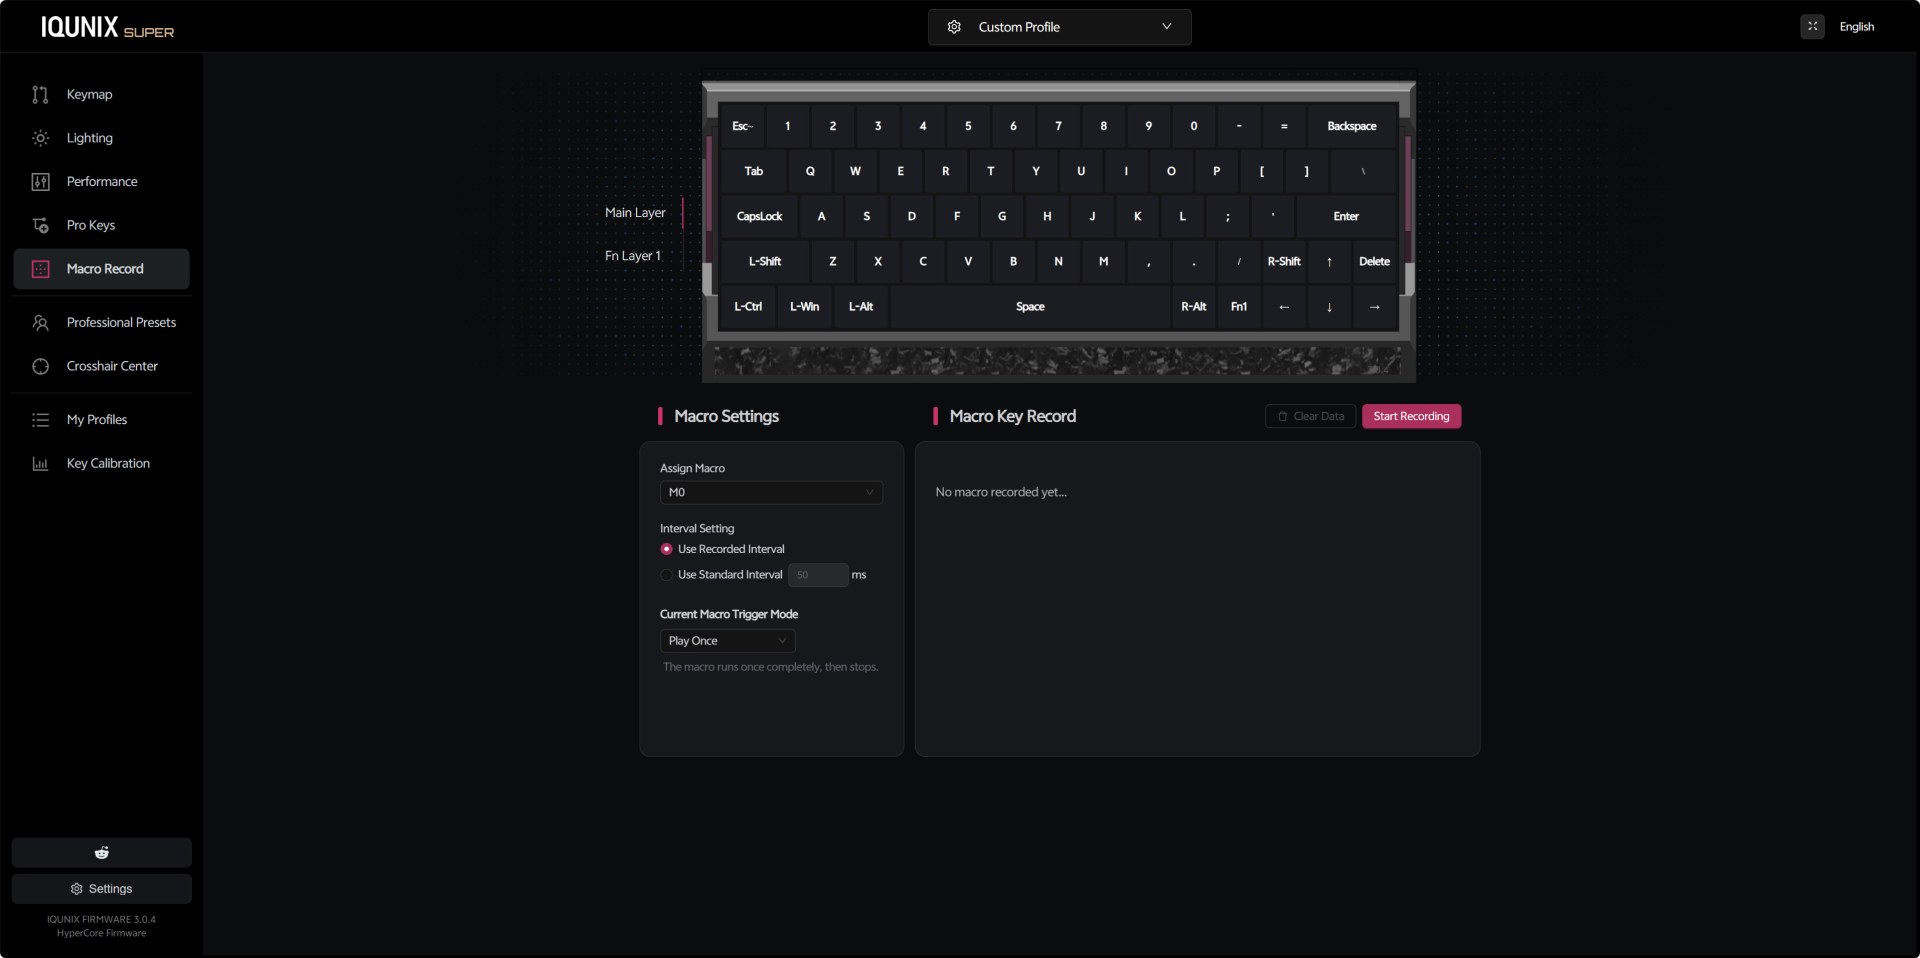
The macro recording interface is simple but effective. You can assign macros to slots like M0, choose between recorded intervals or fixed timing, and set the trigger mode (play once, loop, etc.). The recording panel shows each keypress as you capture it, and you can clear or restart the macro at any time.


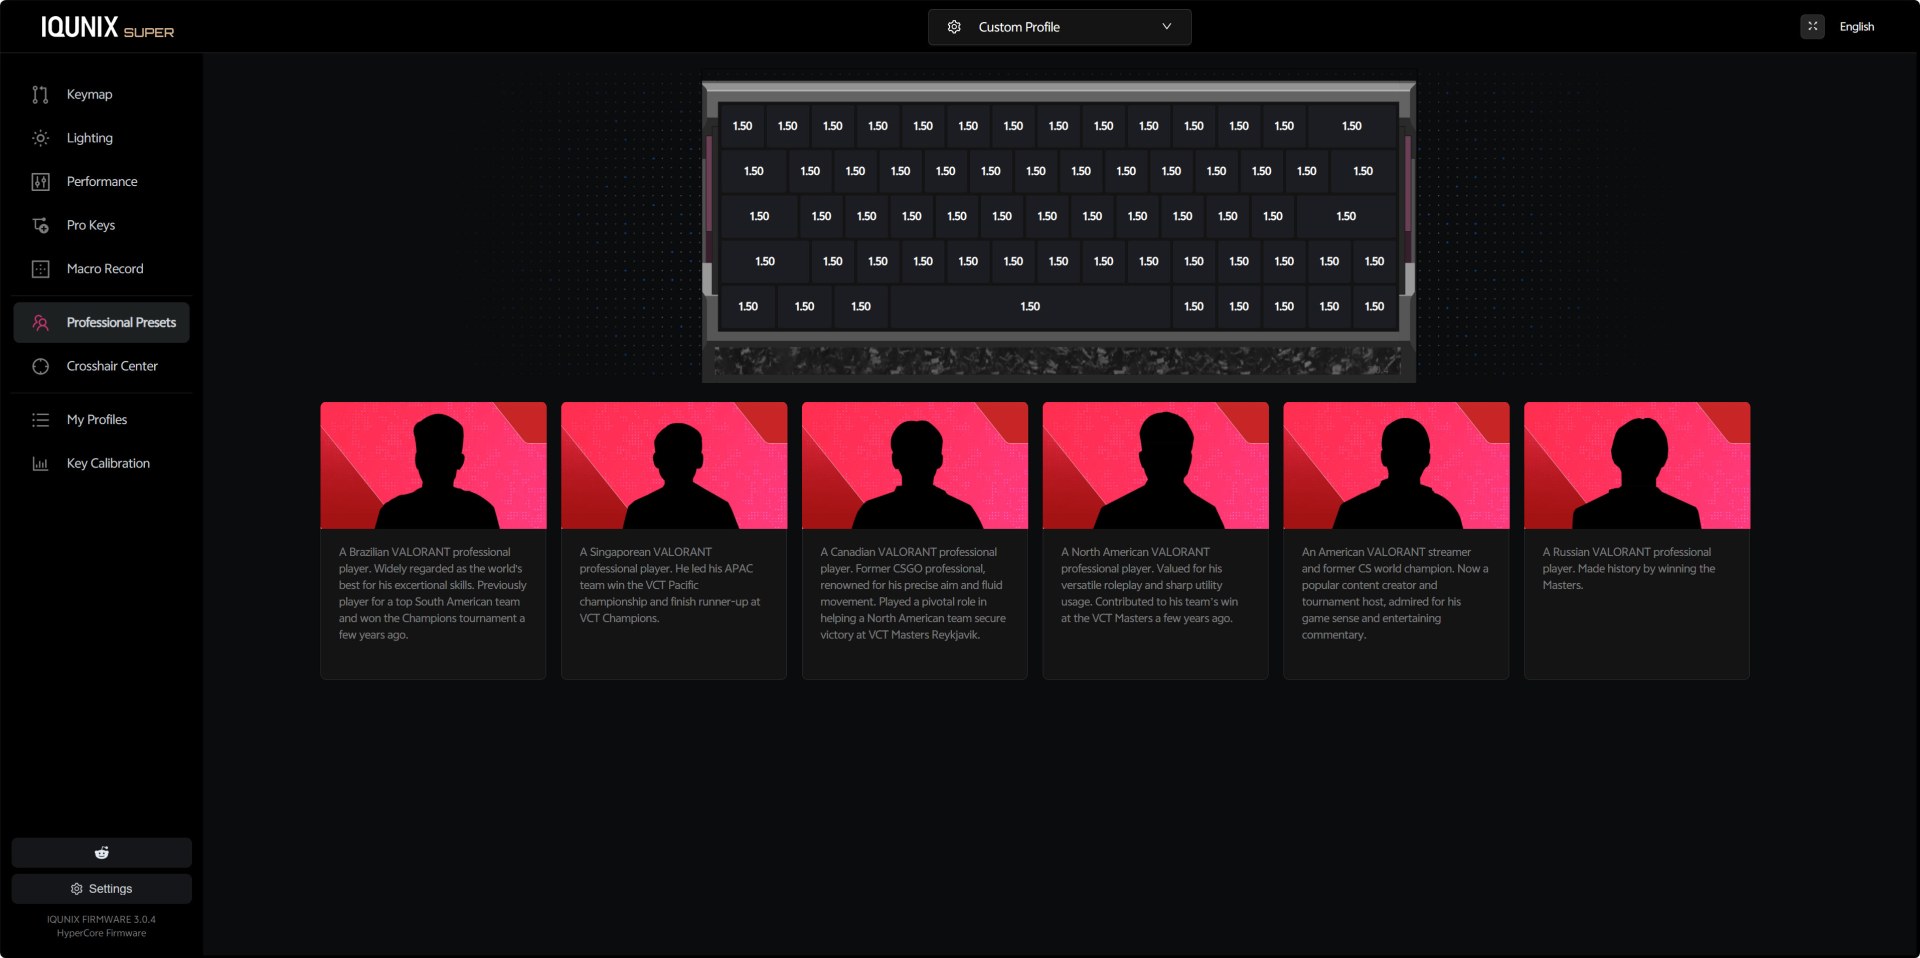
Inside the professional presets IQUNIX has placed profiles inspired by well‑known Valorant players. Each card includes a short description of the player’s background, and selecting one loads a preset tuned for their preferred playstyle.


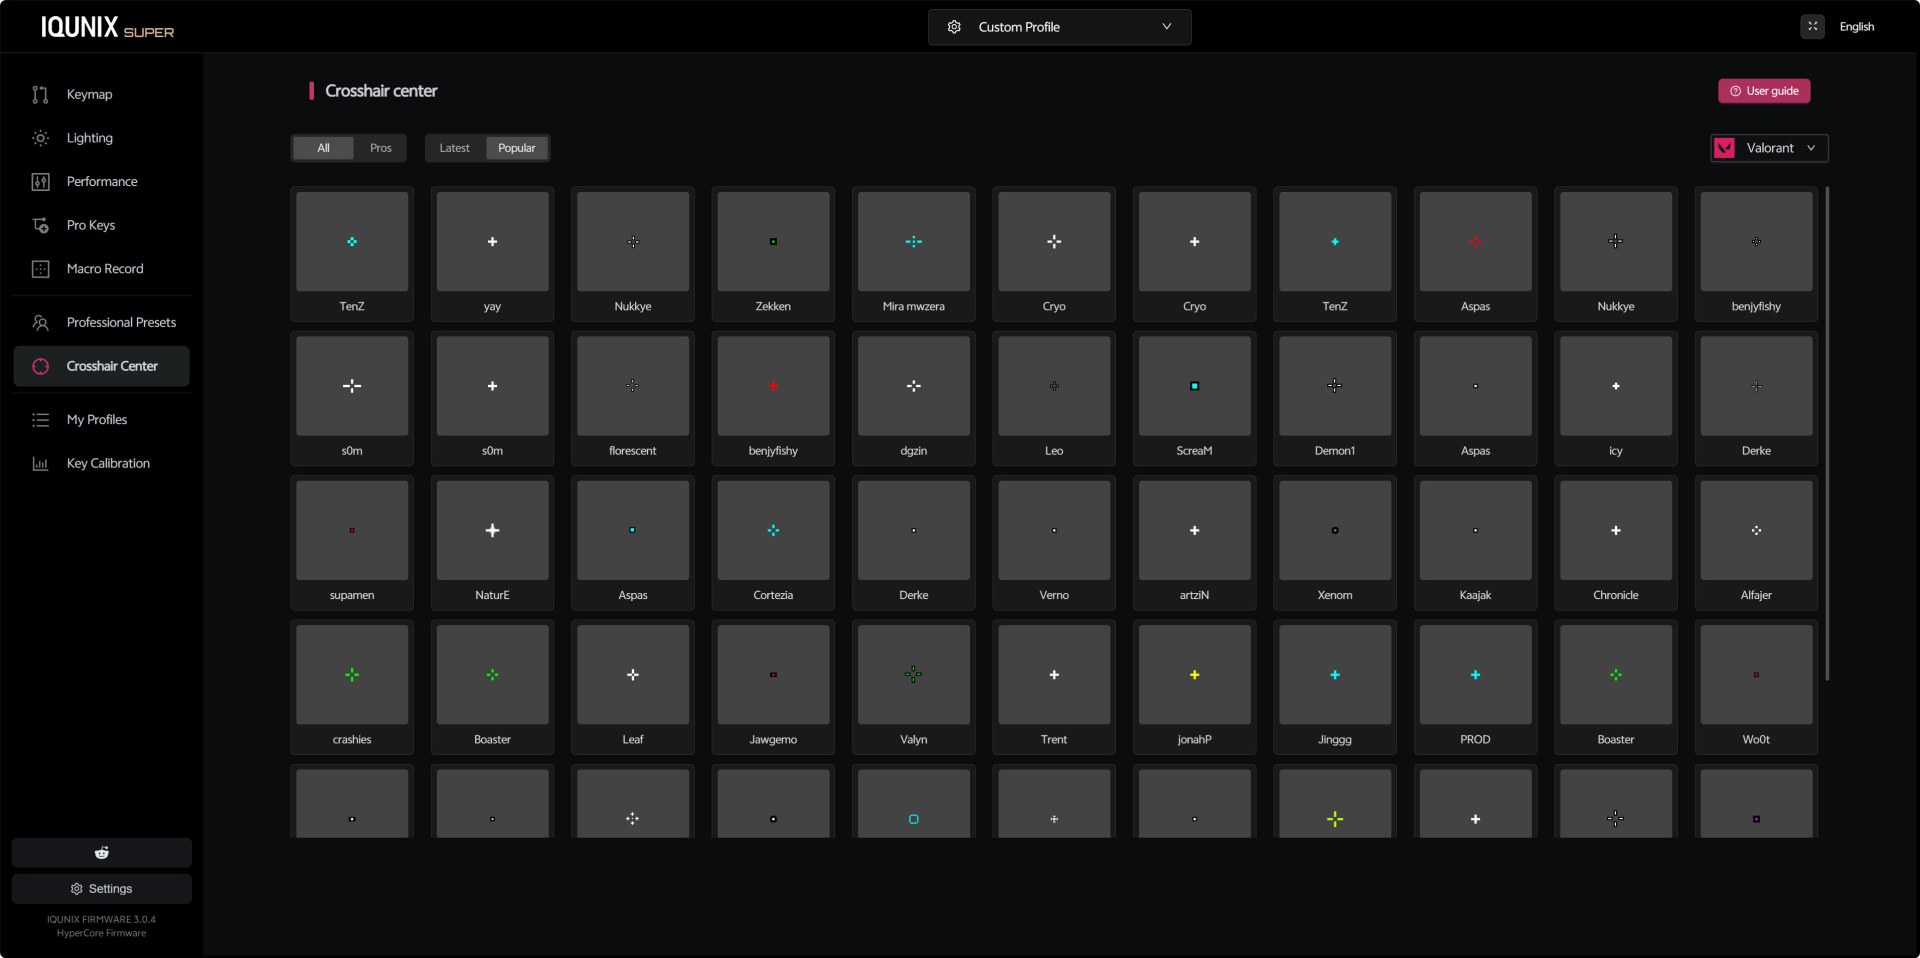
The Crosshair Center is a visual library of crosshairs used by popular Valorant pros. You can browse designs from players like TenZ, yay, ScreaM, Derke, and others, comparing shapes, colors, and styles (you still need to input these manually into the game).


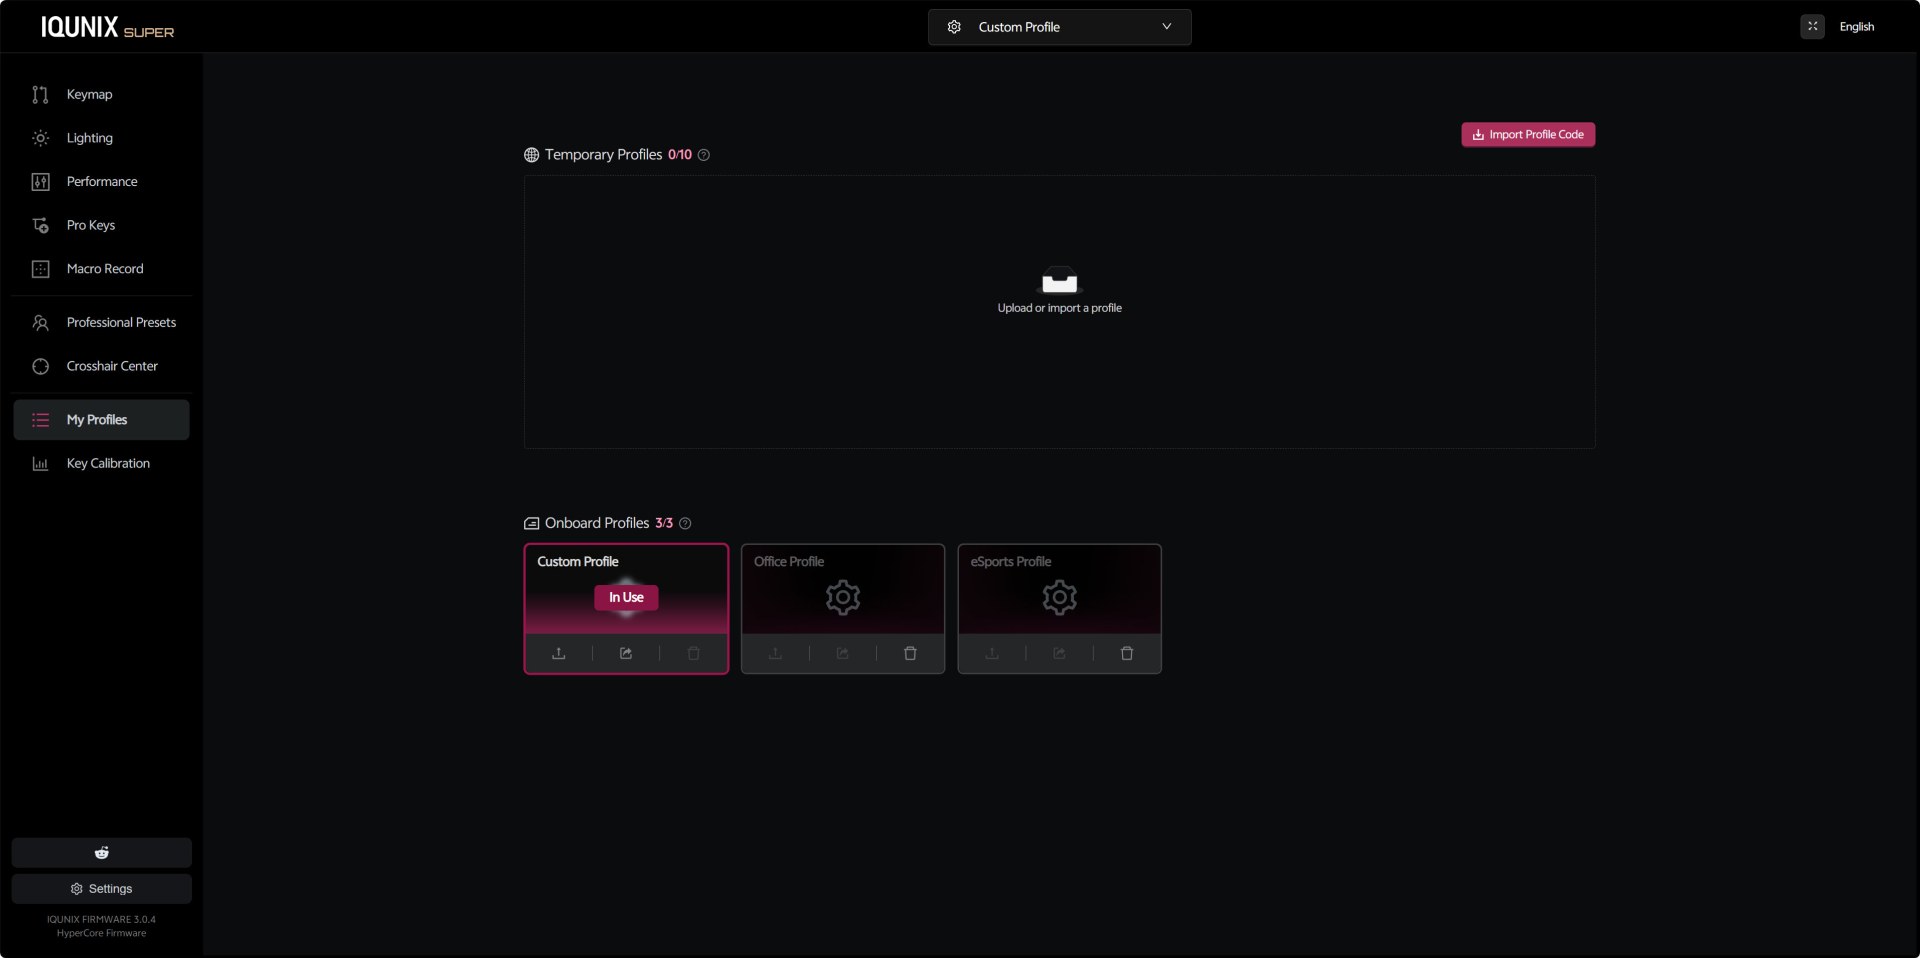
From the profiles tab you can store up to three onboard profiles and up to ten temporary ones. Switching between Custom, Office, and eSports profiles is instant, and each profile can contain its own keymap, lighting, performance settings, and macros.


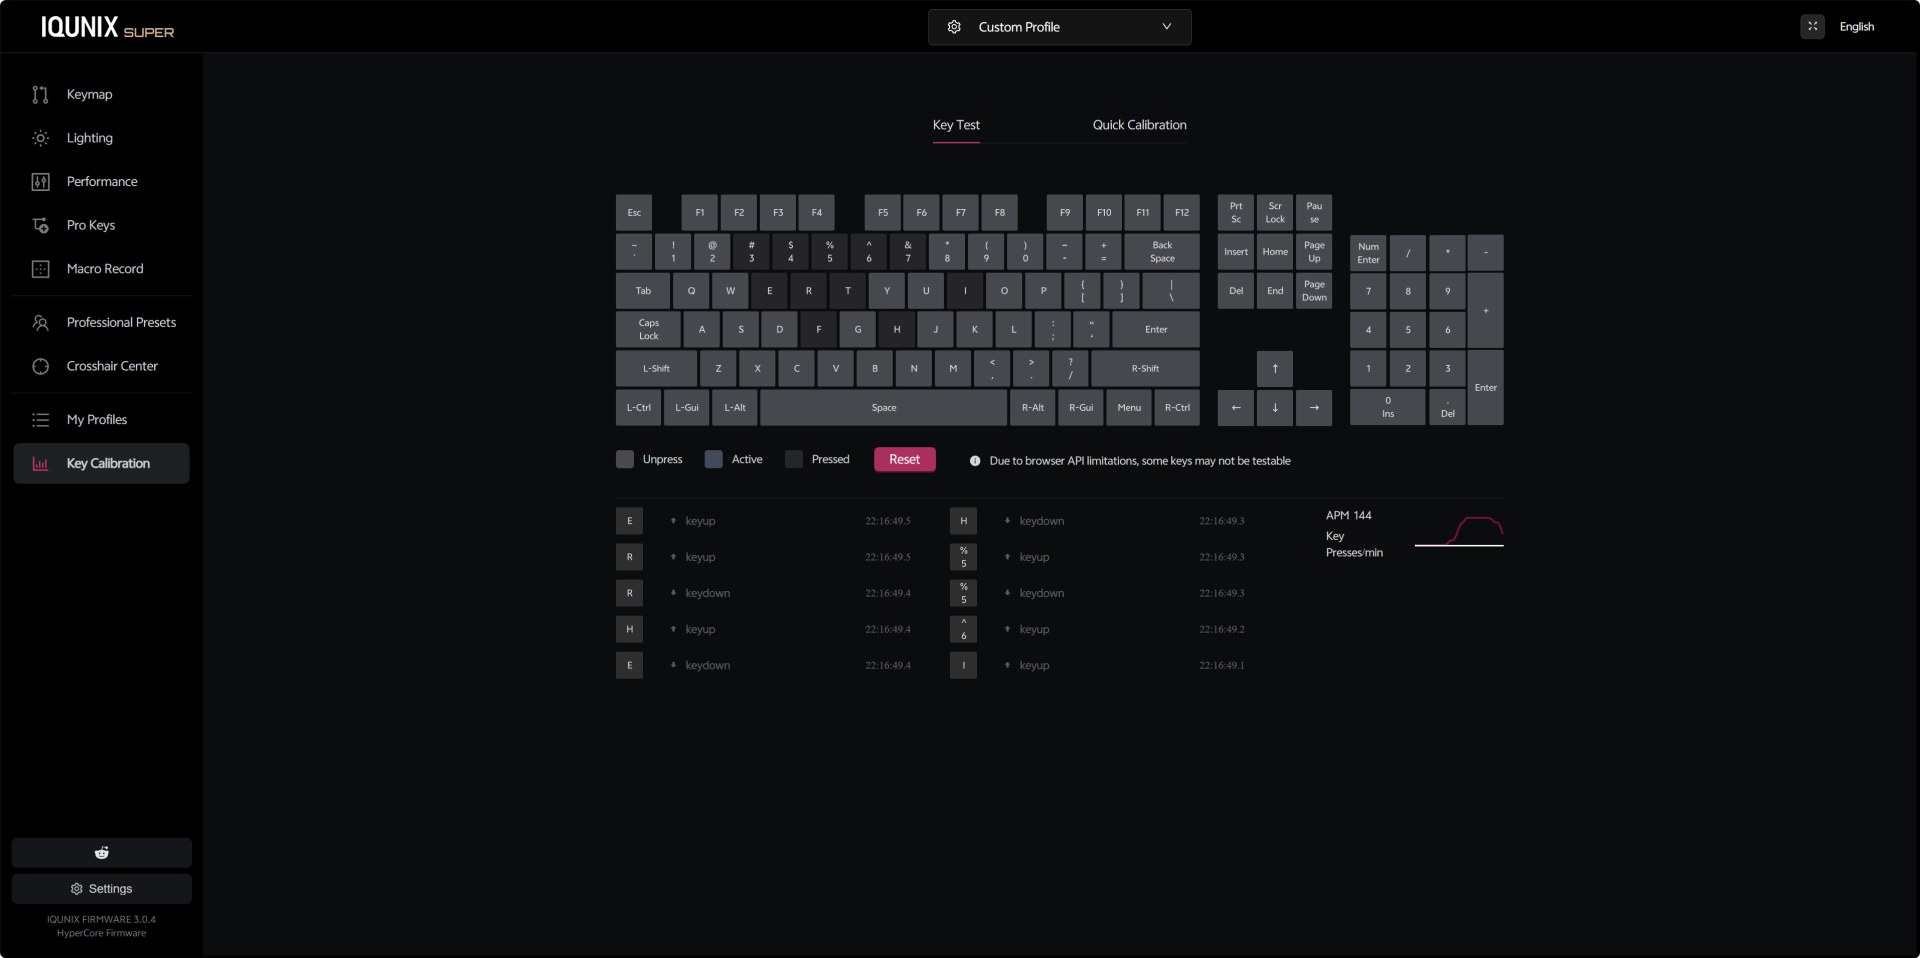
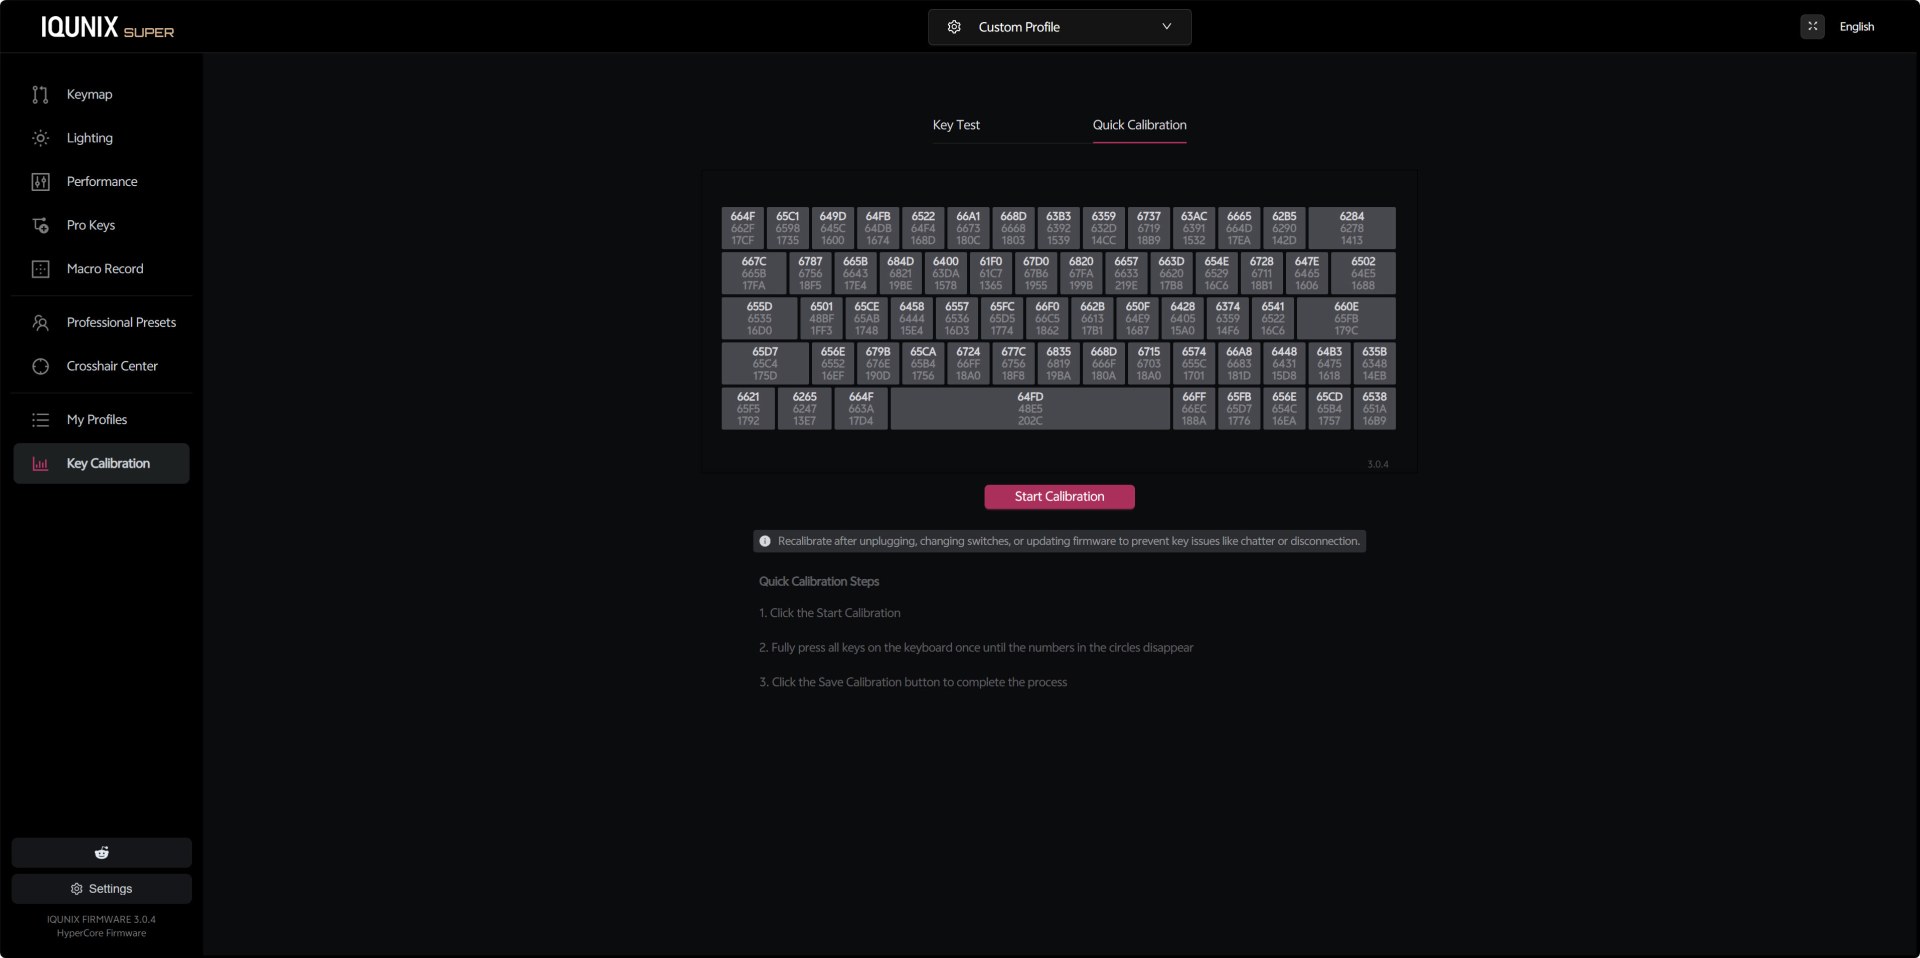
The Key Test panel shows live keypress logs, key states, and an APM graph that tracks your activity. It’s useful for diagnosing chatter, stuck keys, or inconsistent actuation. You can also use the quick calibration feature where each key displays a hex value representing its calibration state.


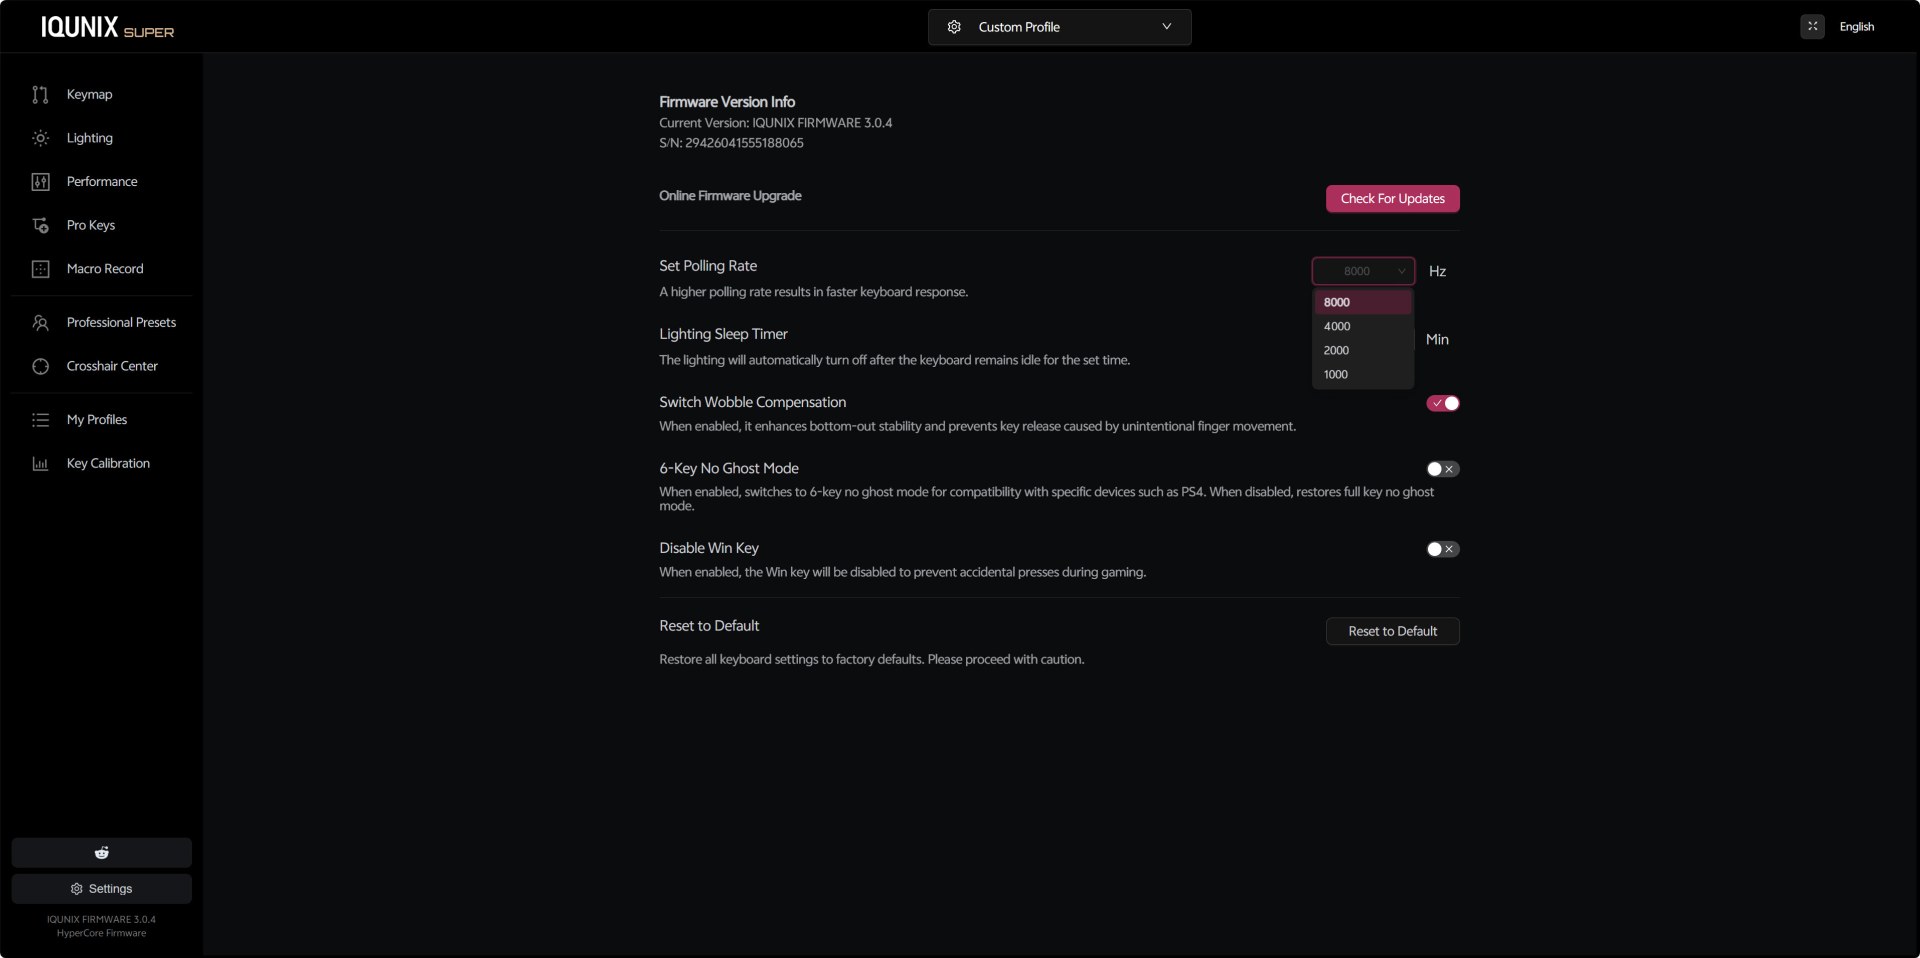
The settings tab includes everything else such us check for available updates, polling rate selection up to 8000Hz (1000/2000/4000/8000Hz), lighting sleep timer, switch wobble compensation, 6‑key no‑ghost mode for console compatibility, Win‑key lock, and a full factory reset option.


AUDIBLE FEEDBACK


Many people ask my opinion on what keyboard they should get for their needs. Some want a “silent” model for use in their living room or even in their bedroom while others ask for a model with good audible feedback for use in the office or for gaming. Because of this I decided to test keyboards by placing our ExTech HD600 vertically over each keyboard (5cm distance) and typing NikKTech a total of 6 times with each (after that the max recorded number - max hold - is placed in the graph). I have to admit that this methodology may not be 100% accurate but it does give a good idea on what you can expect from each model since aside the type of switches used keycaps and keyboard material also matter.


CONCLUSION


    The EV63 Dark Knight feels like a keyboard built for people who care about both performance and craftsmanship. The solid aluminum body, the forged‑carbon detailing, and the overall weight give it a presence that’s hard to ignore. Pair that with adjustable Hall‑effect switches that let you fine‑tune actuation to the millimeter, and you get a board that feels genuinely dialed‑in. The fact that IQUNIX offers multiple styles and colorways (especially the newly added Ghost In The Shell variants) only adds to its appeal. Of course, it’s not perfect. The fixed angle means you’re stuck with one height, it uses a web-based software, the premium pricing makes it a considered purchase, and the switch acoustics can be livelier than expected. But if you value build quality, responsiveness, and a distinct design identity, the EV63 Dark Knight delivers on all three.


    Right now, you can get your very own EV63 Dark Knight hall-effect keyboard for USD209 (IQUNIX.COM) and even though it’s a price tag more than balanced for everything IQUNIX has created, it will still feel far from affordable to some. Cost aside however the EV63 Dark Knight is one of the best mechanical keyboards I’ve ever used, again it’s not perfect but it truly delivers and for that the Golden Award is in order.

PROS


- Build Quality (CNC Machined Aluminum Case / Forged Carbon Fiber Housing)
- Mechanical Hall Effect Switches (3rd Gen Hall Sensors With Magnetic Auto Tune)
- 8000MHz Polling / 16kHz Scanning / 0.125ms Input Latency
- Nkey Rollover / Rapid Trigger / Dynamic Keystroke / Rappy Snappy / Mod Tap / Toggle Keys / Enhanced SOCD Handling)
- Per Key RGB Lighting
- Available In 5 Colors (Violet, Dark Knight, Silver Knight, Ghost In The Shell Cyber Blue / Shell Core)
- EV Software V3 (Easy To Use)
- Detachable USB Cable


CONS


- EV Software V3 (Internet Connection Required)
- Not Height Adjustable
- Noise Levels

- Price (For Some)


ALLPOWERS R2500 V2 Portable Power Station Review

INTRODUCTION


allpowers r2500 v2 review a


    High output and capacity portable power stations have evolved into a core utility for anyone operating beyond fixed electrical infrastructure. Their ability to deliver sustained, clean AC power, alongside stable, low‑ripple DC outputs, makes them indispensable for running heavy‑draw equipment, sensitive electronics, and DC‑native devices alike. From power tools, cooking appliances, lighting arrays, fans and even portable air conditioners to TV's, projectors, drones, routers, radios, and camera gear, they provide a reliable energy backbone without the noise or constraints of traditional generators. They support field technicians, content creators, campers, and homeowners by offering dependable backup during outages and flexible power for off‑grid workflows. In this category, the ALLPOWERS R2500 V2 enters as a straightforward high‑capacity option.


    ALLPOWERS INDUSTRIAL INTERNATIONAL LIMITED is a solar energy technology company integrating R&D and production.  Our headquarter is located in Guangzhou, China. Since its establishment, the company has been committed to research and development of portable solar energy related products. The current main product categories include portable solar panel phone chargers, solar laptop chargers, portable solar semi-flexible solar panel, and solar energy storage systems. ALLPOWERS is mainly oriented to Western Europe, North America, East Asia, Eastern Europe, Middle East and other markets in more than 30 countries and regions. We have accumulated to provide solar energy products for more than 100 customers around the world, and has cooperated with many world-renowned companies or brands, including Hanergy, Hikvision, Decathlon and so on.


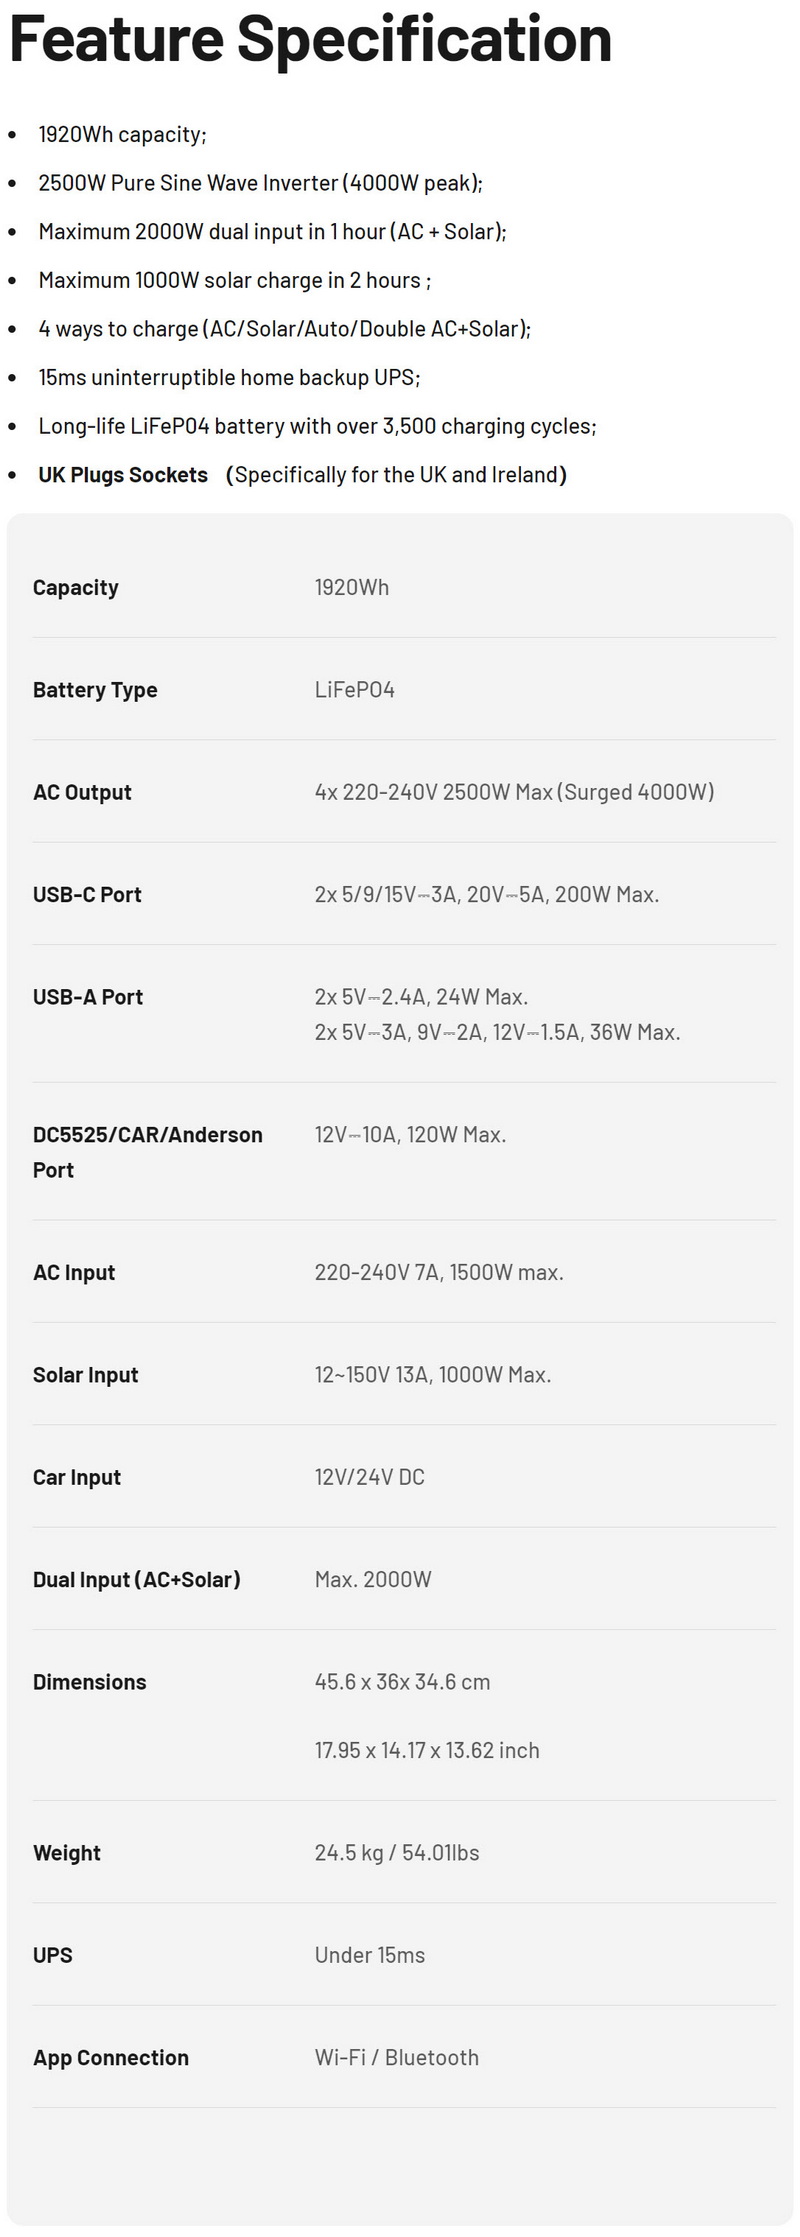
    For users seeking a feature‑rich power station with serious output, the ALLPOWERS R2500 V2 offers a balanced combination of capacity and control. It houses a long‑life 1920Wh LiFePO4 battery rated for 3500+ cycles, supported by a high‑performance BMS that manages over‑temperature, over‑voltage, low‑temperature discharge, overcurrent, overload, short‑circuit, and charge‑protection events. Its 2500W pure sine wave inverter (4000W surge/peak) drives four 220-240V AC outlets, while the DC side includes regulated 12V ports, Anderson, car socket, quad USB‑A outputs (18/12W), and dual 100W USB‑C PD ports (200W total) covering everything from laptops and drones to networking gear and automotive accessories. Charging flexibility is a major strength, up to 1500W AC input (2000W+ in fast mode), 1000W solar input (12-150V / 13A), 12/24V car charging, and a 2000W AC + solar dual‑input mode capable of replenishing the unit in about an hour. The integrated UPS function switches in under 15ms, keeping connected devices running during outages (up to 1500W while in UPS pass through mode), and the unit supports full Wi‑Fi/Bluetooth app control for monitoring, settings, and firmware updates. Finally, the R2500 V2 is also available with different regional plug configurations for the EU, USA and the UK.


SPECIFICATIONS AND FEATURES


PACKAGING AND CONTENTS


allpowers r2500 v2 review 2t

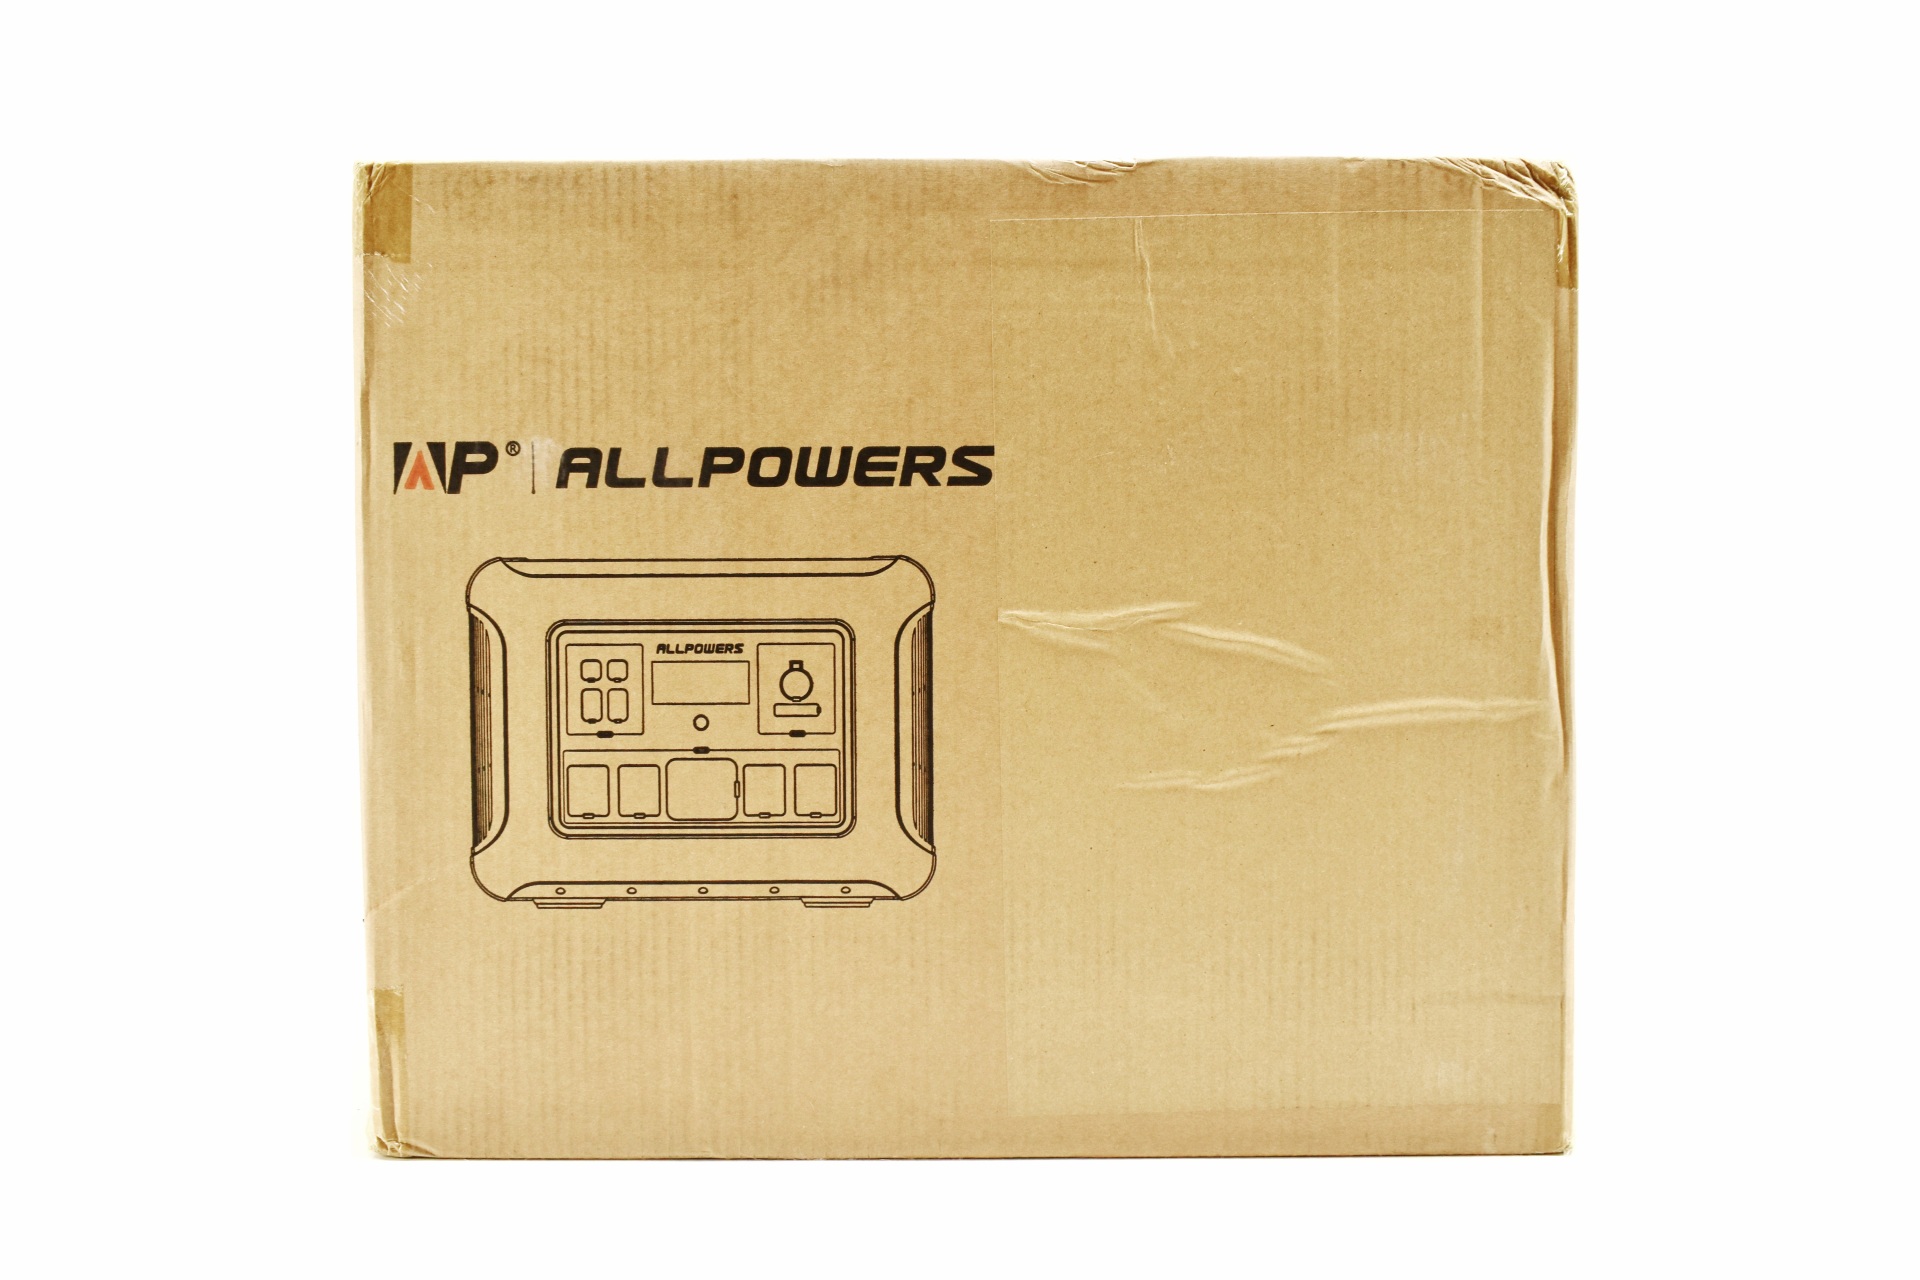
ALLPOWERS ships their R2500 V2 inside a plain cardboard box that just has their logo and a product drawing at the front.


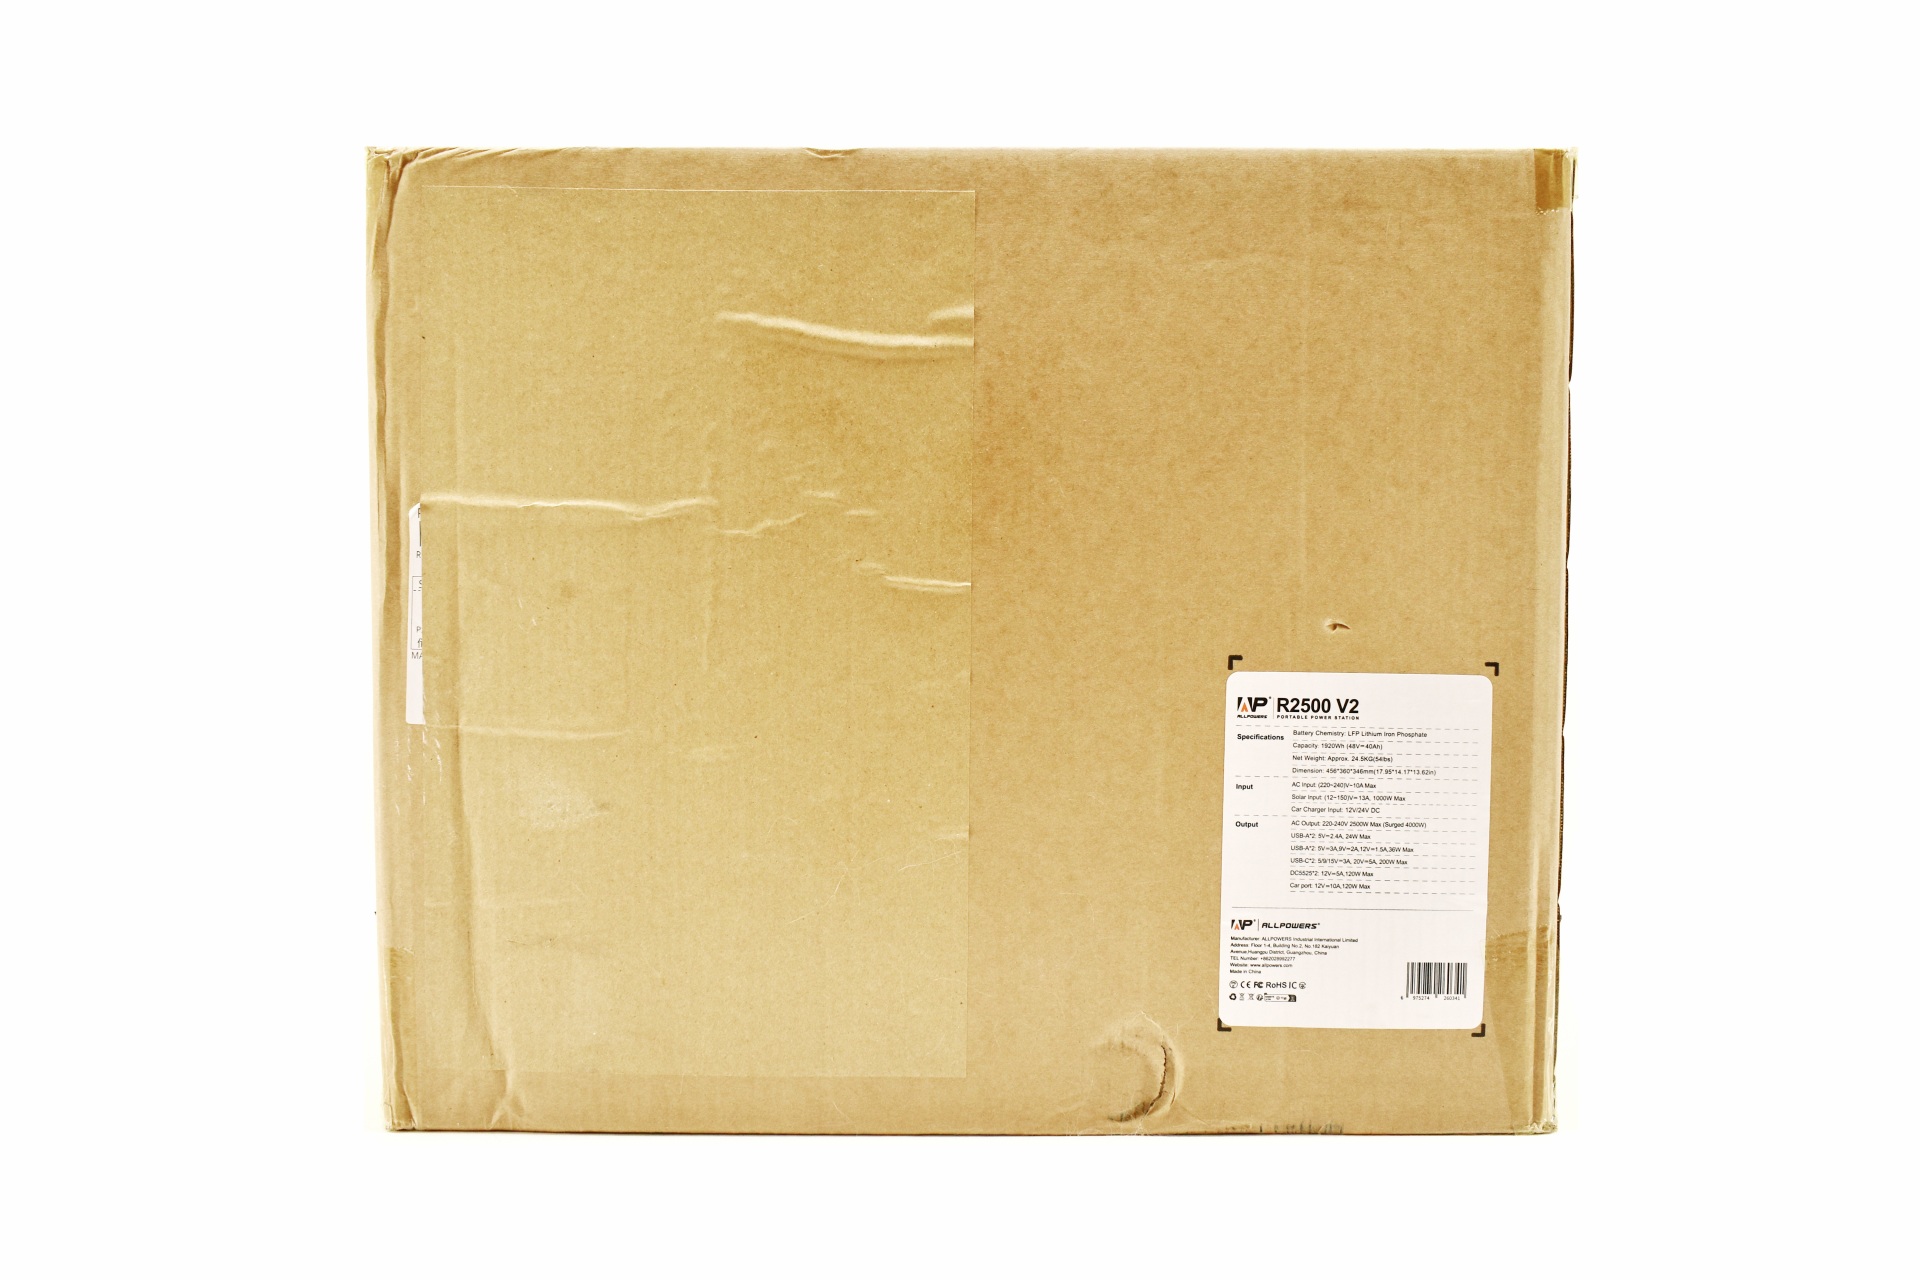
A sticker with the product specifications and features is located at the rear.


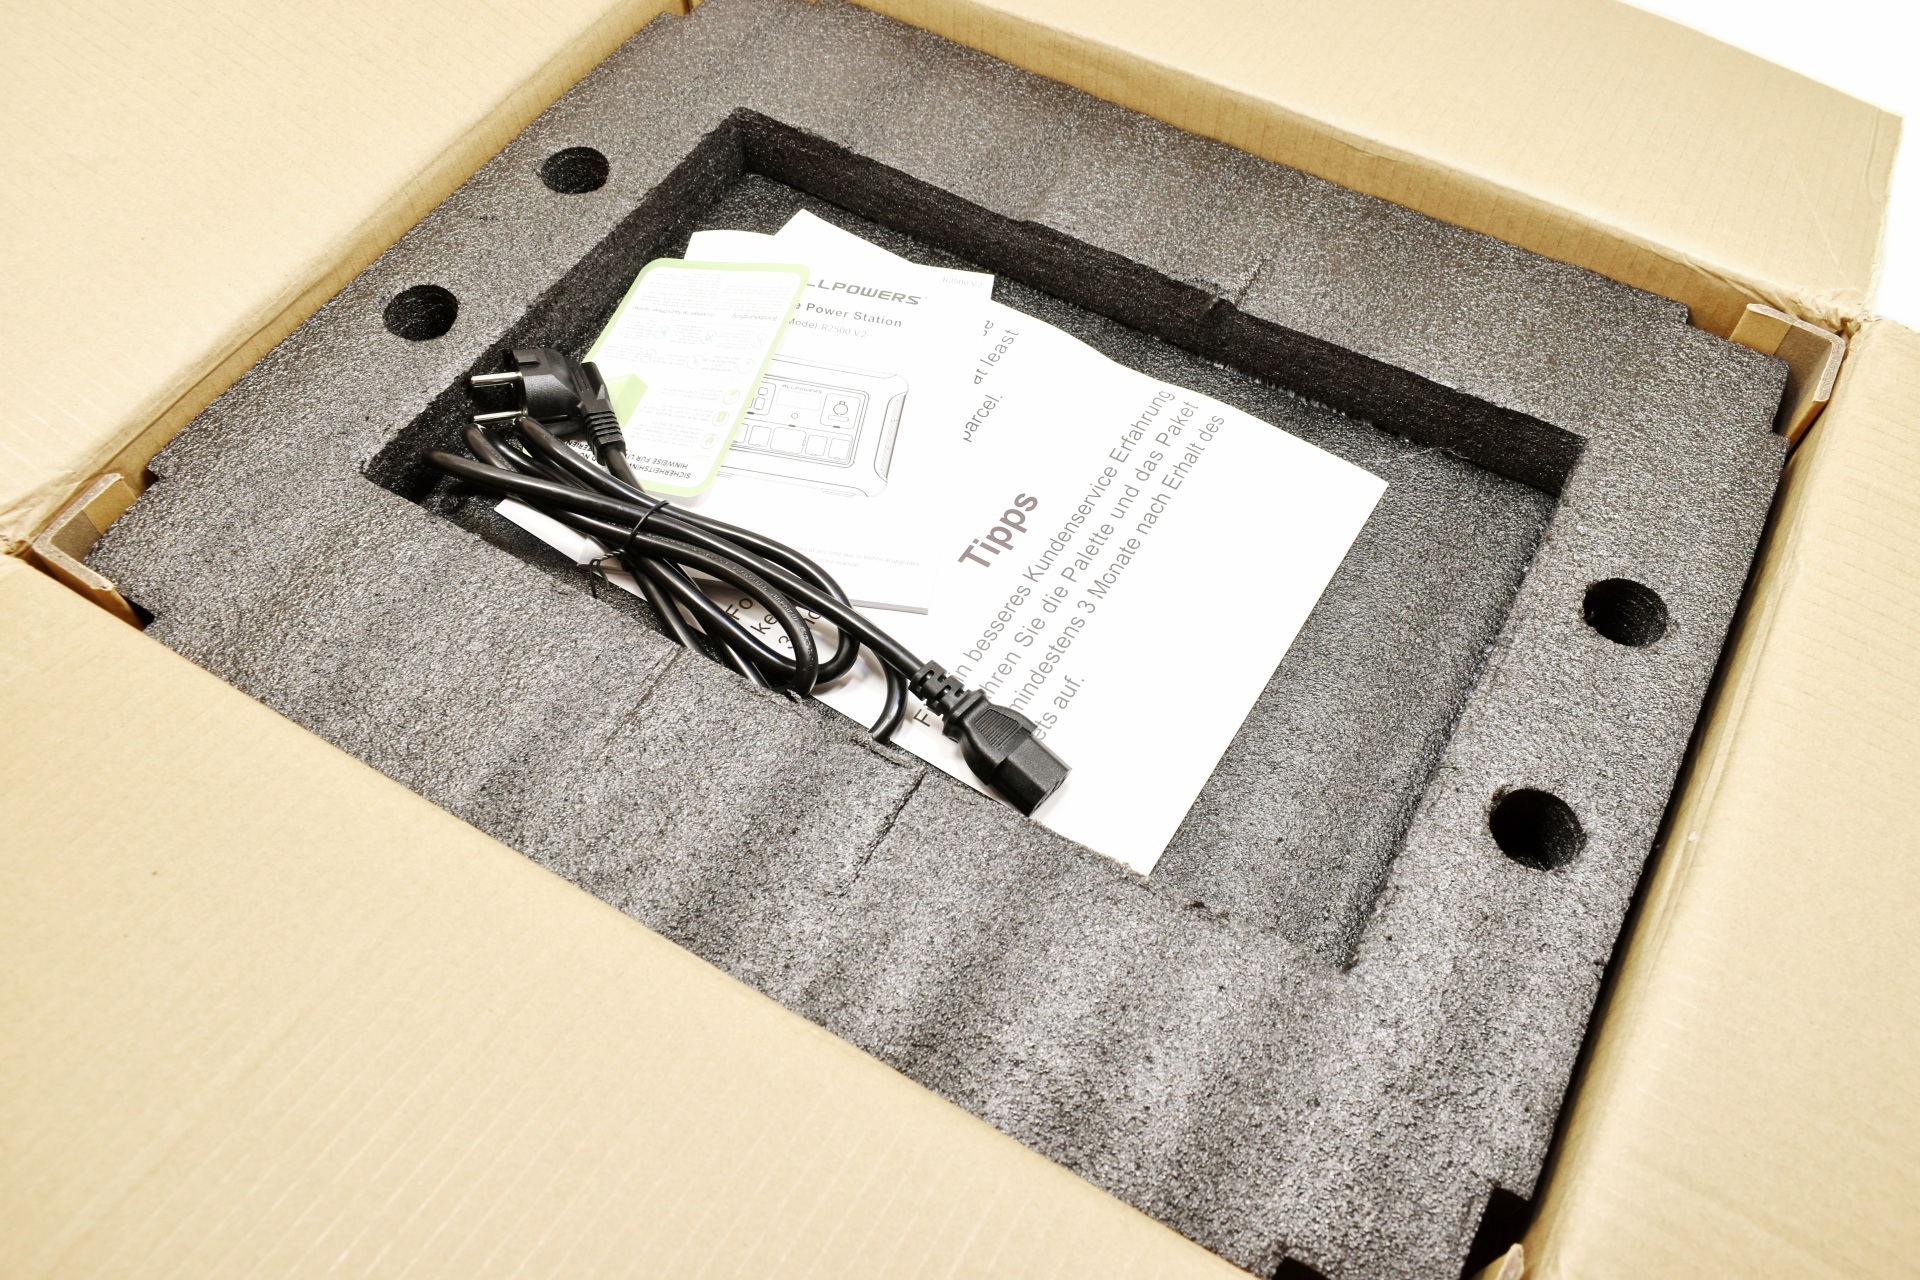
Packing is all but excellent with the R2500 V2 placed between two thick pieces of foam.


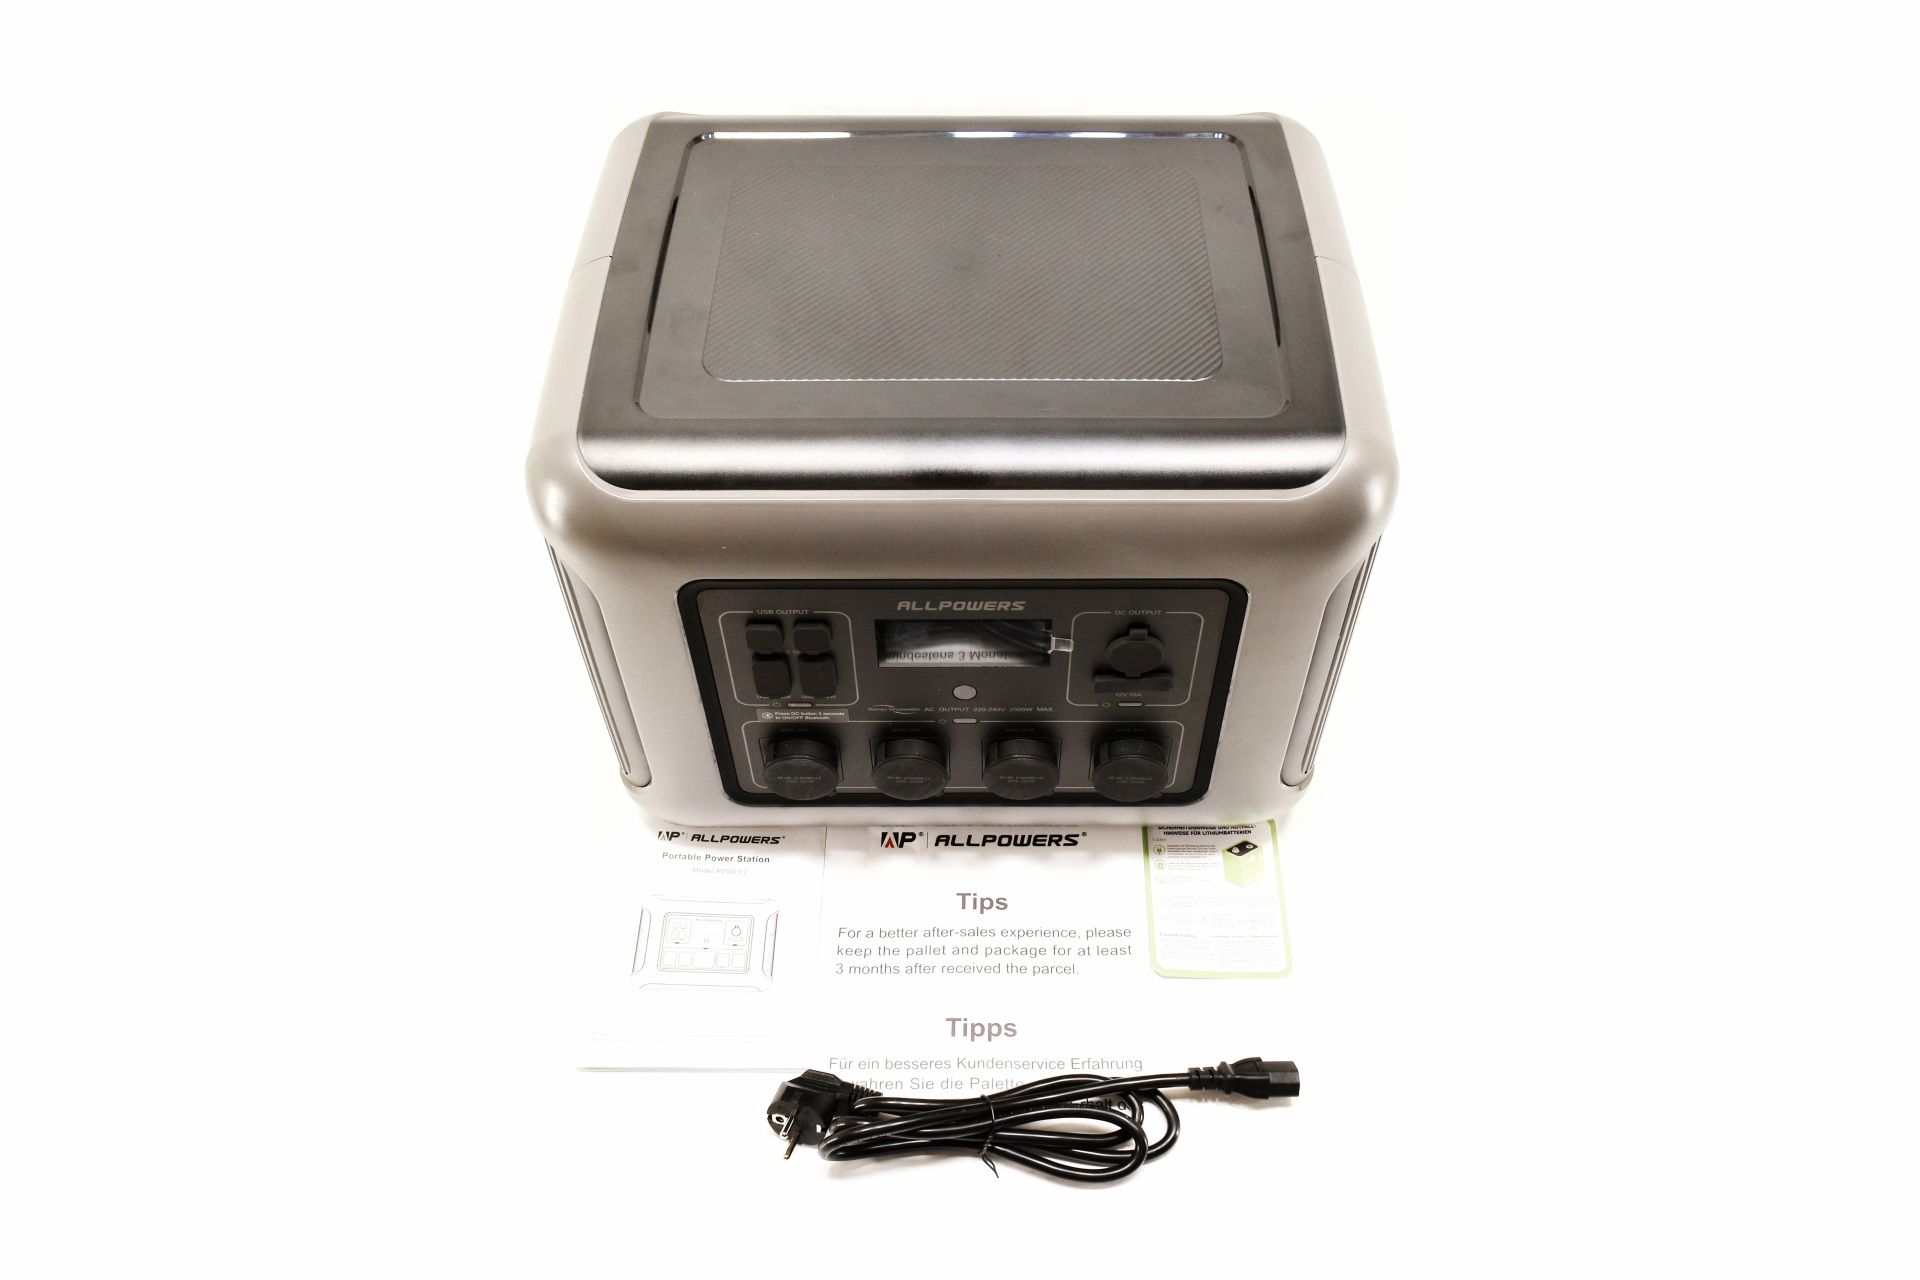
Bundle is not one of the R2500 V2's strongest points since inside the box you'll only find the charging cord, battery warning paper, tips paper and the user manual.


THE R2500 V2


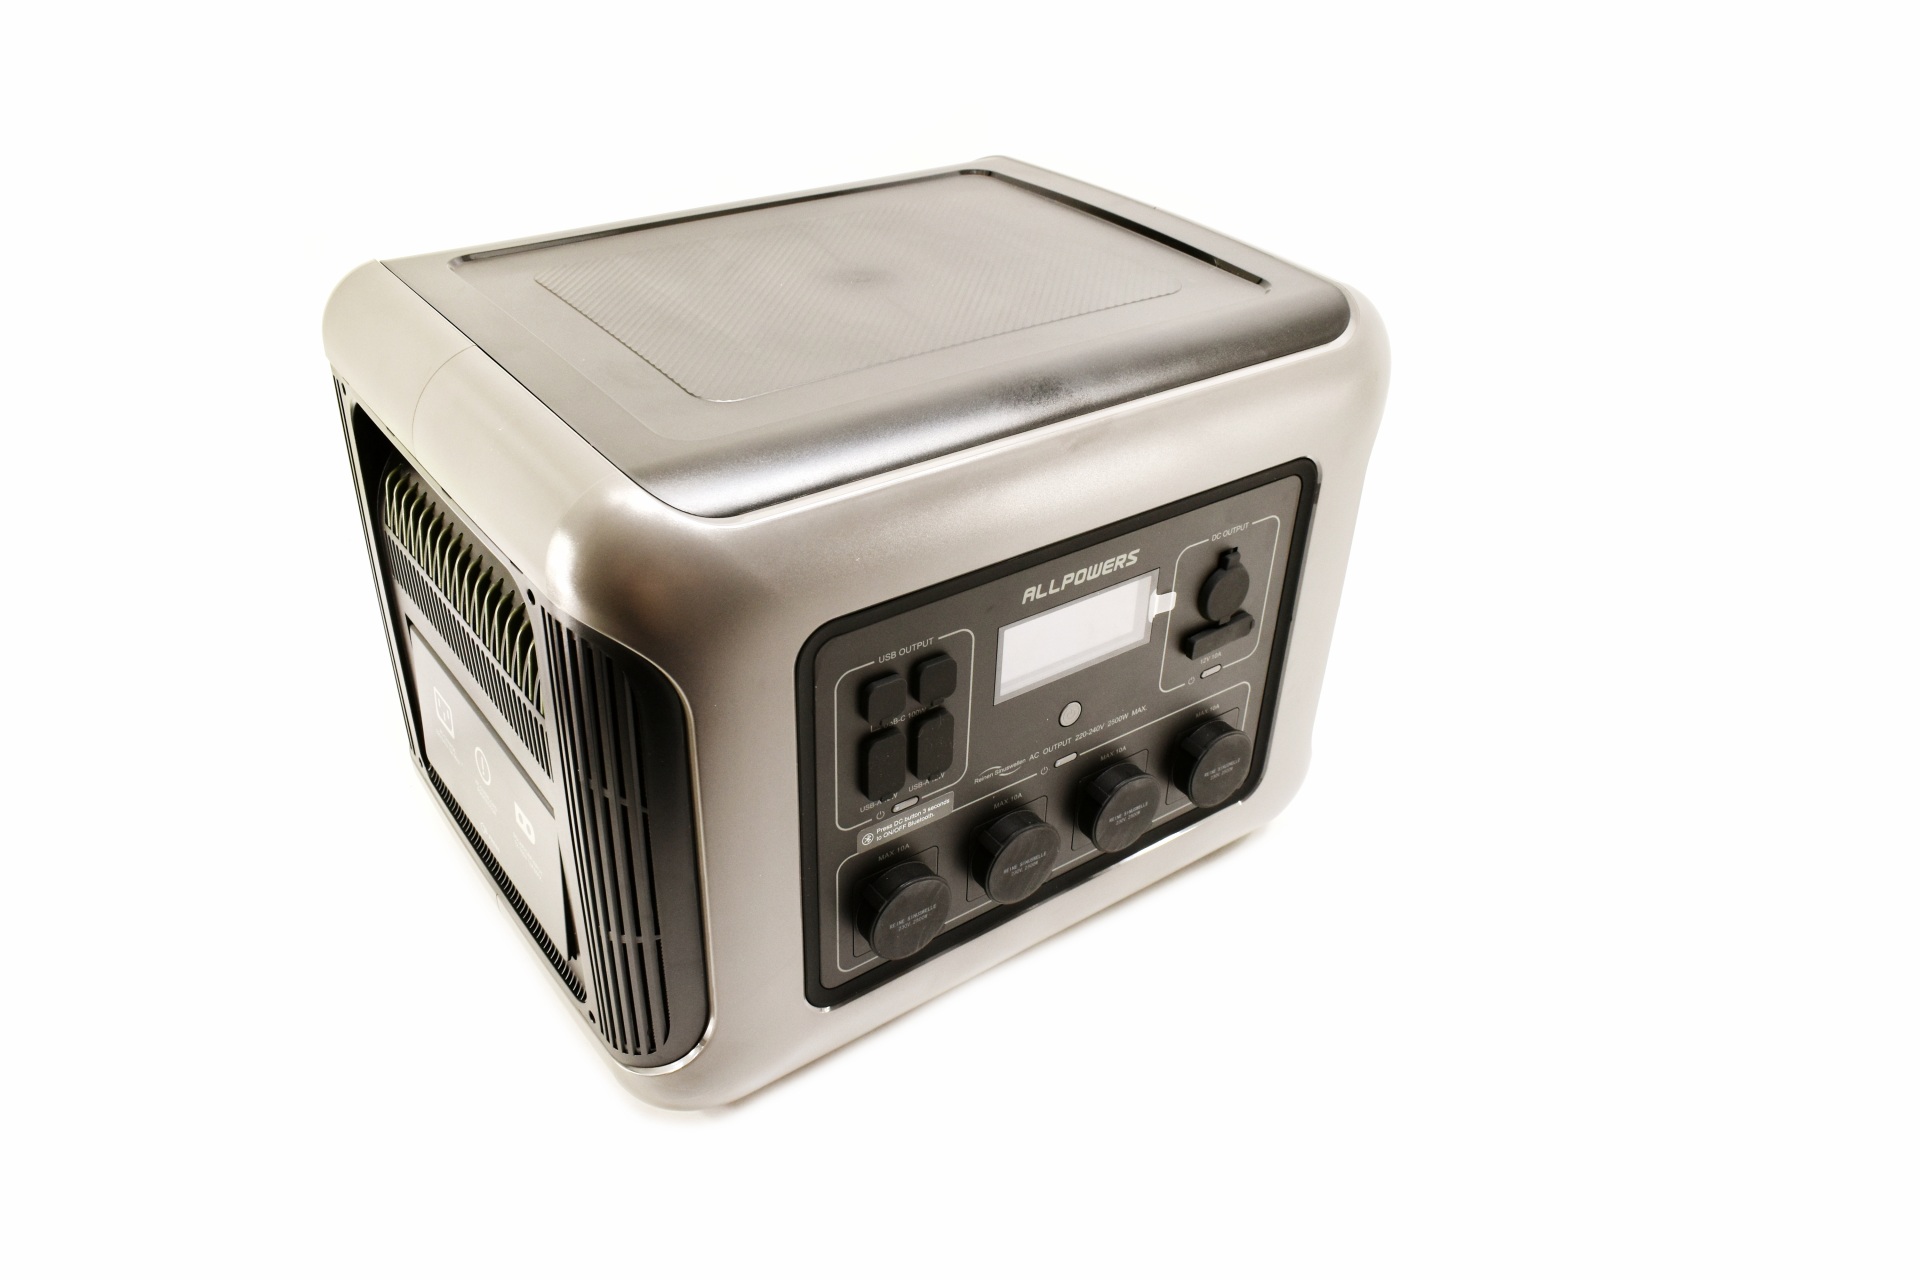
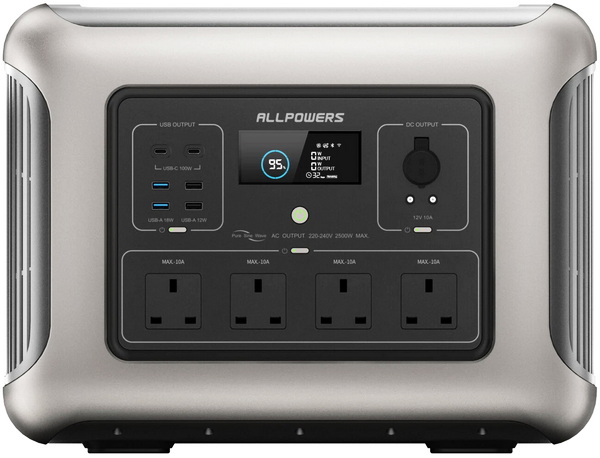
The 24.5Kg heavy R2500 V2 is a large portable power station measuring 456mm in length, 346mm in width and 361mm in height.


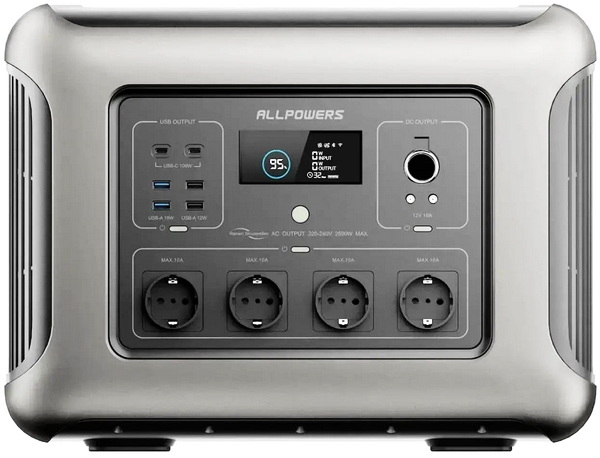
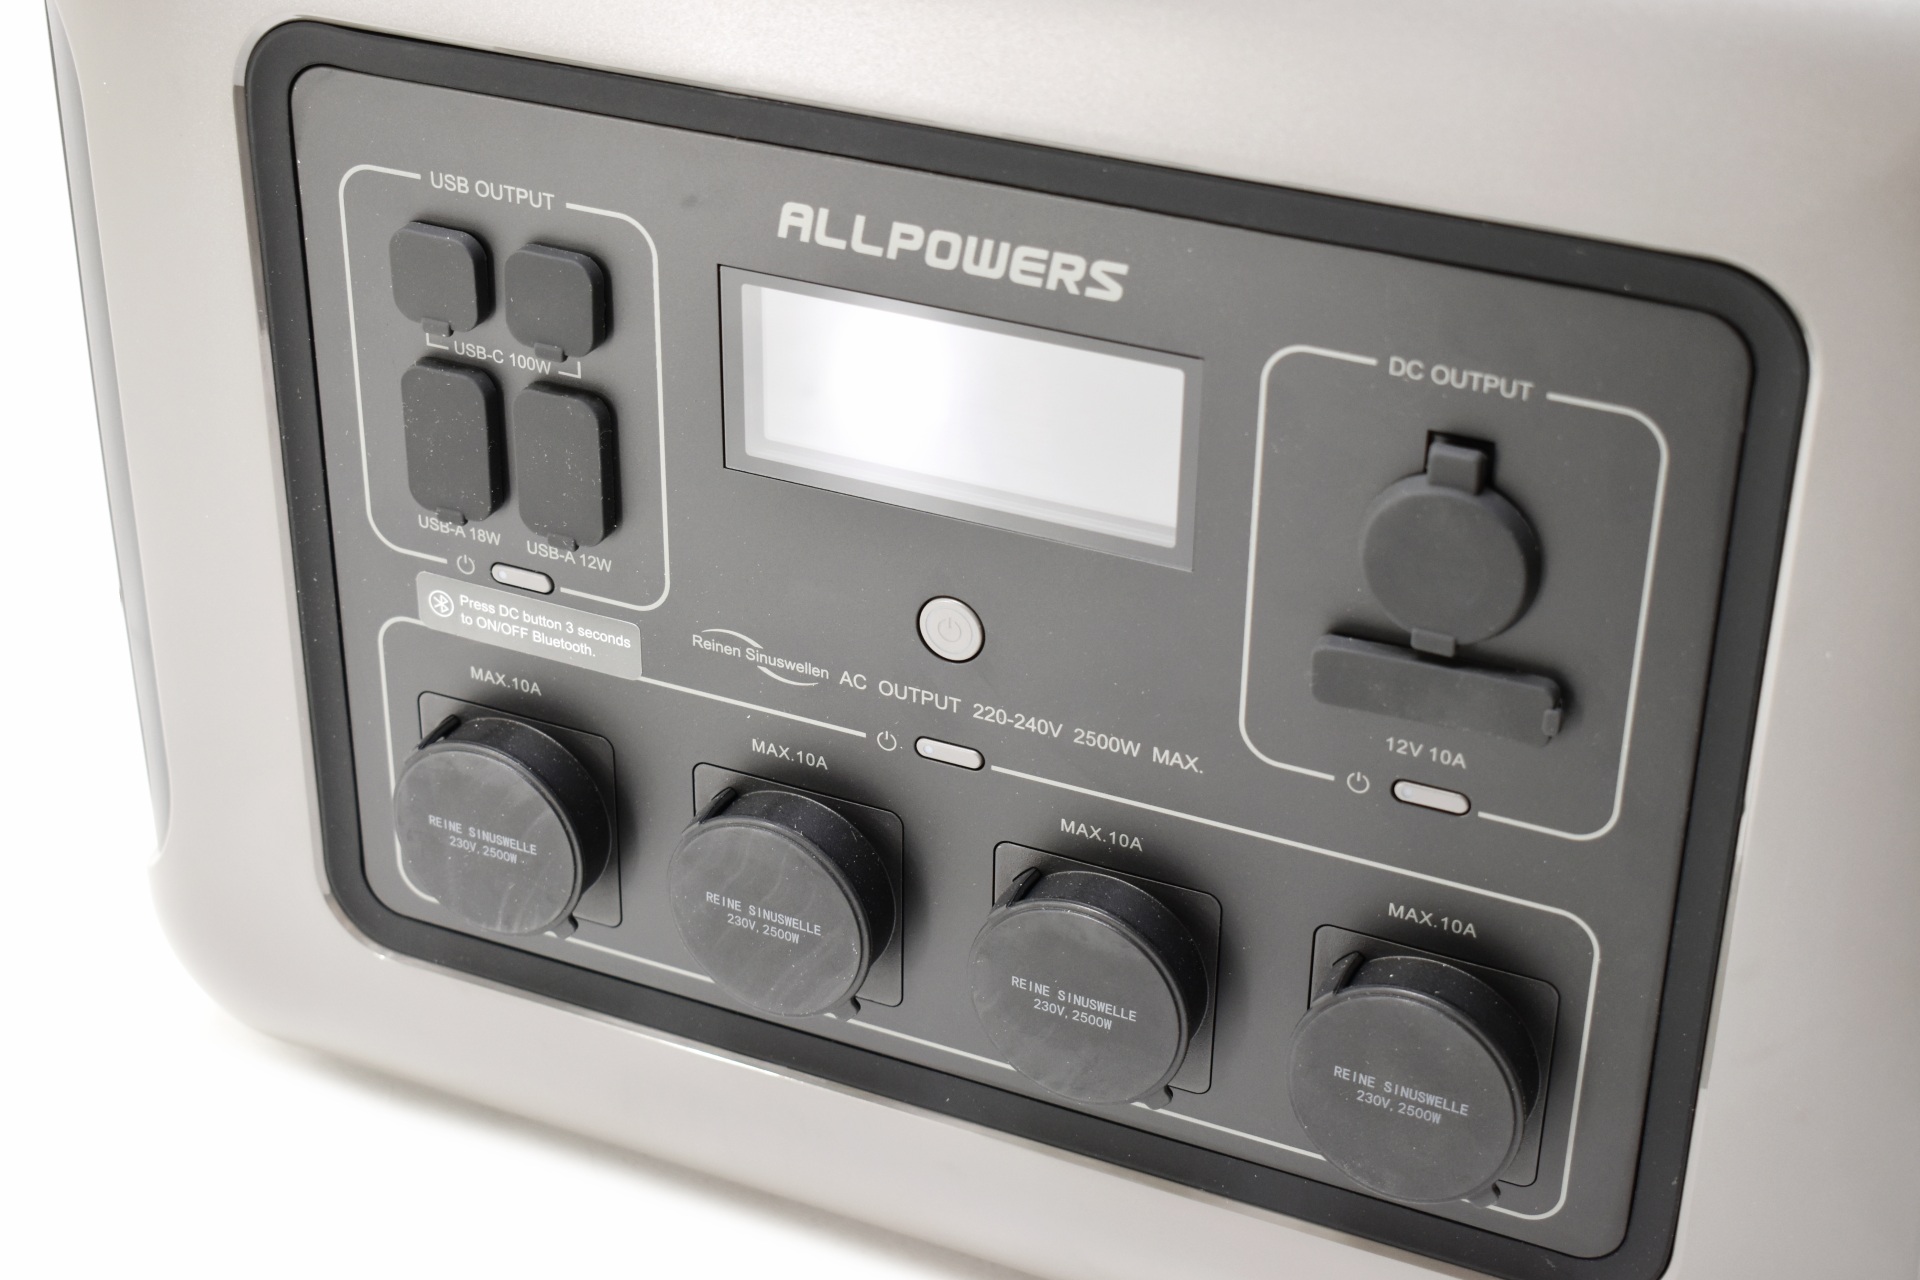
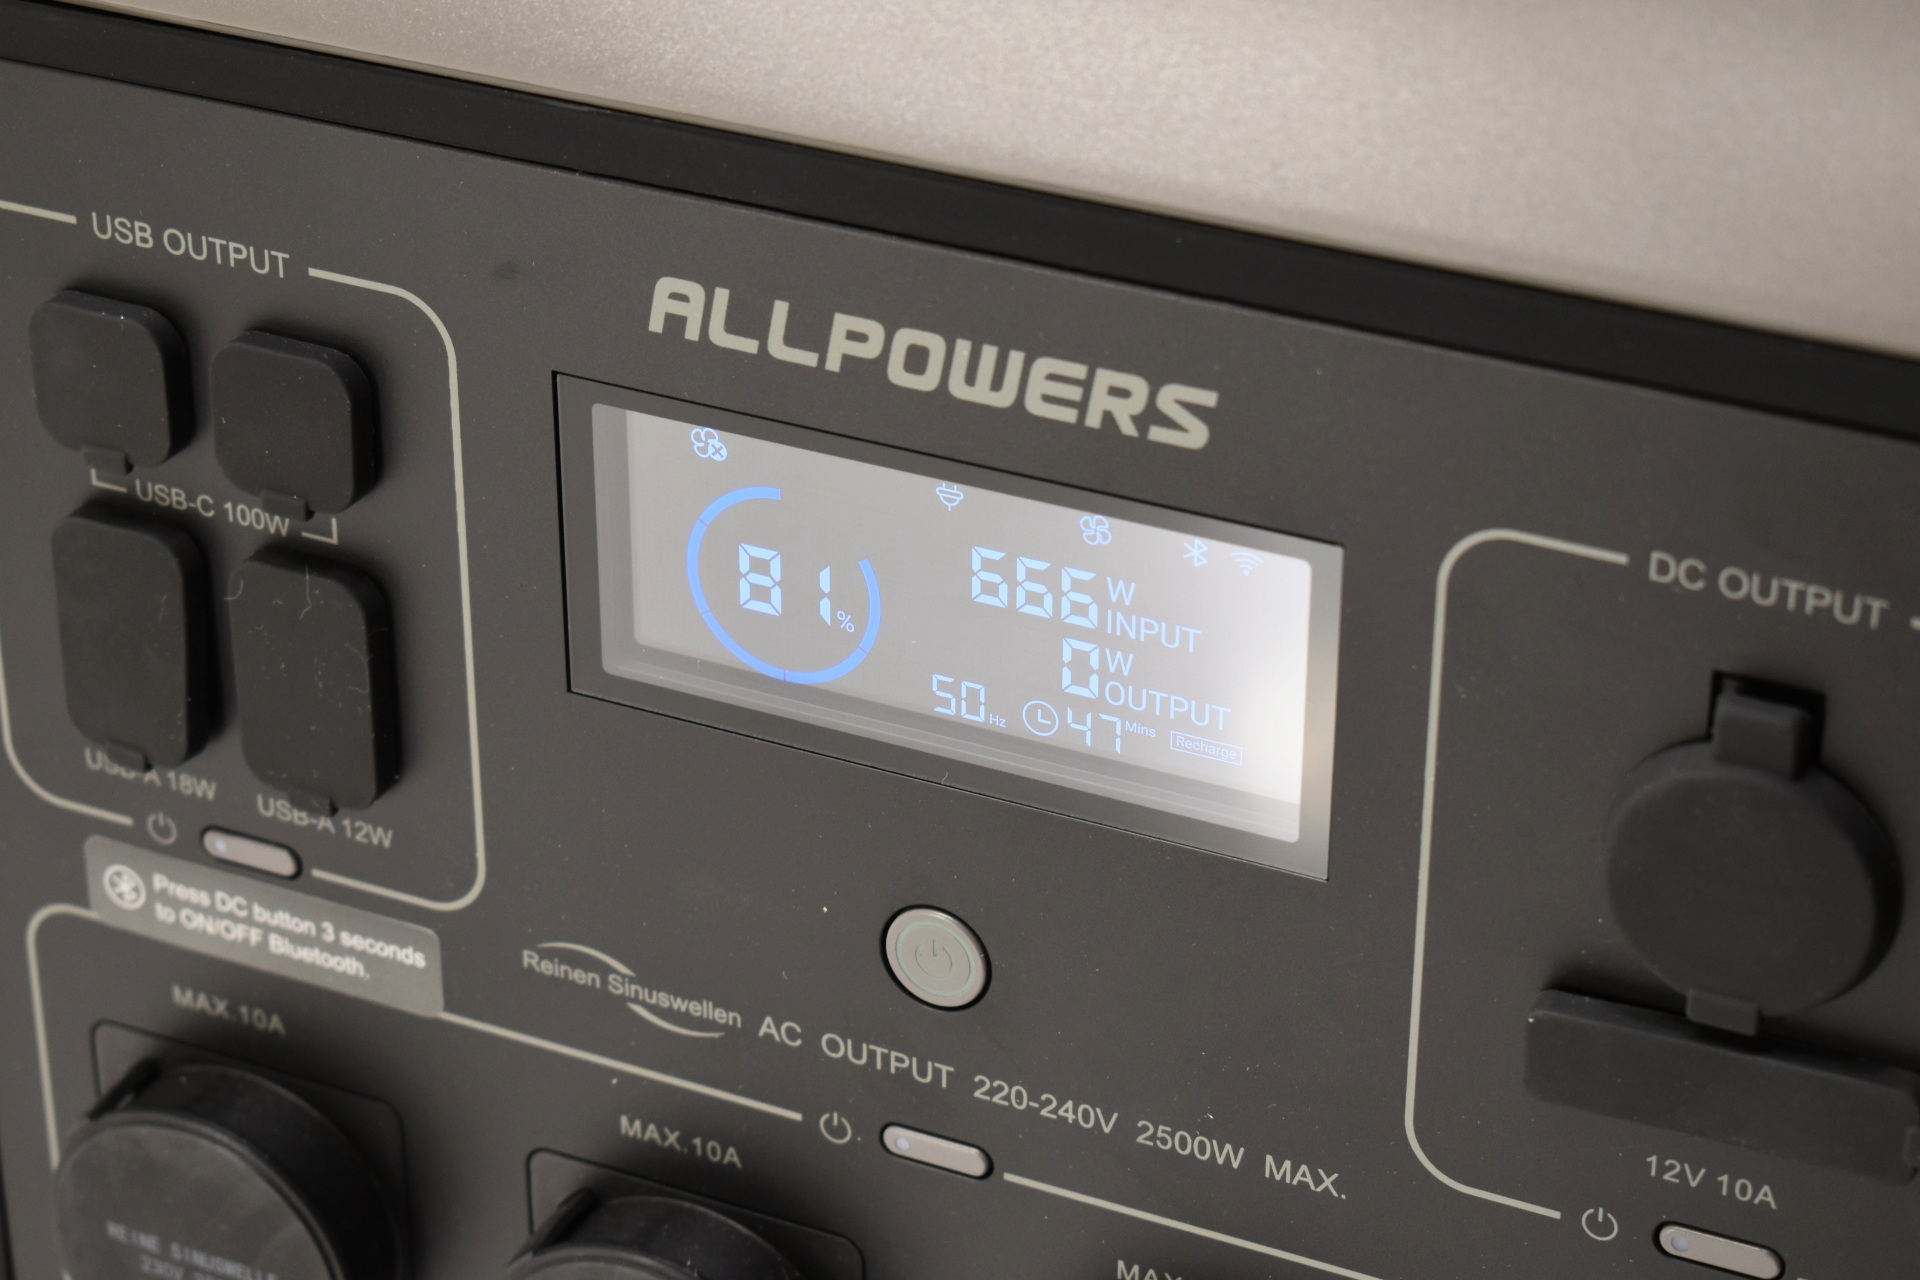
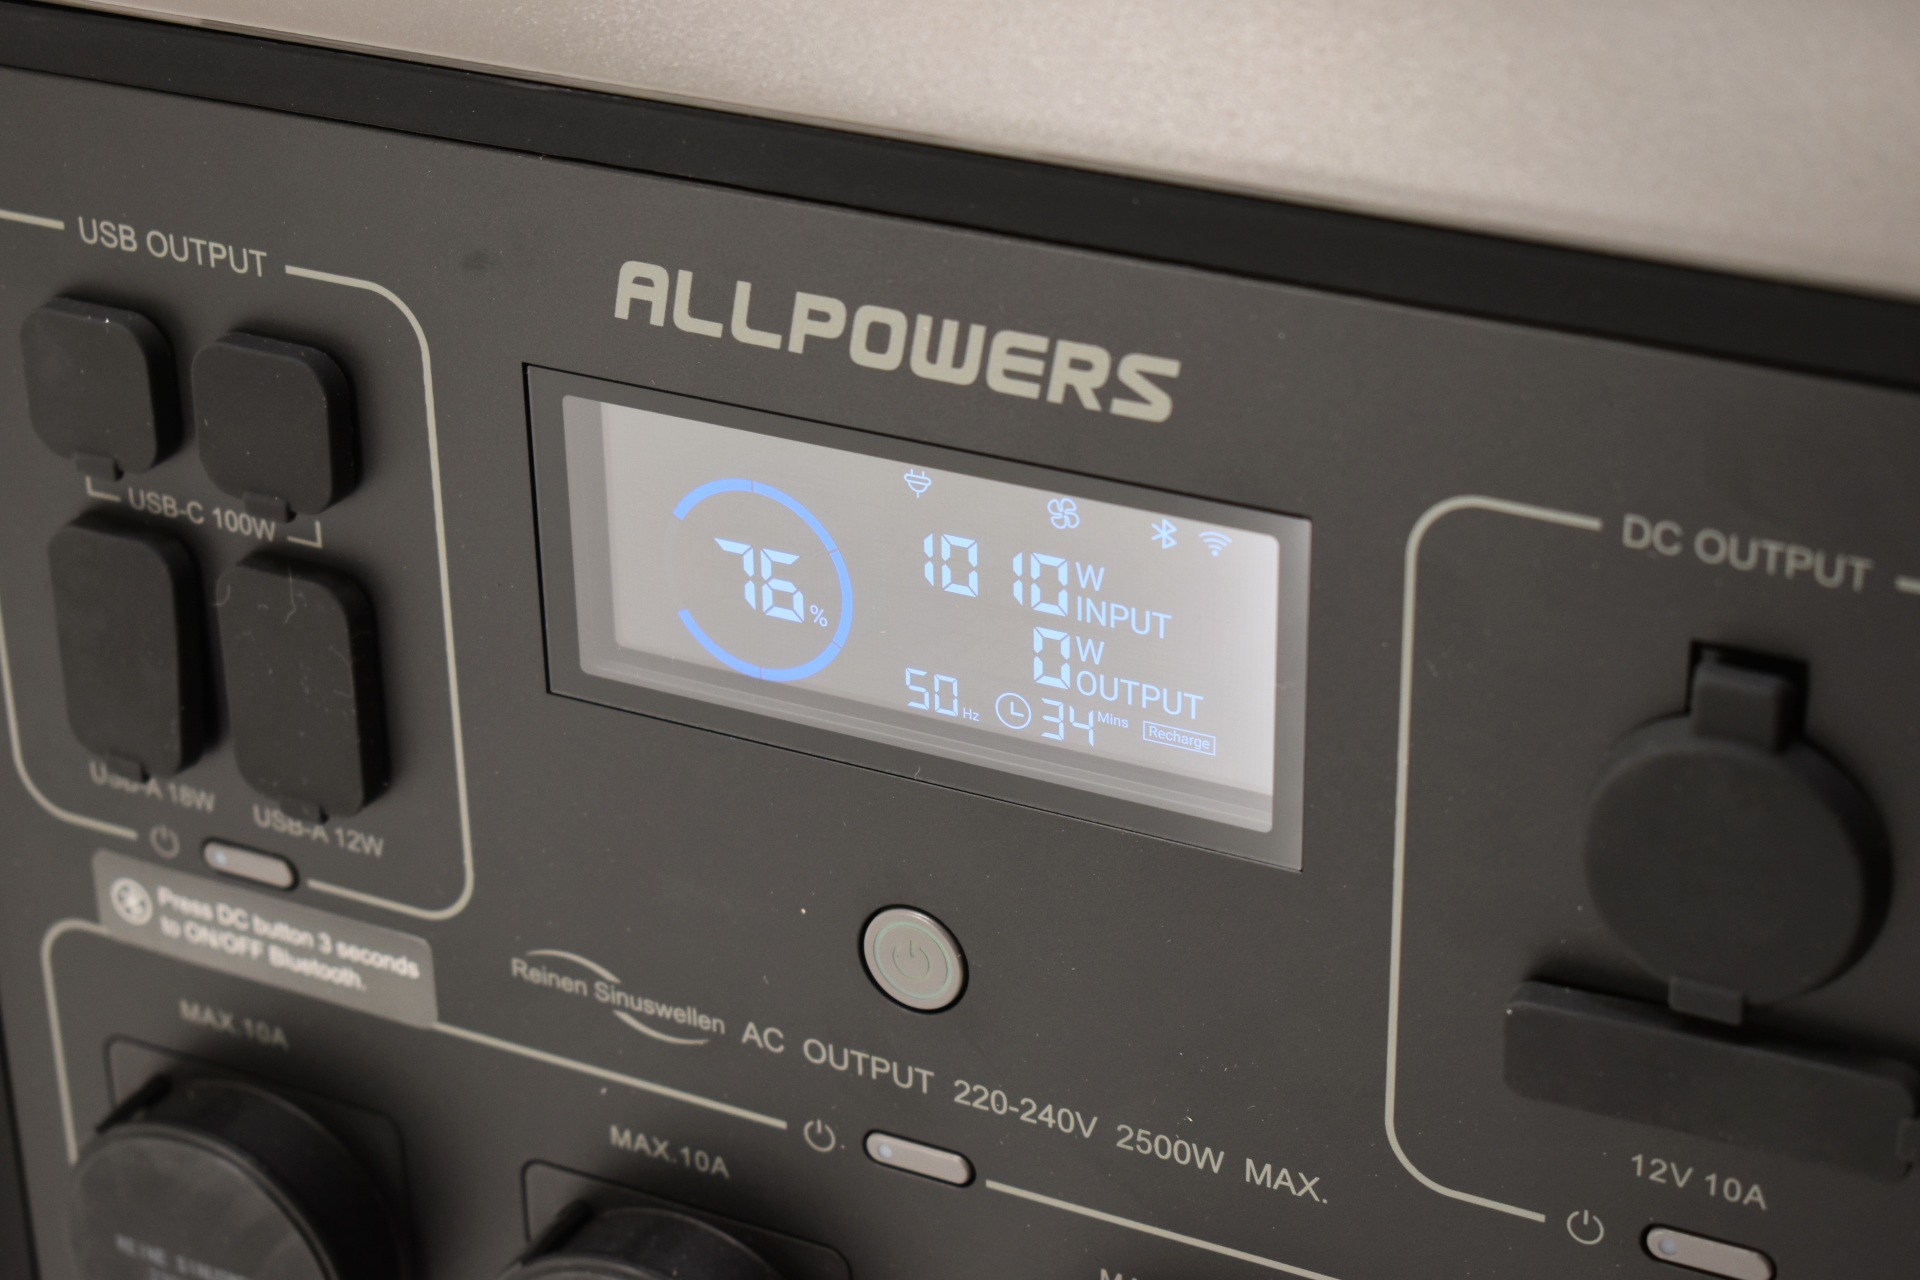
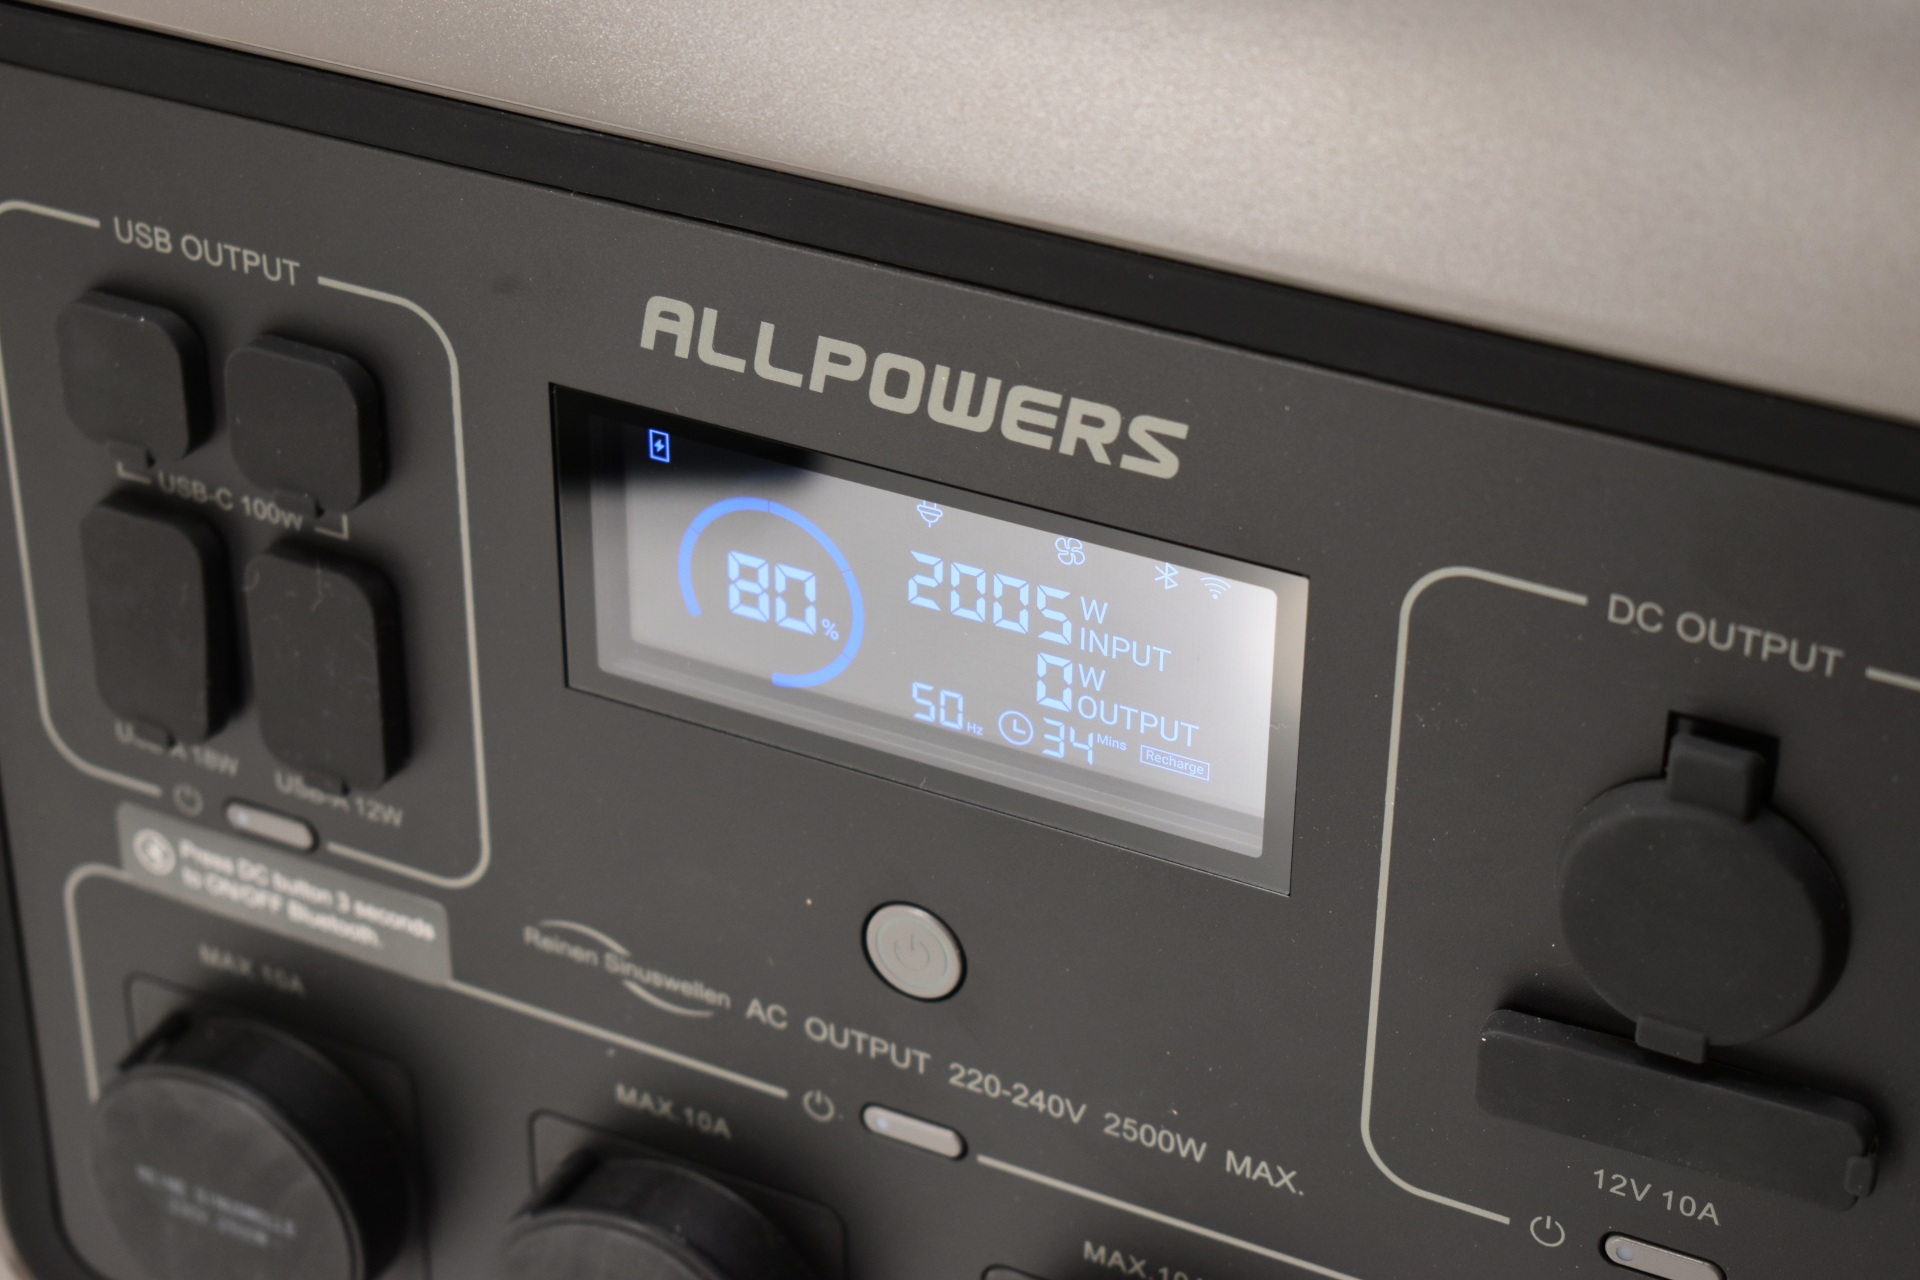
Typically, most connectors are placed at the front so from left to right we find two USB-C ports (100W each), four USB-A ports (18W/12W), USB on/off button, four AC plugs, AC on/off button, LCD screen, on/off button, car cigar port, DC out and the DC out on/off button.


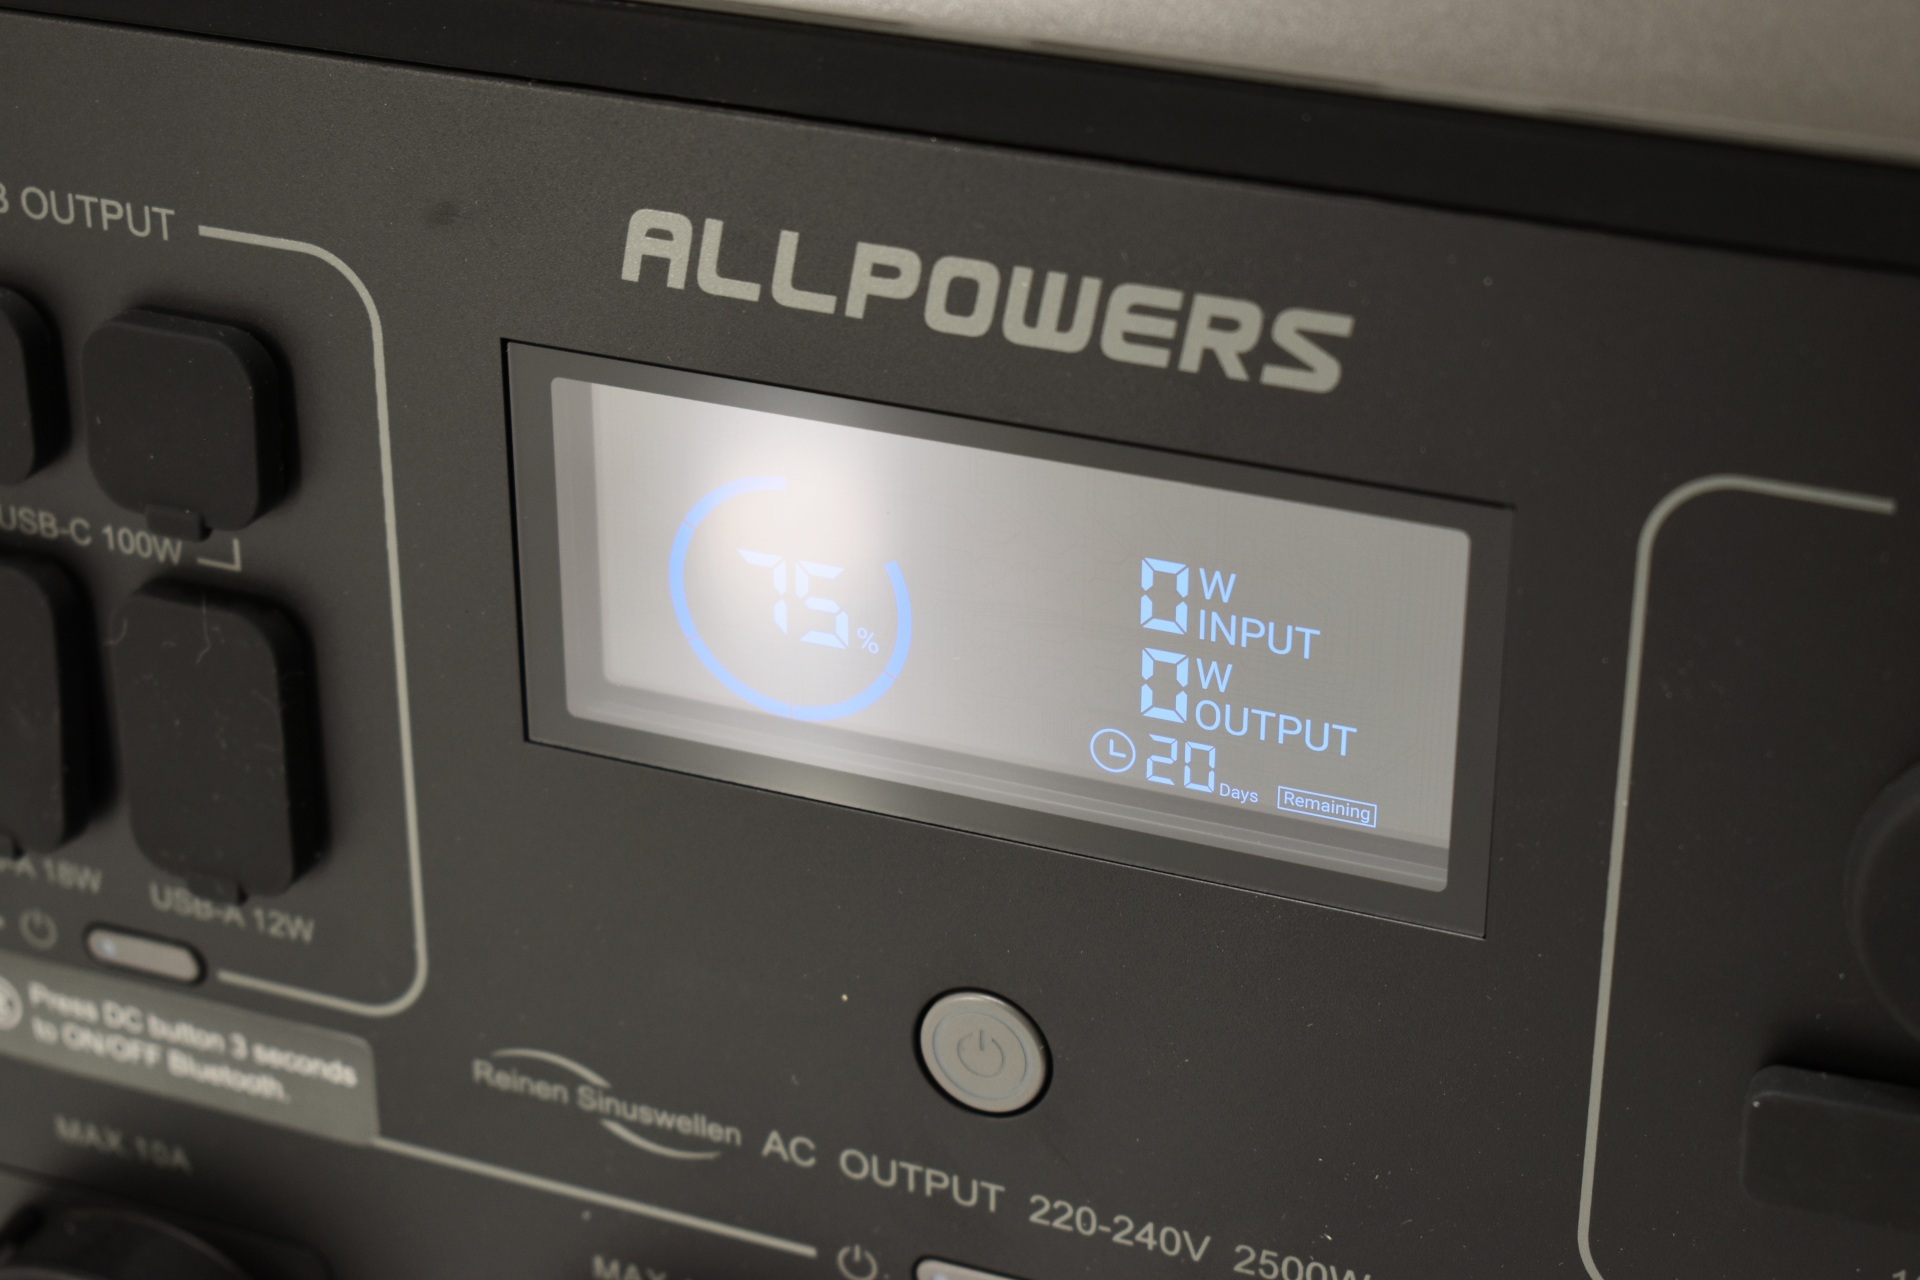
The LCD screen is easy to read but it still depends a lot on the angle (one day I hope every manufacturer puts more weight on this).


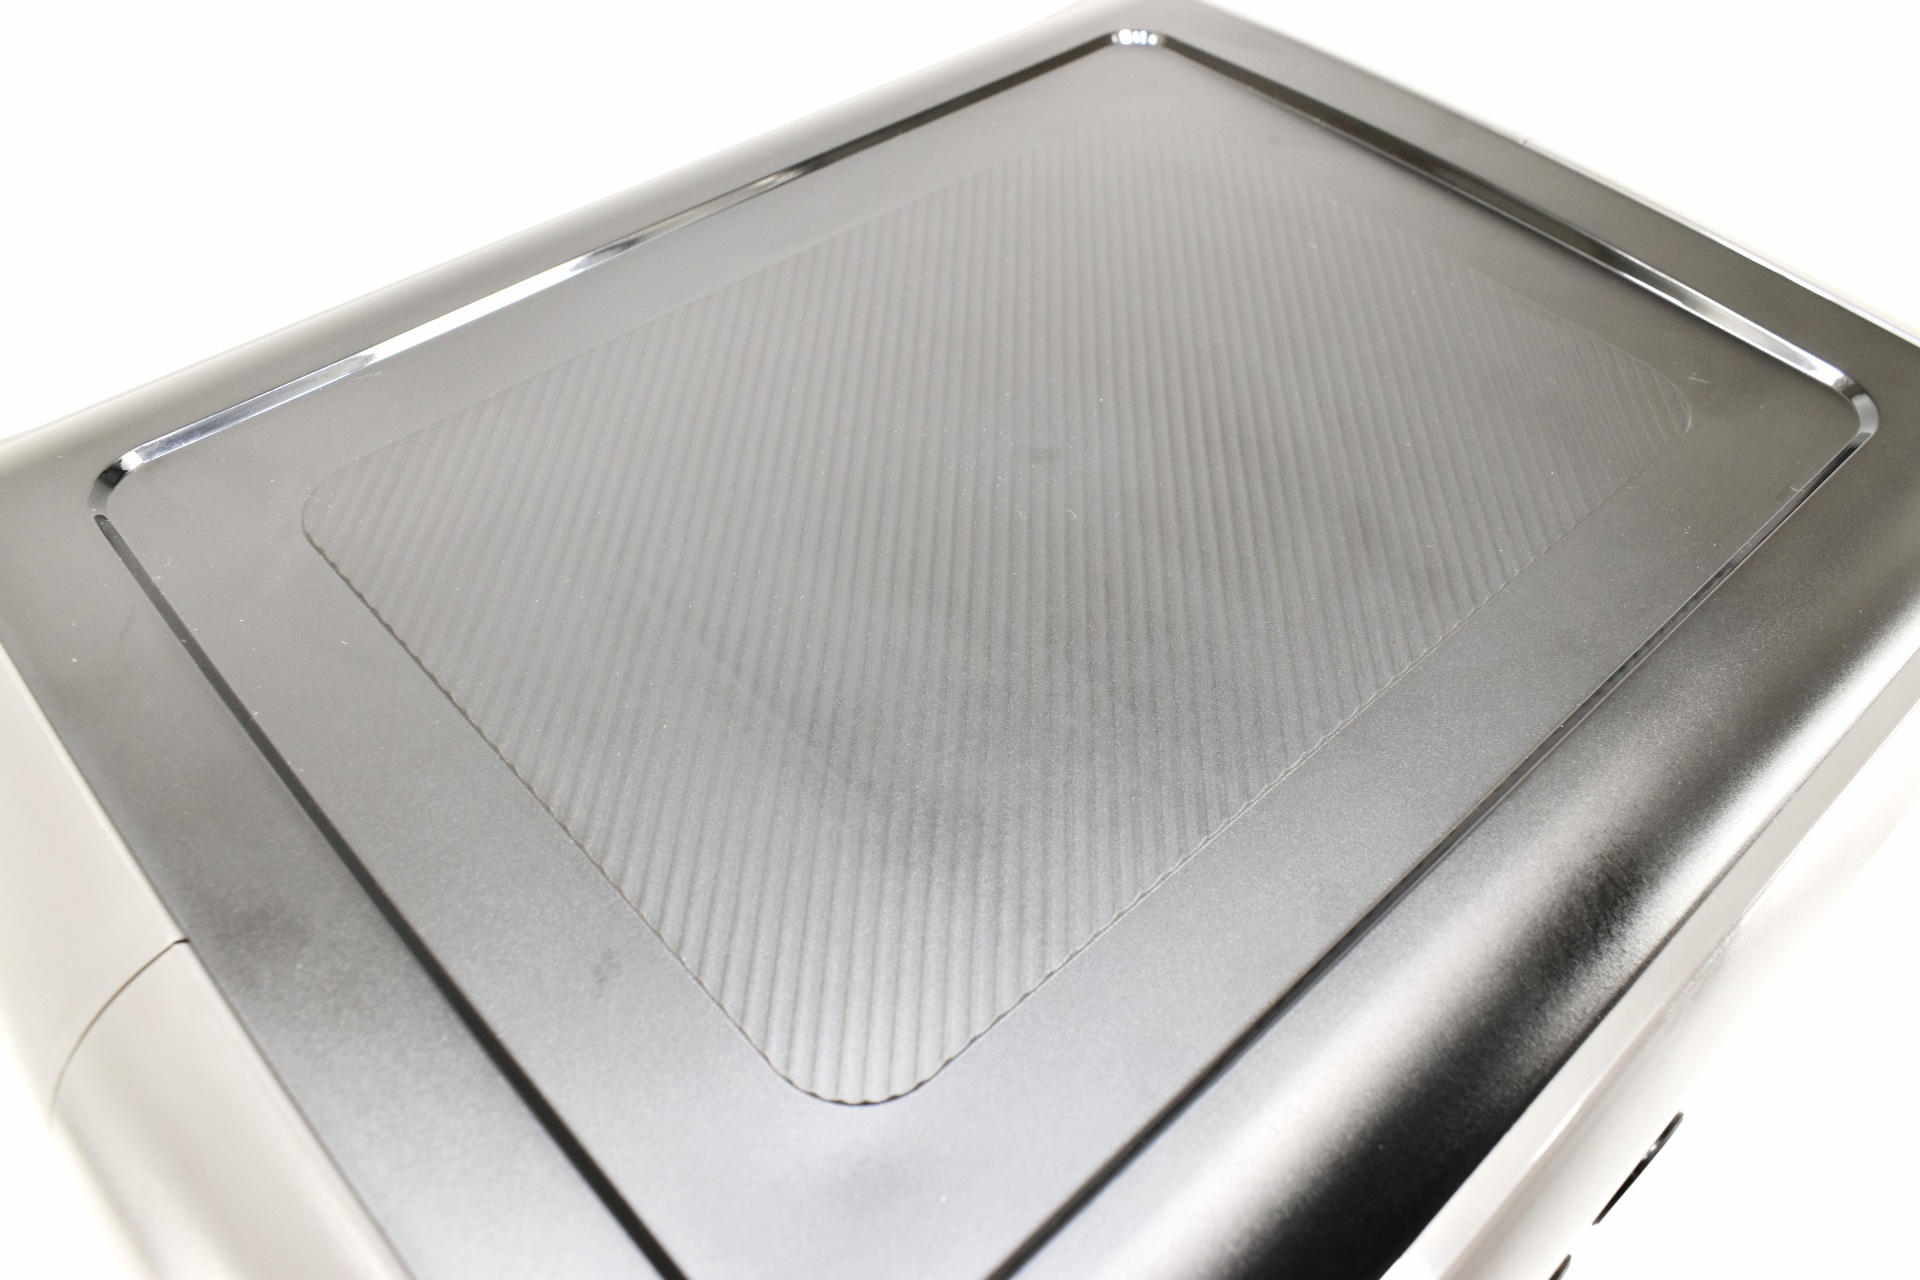
On top ALLPOWERS has placed a textured area where you can place small things like your smartphone or tablet.


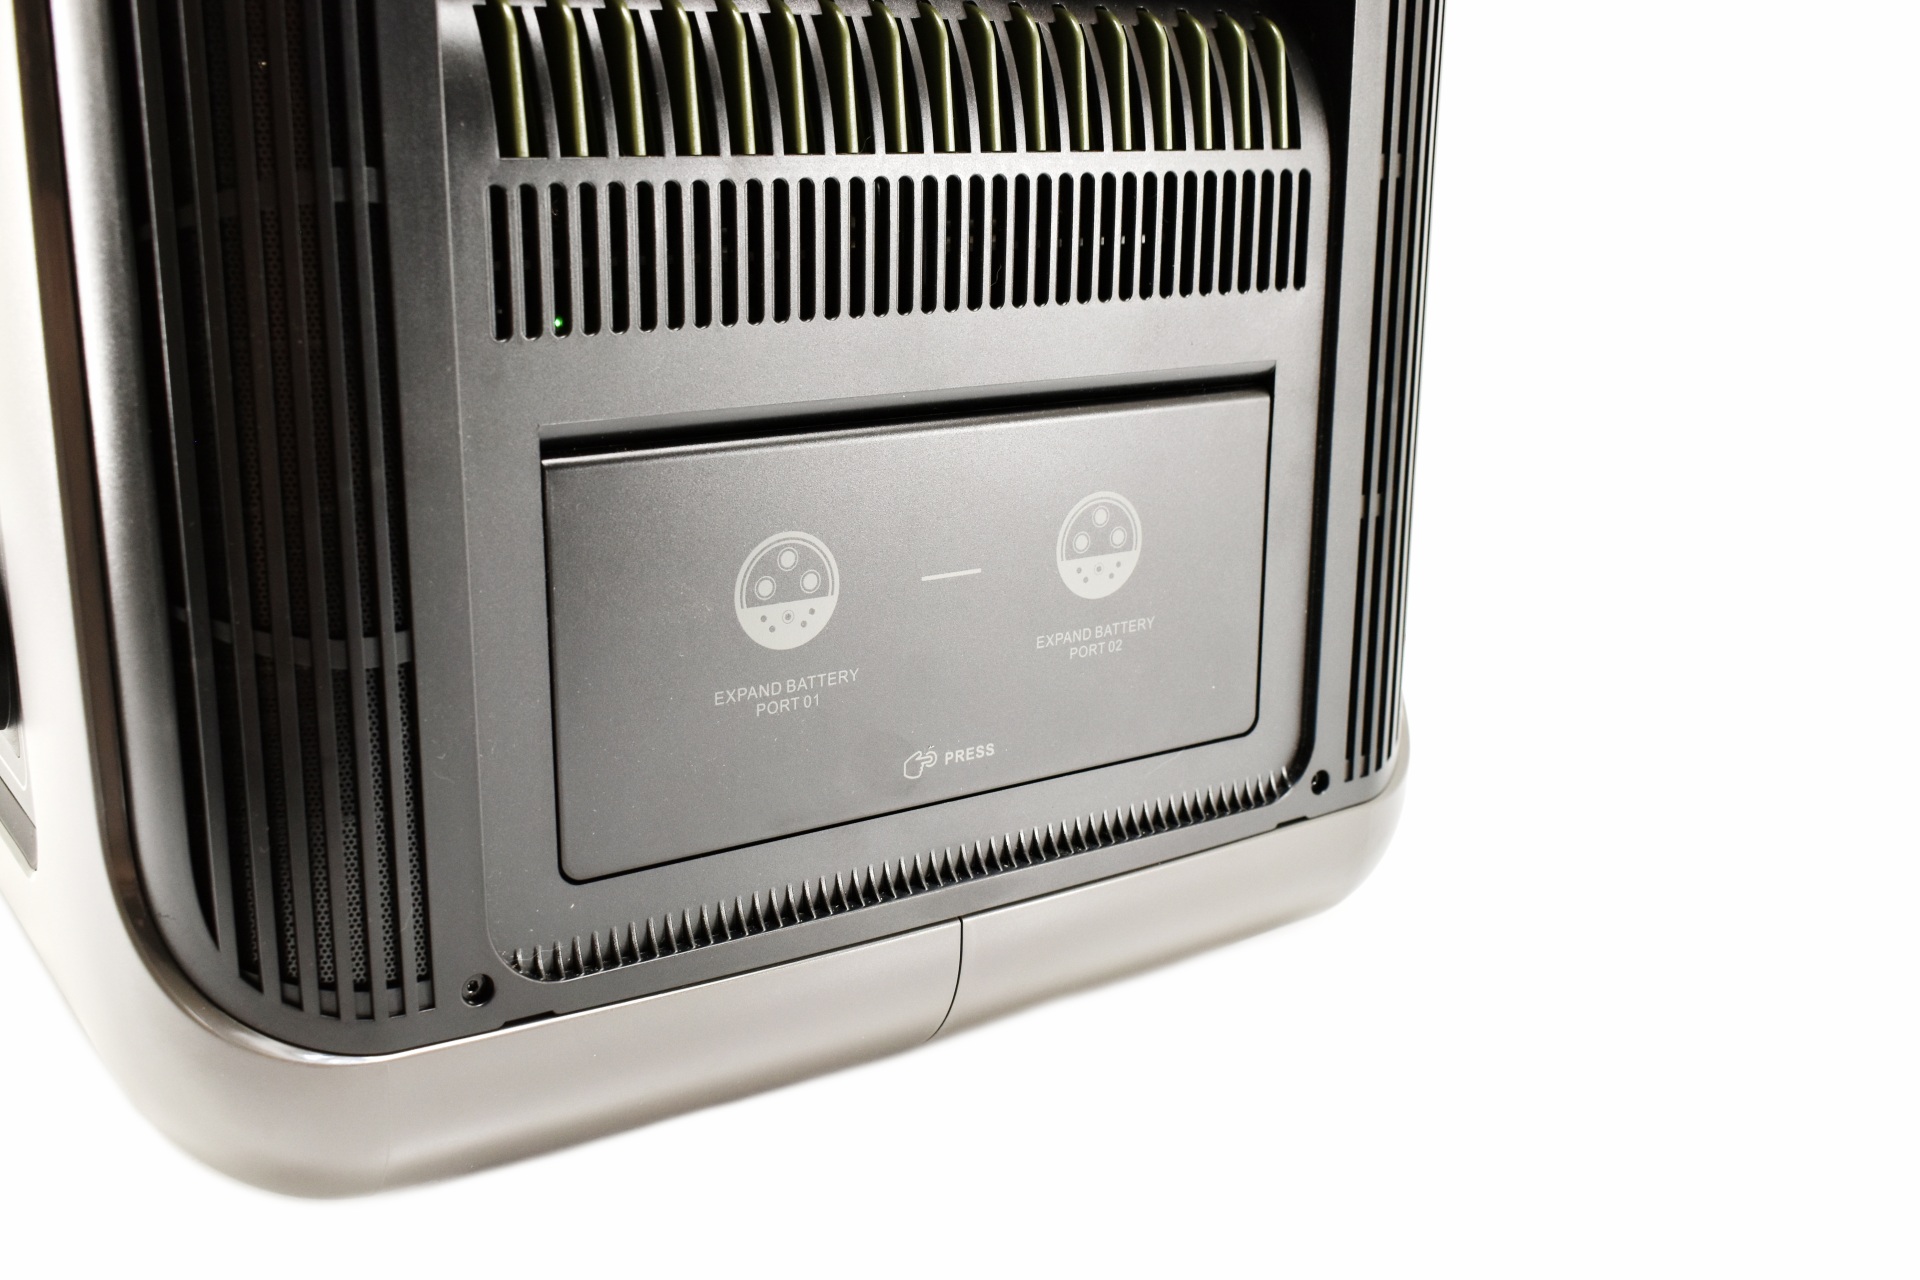
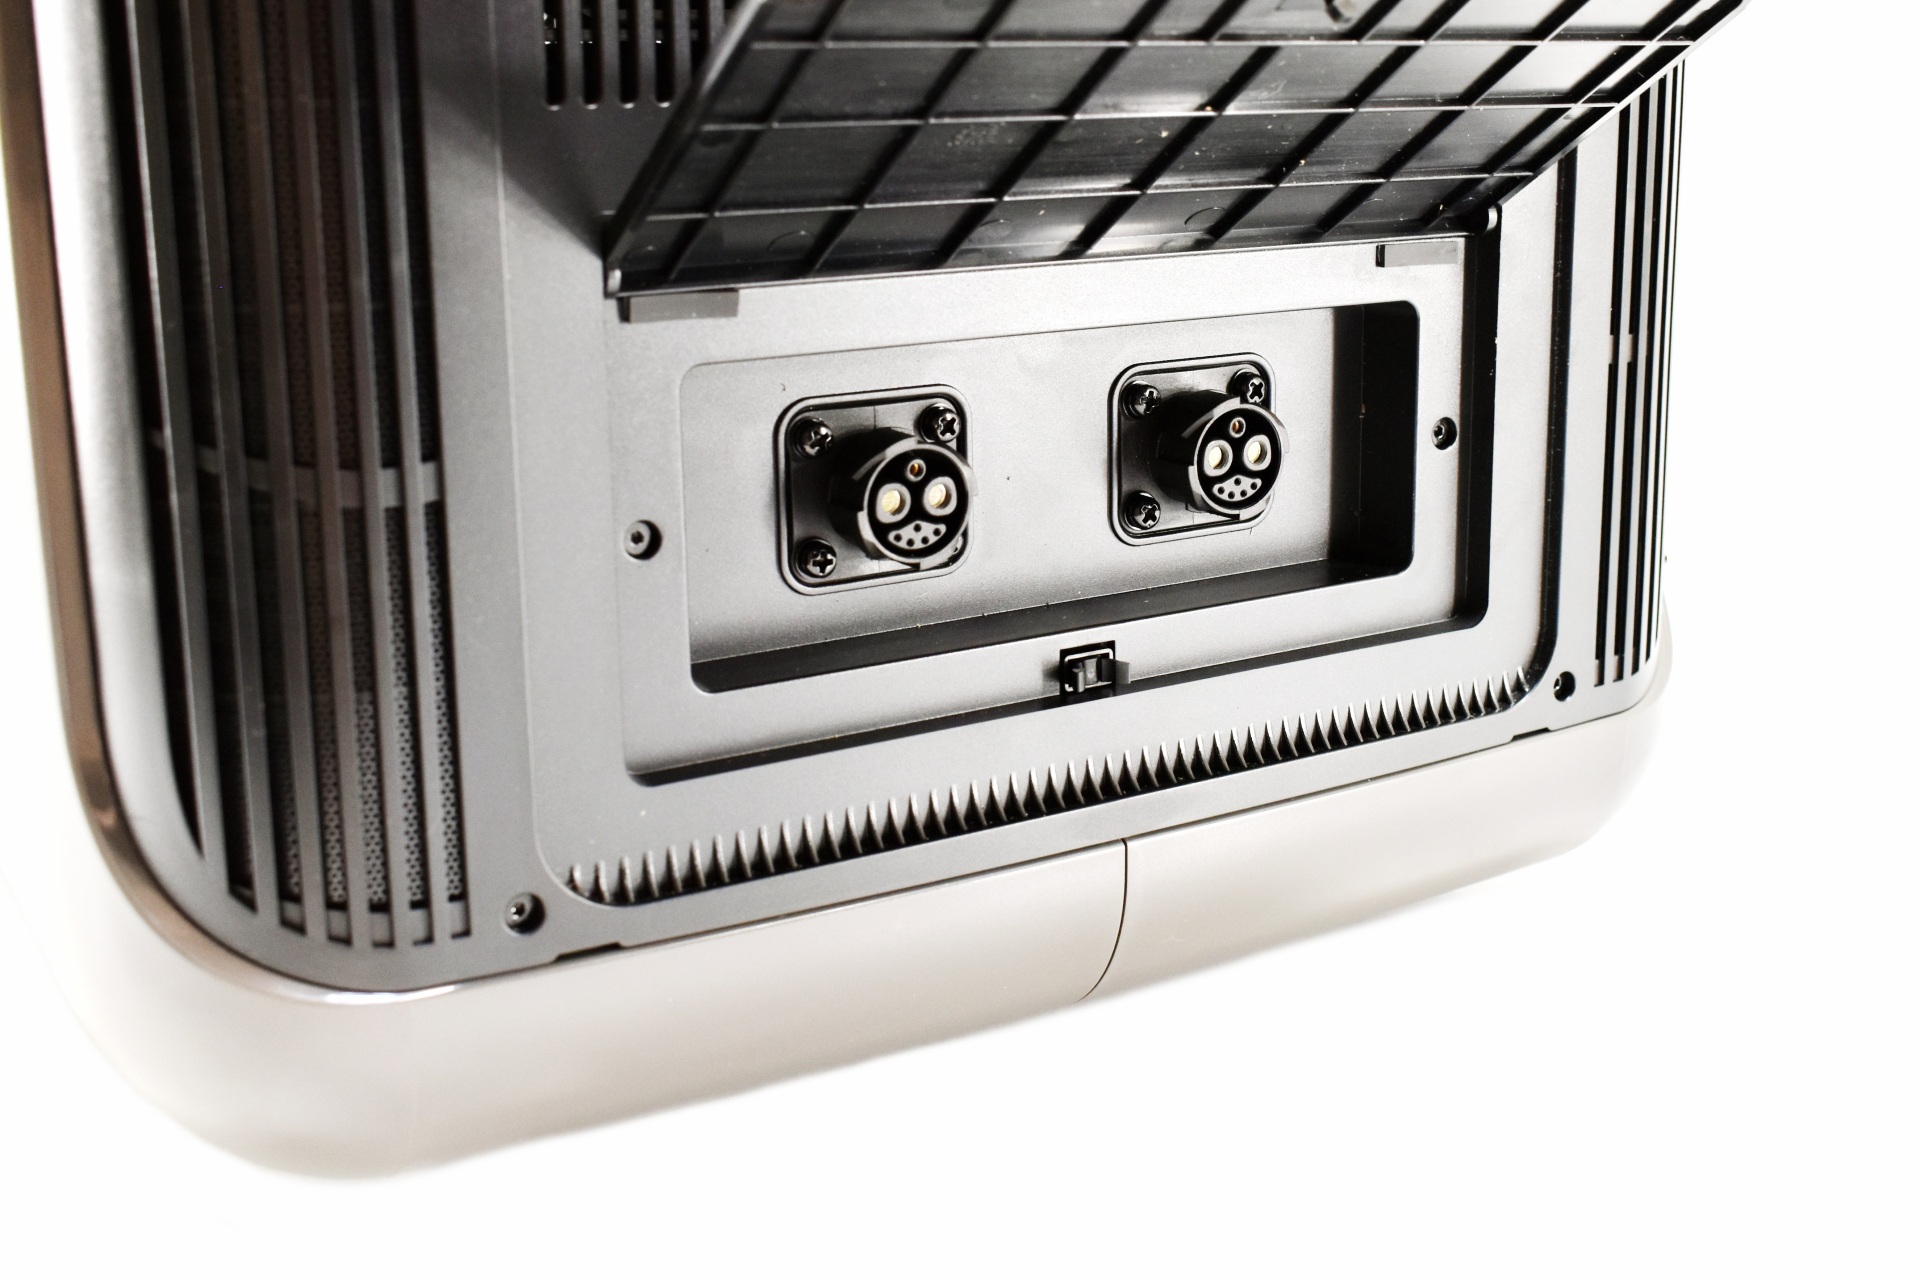
Taking a look at the right side, we find two battery expansion ports under a cover/door.


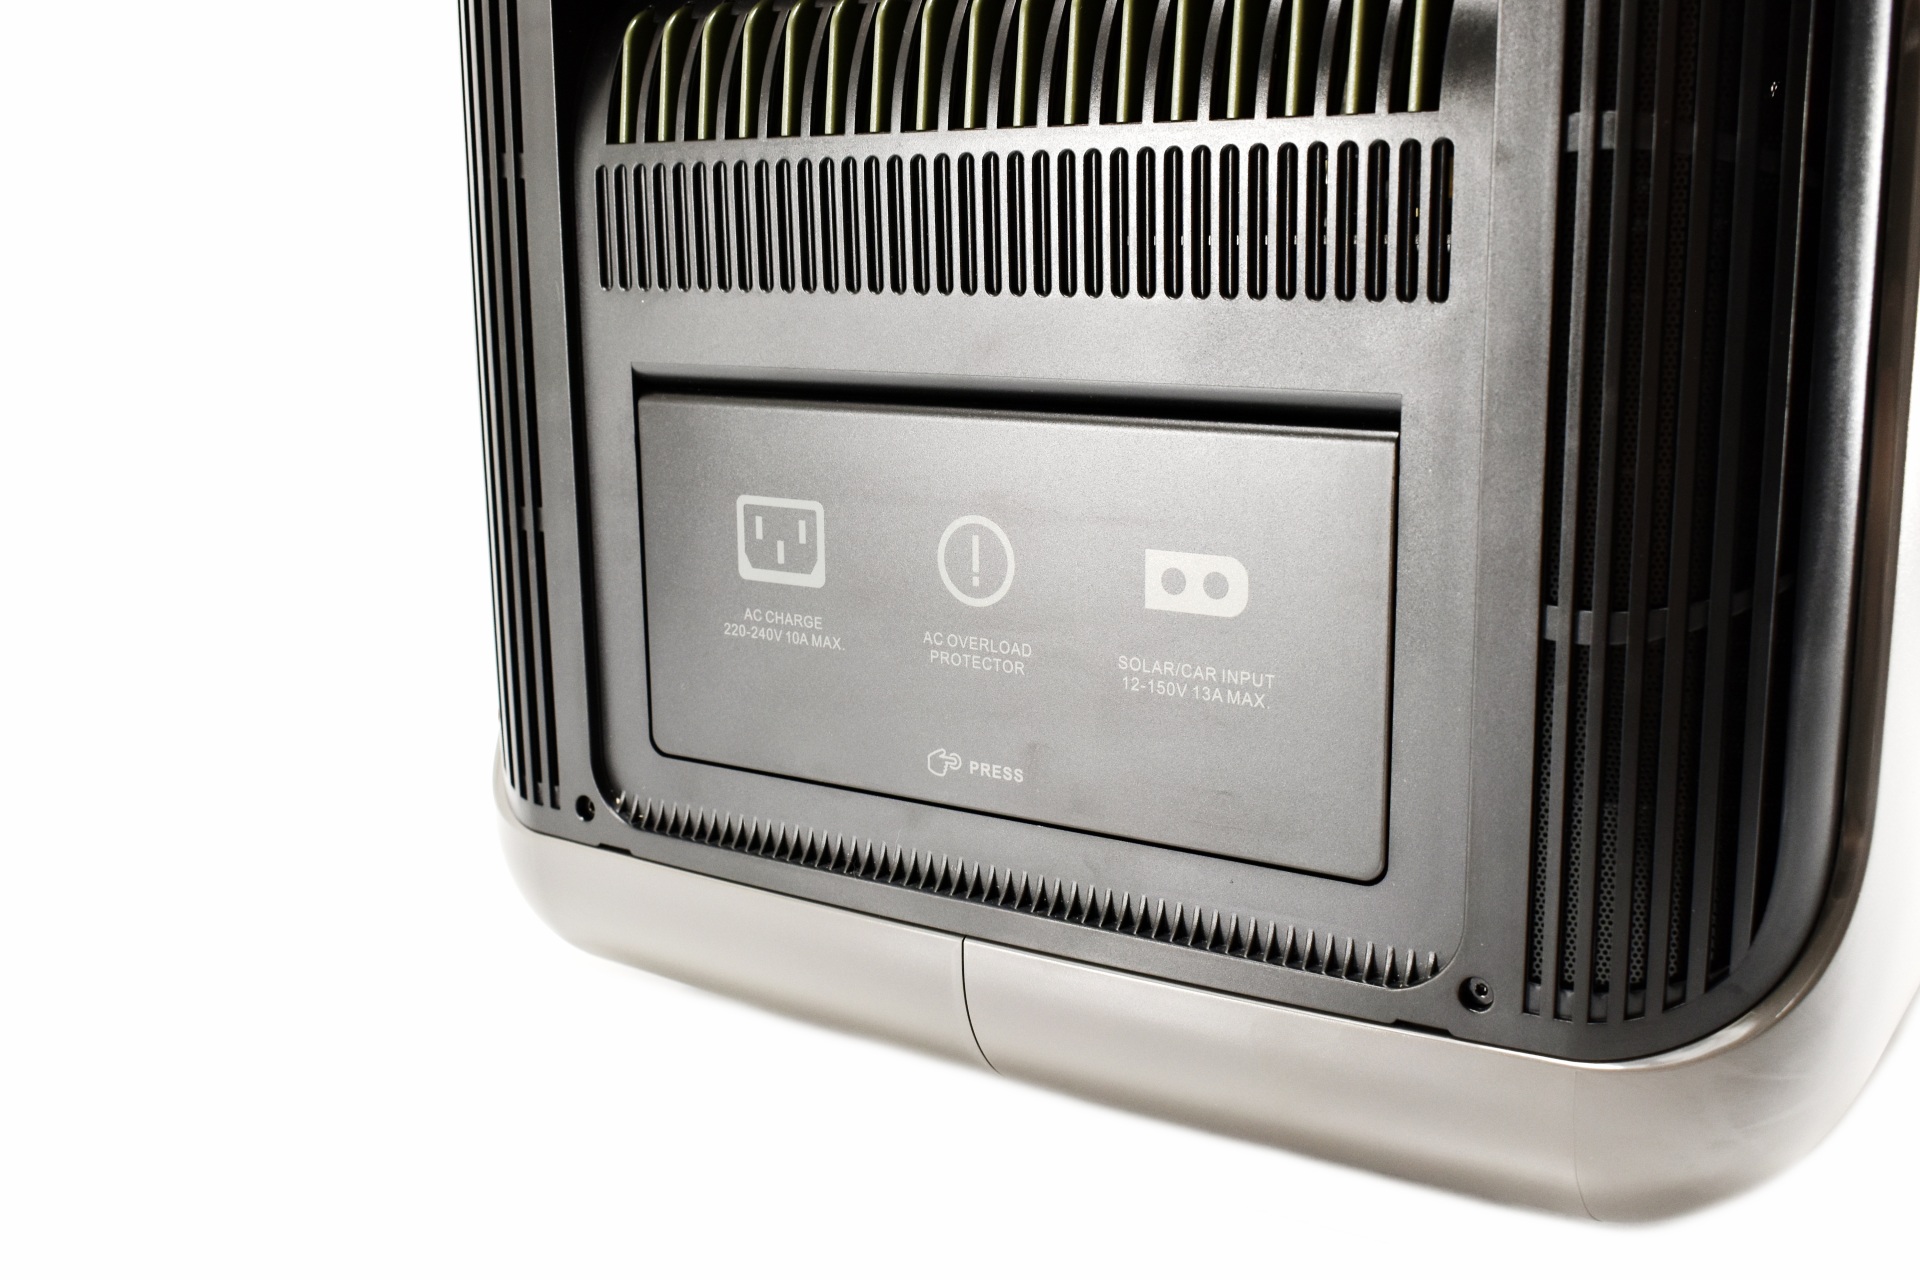
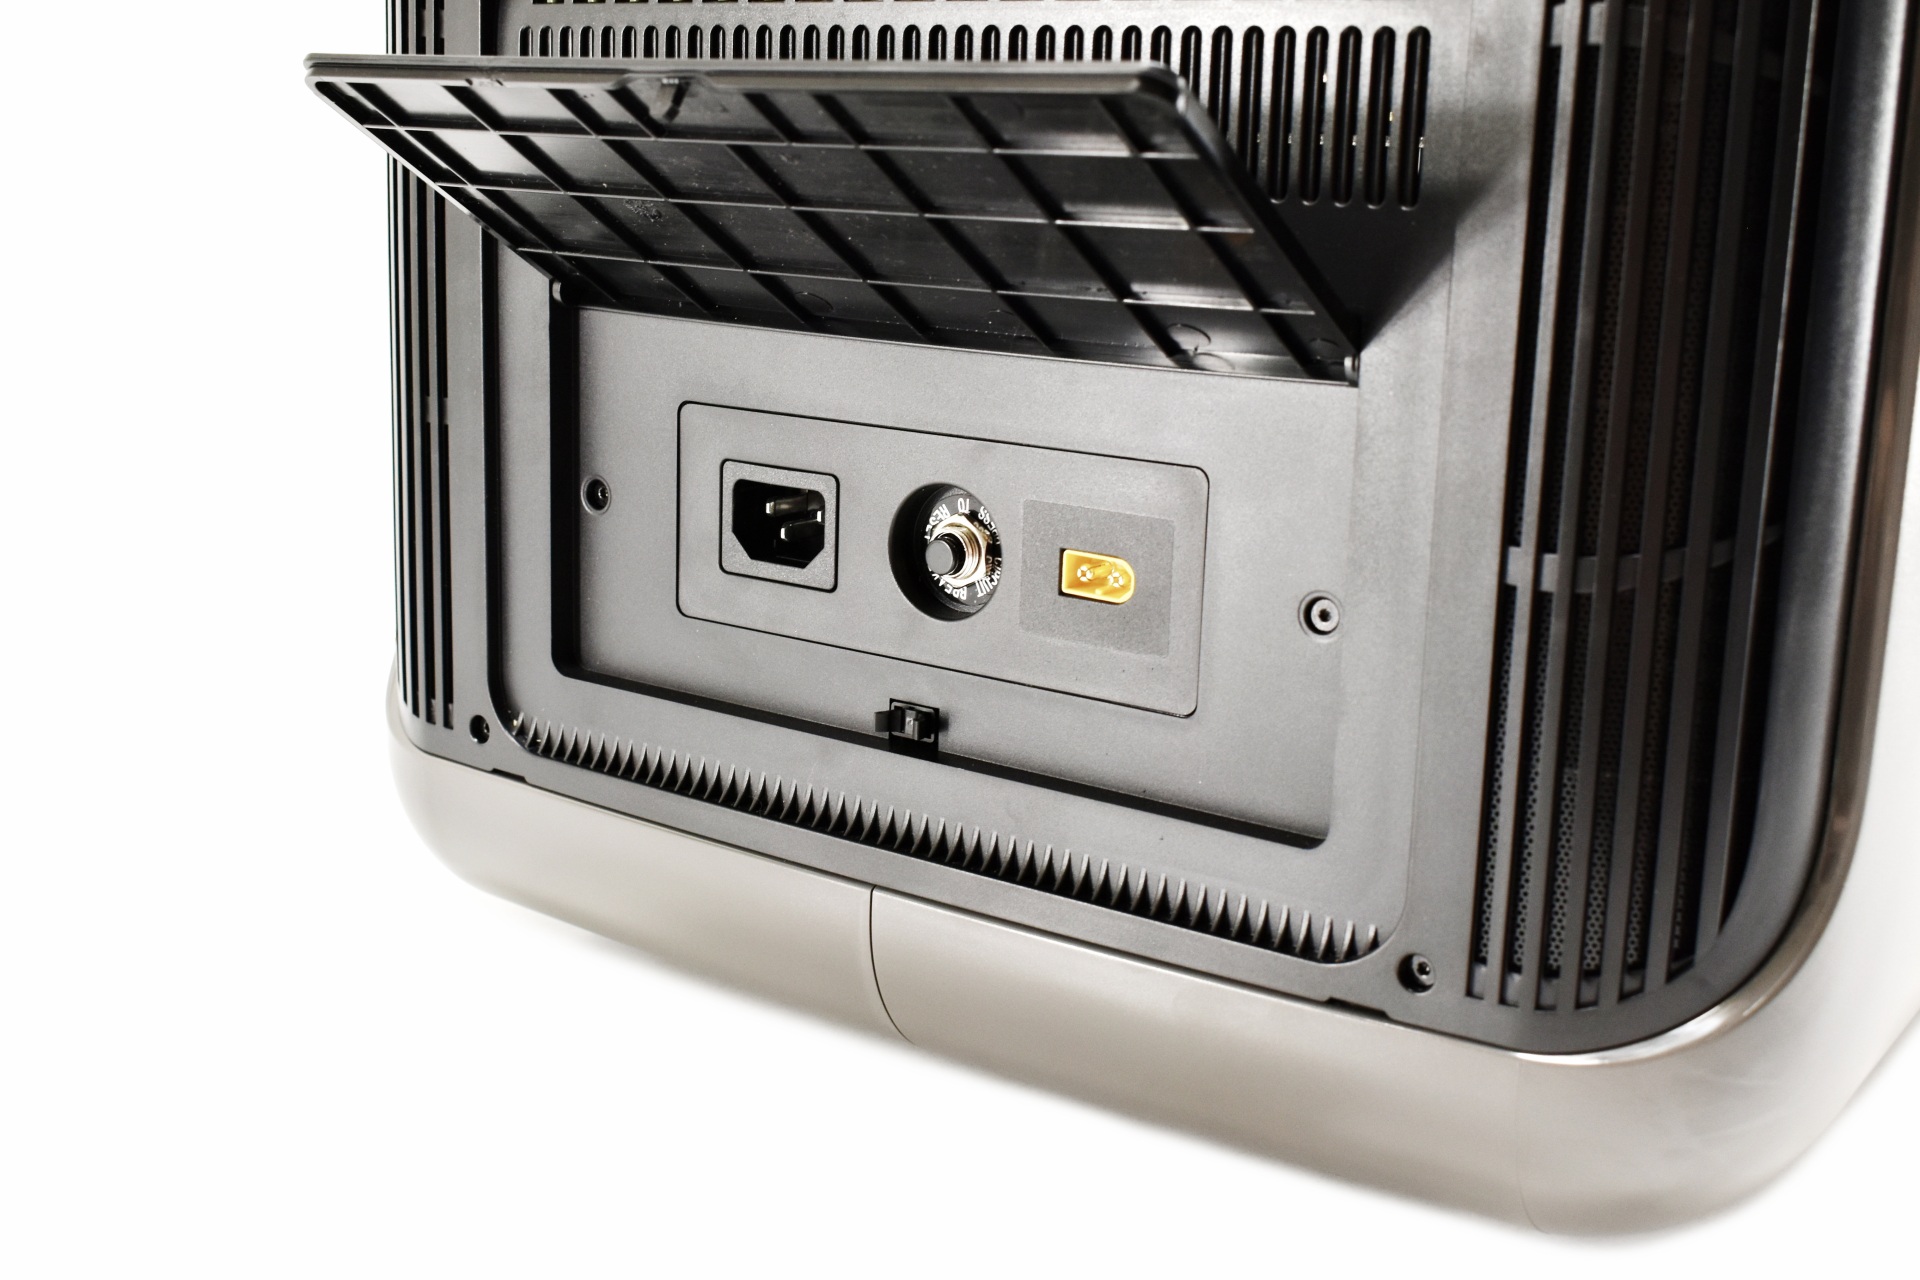
On the left side we find the power port, fuse and solar panel port under a similar cover/door.


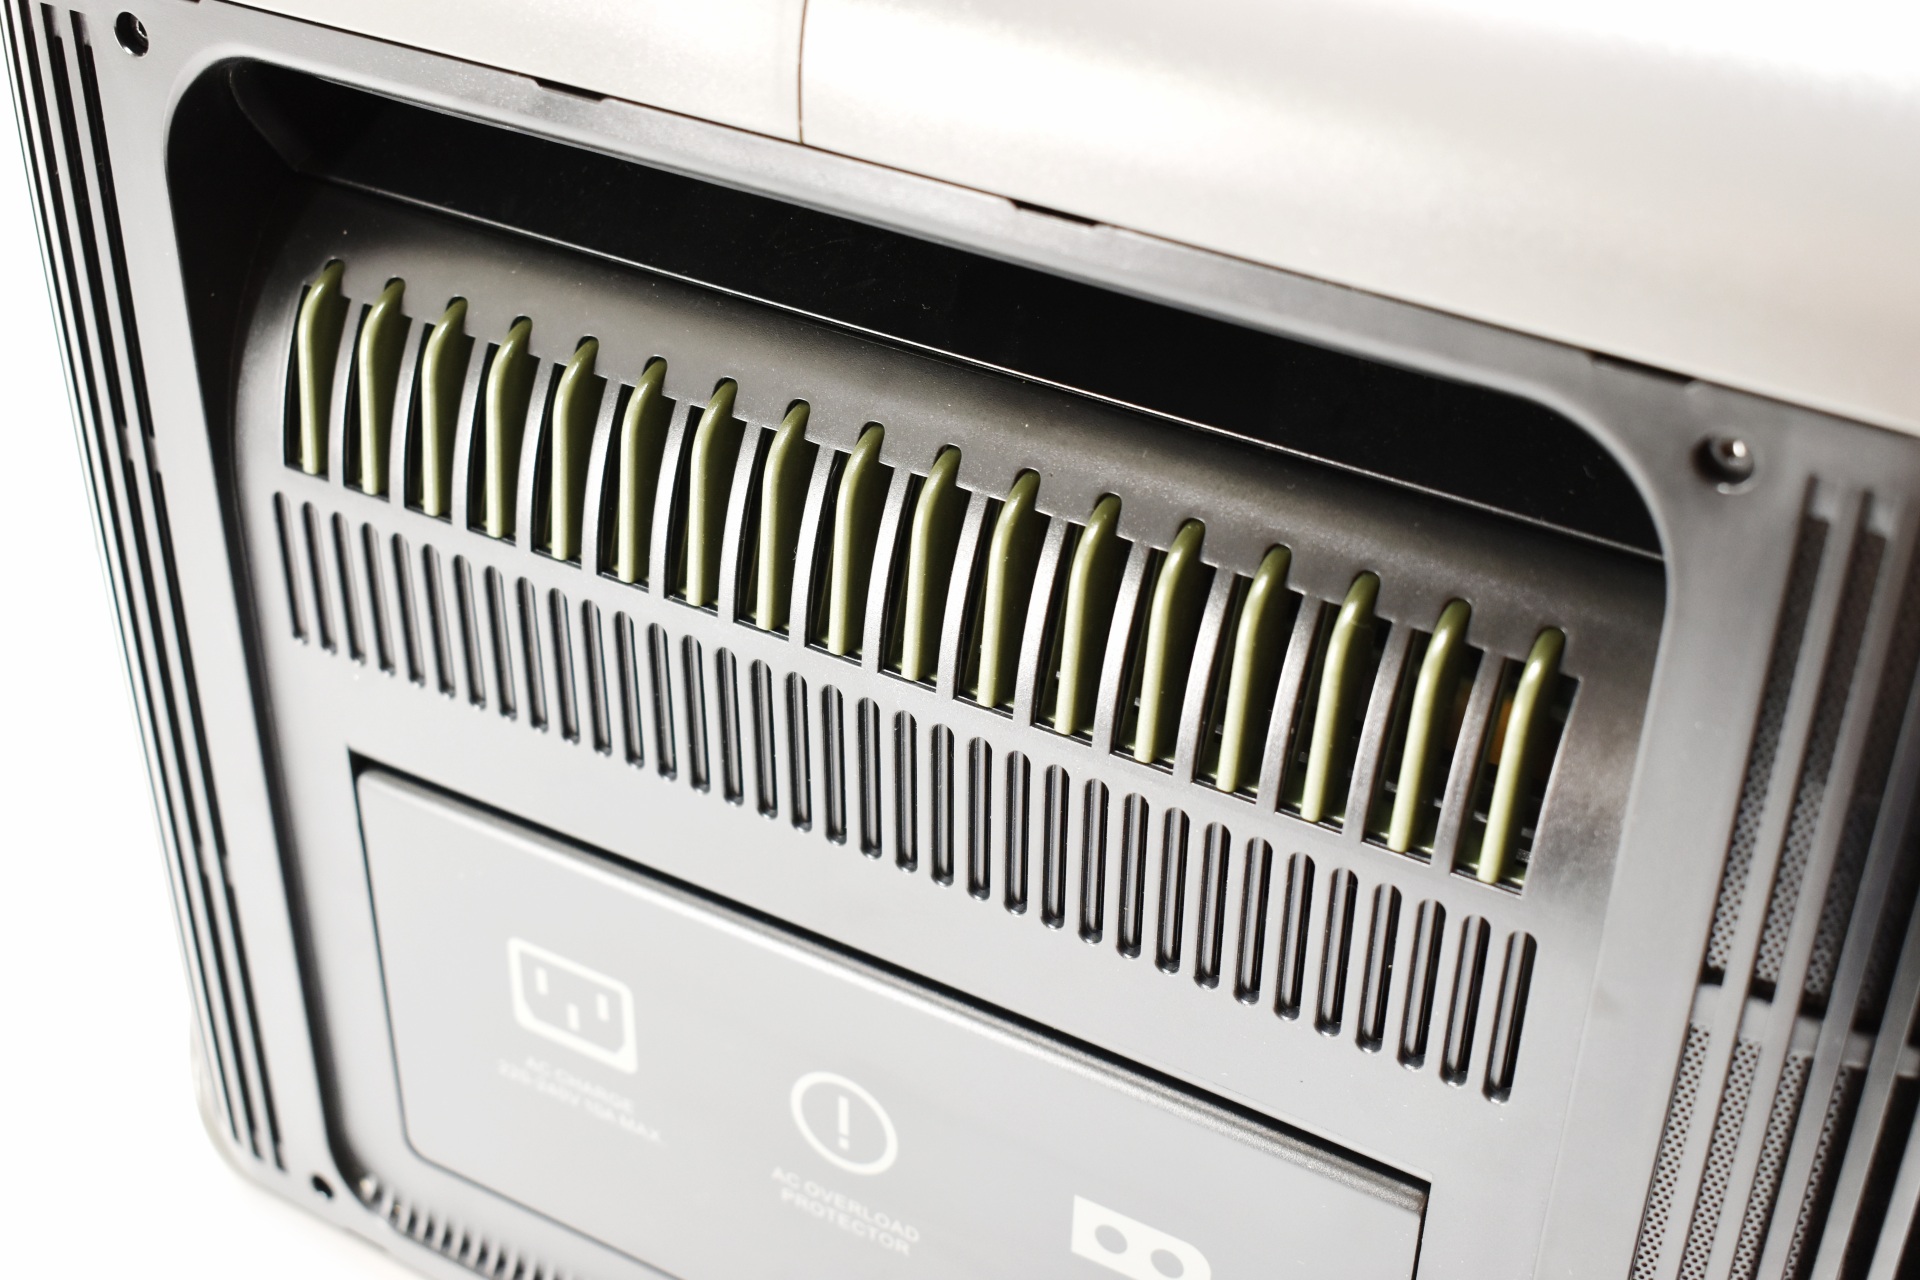
ALLPOWERS is using a very effective combination of anodized aluminum fins and a fan to keep noise to a minimum.


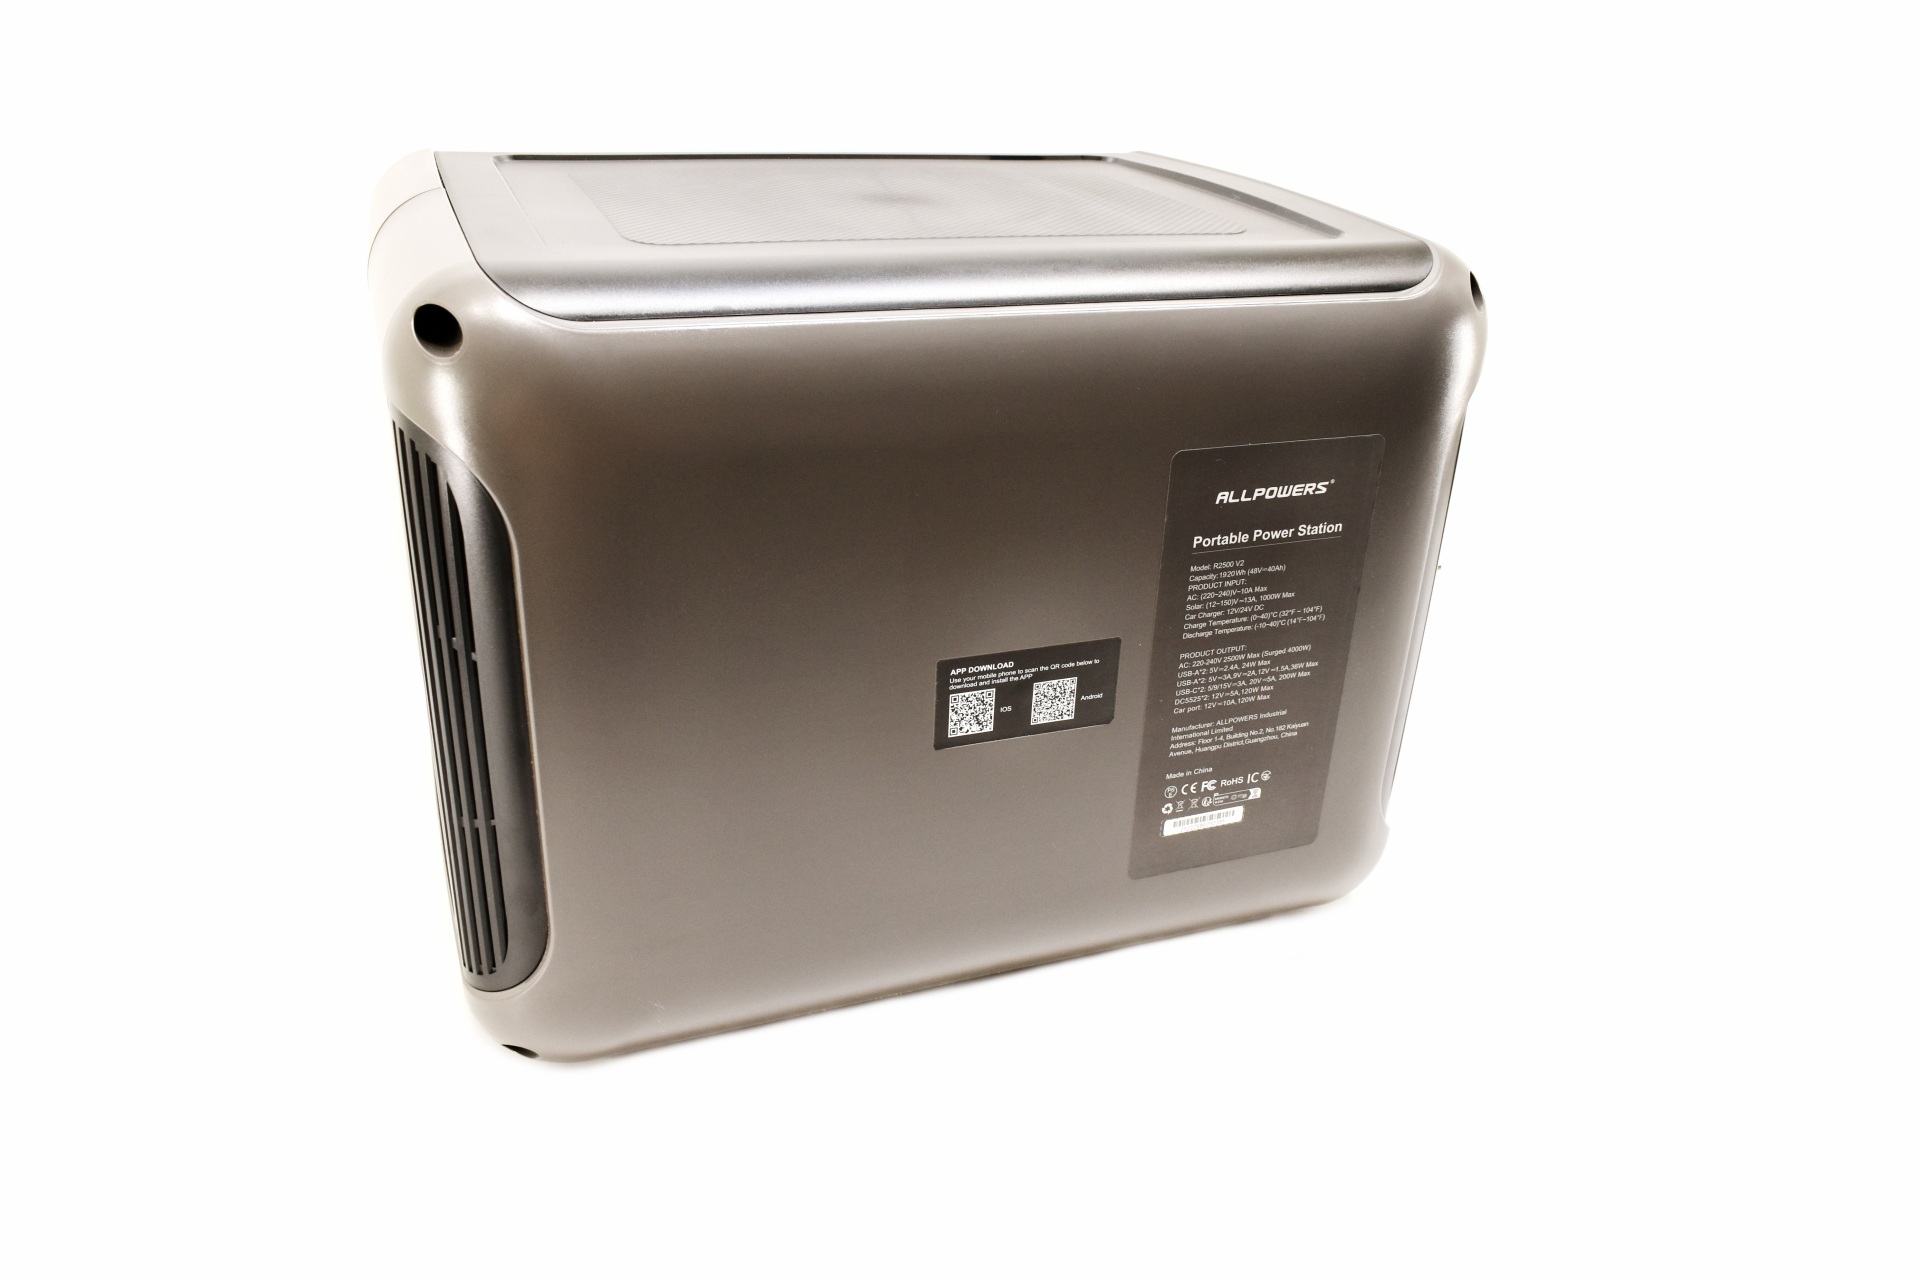
At the rear of the R2500 V2 we find 2 stickers, one pointing to the iOS and Android smart app and one with the unit's specifications.


ALLPOWERS APP


The ALLPOWERS app is a crucial component of the R2500 V2 so you should definitely use it.

allpowers app 1

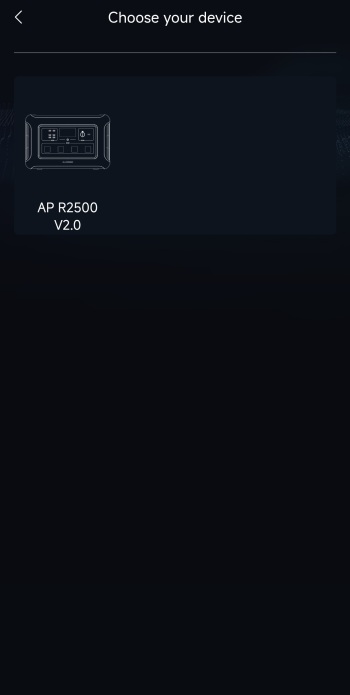
This app uses Bluetooth connectivity to look for nearby power stations by ALLPOWERS.


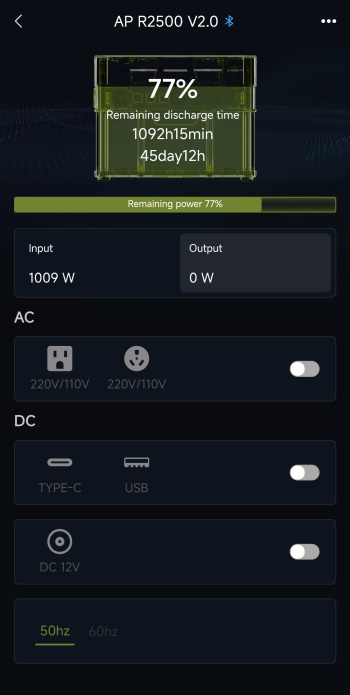
Main tab as with past models showcases current battery charge, remaining discharge time (based on current consumption), input/output, available connectivity (you can also turn them on and off), and Hz.


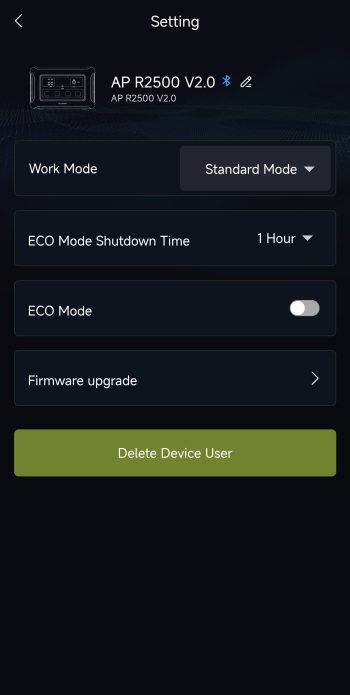
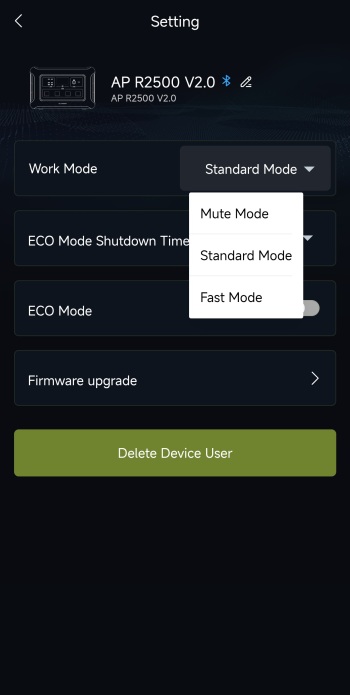
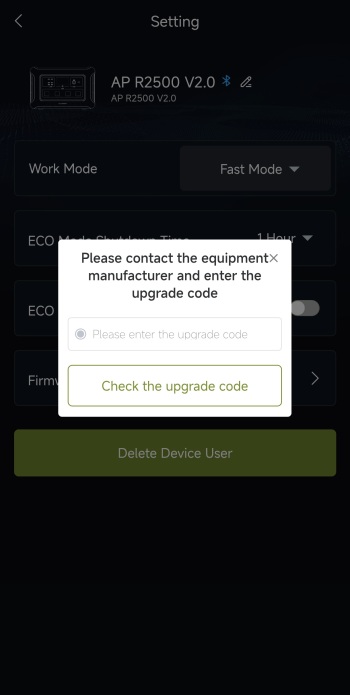
From inside the settings menu (three dots on the upper right corner) you can change the name of the device, charging mode, enable ECO mode with auto shutdown, perform a firmware update and delete the device from the app.


There are three available charging modes, mute, standard and fast.


In my case mute hovered at around 650-700W, standard between 1000 and 1200W and fast between 2000 and 2020W (these are probably affected by ambient temperature meaning you may get higher or lower input).


allpowers app 5

Instead of having an automatic firmware check and update feature the end user is required to ask ALLPOWERS for a unique code in order for that to happen (according to them this is for safety concerns).


TESTING METHODOLOGY


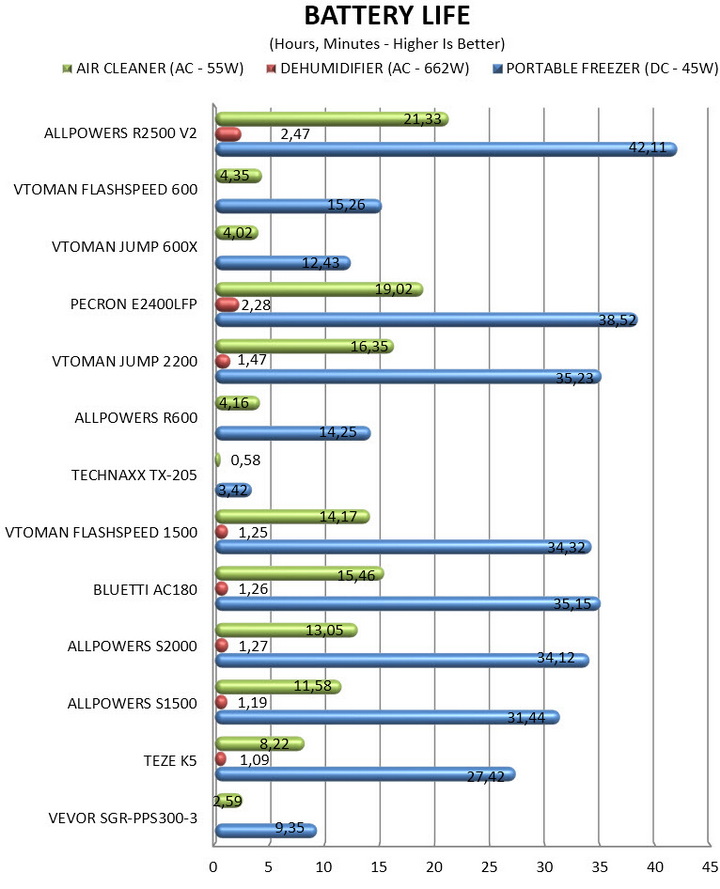
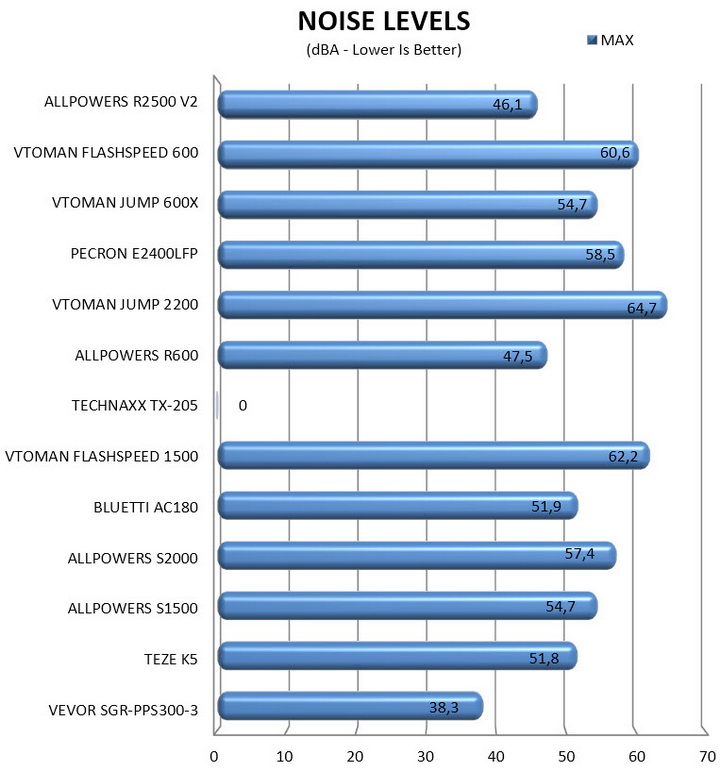
    In order to cover a wide range of electrical and electronic devices i decided that I’ll be using 3 different ones to test portable power stations, the VEVOR SH-C22 Bluetooth car refrigerator (DC, around 45W consumption - not continuous), Delonghi Aria Dry Light dehumidifier (AC, around 662W consumption) and a generic air cleaner (AC, around 55W consumption). Of course, my ExTech HD600 dBA meter will also be used at around 10cm away from each portable power station to record the maximum noise coming from the built-in fan/s (ambient temperature is once again set at 23 degrees Celsius for all tests).


TEST RESULTS

battery


CONCLUSION


allpowers r2500 v2 review b


    Overall, the ALLPOWERS R2500 V2 delivers a compelling blend of long‑life LiFePO4 battery chemistry, robust electrical protections, dependable build quality, and a generous selection of AC and DC connectors that make it easy to integrate into a wide range of setups. Its pure sine‑wave inverter ensures stable, appliance‑safe (and more efficient compared to other power stations) AC output, which pairs well with its efficient DC ports for lower‑loss operation. The three available charging modes (via the app) add meaningful flexibility, the quiet mute mode that holds at around 650-700W, the fast 1000-1300W standard mode, and the 2000W+ fast charge mode when speed takes priority. Combined with low operating noise and efficient power delivery, especially through its DC outputs, the unit performs confidently in both home‑backup and off‑grid scenarios. The drawbacks are practical rather than critical. The R2500 V2 is undeniably heavy, and the rubber stops on the side doors can easily peel or loosen over time due to the repeated flexing of the hinged covers (in my case they fell off after opening the left right just 5 times - you can see m placing them under the top end of the right door in my pictures since they had already fallen off). It also ships without a car cigar charging cable, which feels like an omission given its versatility, and the app’s firmware‑update process requires obtaining an upgrade code directly from ALLPOWERS before you can apply new firmware (ALLPOWERS says if the battery works fine, it's not needed but still). These quirks don’t overshadow the core strengths, though, strong protections, LiFePO4 longevity, quiet operation, flexible charging, and a well‑rounded connector layout make the R2500 V2 a capable and efficient high‑output power station for users who want reliability and versatility in one unit.


    At the time of this review the latest R2500 V2 portable power station by ALLPOWERS retails for USD799 inside the USA (ALLPOWERS.COM / USD719.10 by using code NIK10 at checkout) and for 854Euros inside the EU (ALLPOWERS.EU / 768.60Euros by using code NIK10 at checkout). At the end of the day the ALLPOWERS R2500 V2 may not be the highest capacity or output model in the market but it does offer a great price/performance ratio and on top of that it’s the best model to arrive in the lab to date and so the Platinum Award is in order.

PROS


- Build Quality
- 2500W Output (4000W Peak)
- 1920Wh LifePO4 Battery Capacity (3500+ Cycles)
- Pure Sine Wave Model
- BMS Advanced Battery Management
- 3 Charging Modes (Mute, Standard & Fast)
- Available Ports (4xAC Outlets / DC Car Lighter Output / 2 Battery Expansion Ports / DC5525 Port / XT60 / 4xUSB A Ports / 2xPD100 USB C Ports)
- Smart App
- Noise Levels


CONS


- Code Required For Firmware Upgrade
- Door Rubber Stops (May Fall Off)


CPS PcCooler GT360 ARGB & DT360 ARGB High Performance AIO CPU Coolers Review

INTRODUCTION


cps pccooler gt360 dt360 argb review a


    Keeping modern CPUs cool under sustained load demands hardware that can move heat quickly and consistently, which is why AIO liquid coolers dominate performance‑oriented builds. Their combination of copper cold plates, high‑flow pumps, and large radiators gives them a clear advantage over air coolers when dealing with aggressive boost behavior and high ambient temperatures. CPS PcCooler’s GT360 ARGB and DT360 ARGB High Performance AIO CPU Coolers enter this segment as two 360mm options built for users who want strong thermal results, solid component quality, and synchronized ARGB lighting as part of a cohesive system aesthetic.


    Shenzhen Fluence Technology PLC, established in 2005, is mainly engaged in lithium battery cathode materials, new cooling devices for electronic products and LED industry chain-related businesses, which is recognized as a national high-tech enterprise.


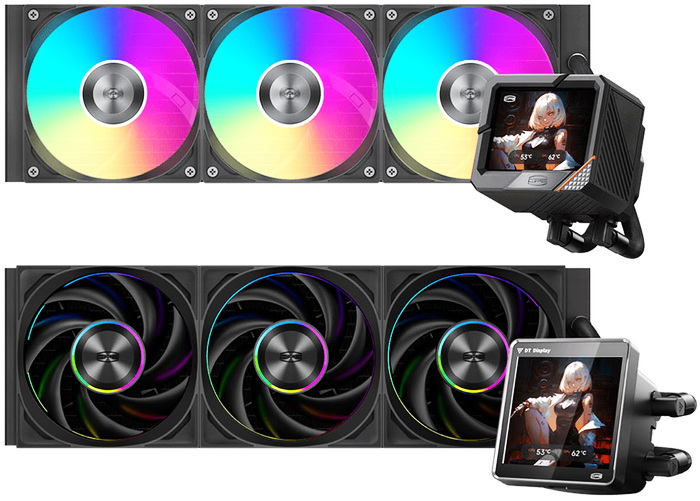
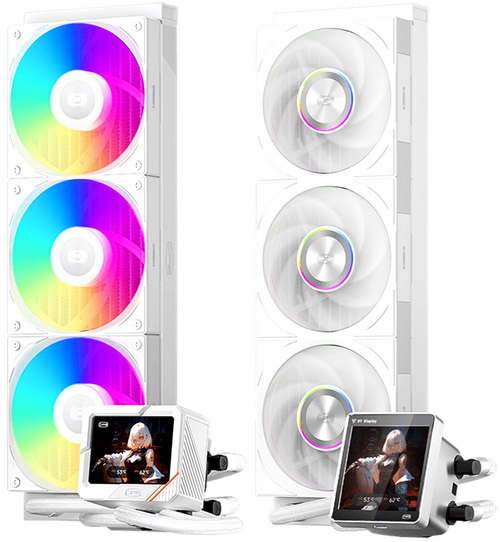
    CPS PcCooler’s LCD 360mm AIO CPU Cooler lineup splits into two distinct designs the GT360 ARGB and the DT360 ARGB, each built around a high‑resolution IPS display but tuned for different cooling priorities. The GT360 ARGB features a 3.5" 640x480 IPS screen, a 2600RPM pump, and a precision‑machined copper cold plate, feeding a 397x120x27mm radiator with three 3000RPM ball‑bearing ARGB fans (99CFM/5.33mmH2O/41.5dBA) designed for stronger airflow and balanced acoustics. The DT360 ARGB on the other hand counters with a 3.4" 480x480 IPS display mounted on a magnetic detachable module, paired with a 2600RPM pump and a 14 channel high‑density radiator that increases coolant contact area for sustained thermal performance. Its three ball‑bearing 120mm fans also run at 3000RPM, delivering up to 83CFM with 5.7mmH2O air pressure at a quieter 33.1dBA. With almost identical pump and fan performance, the GT360 ARGB becomes the more visually expressive, higher‑resolution option, while the DT360 ARGB emphasizes radiator density, modular display flexibility, and a cleaner, more understated lighting profile.


SPECIFICATIONS AND FEATURES


PACKAGING AND CONTENTS


Both boxes have a product picture at the front along with the company logo.


At the rear we find the complete specifications table.


The coolers and their bundles are placed inside a thick piece of foam.


Inside both boxes you'll find the AIO coolers, LCD screens, thermal paste tubes, user manuals, backplates and all the necessary bits to install the coolers onto Intel LGA 1150/1151/1155/1200/1700/1851 and AMD AM4/AM5 motherboards. However, the DT360 ARGB also comes with fan extension cables and a 8-fan ARGB hub.


THE GT360 ARGB & DT360 ARGB


Both the GT360 ARGB and DT360 ARGB AIO CPU coolers look almost the same (they both use 394mm long, 120mm wide and 27mm thick aluminum radiators).


Radiator thickness with and without the fans is roughly 52mm/27.2mm for the GT360 ARGB and 56mm/27.8mm for the DT360 ARGB (thicker fans).


FPI (fins per inch) count for both radiators is around 20.


Even though the three 120mm ARGB fans of the GT360 ARGB model look better the ones used with the DT360 ARGB are probably more durable.


Tube length for both coolers is 400mm so you shouldn't have an issue with installation (perhaps in super towers).


The base of the GT360 ARGB features a detachable LCD screen and even though the base of the DT360 ARGB also features a detachable LCD screen it's one which you can position anywhere on your tower (for people who many decide to do so the base also has basic ARGB lighting).


You can move the tubes of both AIO coolers from their bases as usual.


Both models feature copper cold plates of roughly the same total surface.


INSTALLATION


Typically, I start by mounting the radiator with the pre-installed fans as seen above.


As with past AIO coolers base installation starts by attaching the backplate.


After that just attach the spacers and then mount the base (I chose to mount both bases with the tubes as shown on the exterior of each box).


The LCD screen of the GT360 ARGB looks sharper but the one used with the DT360 ARGB is far more versatile since you can attach it anywhere in your case (will still need to power it with the USB-C to motherboard header cable). As always, a short clip (for uknown reasons my GT360 ARGB video was corrupt and so I couldn't use it) is available both in YouTube and TikTok.


DISPLAY SOFTWARE


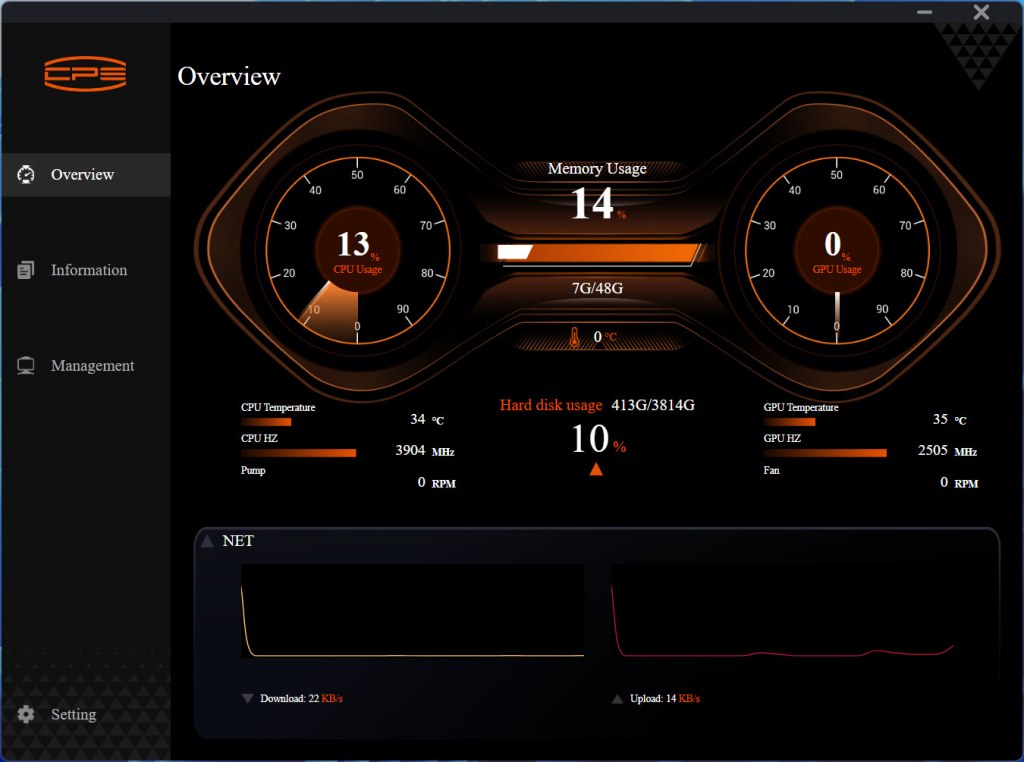
To control either AIO you will need to connect them to your motherboard's USB header and download the CPS Display software.

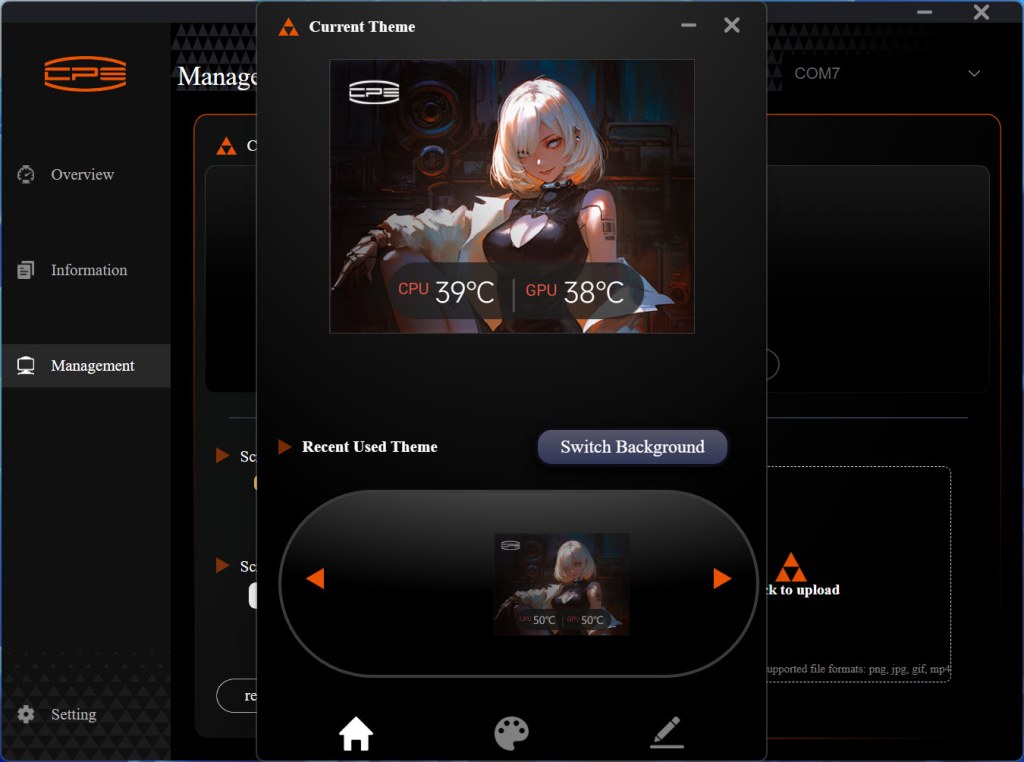
The initial tab of this software is basically a system monitor tool.


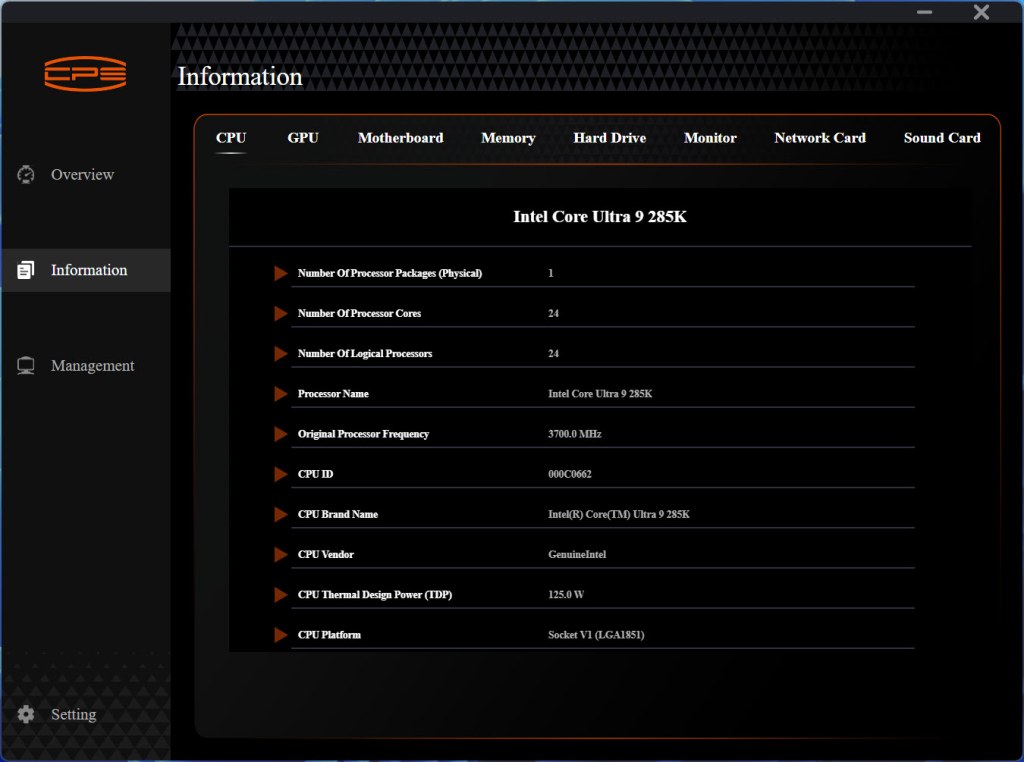
You can also access system information from the second tab.


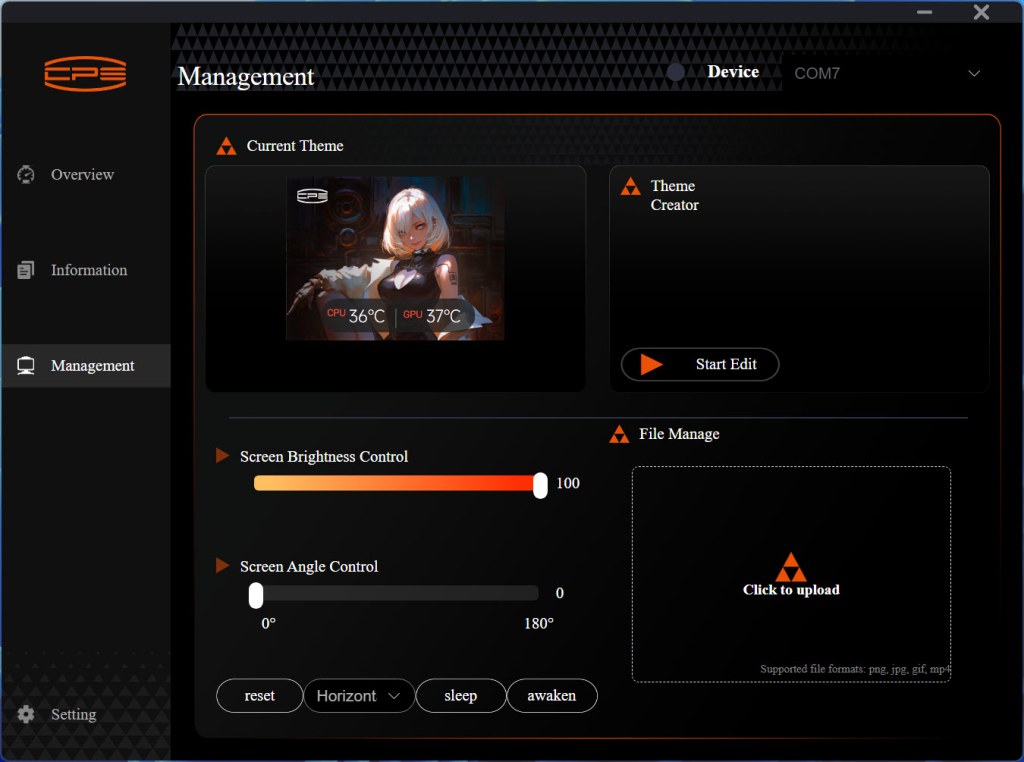
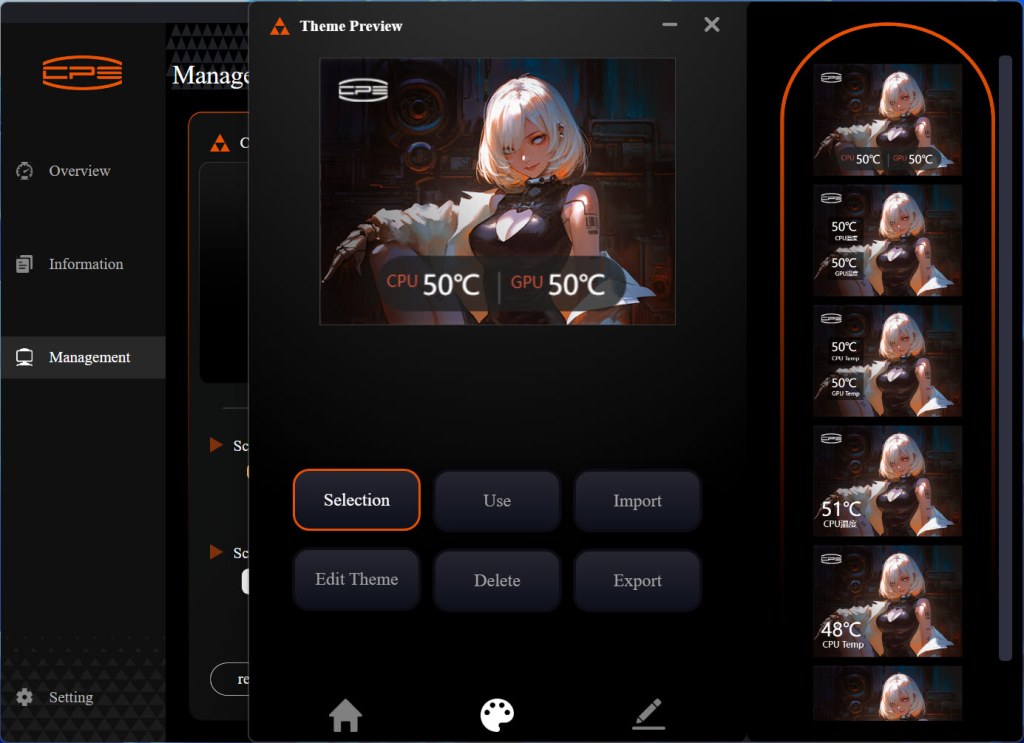
From the management tab you can control the LCD screen brightness, screen angle, background (input pictures), temperature location, and even edit the graphic of the screen.


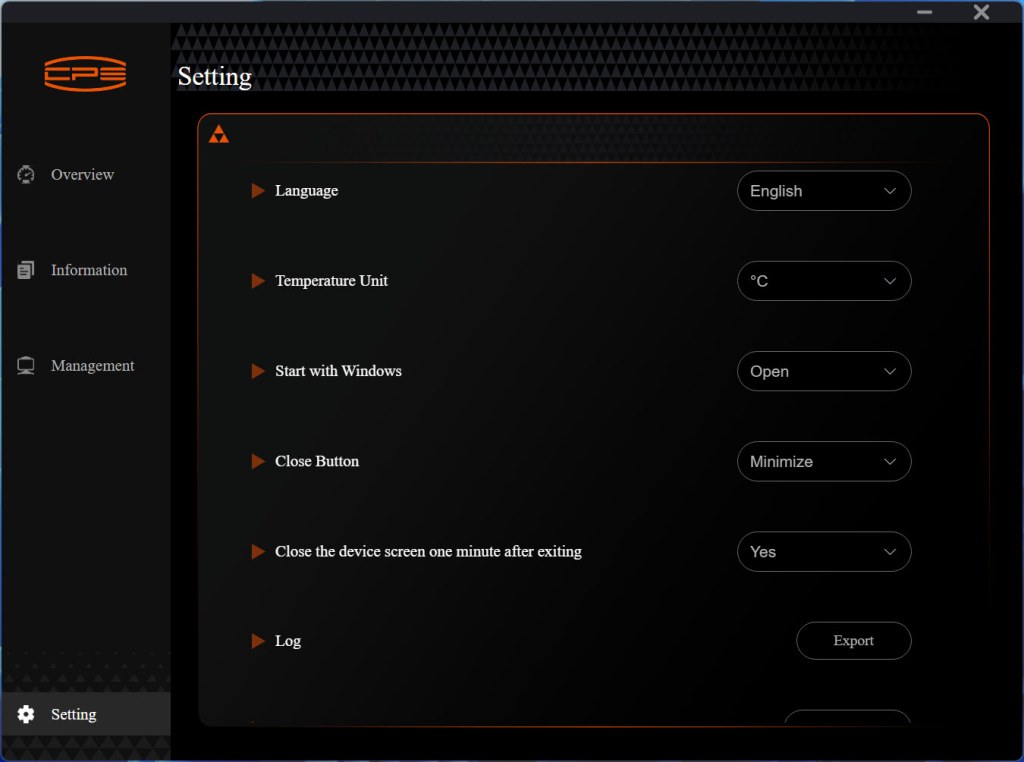
Finally, from the settings tab you can change the language and temperature unit.


TEST BED


TESTING METHODOLOGY


   Testing complete water cooling kits or individual radiators is no different than testing CPU Coolers and since we want all of you to be able to compare similar products, we created new and separate charts (you can still cross-compare results however since we are using the same test rig). So once again single (120/140mm) watercooling solutions are tested with the radiator mounted at the rear of our test rig while dual/triple/quad (240/260/280/360/420/480/560mm) solutions with the radiator mounted at the top. For the dBA tests complete water cooling kits or radiators with bundled fans are measured both while on idle mode or with the fan controller in the minimum setting and while on extreme load or with the fan controller all the way to the highest possible setting (PWM fans do that on their own without our intervention). Every single test takes place in a temperature controlled room of 23 degrees Celsius Ambient Temp with the help of two AC units placed diagonally inside the room and as for thermal paste I’m using the NT-H2 by Noctua. Finally, much like when testing CPU Coolers, it's very important to point out that just because a water cooling kit (or a AIO) outperforms another when tested with our test rig (when we test complete water cooling kits) that does not necessarily mean that the same performance differences will apply 100% for other CPU models and in other situations (such as different ambient temps and system configurations).


     To successfully record the load temperatures, we use the latest OCCT application for around 6-10 minutes to push the processor to its limits and after that is done and the temperatures are recorded, we wait for about 10-20 minutes for the CPU to cool down and record idle temperatures. This is done to allow time for the thermal conductive material to achieve the optimal performance level. Same procedure is then repeated with the Passmark BurnIn Test as a failsafe just in case the OCCT results are wrong. This procedure takes a lot more time than the usual peltier/thermometer tests, but this way not only can we deliver real world results to our readers based on real CPUs, but we can also triple check the results using a variety of programs. Last but not least the temperatures were recorded using the latest version of AIDA64 while noise level tests (when fans exist in the bundle) are performed using a high precision ExTech HD600 Decibel Meter placed about 10-15cm above the radiator. Still although the same testing procedure applies to all units do take into consideration that unlike the official numbers which are measured in special noise isolated labs with just the fans here, we also have both the rest of the cooler and the rest of the system (although all system fans are turned off when recording noise levels).


* Since some manufacturers have ceased support for the Intel LGA 2011-3 platform, for such coolers, I’ll be using the Ryzen 7900X / ASRock X670E test rig.
** After high demand since September 2024 I’ll be including average temperatures in my AMD Ryzen 9 7900Χ/Χ670Ε charts (under light load such as Internet browsing and Office use).
*** Since November 2024 I swapped test systems with the Intel Core Ultra 285K (same methodology as with the AMD Ryzen 9 7900X).


TEST RESULTS


...........


CONCLUSION


    In the end, both the GT360 ARGB and DT360 ARGB by CPS PcCooler prove themselves as highly capable 360 mm coolers, combining strong thermal performance with refined LCD implementations. Their IPS displays add real functional value rather than gimmick flair, with the GT360 ARGB offering the slightly larger, sharper panel and the DT360 ARGB introducing a clever magnetic detachable LCD that makes customization and repositioning effortless. The DT360’s ARGB 14 channel high‑density radiator and quieter ball‑bearing fan profile give it a slight edge in sustained thermal performance, while the GT360’s ARGB full ARGB fan illumination appeals to builders who want a more expressive visual footprint. The only real drawbacks are external, CPS PcCooler’s global availability remains limited, and the software, while functional, could benefit from an easier to navigate UI and smoother integration. But taken as a whole, both coolers deliver a compelling mix of performance, ARGB lighting, and display‑driven personalization that stands out in the 360mm category.


    Right now, the CPS PcCooler GT360 ARGB retails for USD62.99 (Amazon.com – 30% in page discount coupon) while the DT360 ARGB retails for USD90.99 inside the USA (Amazon.com – 30% in page discount coupon) so they are priced extremely well for what they offer (EU availability however is not so great). At the end of the day unless you’re looking for an larger LCD screen both the GT360 ARGB and DT360 ARGB deliver when it counts and that’s why both deserve the Golden Award.

PROS


- Build Quality
- Very Good Cooling Efficiency
- 3.5/3.4” IPS Display (640x480/480x480p)
- ARGB Lighting
- Motherboard Compatibility
- Large Coldplates
- Display Software
- Available In Black & White Colors
- Price (USA)


CONS


- Noise Levels
- Availability (EU)
- Display Software (Not Very Easy To Navigate)


Edifier R2750DB MKII Powered Bookshelf Speakers Review

INTRODUCTION


edifier r2750db mkii review a


    Bookshelf and desktop speakers have quietly become the go‑to choice for listeners who want real sonic authority without dedicating half their room to audio gear. The latest generation embraces both worlds, dependable wired inputs for purists and wireless Hi‑Res options for effortless streaming. Optical ports, coaxial links, LDAC support, and tuned DSP profiles allow these compact cabinets to punch far above their size, delivering clean mids, controlled bass, and enough headroom to stay composed at higher volumes. Power ratings have also climbed and so modern 2.0 systems routinely push 100W+ RMS, giving near‑field setups the kind of dynamic swing that used to require a dedicated amp. Last month Edifier released the R2750DB MKII Powered Bookshelf Speakers and that's what I've been using to enjoy my favorite Hi-Res tracks for over a week now.


    Edifier specializes in premium sound systems that showcase technological innovation and design elegance, delivering outstanding audio experiences through a wide range of headphones, speakers, and music systems, for personal entertainment and professional excellence. Established in May 1996 in Beijing, Edifier is the brainchild of a small group of enterprising music lovers. Over the past 25 years, Edifier has been guided by the “passion for sound” principle, which helped the brand emerge as a world-class designer and manufacturer of award-winning sound systems. Today, Edifier serves audio lovers worldwide through its distributors in over 70 countries, with operations in North America, South America, Europe, the Middle East, and Asia Pacific regions.


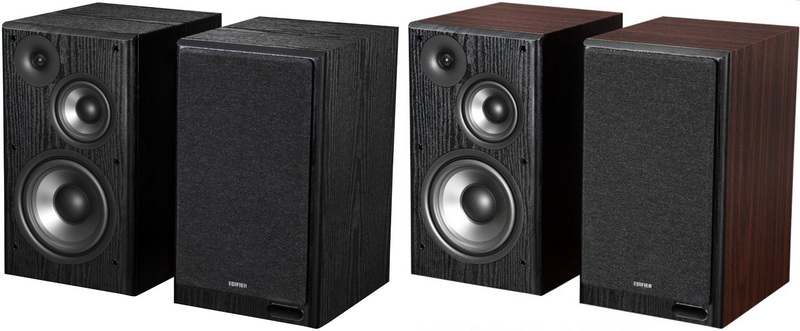
    The acoustic design of the brand new R2750DB MKII powered bookshelf speakers by Edifier (available in black and walnut colors) is built around a true three‑way active structure, 7‑inch (178mm) long‑throw woofers for low‑end weight, 4.5‑inch (114mm) mid‑range drivers for vocal clarity, and 1‑inch (25mm) silk‑dome tweeters for smooth treble, all powered by four dedicated Class‑D amplifiers delivering a combined 144W RMS. Edifier’s DSP engine, three‑way digital crossover, and dynamic range control maintain stability and precision even at higher volumes. On the connectivity side, the speaker offers HDMI eARC with CEC, optical and coaxial digital inputs, analog line in, and Bluetooth v6.0 with LDAC (990kbps) for Hi‑Res wireless playback, plus multipoint pairing and a rear sub out for system expansion. Users can fine‑tune EQ and manage sources through the ConneX app. With Hi‑Res Audio certification and a 45Hz–40kHz frequency range, the R2750DB MKII is engineered as a modern desk and bookshelf powerhouse built for clarity, punch, and everyday flexibility.


SPECIFICATIONS AND FEATURES


PACKAGING AND CONTENTS


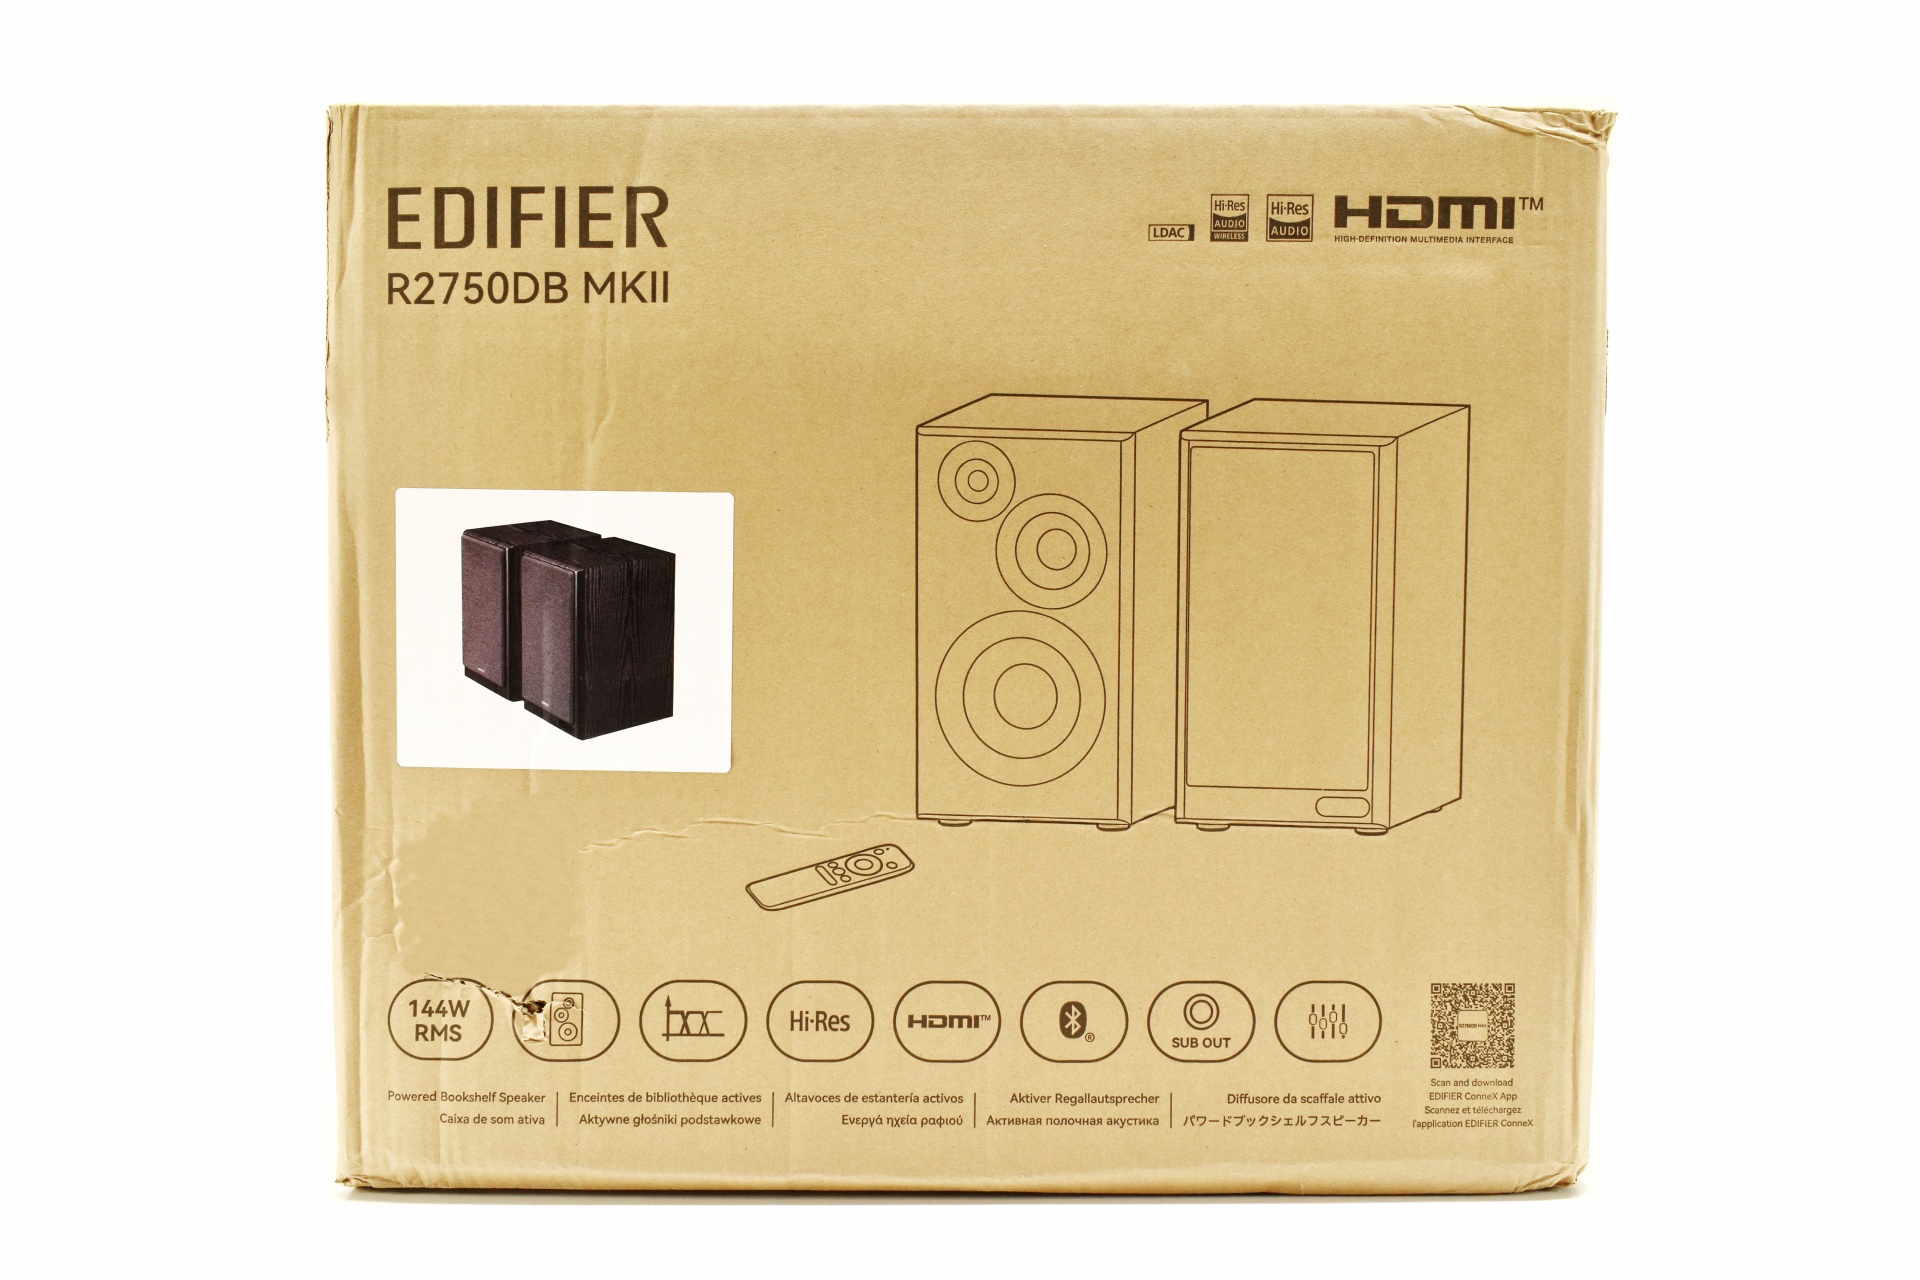
For the R2750DB MKII Edifier is using a plain cardboard box that has a sticker with a product picture, product drawing, company logo and the main product features at the front.


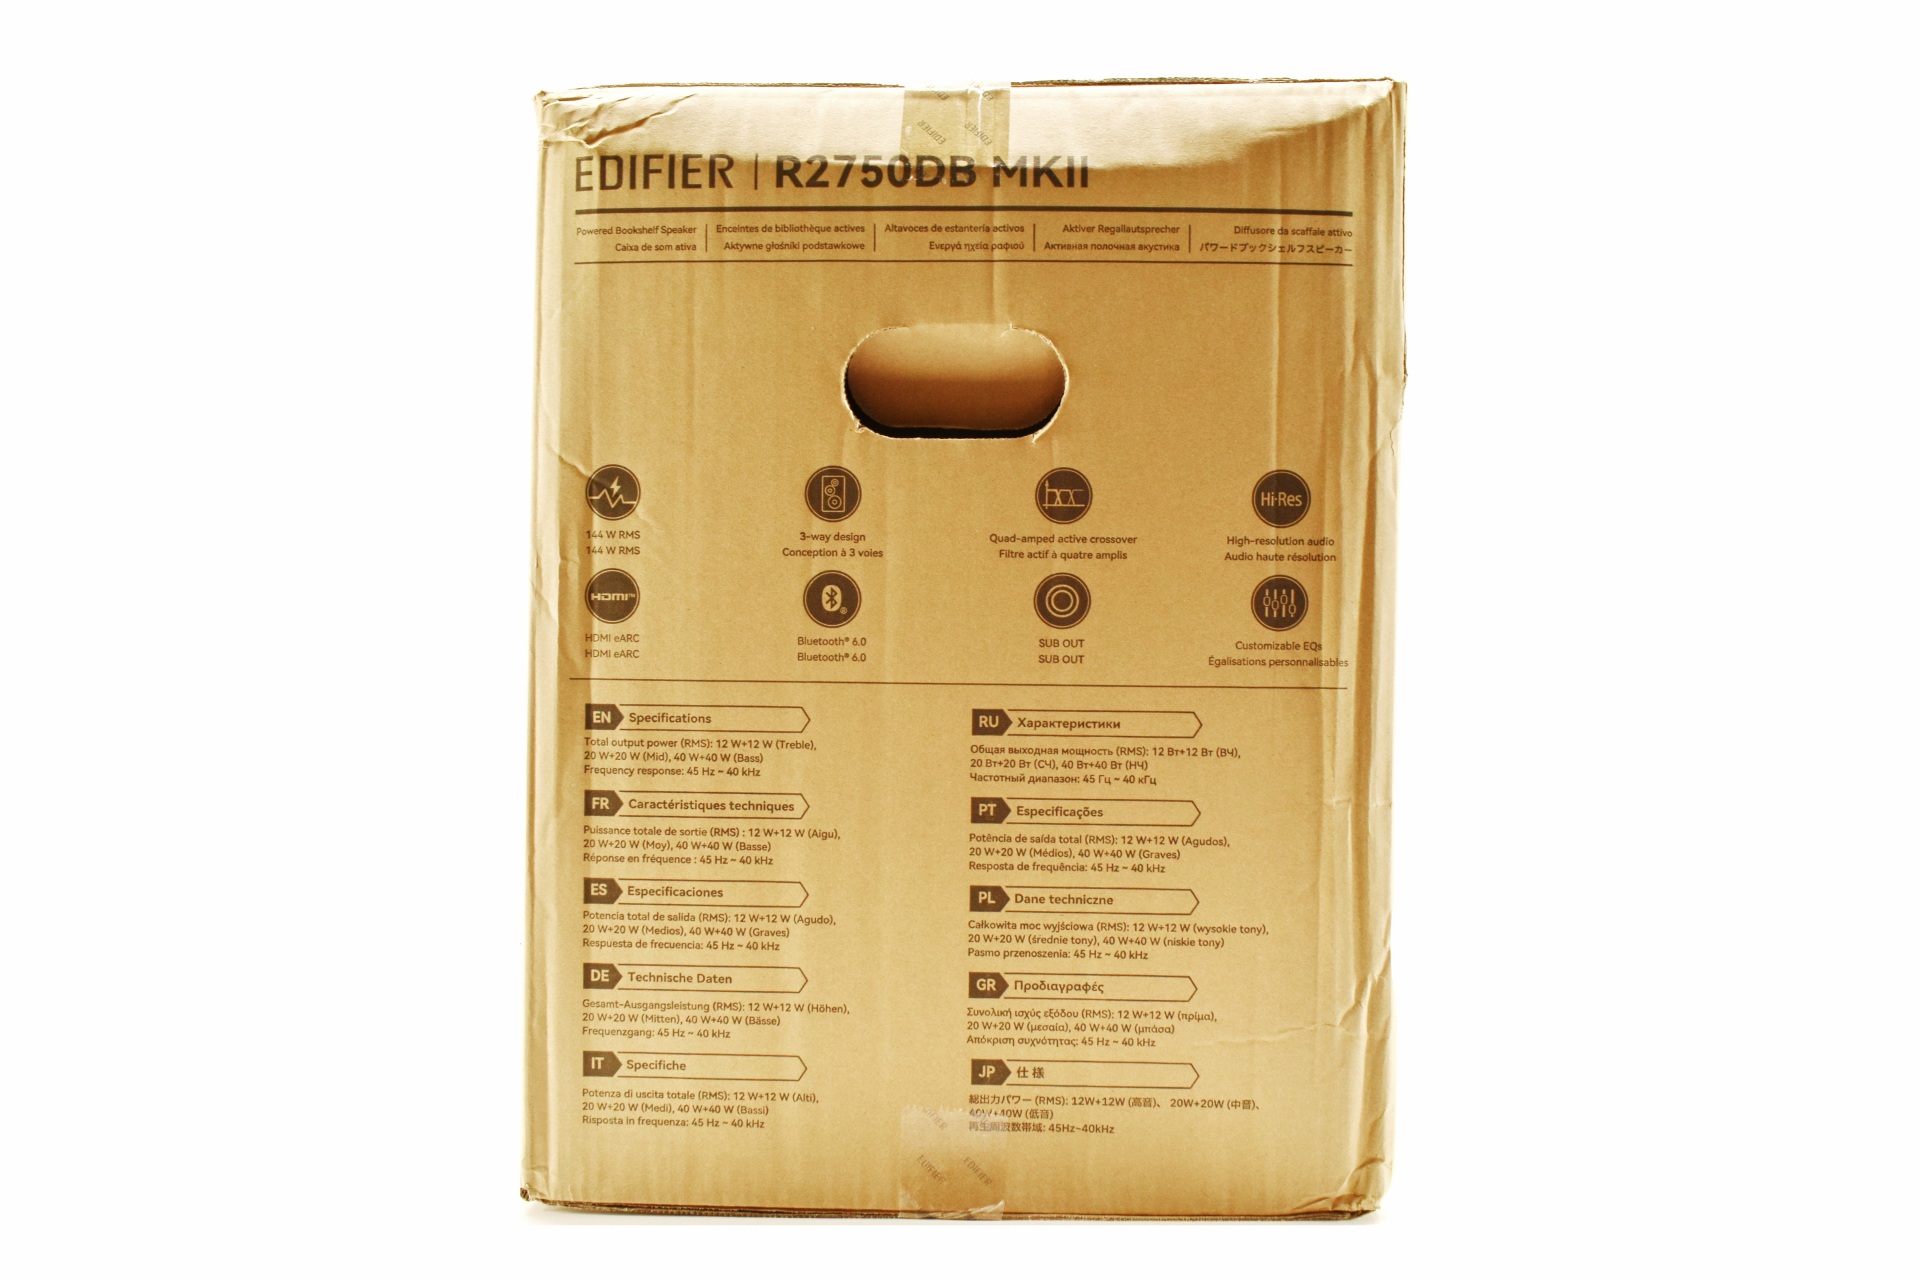
The features are printed on the left side in 10 languages.


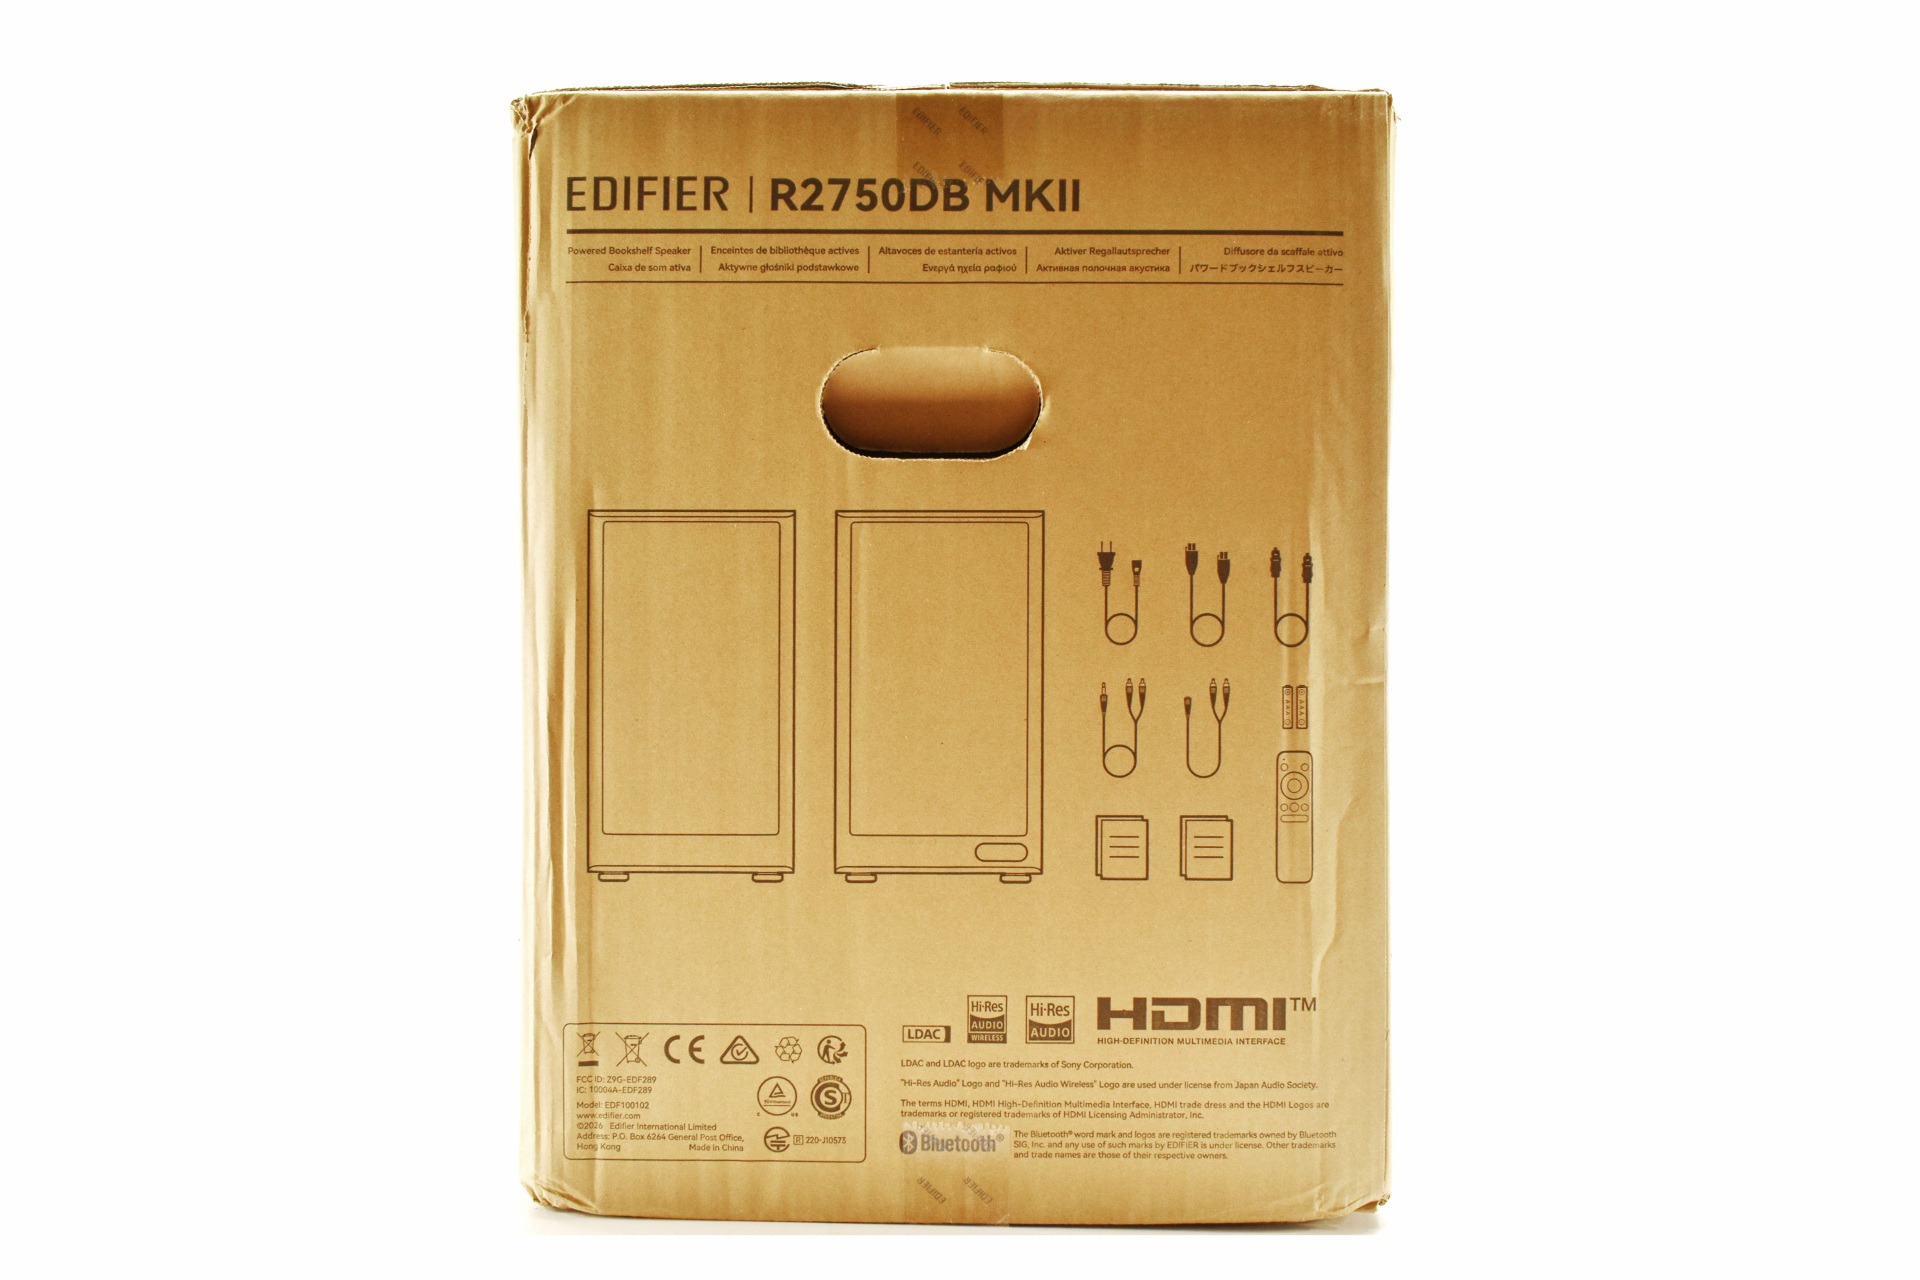
Another product drawing is available on the right side right next to a drawing of the bundle contents.


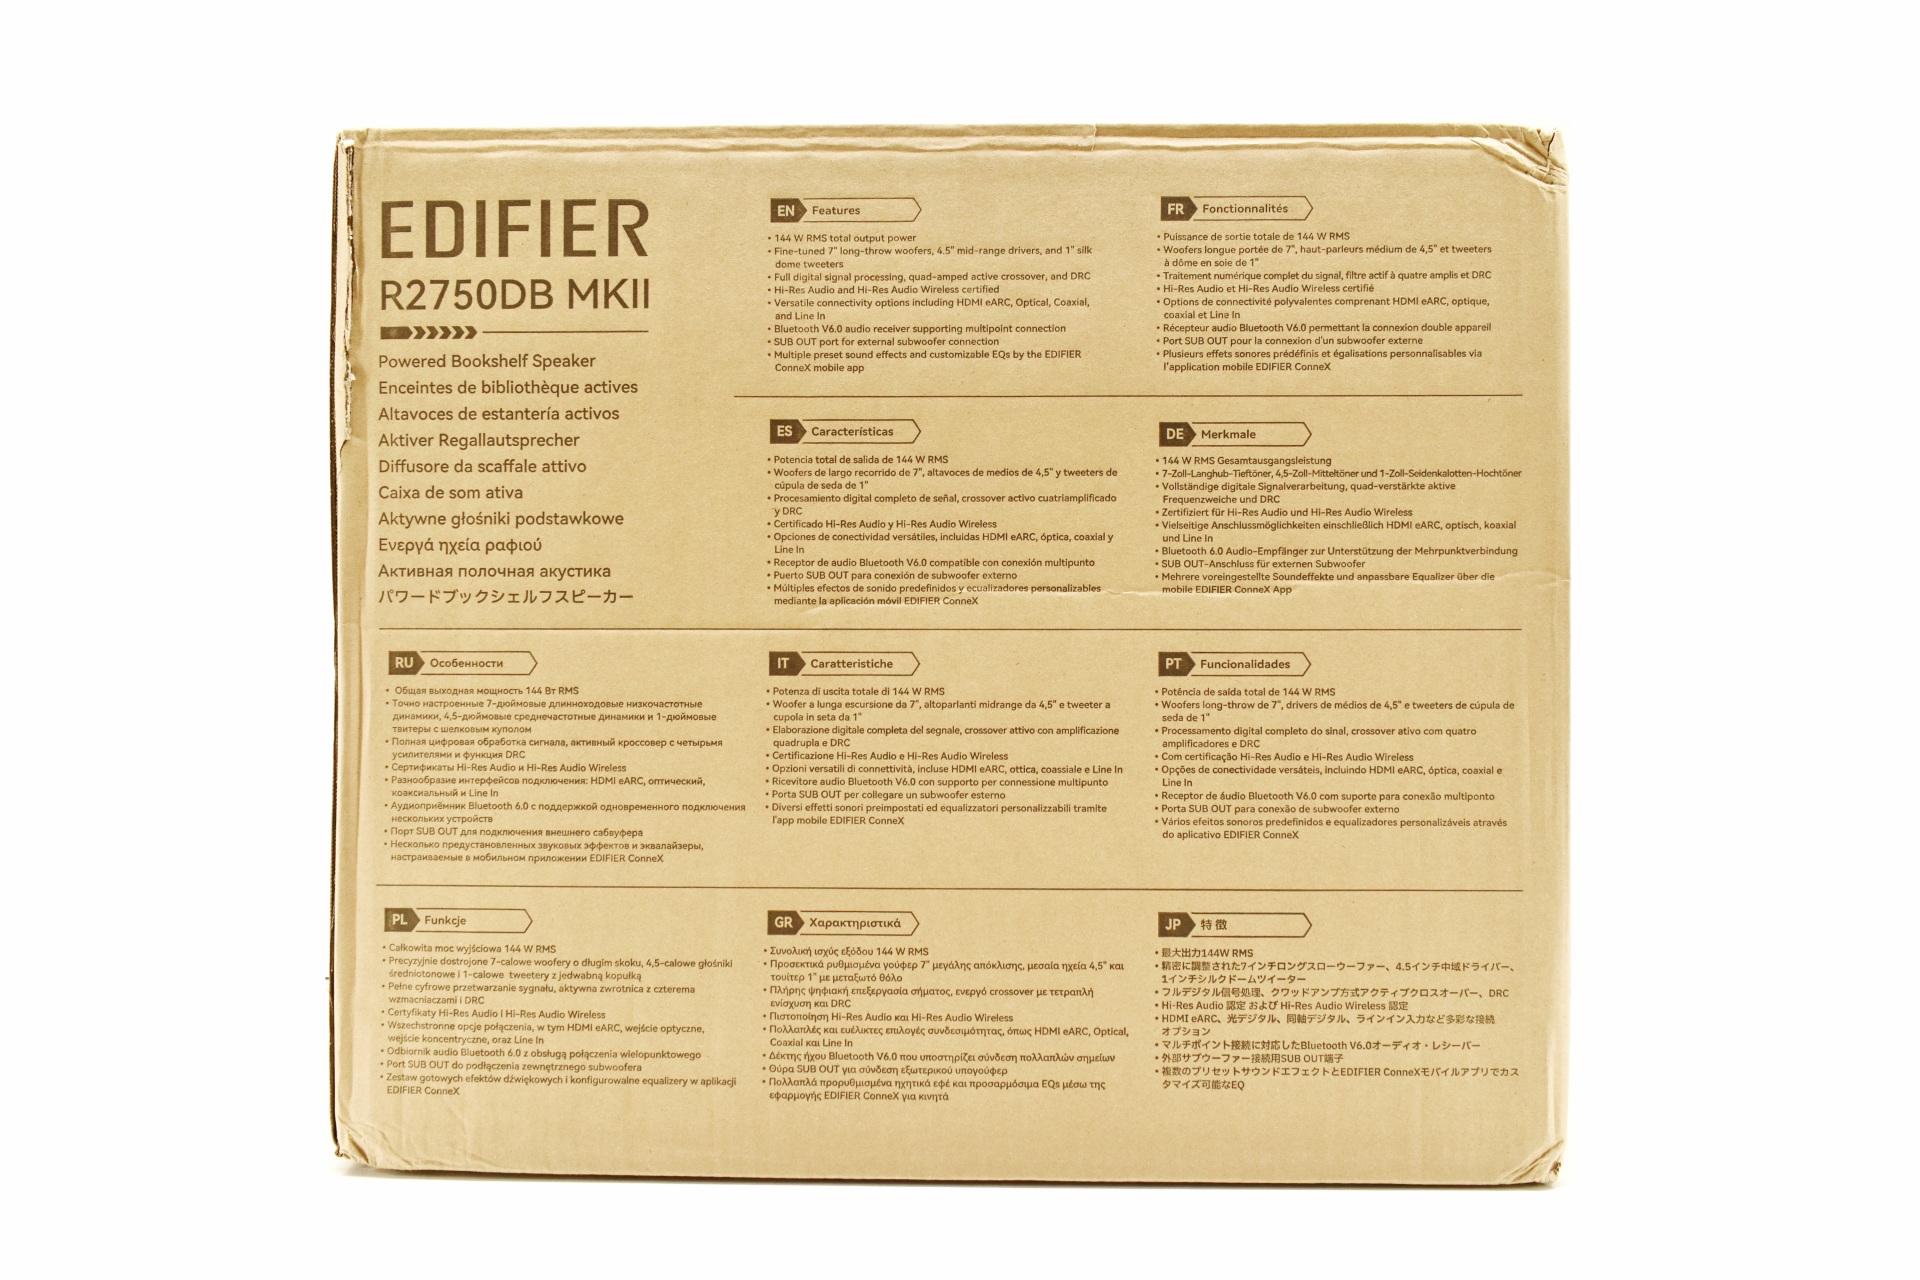
Moving at the rear we find the features list in 10 languages.


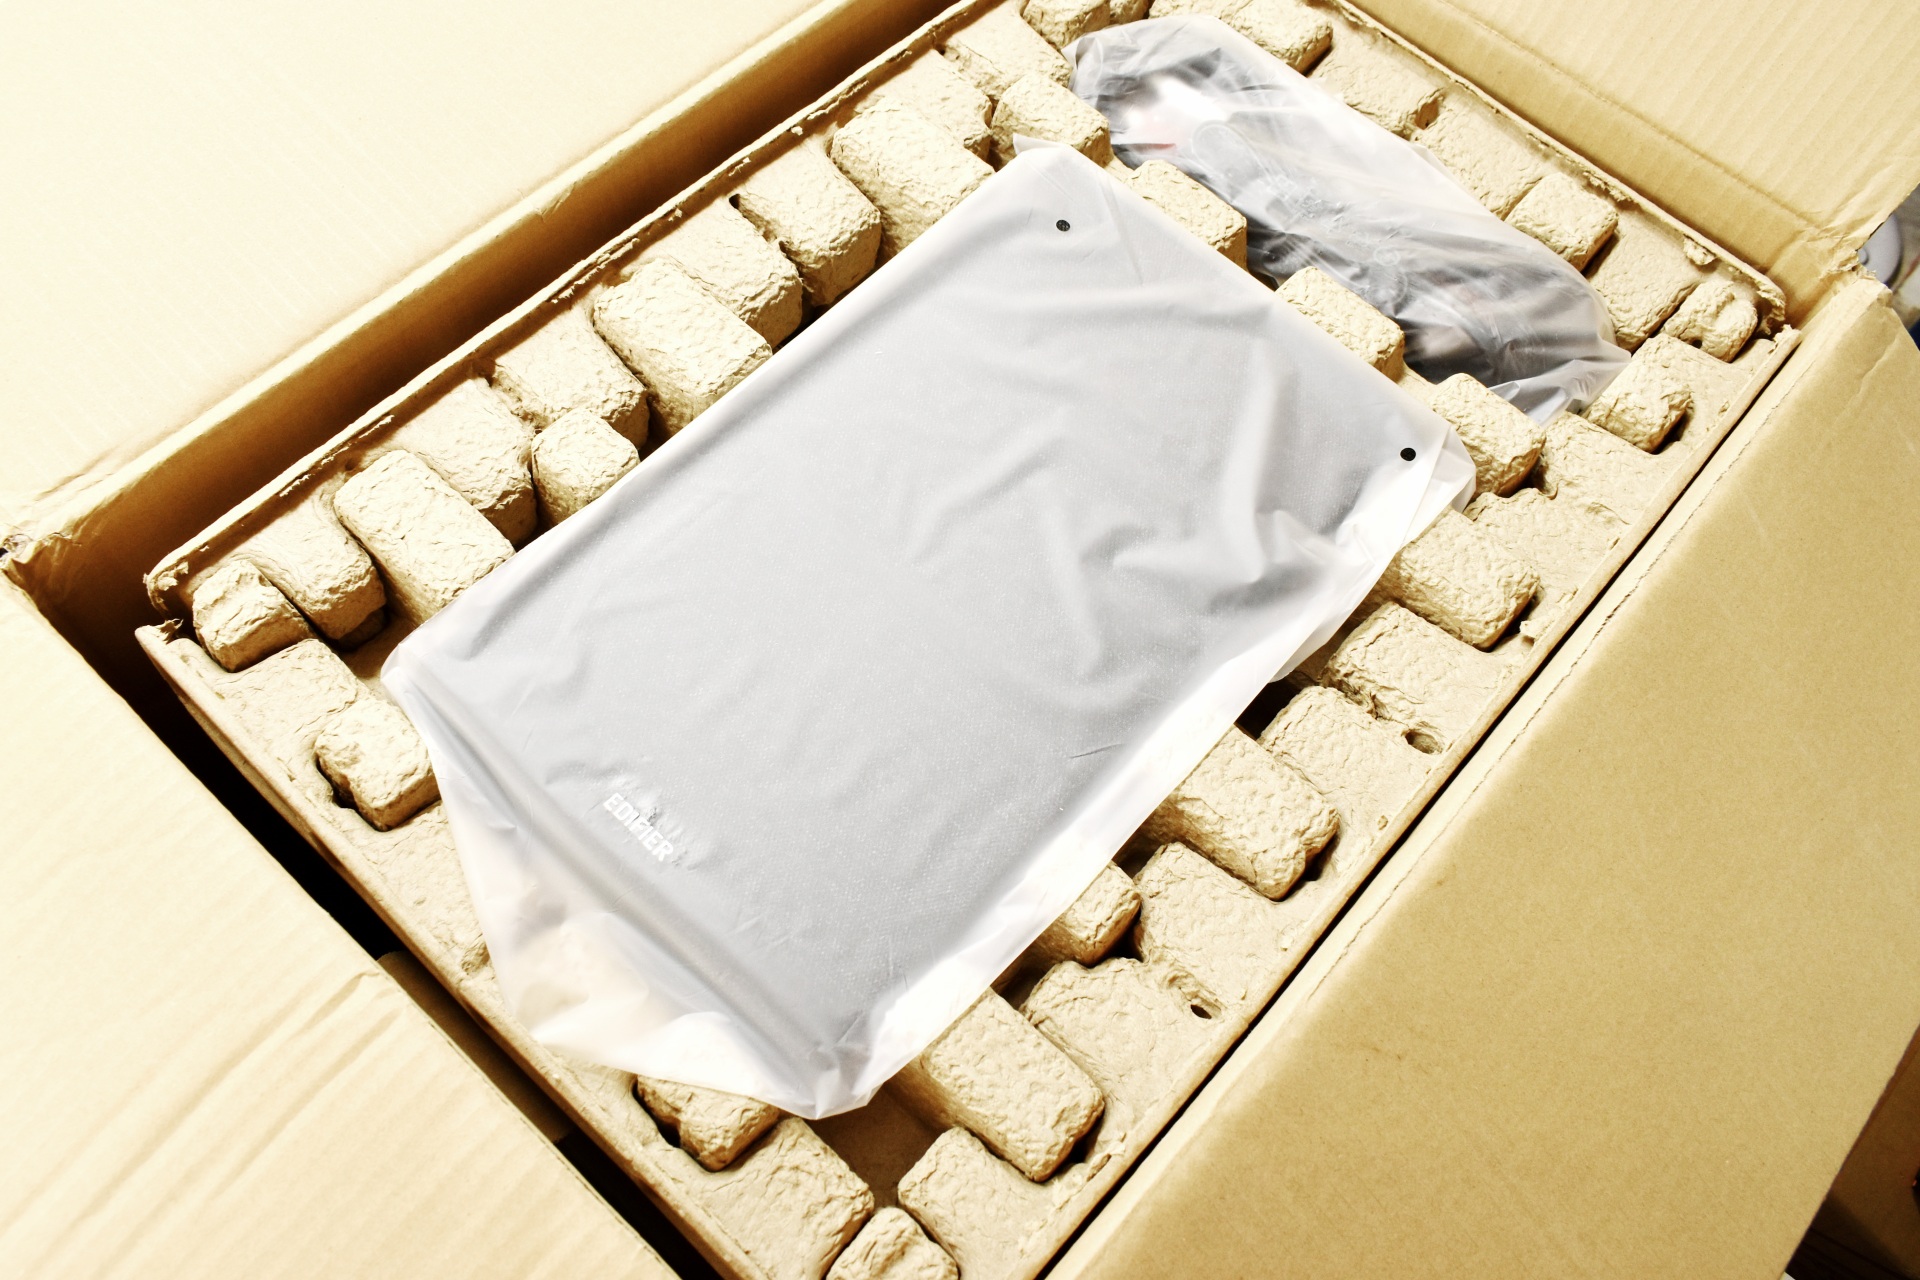
The R2750DB MKII are placed between two thick pieces of cardboard as seen above.


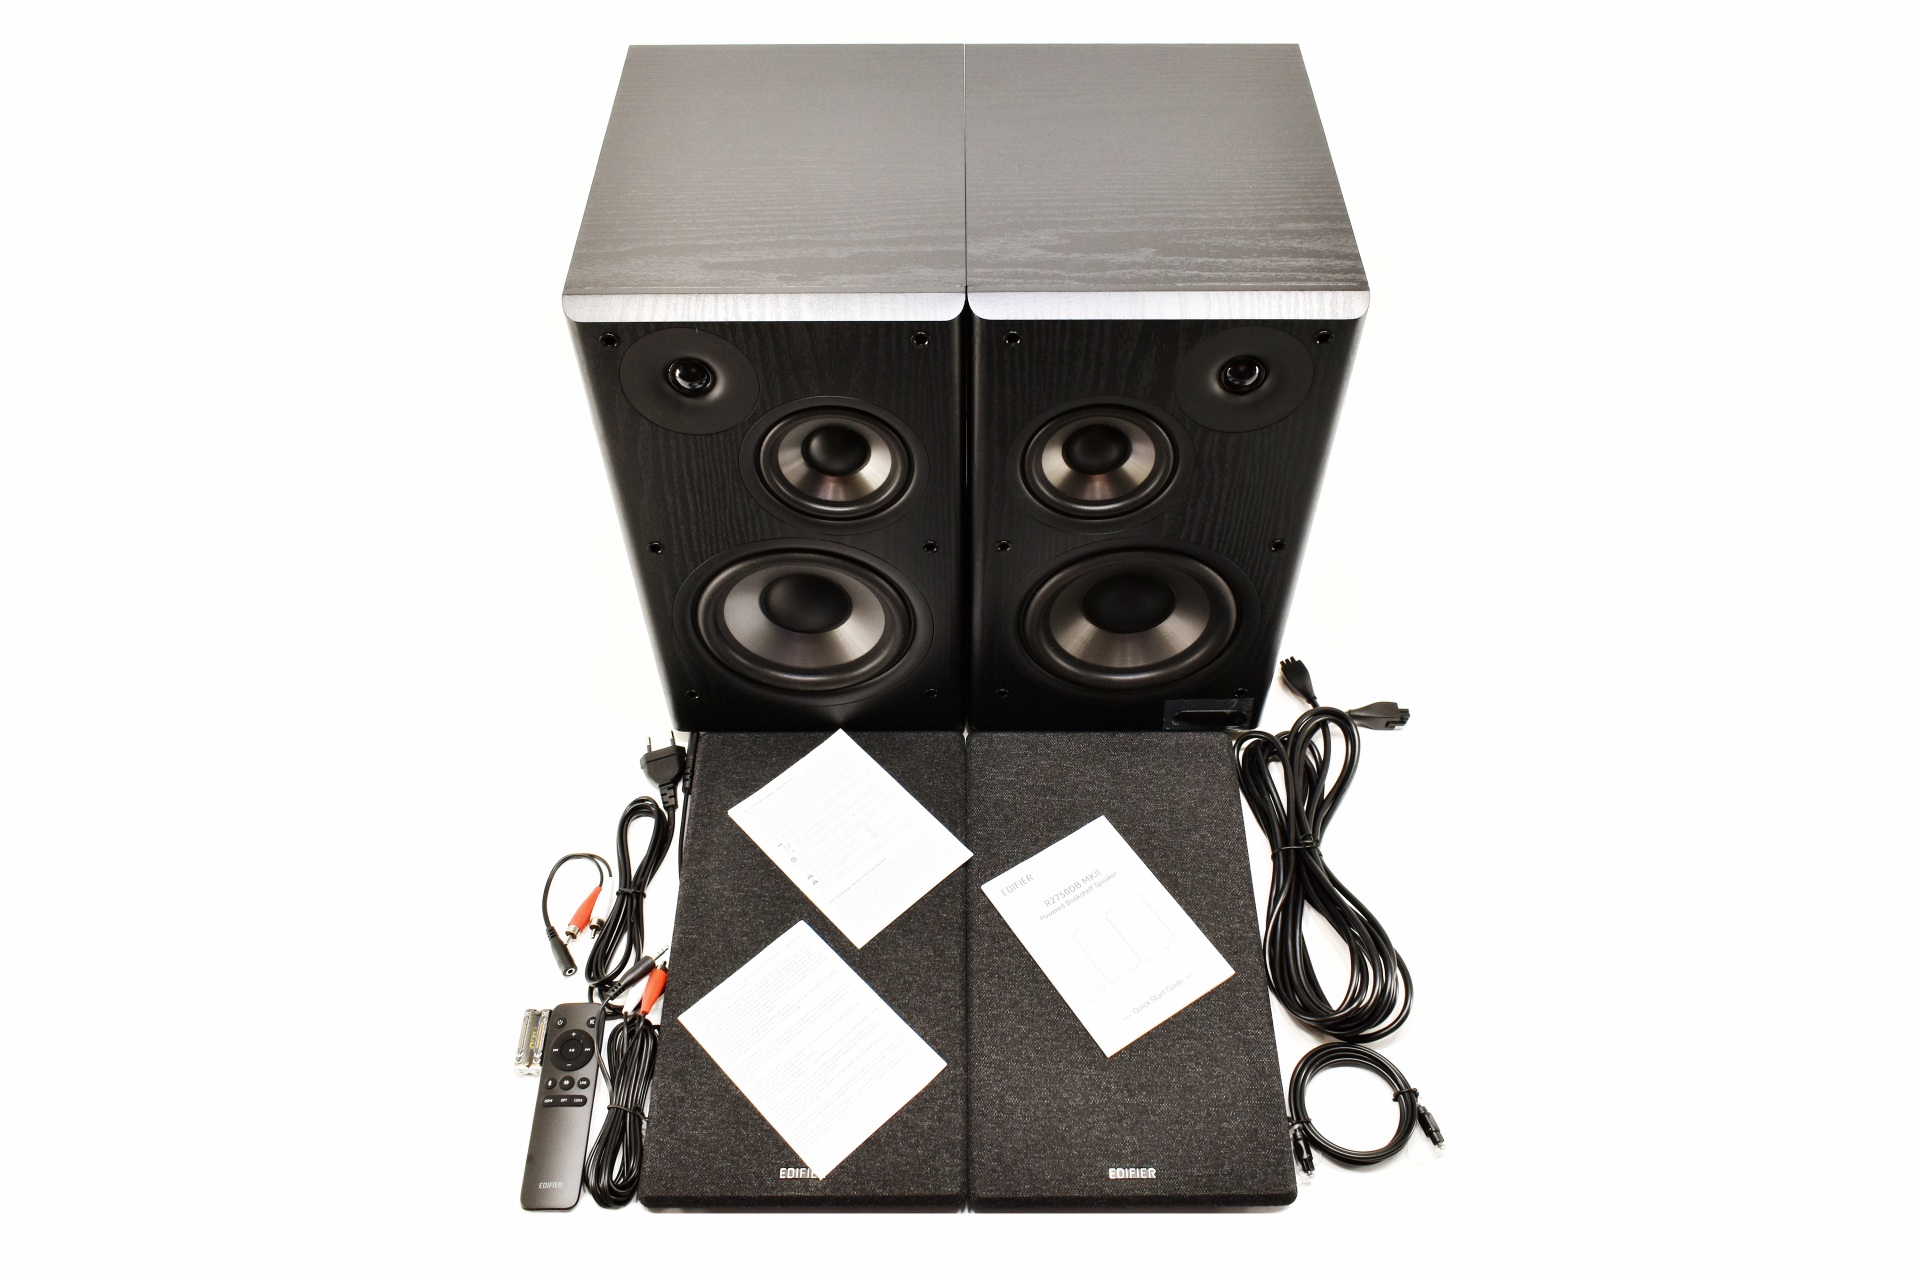
Aside the R2750DB MKII and their power cord inside the box you'll also find the speaker connection cable, two speaker grilles, RCA to 3.5mm adapter, RCA cable, optical cable, remote control with two AAA batteries, warranty information paper, warning paper and the quick start guide.


THE R2750DB MKII


The R2750DB MKII are somewhat large with each one measuring 395.4mm in height, 223.4mm in width, 279.8mm in depth and weighing almost 8.6Kg (16.57Kg total).


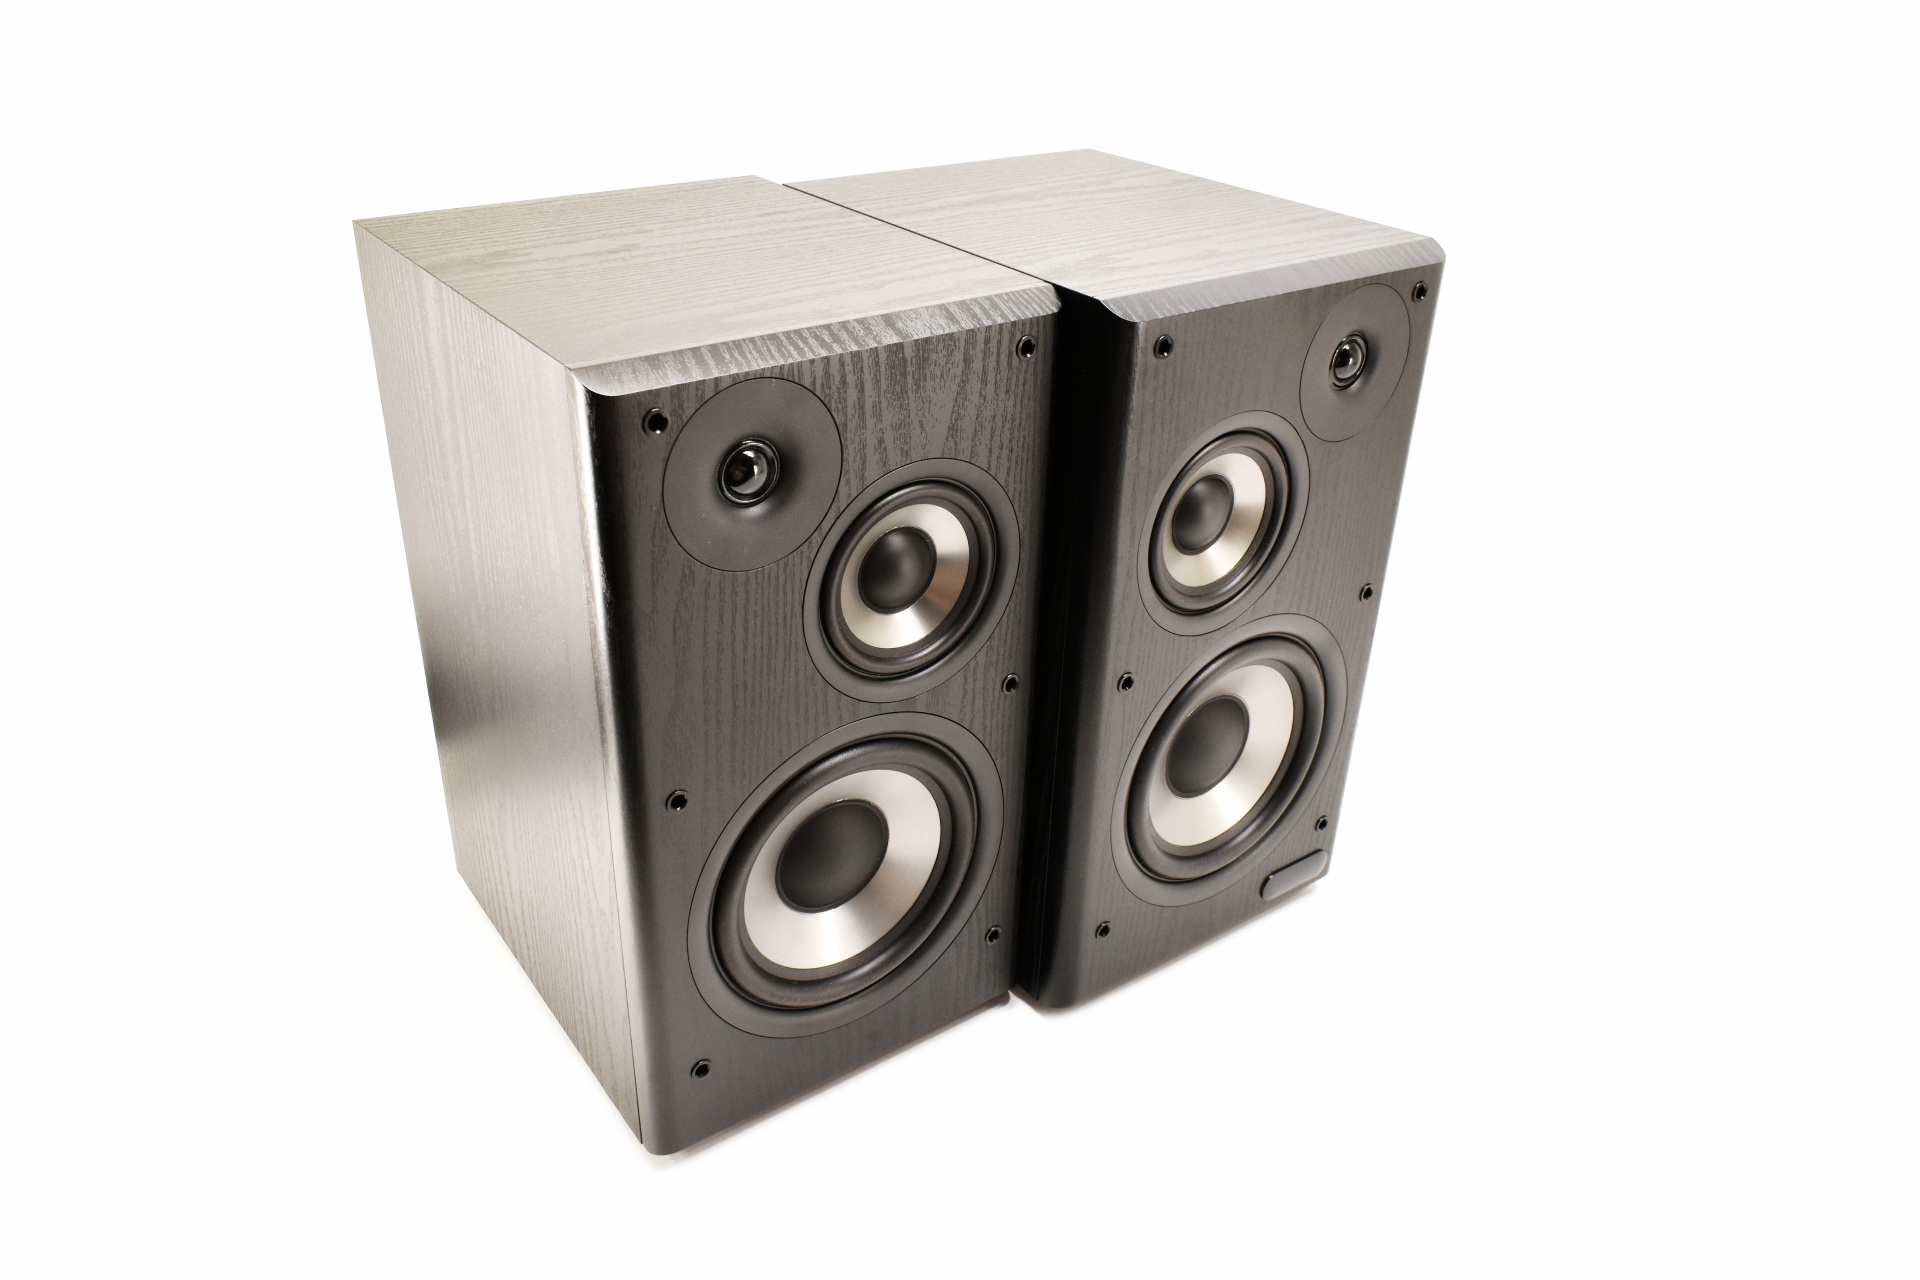
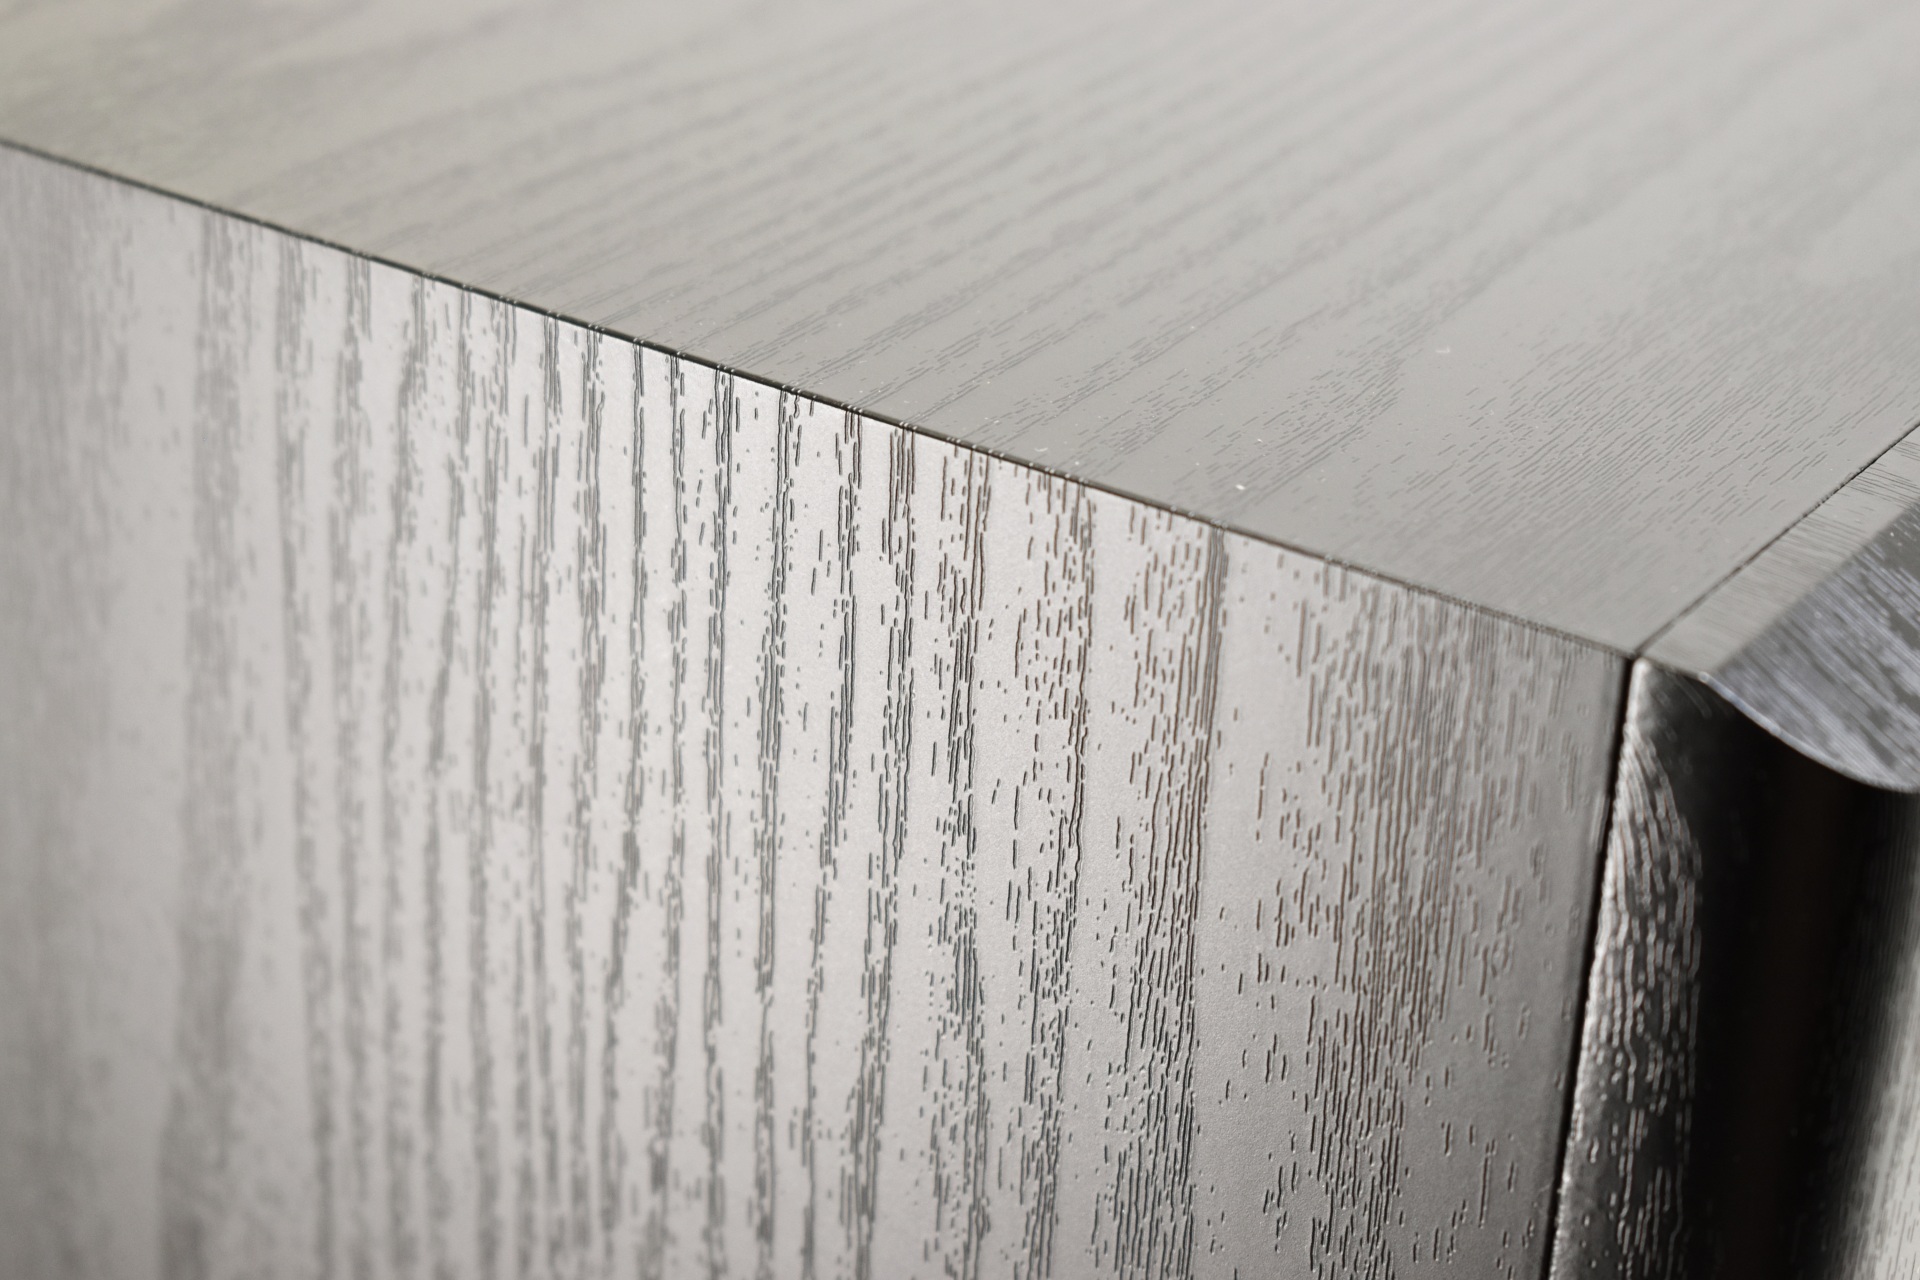
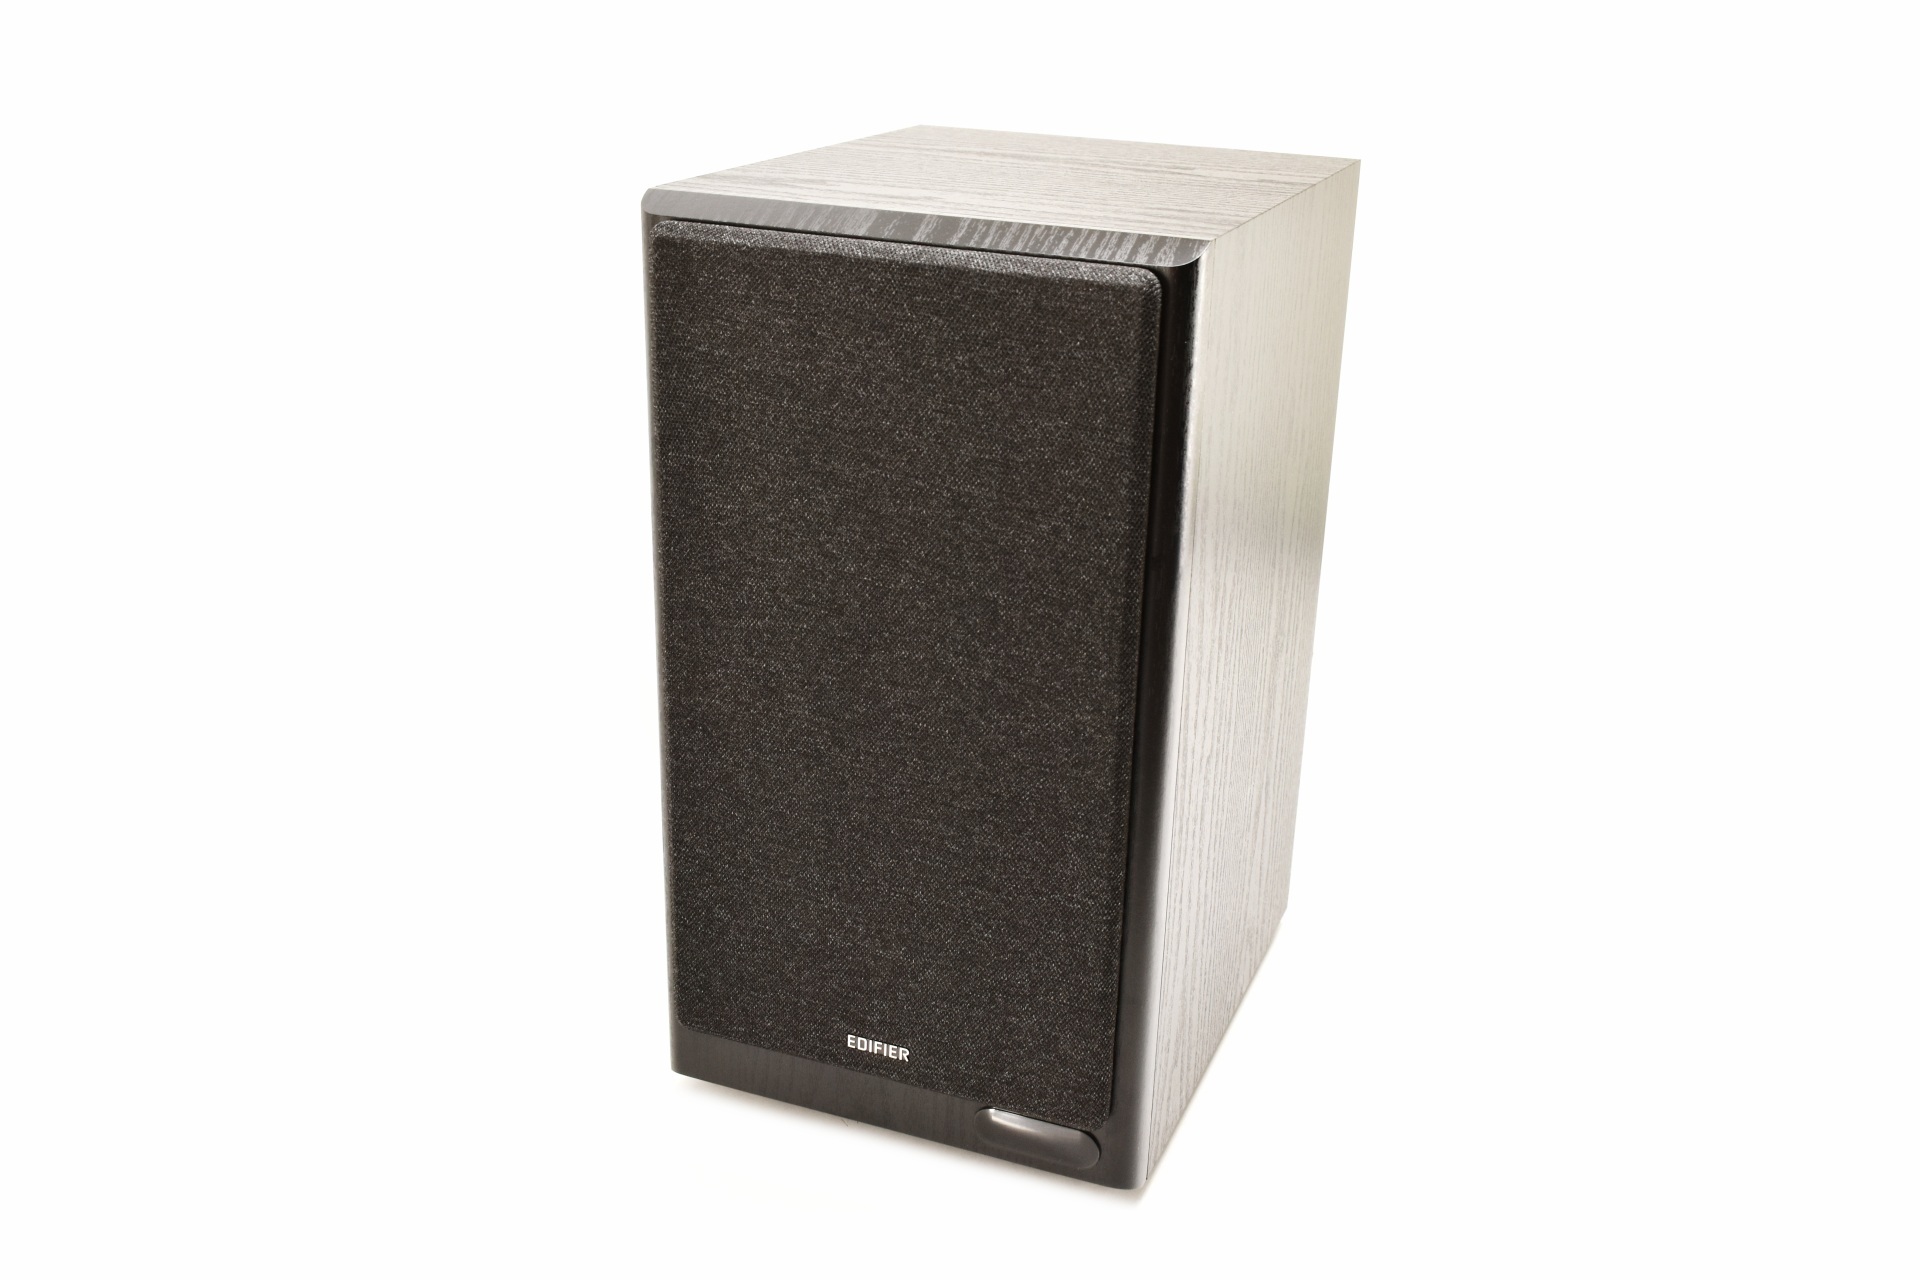
Both cabinets are made of MDF (Medium-Density Fiberboard) and feature a very nice coating (almost feel like real wood).


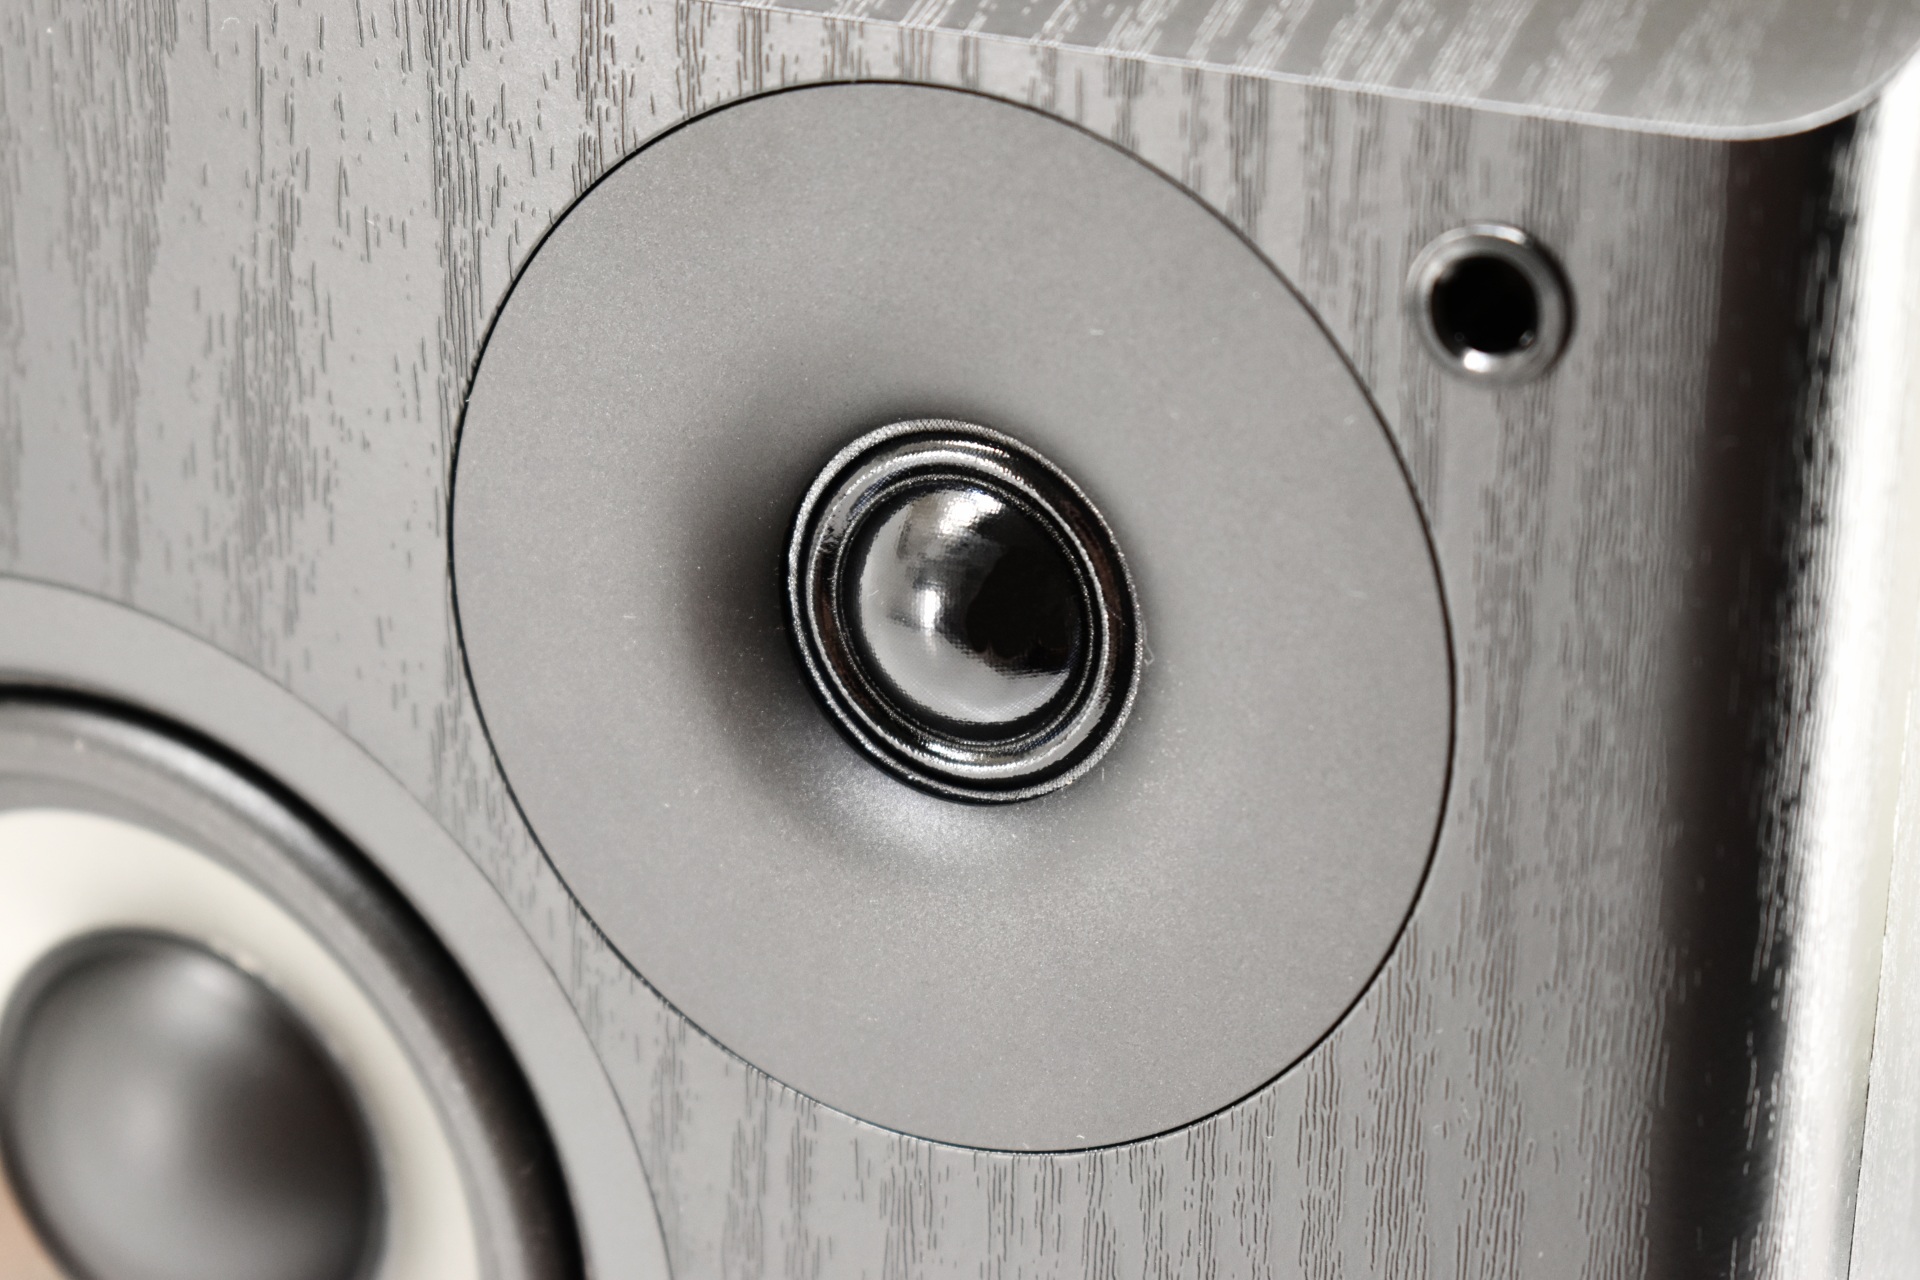
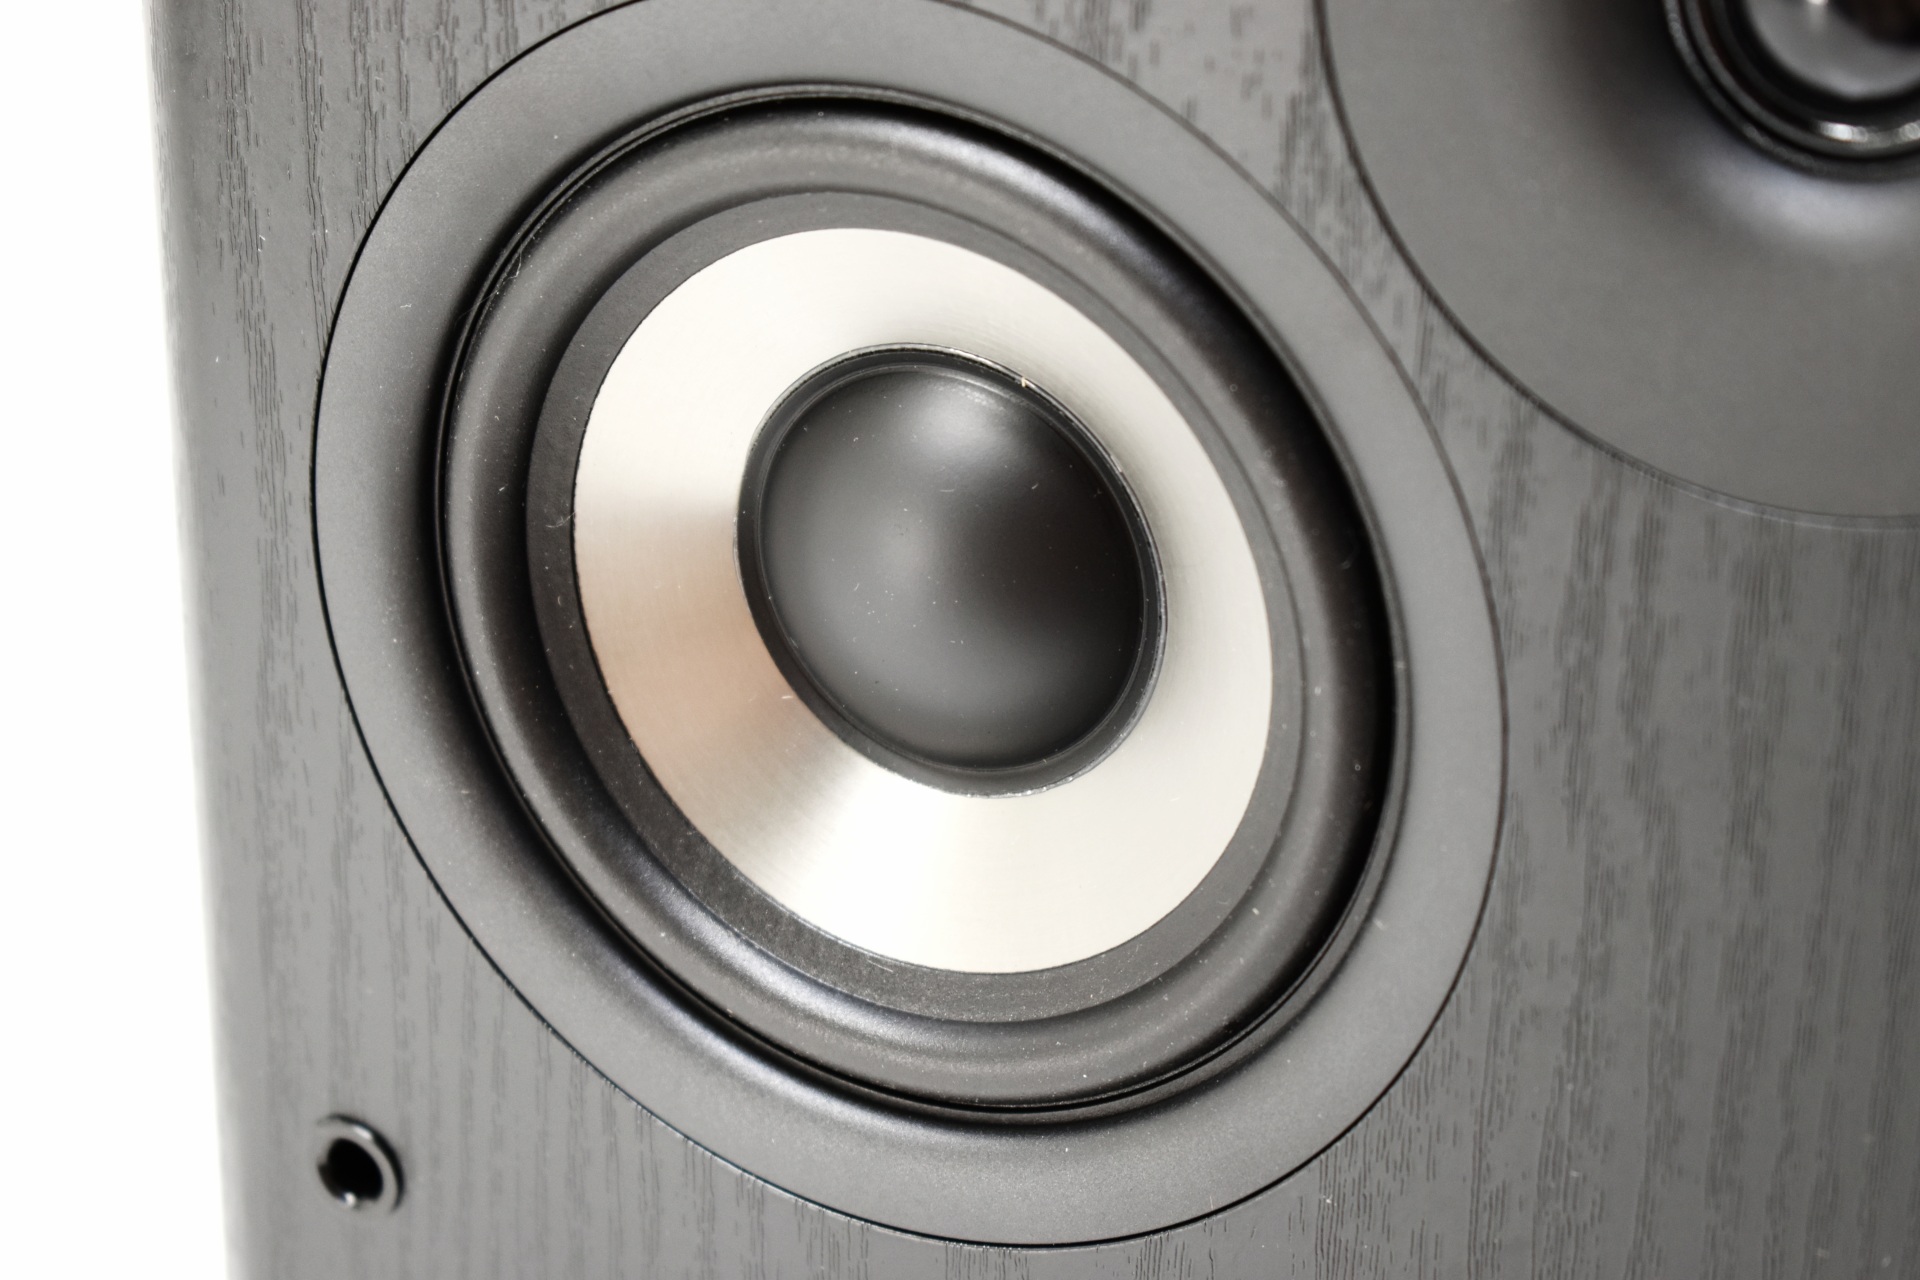
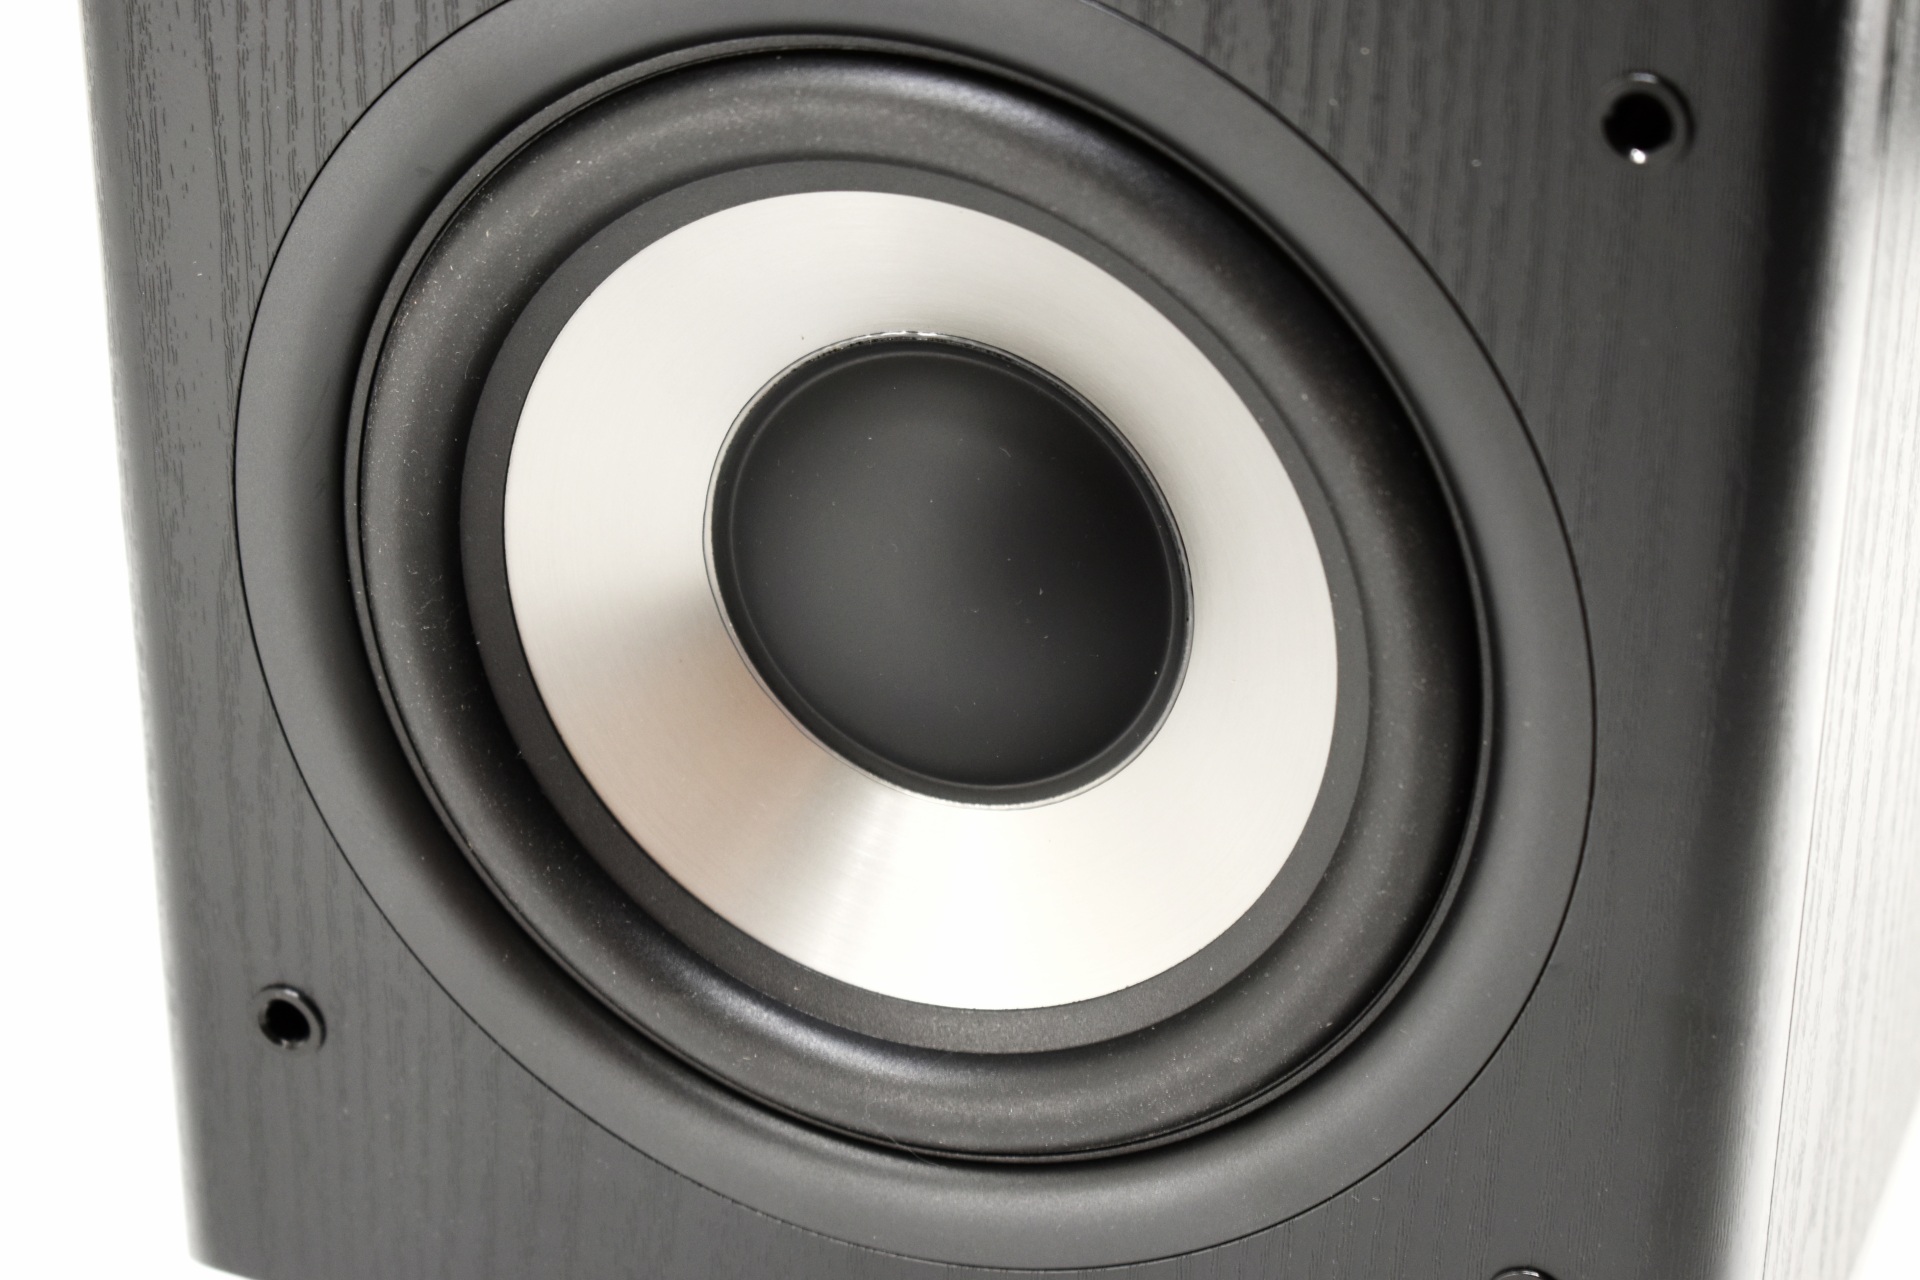
At the front of both speakers, we find a 1‑inch (25mm) silk‑dome tweeter, 4.5‑inch (114mm) mid‑range driver and a 7‑inch (178mm) long‑throw woofer.


The primary speaker has a small LCD screen on the lower left which informs you of the current input/source.


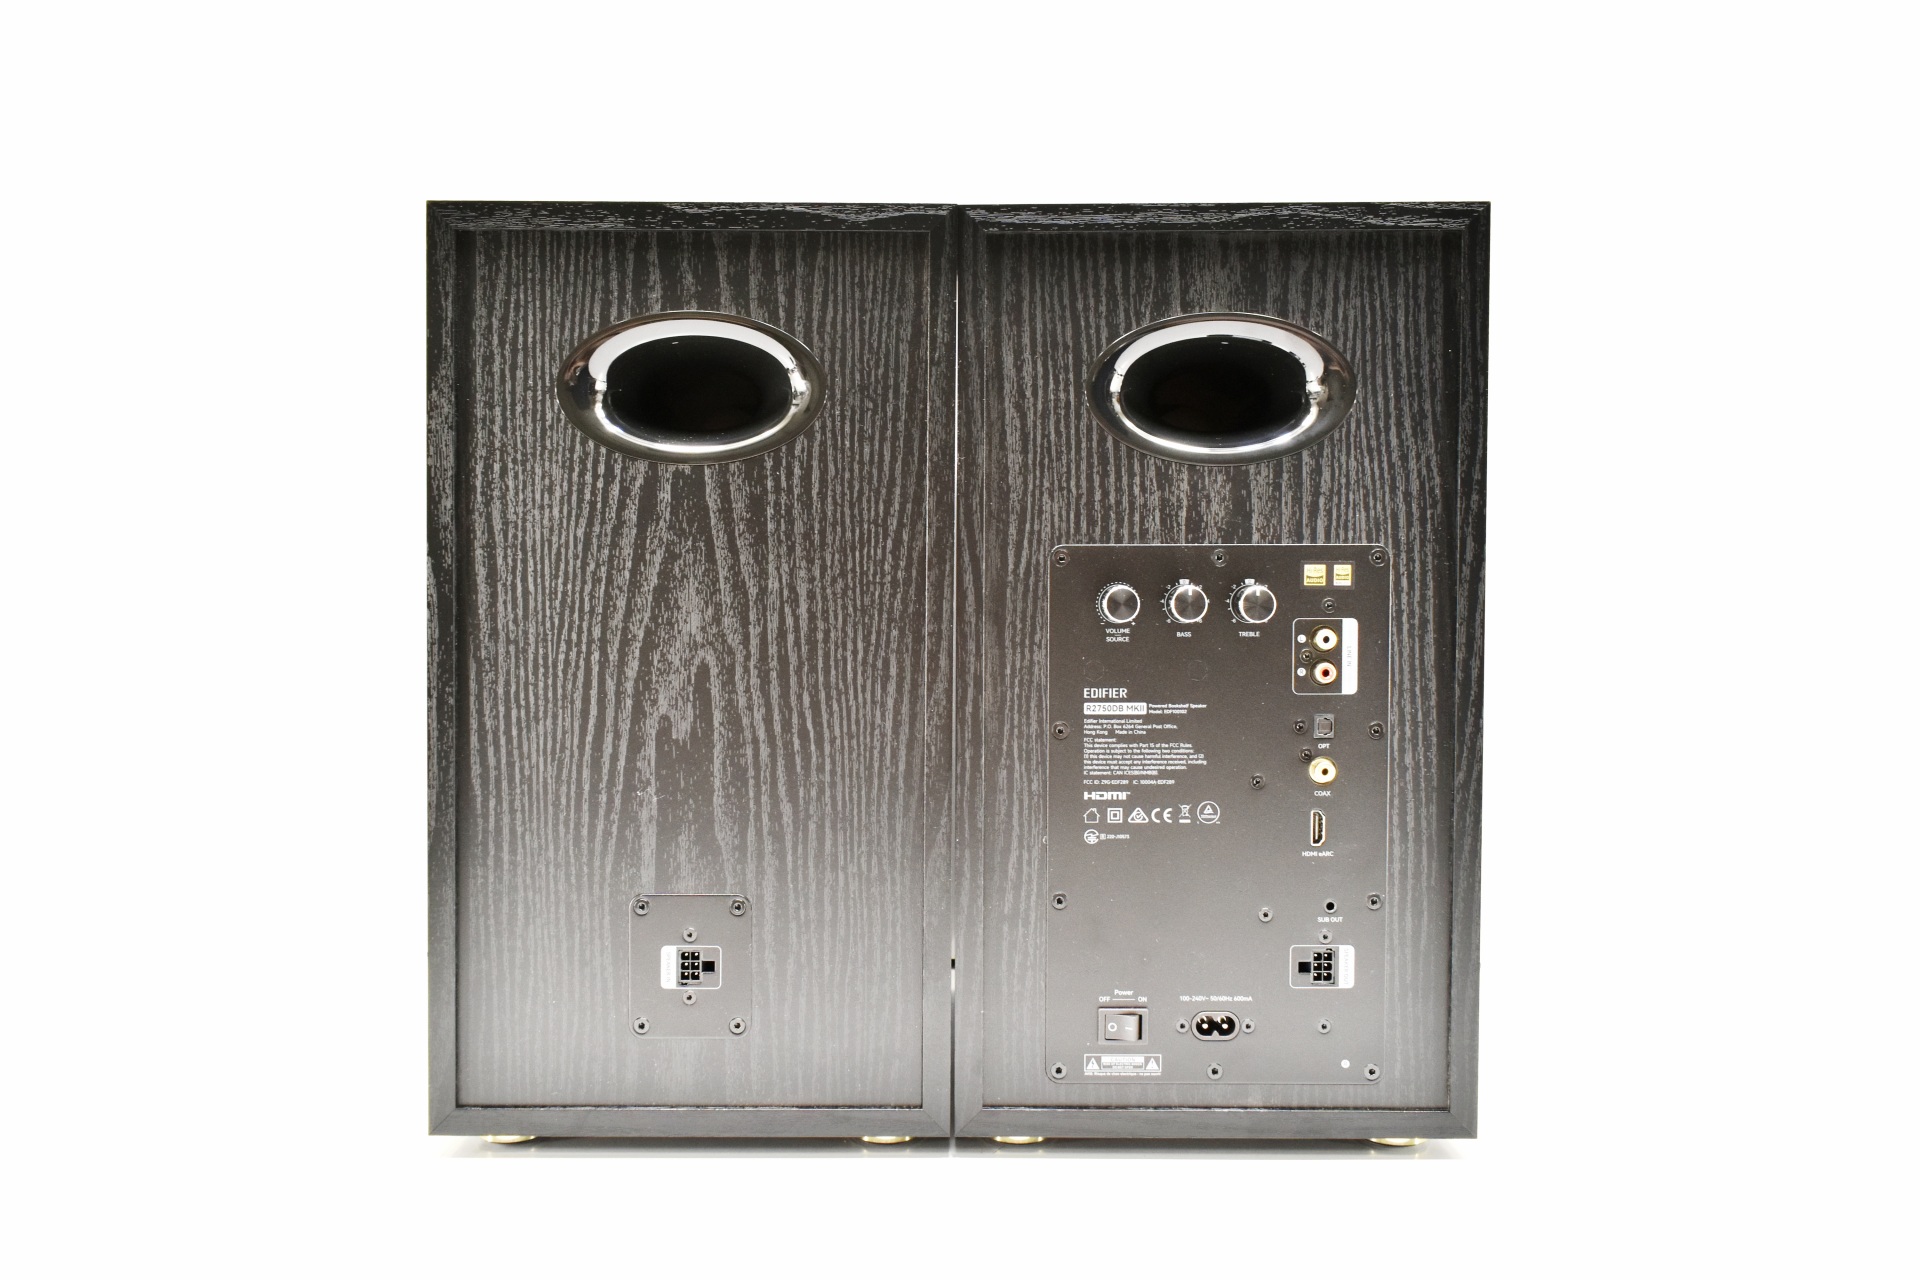
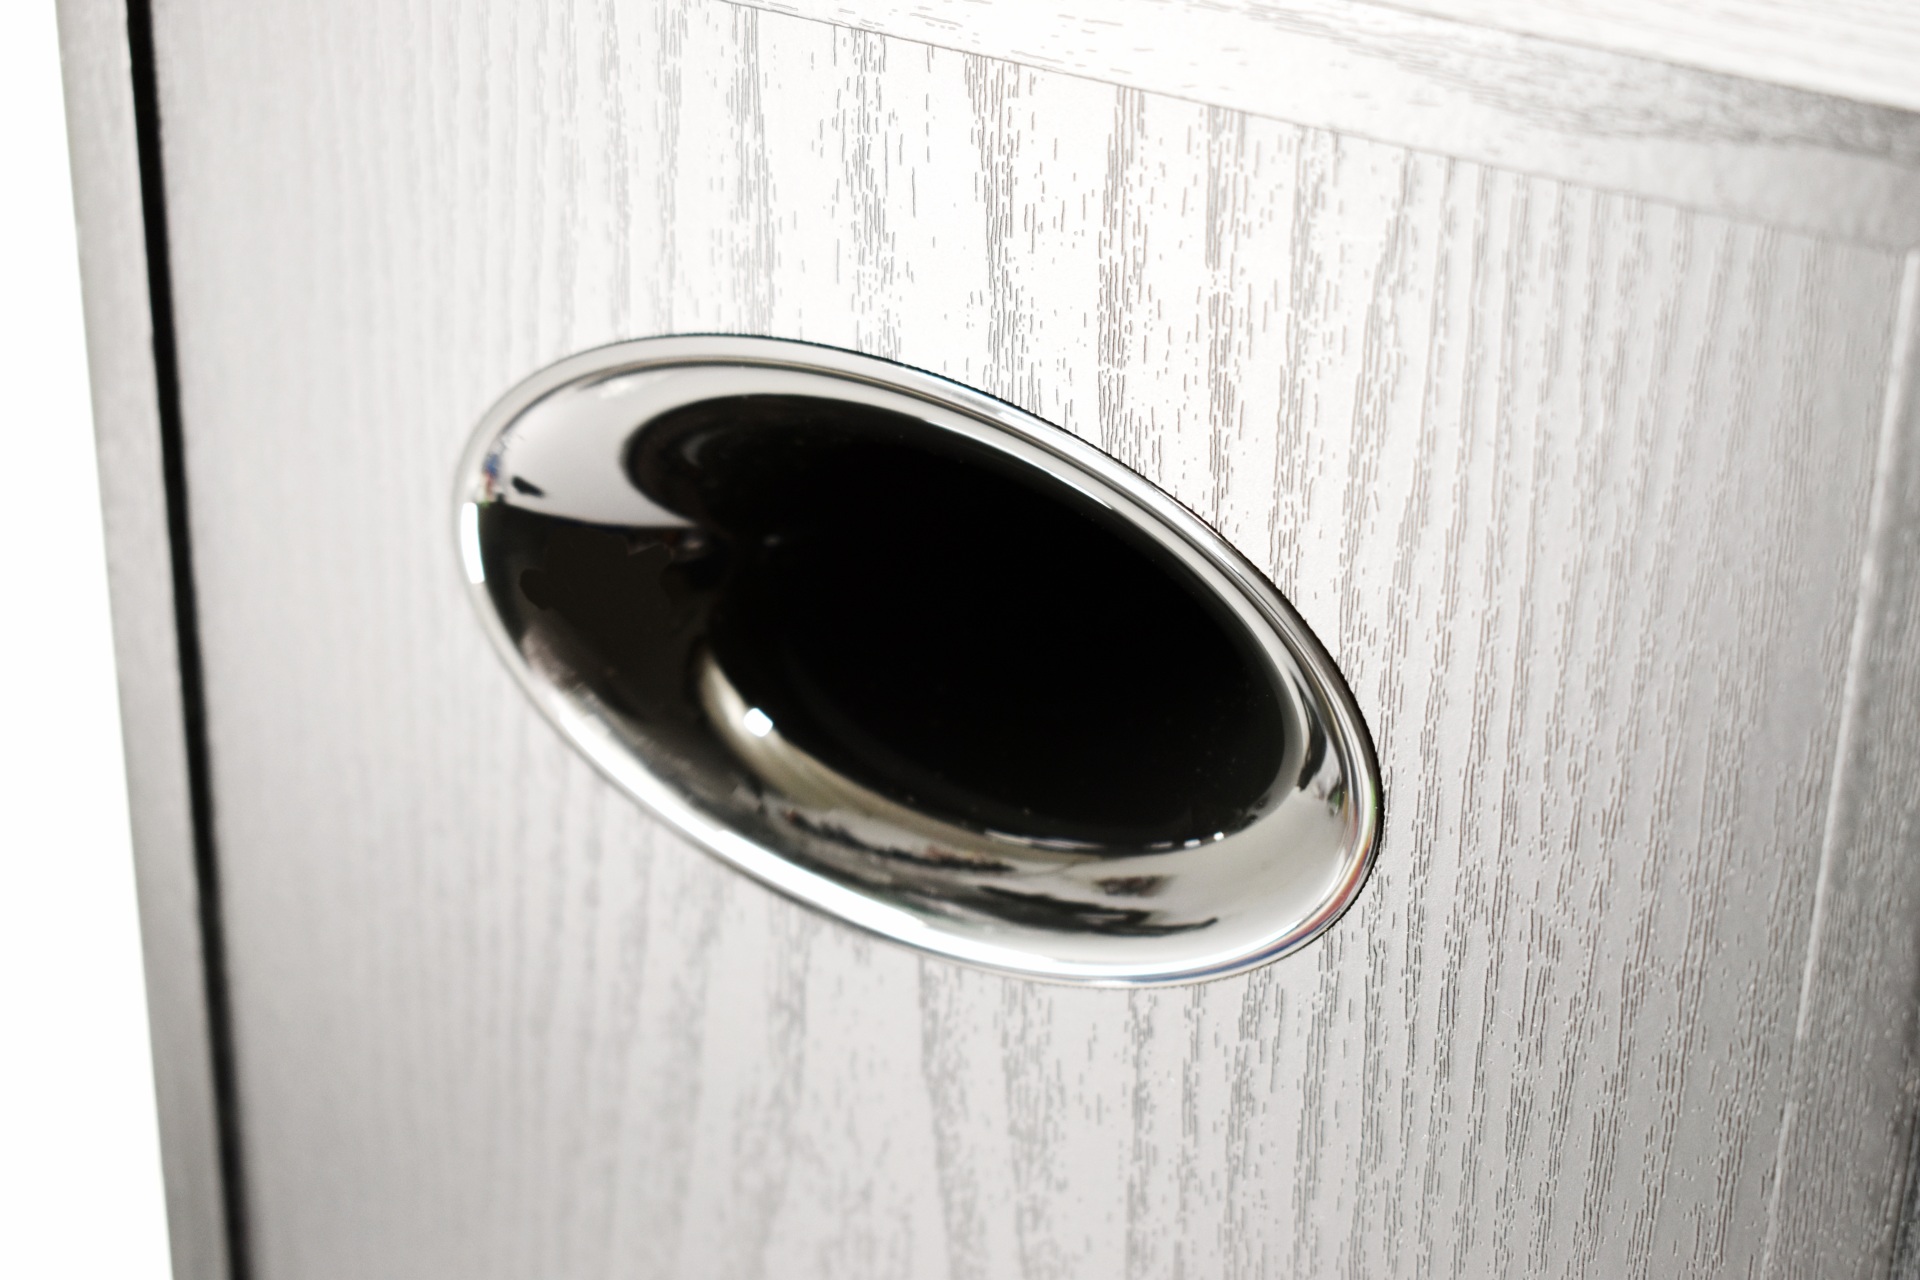
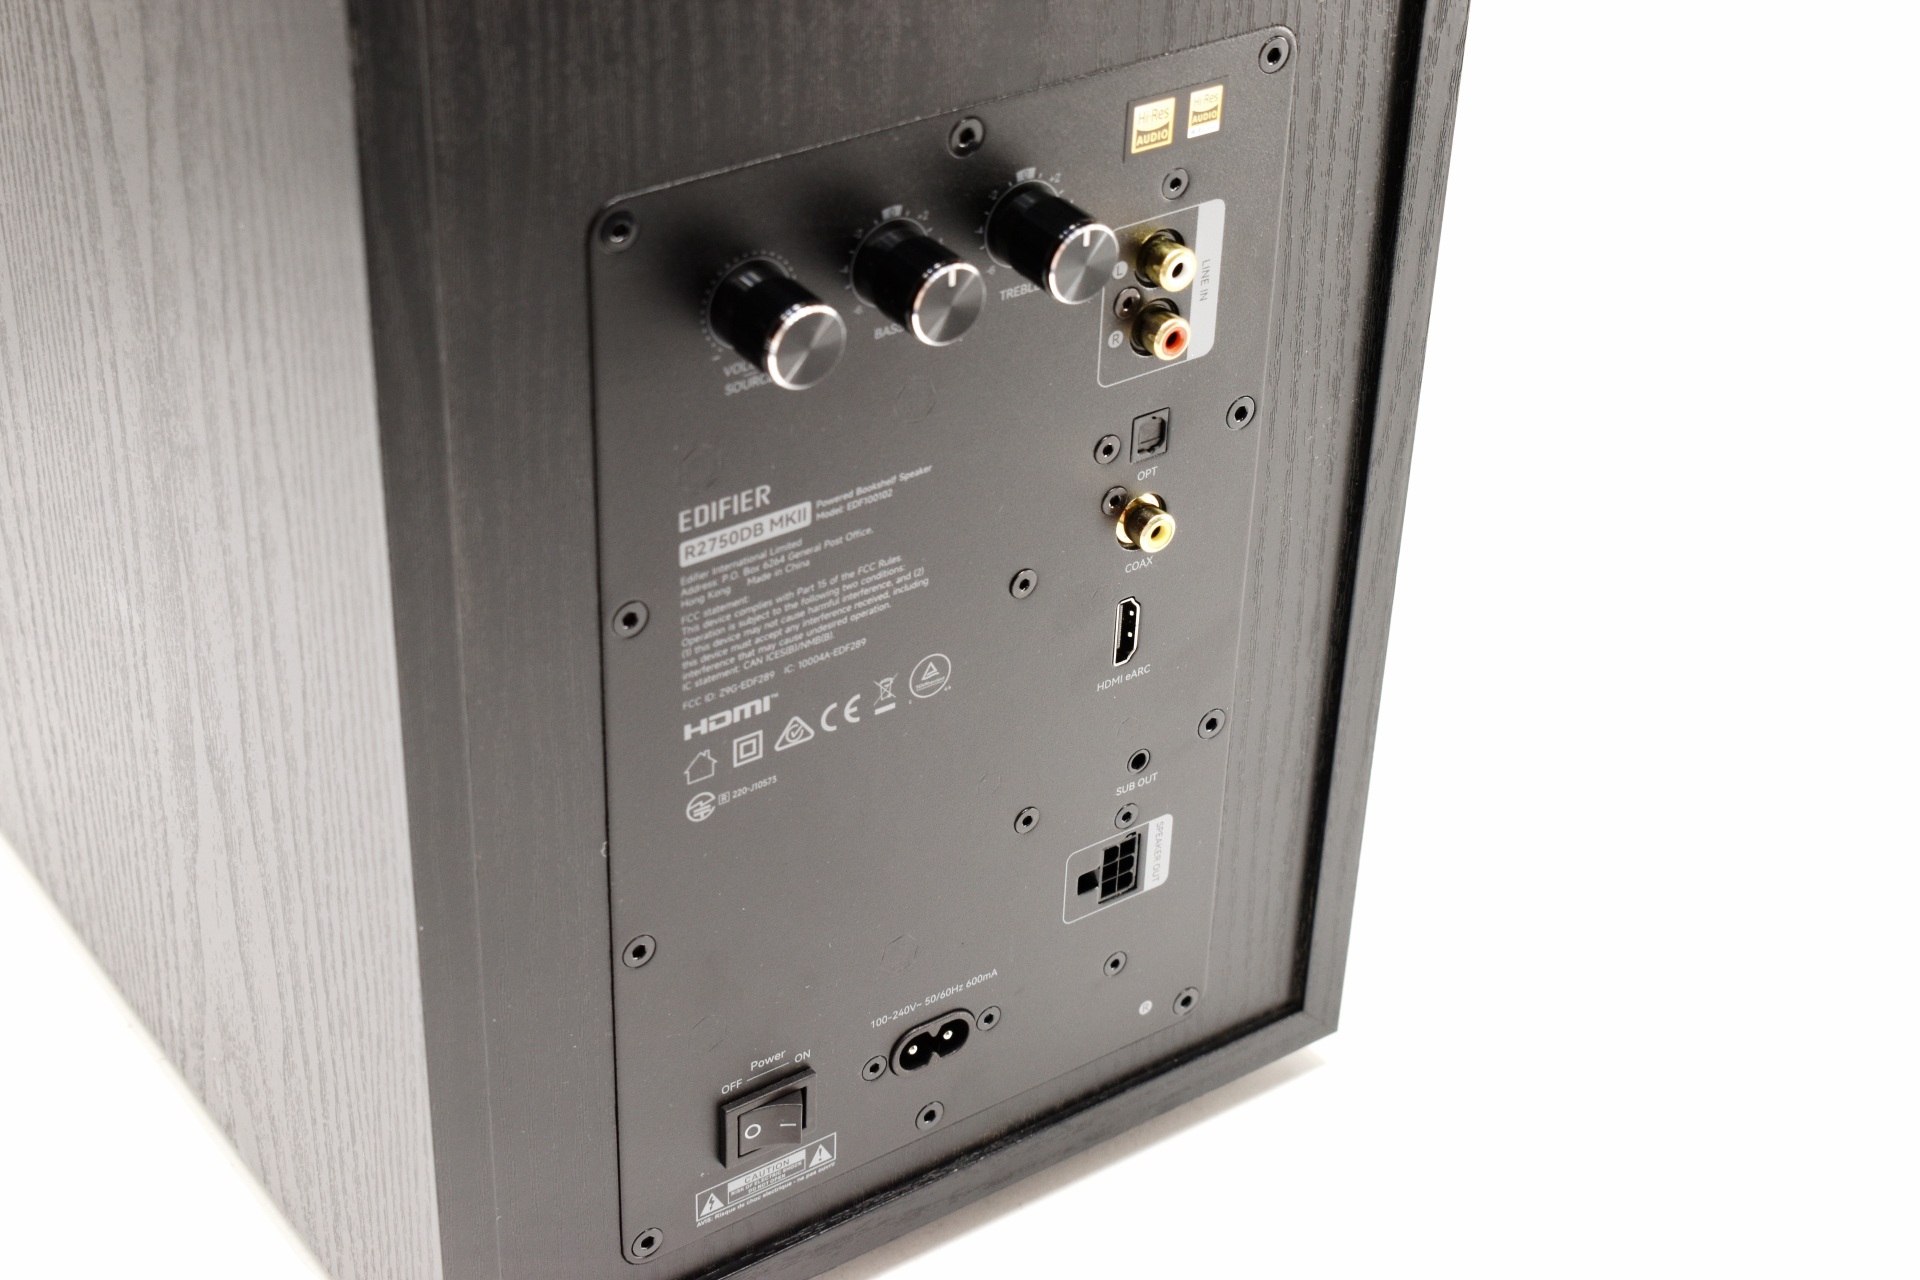
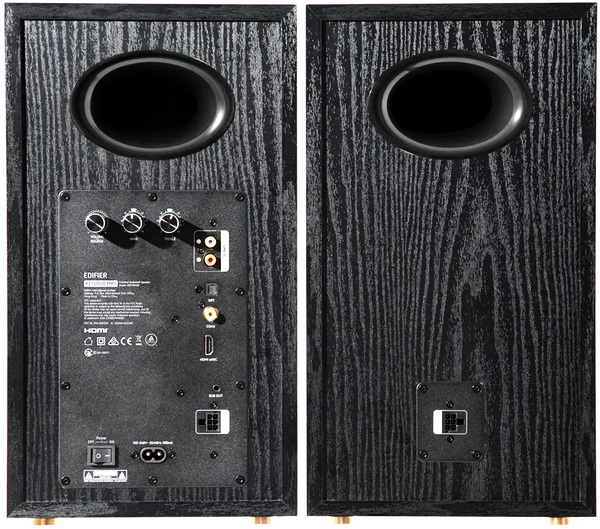
Turning the speakers around we see the speaker connection port and bass reflex on both but everything else is located on the primary speaker.


From top to bottom we find the volume/source, bass and treble knobs, RCA LINE IN, optical port, coaxial port, HDMI eARC port, 3.5mm sub out, power port and the on/off switch.


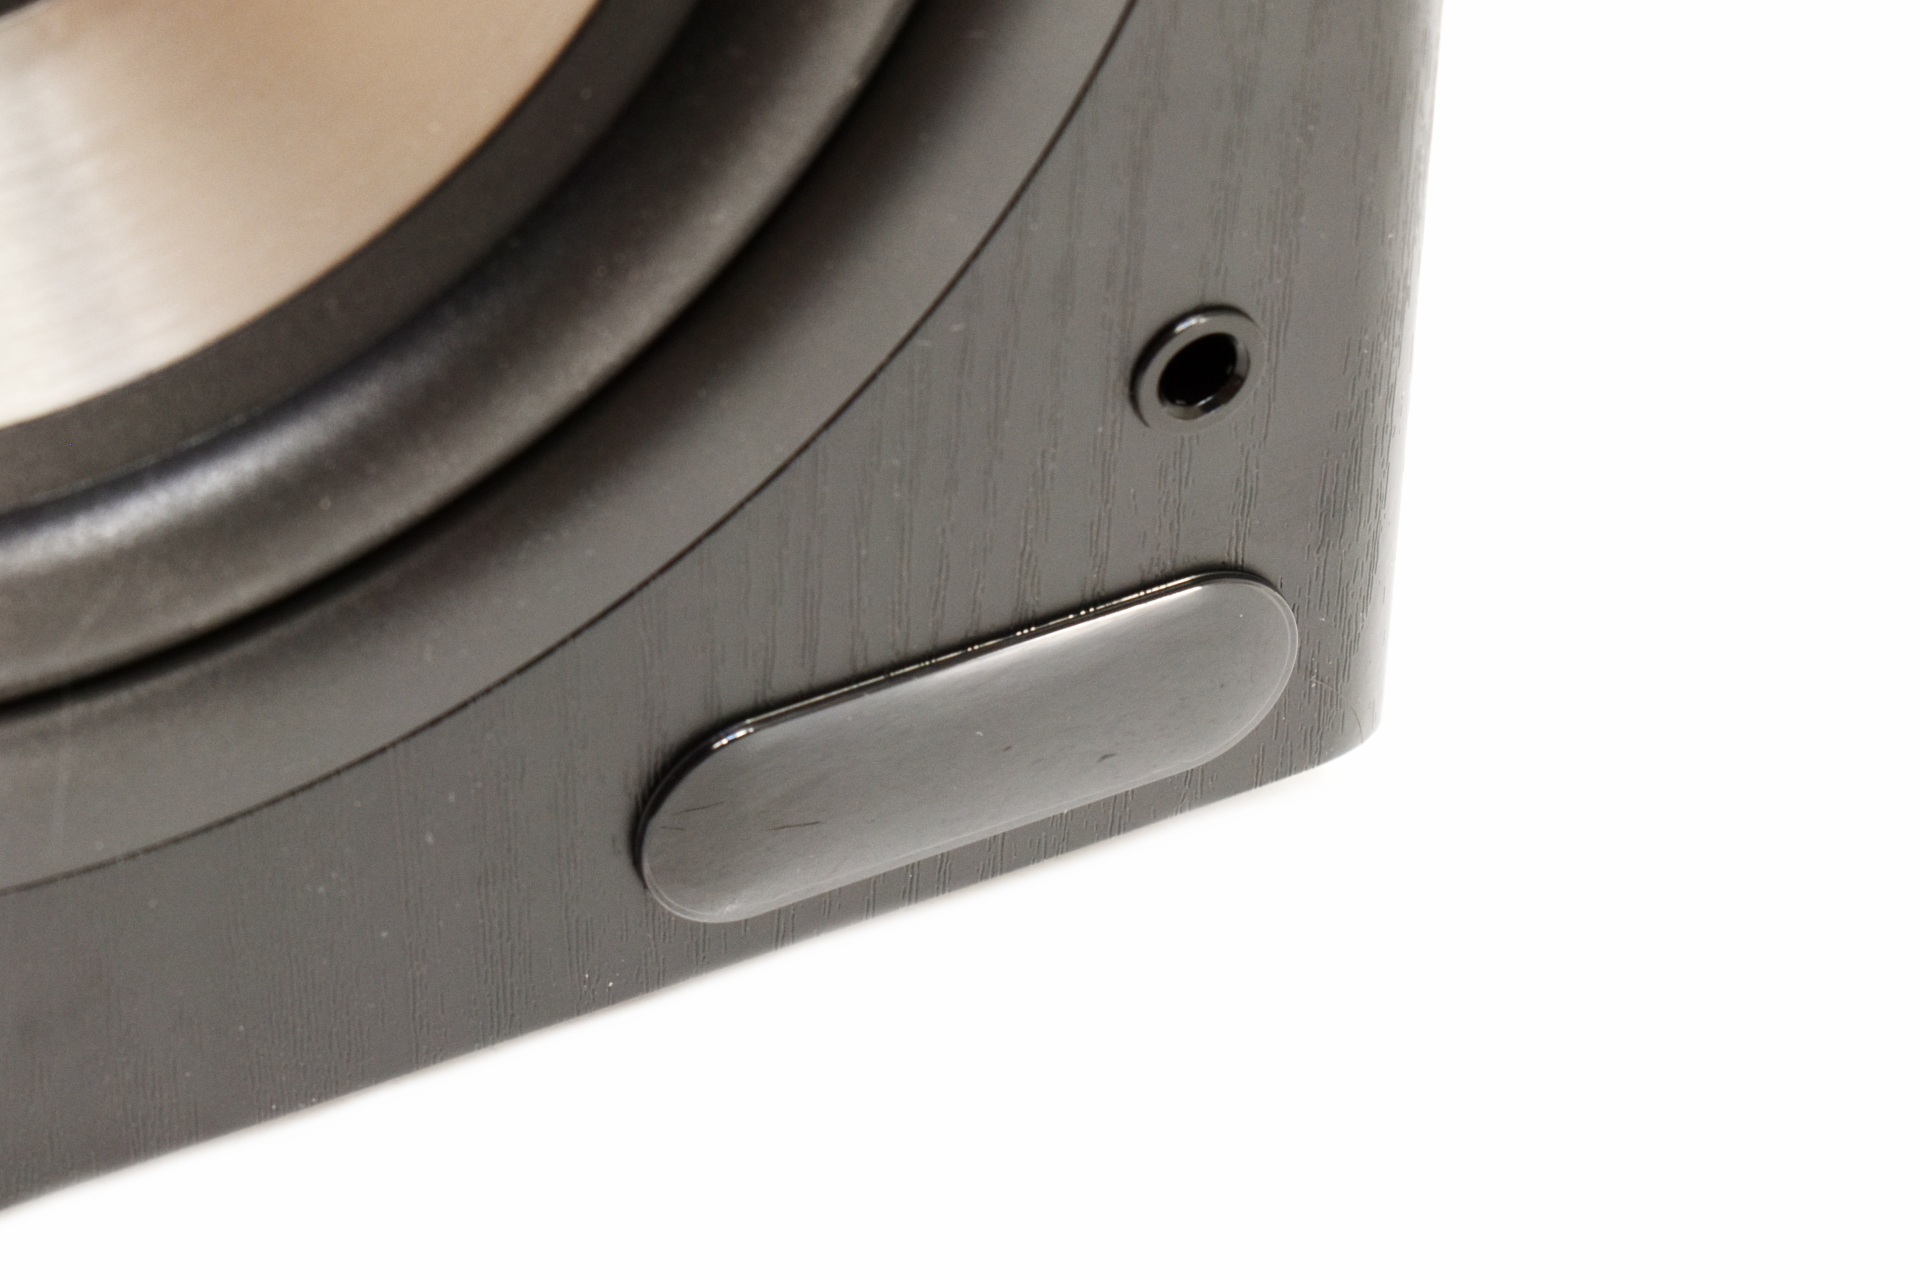
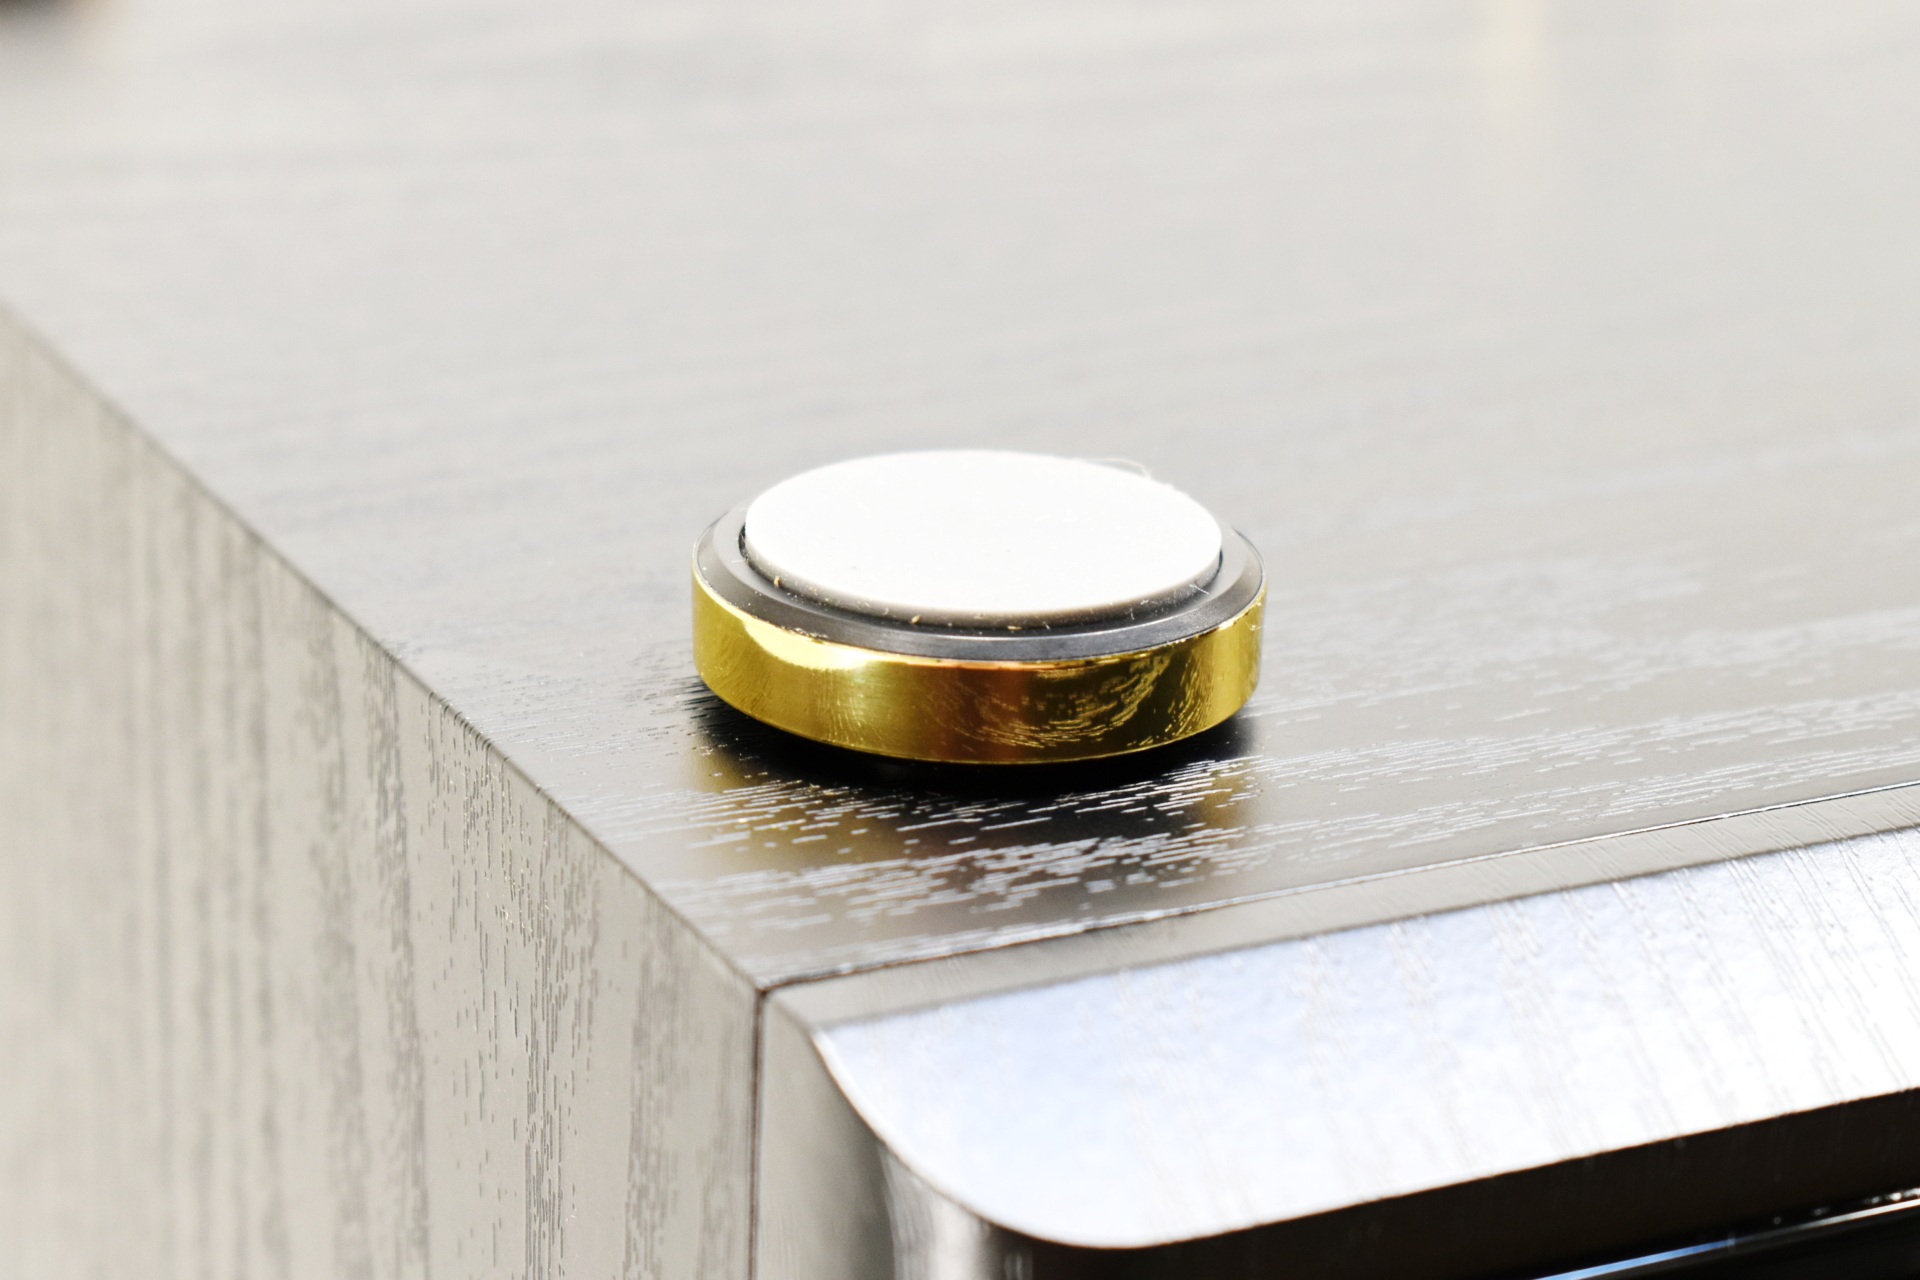
Each of the speakers sits on 4 round feet as seen above.


Mounting the grilles makes the R2750DB MKII feel a bit old school.


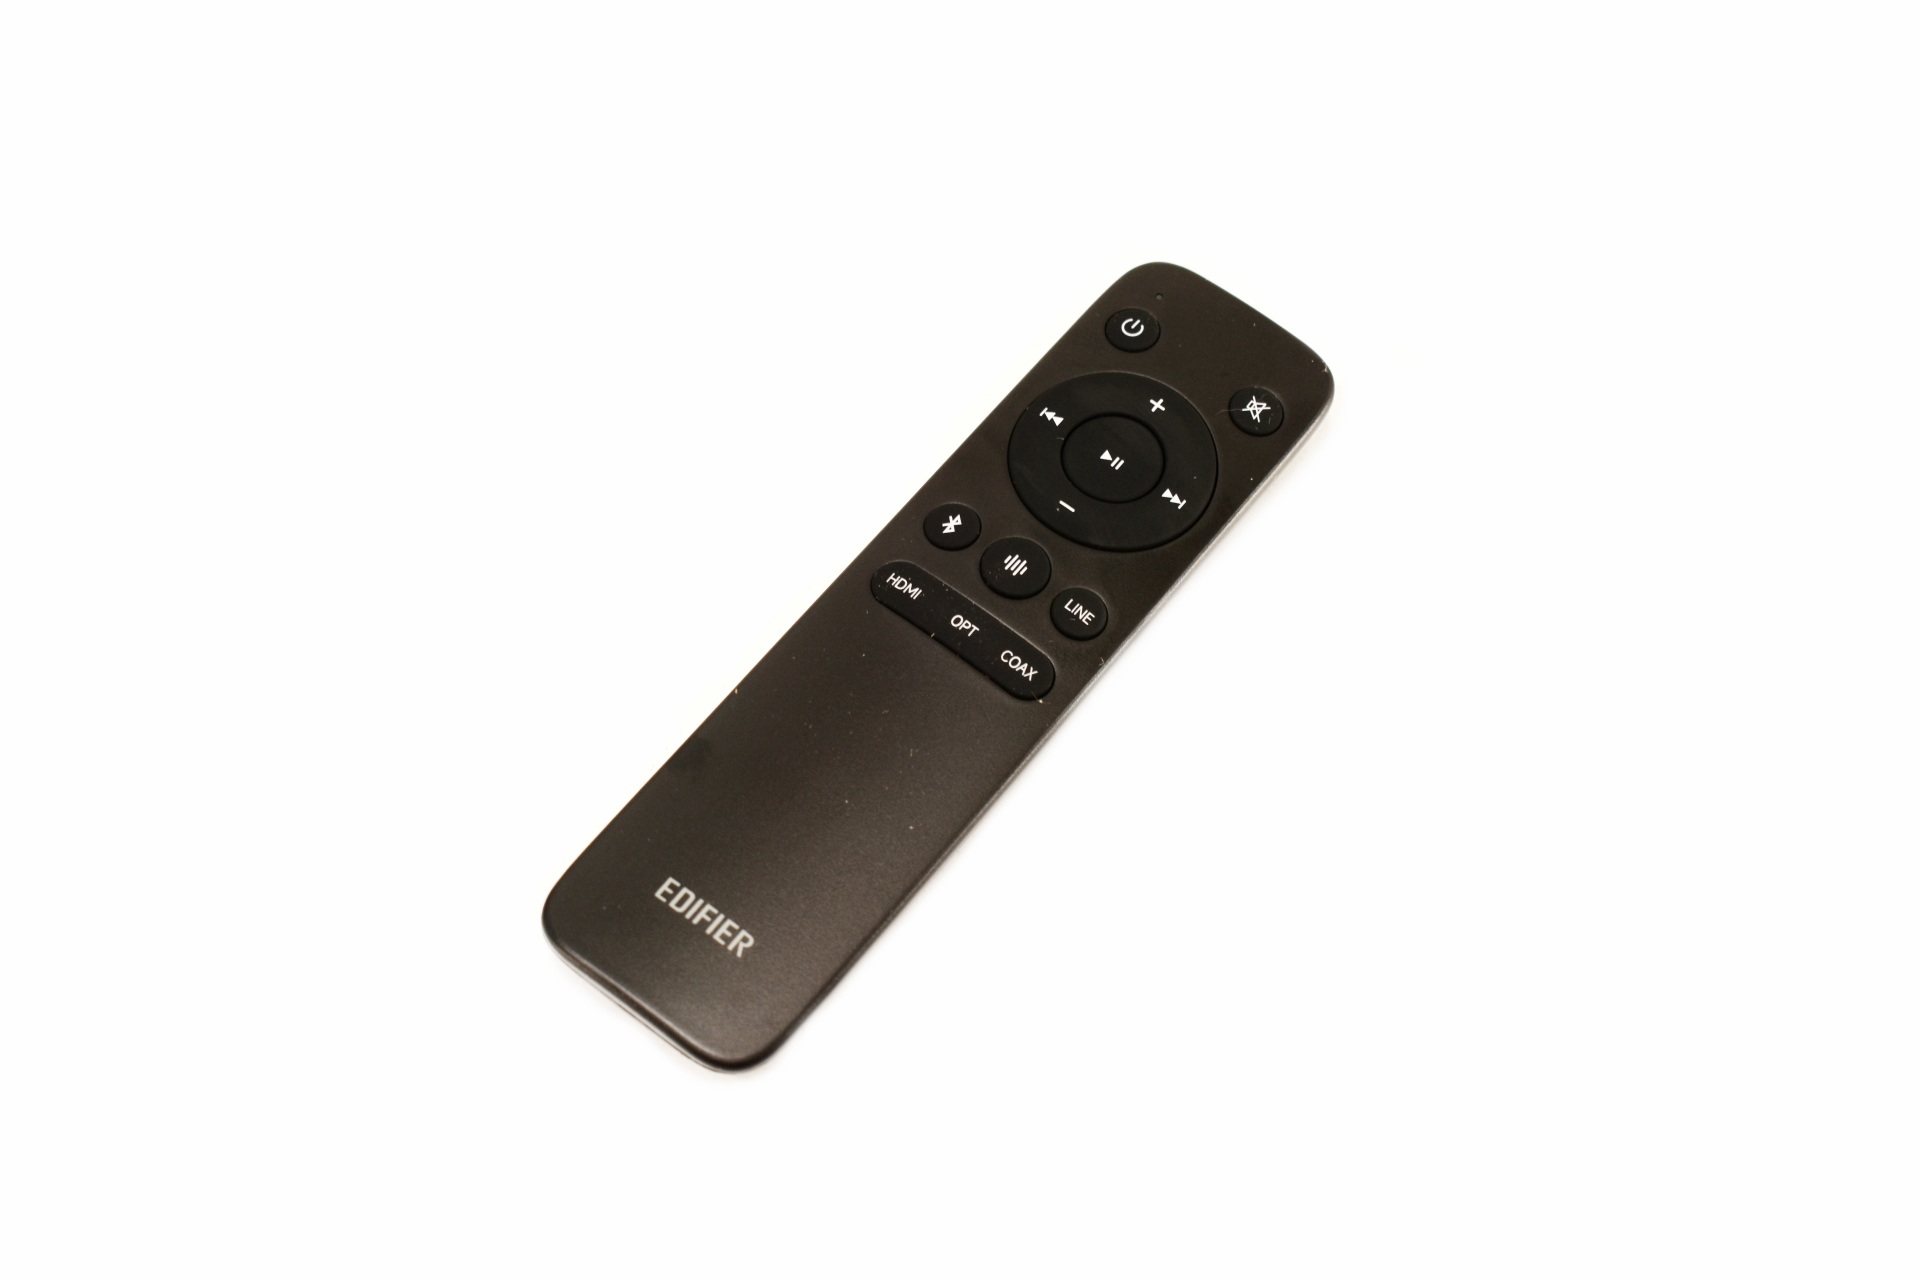
Even though the remote control is nothing to get excited it does pack everything you need.


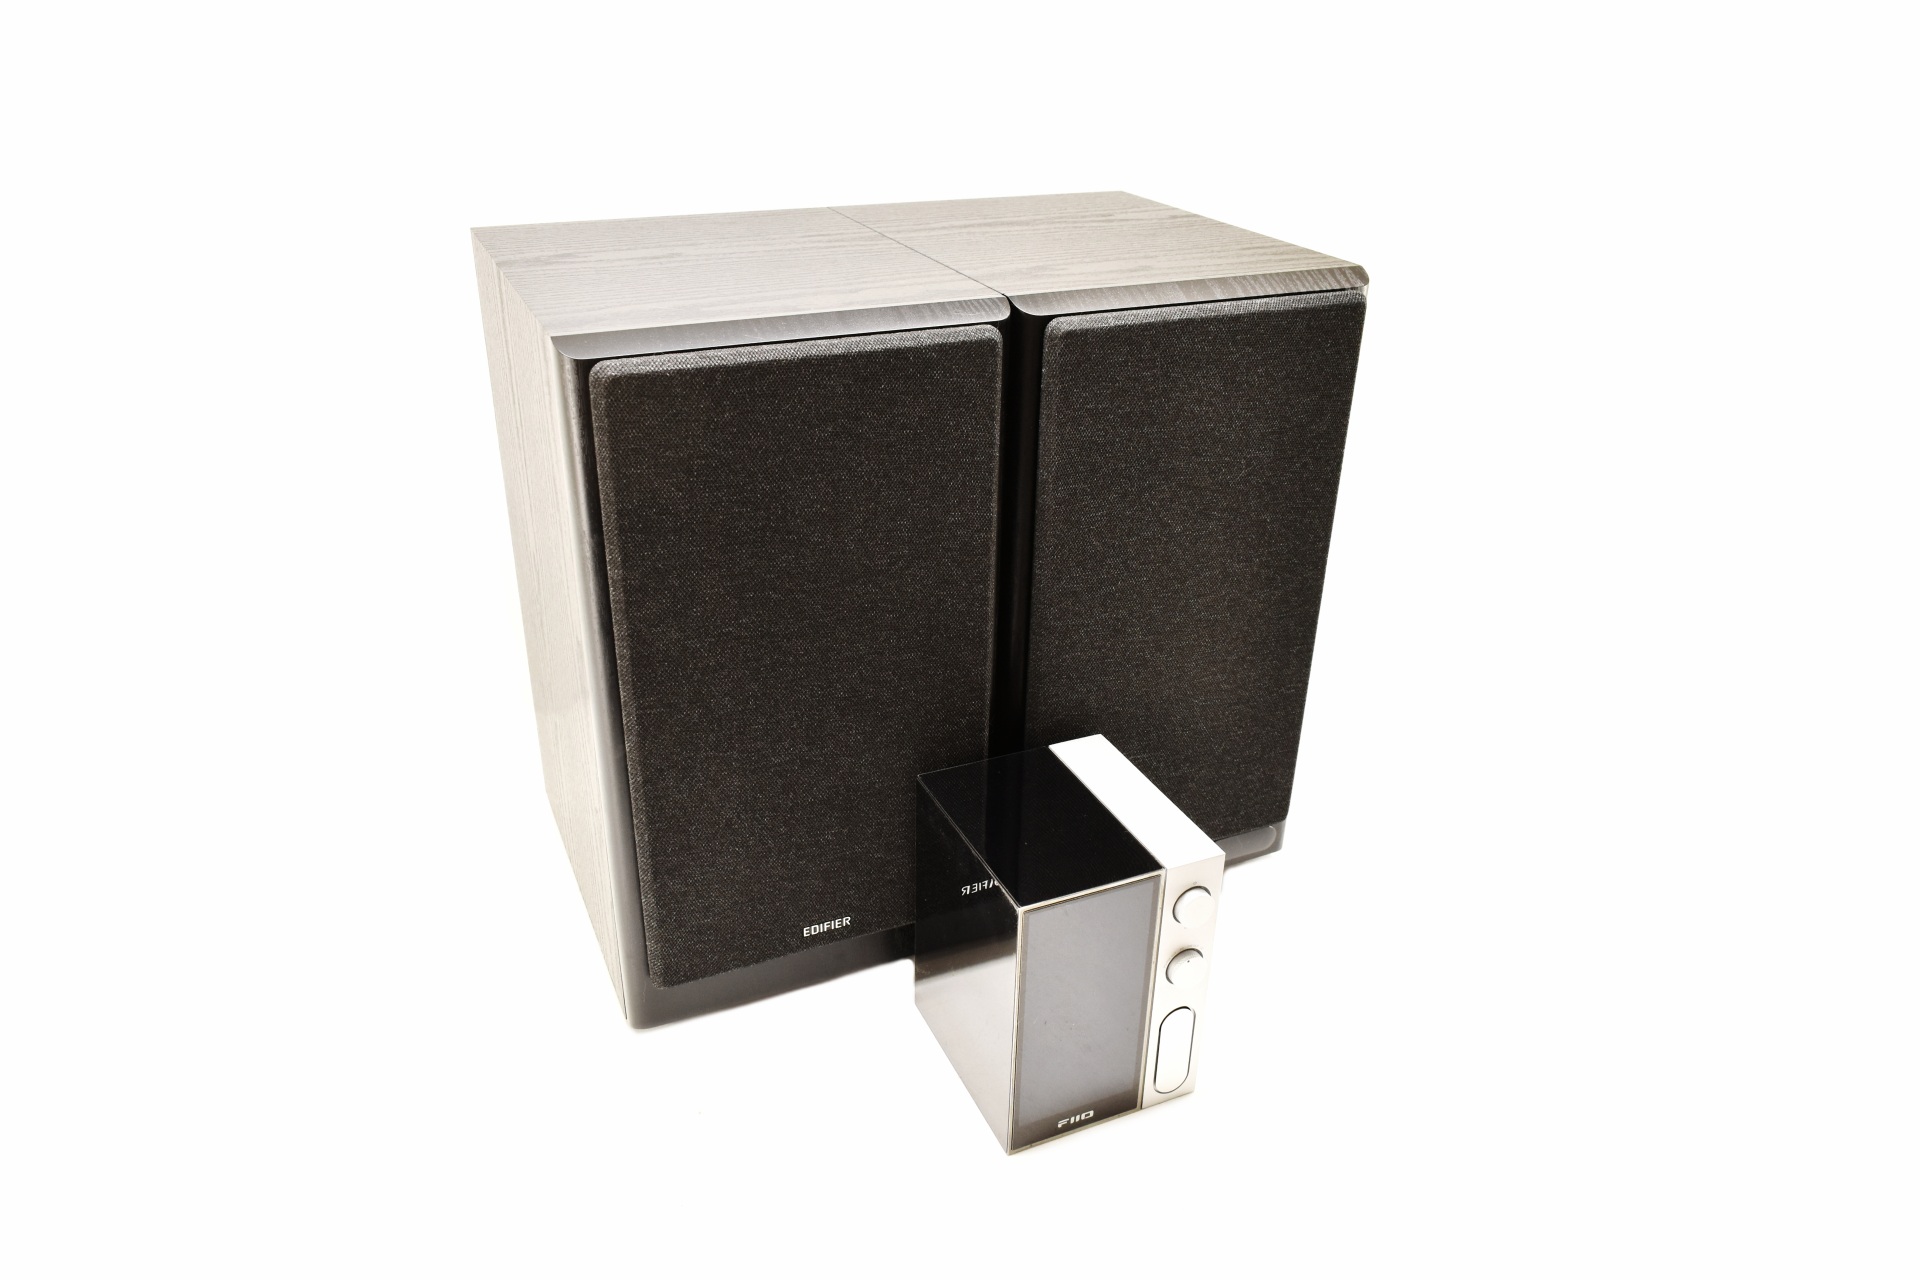
As usual I primarily used the R7 and R9 music players by FiiO to test the R2750DB MKII and as you can see, they dwarf the R9.


CONNEX APP


Once again just like with past models for full control over the new R2750DB MKII I strongly recommend downloading the Edifier ConneX smartphone app.

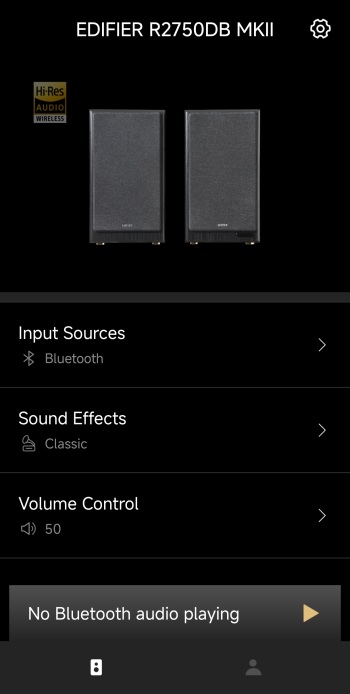
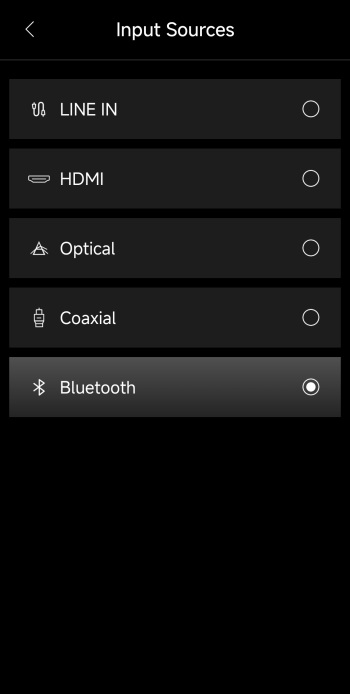
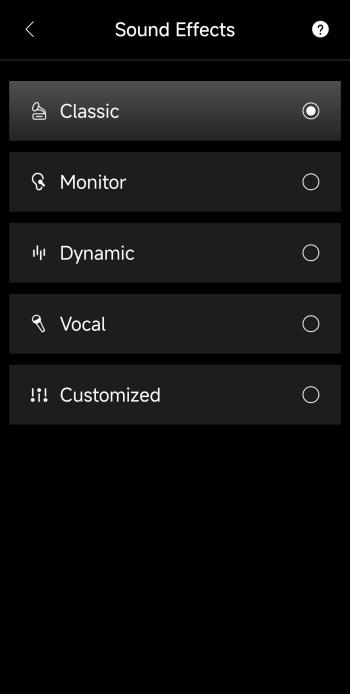
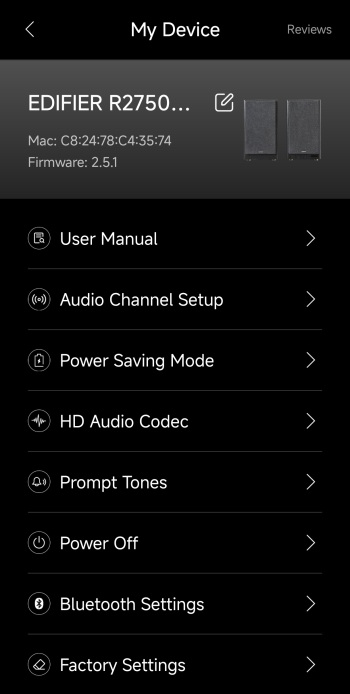
connex app 1

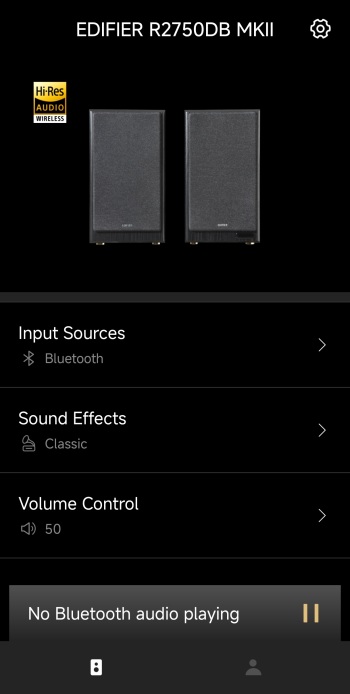
From the main tab this app allows you to change the input source (LINE IN, HDMI, Optical, Coaxial, Bluetooth), use the built-in equalizer (4 effects and 1 custom), set the volume and change input.


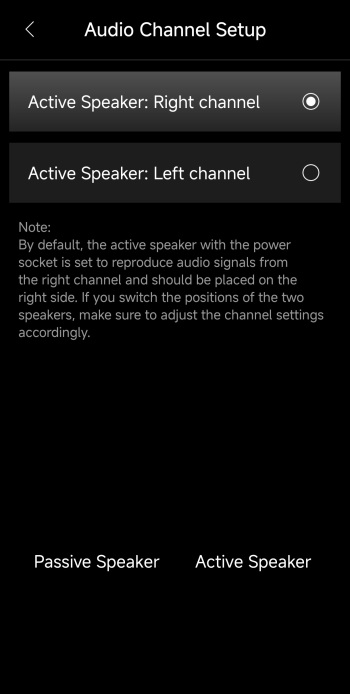
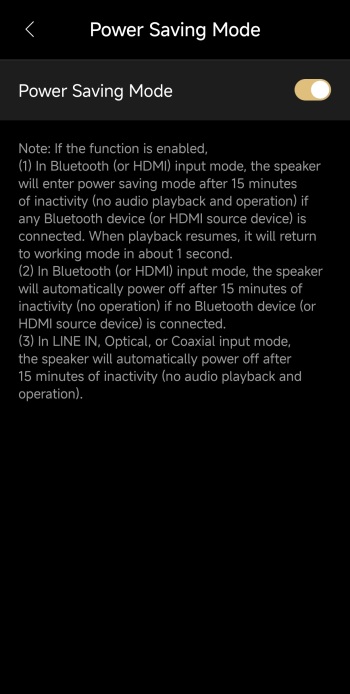
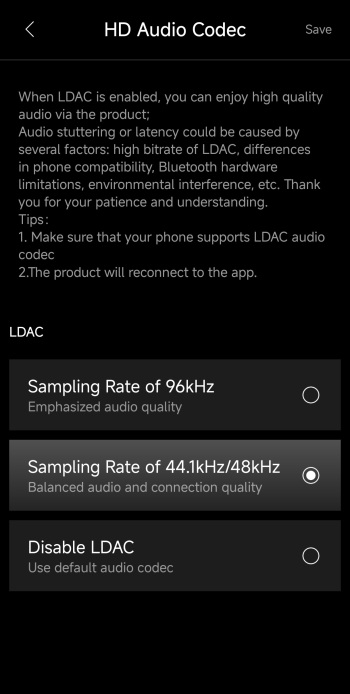
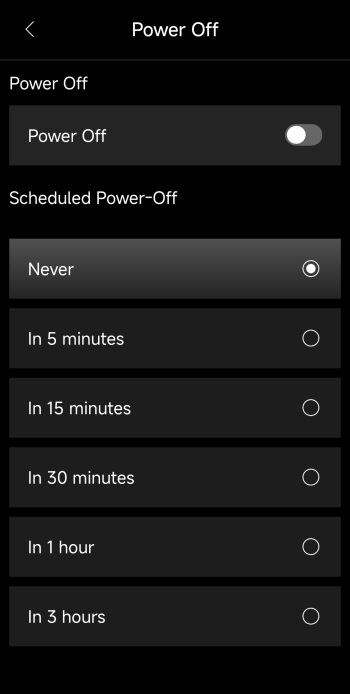
Accessing the settings tab (top right) allows you to read the online manual, change the speaker channel (left/right), enable/disable power saving mode, change the codec to LDAC 96kHz (disabled by default - once enabled the Hi-Res logo lights up in the main tab), enable/disable prompt tones, power off the speakers, disconnect Bluetooth and reset all settings to their factory defaults.


CONCLUSION


edifier r2750db mkii review b


    As the review comes to a close, the Edifier R2750DB MKII stands out as a system that gets its fundamentals right and then layers on genuinely useful modern features. Its volume performance is confident and controlled, with enough headroom to handle everyday listening, movies, and near‑field music sessions without strain. Audio reproduction remains one of its strongest qualities with clean and accurate mids, smooth treble, and a well‑behaved low end that benefits from the three‑way active design. The build quality feels reassuringly solid, with cabinets that look and feel more premium than their price bracket suggests. As for connectivity things here are simply excellent, HDMI eARC with CEC, Optical and Coaxial digital inputs, analog LINE IN, LDAC 96kHz capable Bluetooth, multipoint pairing, and app‑based EQ control give the MKII a level of flexibility that fits both traditional setups and modern multimedia spaces. There are, however, a couple of caveats. Current availability isn’t yet where it should be, with stock varying significantly by region. LDAC 96kHz still needs to be turned on from the ConneX app. And while the cabinets are well‑built and visually balanced, their overall size combined with the volume output leaves a small gap between expectation and reality since end users might anticipate slightly more loudness given the three‑way design and enclosure volume. It’s a minor shortfall, but one worth mentioning for volume‑focused listeners. Even so, the R2750DB MKII stands as a capable, hi‑res‑ready bookshelf speaker that offers clarity, control, and a genuinely modern feature set.


    The Edifier R2750DB MKII currently retail for USD499.99 inside the USA (Amazon.com) and for 299.99Euros inside the EU (Amazon.de) so they are clearly priced higher than expected on the other side of the Atlantic. That aside however the R2750DB MKII offer great value not only due to their audio quality (which is extremely good for the price) but also connectivity and build quality so the Golden award is well deserved.

PROS


- Build Quality
- Very Good Audio Reproduction (Accuracy / Detail)
- HiRes Wired & Wireless Audio (LDAC)
- Inputs (Line In / Optical / Coaxial / HDMI eARC)
- Sub Out
- Volume & Bass Levels
- Available Colors (Black & Walnut)
- ConneX App
- Price (EU)


CONS


- Price (USA)
- Size (For Some)
- LDAC 96kHz Disabled By Default (ConneX App Needed To Enable)


GOOLOO DS900 Automotive Diagnostic Tool Review

INTRODUCTION


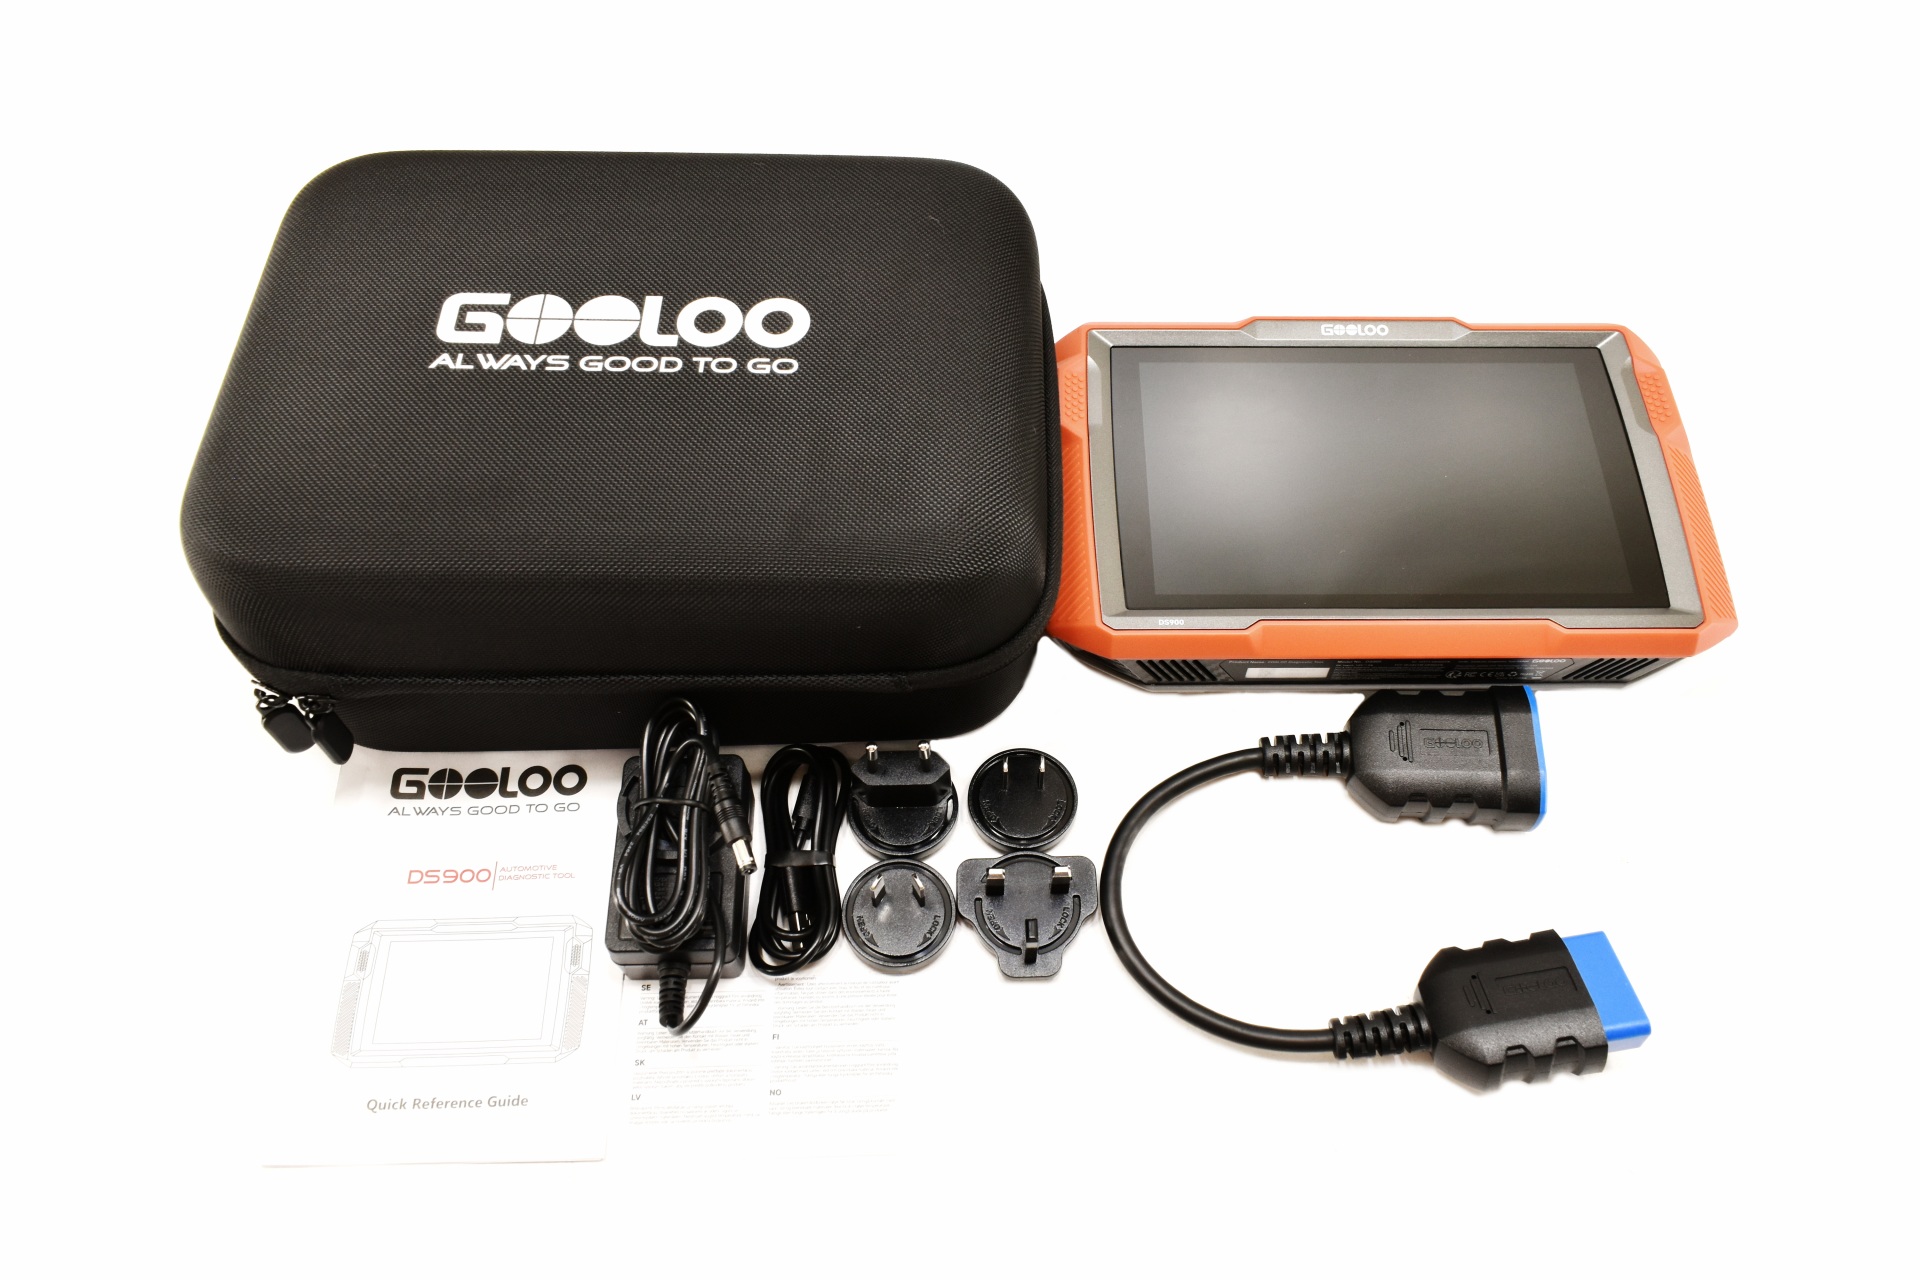
gooloo ds900 review a


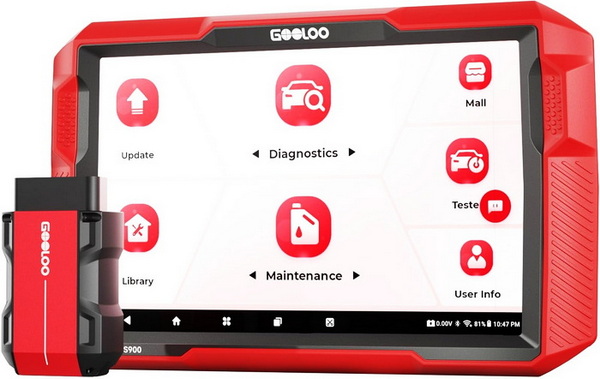
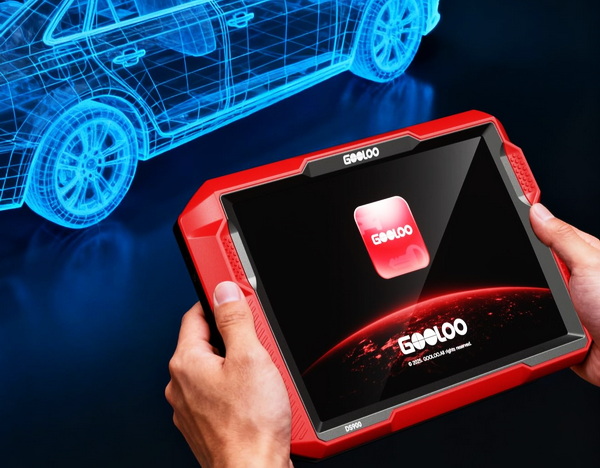
    As vehicles grow more electronic, diagnostic tools have become the quickest way to translate warning lights and sensor data into something a driver can actually act on, from maintenance resets to detailed module checks. They’re especially valuable for DIY drivers who prefer handling repairs themselves whenever feasible, relying on solid information rather than guesswork to keep their cars running smoothly. At the same time, these devices are equally relevant to professionals who need dependable, repeatable diagnostics to support daily workflows and ensure accuracy across different vehicle systems. For both groups, the latest DS900 Automotive Diagnostic Tool by GOOLOO offers a balanced mix of depth and usability, giving solo troubleshooters and working technicians a full‑system scanner that stays approachable while still delivering the level of insight modern vehicles demand.


    GOOLOO is a global leader in automotive solutions, specializing in high-performance lithium jump starters, smart power banks, and 2-in-1 air compressor tools. With over 5 million units sold across 160+ countries, GOOLOO is trusted by drivers, mechanics, and outdoor adventurers alike. From everyday roadside emergencies to professional-grade fleet solutions, GOOLOO products are designed to deliver unmatched safety, portability, and performance—anytime, anywhere.


    The GOOLOO DS900 is a tablet‑style diagnostic platform running Android v11, giving both DIY users and professionals a fast, modern interface for deep vehicle analysis. At its core, it delivers full‑system diagnostics across major modules (Engine, ABS, Airbag, Transmission, etc.) while supporting 8+ reset services such as Oil, EPB, DPF, throttle, steering and ABS making it capable of handling routine maintenance tasks as well as more advanced troubleshooting workflows. The DS900’s bidirectional control is one of its defining strengths, allowing active testing of components like injectors, windows, and wipers so users can command ECUs directly and verify system behavior in real time, an essential capability for professional technicians and a major empowerment tool for DIY mechanics who want dealership‑level insight without dealership‑level equipment. Wireless operation is central to its design, Bluetooth v5.0 provides stable communication up to 10 meters, enabling cable‑free diagnostics, while the device’s wireless bidirectional scan functions expand flexibility during testing. The hardware is equally robust, featuring a bright 8‑inch touchscreen for clear data visualization and a massive 10.000mAh lithium-ion battery that supports up to 12 hours of continuous runtime, ensuring the scanner can survive long shop days or extended driveway troubleshooting sessions without interruption. Coverage is broad and practical, the DS900 supports 100+ brands and over 10.000 vehicle models released between 1996–2025 (as of now), with regular updates to maintain compatibility across global manufacturers, an important factor for professionals who encounter diverse vehicles and DIYers who maintain multiple cars or help friends and family. To further streamline repairs, the scanner includes DLC locations and smart DTC repair guides, offering structured fault explanations and recommended steps, reducing guesswork and speeding up both professional diagnostics and at‑home troubleshooting.


SPECIFICATIONS AND FEATURES


PACKAGING AND CONTENTS


gooloo ds900 review 1t

The DS900 is shipped inside a black and red box that has a large product picture at the front right next to the company logo.


At the rear GOOLOO has placed the features and specifications of the DS900 along with company contact information.


Contained inside the box are the DS900, hard carrying/storage case, power adapter with 4 tips, USB-C to USB-A cable, OBD-II extension cable, warning information paper and the quick reference guide.


THE DS900


gooloo ds900 review 4t

The DS900 measures roughly 258mm in length, 159mm in width and 50mm in thickness.


This is a partially rugged (rubberized) tablet with textured areas on both sides for improved thumb grip.


Several warning labels are printed on a sticker located on the base of the unit right next to its serial number and barcode, electrical requirements and company info.


From left to right on top we find the on/off power button, 3.5mm audio out, RJ45 10/100Mbps ethernet port, USB 2.0 data port, DC in, HDMI v1.4 out, USB-C charging port and the screenshot button.


There's also a single-capsule omnidirectional microphone located on the far right and a reset button on the far left as seen above.


gooloo ds900 review 10tTurning the device around we find a microSD slot (supports capacities up to 64GB), 5MP camera with flash, adjustable metal stand and the VCI which is magnetically attached at the rear (magnet is on the VCI).


The bundled hard case has more than enough room for the DS900 and its bundle.


DS900 OS


gooloo ds900 os 1t

The DS900 boots into its diagnostic software which is divided onto 7 tabs.


From the update tab you can expand compatibility by installing and updating brand/car specific instructions.


Then you can access the diagnostics tab from where the DS900 detects and lists possible issues with your car.


Gooloo allows end users to further expand the capabilities of the DS900 by purchasing access to various secure gateway modules (for example from Nissan).


The tester tab points to the BTMobile Pros app which allows for several battery check functions (this however isn't available with the stock VCI).


To assist end users GOOLOO has placed a library tab from where you can look for error codes, access TSB bulletins, find the DLC (OBD-II) location in any car, access information on various warning lights, and check whether or not a specific car function is supported by the device.


Inside the maintenance tab you'll find extra functions such as oil driving mileage reset, throttle actuation adjustment, EPB (brake pad reset), steering angle reset, ABS bleeding, DPF regeneration, battery monitoring reset and airbag data reset.


You can perform software and firmware updates and access various settings from the user tab.


The DS900 is basically a tablet and so if you exit the DS900 app you can use it as a regular tablet.


You can also access the camera settings as seen above.


CONCLUSION


gooloo ds900 review b

    From a technical standpoint, the DS900’s strengths are rooted in its hardware‑software integration, the large LCD provides high‑visibility data rendering for multi‑PID live streams, the wireless VCI interface maintains stable communication without tethered limitations, and its broad vehicle database ensures compatibility with a wide range of ECUs across powertrain, chassis, and body modules. The extended battery life supports long diagnostic sessions, while the 5MP built‑in camera adds practical utility for documenting component conditions or capturing fault‑related visuals. Its ability to operate as a standard Android tablet also means users can run auxiliary apps, service manuals, wiring diagrams, or diagnostic references, directly on the same device. However, the DS900’s technical shortcomings are equally clear, certain vehicles that should fall within its supported range are missing entirely, some advanced functions are missing as well (cars with safety guards require the purchase of extra licenses – and even those are not for all cars) and others just lack step by step instructions. ABS bleeding, for example, may initiate but fails to provide full step‑sequencing (wheel order) or safety prompts, leaving users without the complete workflow required for a proper hydraulic purge. These gaps don’t negate the DS900’s capabilities, but they do place it firmly in the category of “powerful, but occasionally inconsistent,” making it best suited for users who value strong hardware and wireless diagnostics but can navigate incomplete coverage when it appears.


    At the time of my review the DS900 Automotive Diagnostic Tool by GOOLOO is on sale and so you can find it for just USD339.99 inside the USA (Gooloo USA), €339.99 inside the EU (Gooloo Germany) and for £299.99 inside the UK (Gooloo UK) so it’s clearly aimed towards very demanding users and professionals alike (be sure to use GOOLOO1 at checkout for an extra 5% discount on all 3 pages). Thing is that unless you really need the extra functions, deep scan and versatility offered by the DS900 you can get a somewhat basic OBDII device like the DS200 again by GOOLOO which you can use with your very own smartphone/tablet (and will cost you around 1/6th of the price). Again, it will not land anywhere close to the DS900 but for basic diagnostics it will get the job done. At the end of the day, it all comes down to what your needs are but since the GOOLOO DS900 does deliver as advertised the Golden Award is in order.

PROS


- 8 Inch Rugged Tablet
- Wireless Connectivity
- Supported Brands & Vehicles
- Available Functions
- Deep Diagnostics Scan
- Available Ports (HDMI / USB A / USB C / 3.5mm)
- 5MP Camera & Microphone
- Easy To Use
- Bundle (Hard Case / OBDII Extension Cable / Power Adapter With 4 Tips)
- Battery Life (Up To 12 Hours)
- 2 Years Of Free Updates


CONS


- Price (For Some)
- Extra Licenses Required
- Lacks Some Functions
- Some Instructions Need Improving


MSI MPG 271QR QD-OLED X50 Gaming Monitor Review

INTRODUCTION


msi mpg 271qr qd oled x50 review a


    Gaming monitors have evolved through TN, IPS, VA, and OLED panels, each shaping how players experience speed, contrast, and color, but the real shift in recent years has come from QD‑OLED technology, which merges OLED’s perfect blacks and instant pixel transitions with quantum‑dot color conversion to deliver higher luminance, richer saturation, and dramatically stronger HDR performance. Unlike traditional OLED approaches that rely on white subpixels and lose vibrancy at peak brightness, QD‑OLED maintains full‑strength RGB output, giving games deeper contrast, cleaner motion, and a level of visual punch that feels genuinely next‑generation. It’s within this rapidly maturing landscape that MSI positions the MPG 271QR QD-OLED X50, a 27‑inch gaming monitor built around the latest 3rd generation QD‑OLED panel iteration by Samsung engineered to push clarity, responsiveness, and HDR impact even further.


    MSI is a world leader in AI PC, gaming, content creation, business & productivity and AIoT solutions. Bolstered by its cutting-edge R&D capabilities and customer-driven innovation, MSI has a wide-ranging global presence spanning over 120 countries. Its comprehensive lineup of laptops, graphics cards, monitors, motherboards, desktops, peripherals, servers, IPCs, robotic appliances, vehicle infotainment and telematics systems, and EV charger are globally acclaimed. Committed to advancing user experiences through the finest product quality, intuitive user interface and design aesthetics, MSI is a leading brand that shapes the future of technology.


    The MPG 271QR QD‑OLED X50 centers on a 27‑inch (26.5-inch to be precise with a PPI of 110) 2560x1440 QD‑OLED panel (3rd gen Samsung with EL Gen 2 materials) running at an extreme 500Hz with a 0.03ms GtG response time, backed by VESA ClearMR 21000, VESA DisplayHDR True Black 500, 300cd/m² SDR brightness, up to 1.000cd/m² peak HDR brightness, 1.500.000:1 contrast ratio, 99% DCI‑P3 coverage, and factory calibration to Delta E ≤ 2, while input lag is kept to a minimal 1.5ms for competitive play. Connectivity is fully next‑gen with DisplayPort v2.1a (UHBR20) delivering up to 80Gbps for lossless 2K/500Hz output, HDMI v2.1, and USB‑C with DP Alt Mode plus 98W power delivery, complemented by granular image controls including gamma, six‑axis color, and MSI’s QD Premium Color tuning. Moving into features, the monitor integrates MSI’s AI Care Sensor, a CMOS + NPU system that checks for user presence every 0.2s to enable wake‑on‑approach, auto‑lock, adaptive dimming, and automatic brightness and color‑temperature adjustments, all tied into OLED Care 3.0, which adds pixel shift, pixel refresh, logo luminance control, boundary protection, and a custom thermal solution using a dedicated heatsink and graphene film, reinforced by a three‑year burn‑in‑included warranty. Gaming tools include G‑SYNC and FreeSync support, AI Navigator, AI Menu, AI Crosshair, AI Vision, multi‑stage aim magnifier, and firmware‑upgradable software through MSI’s apps, while Mystic Light and Windows Dynamic Lighting handle synchronized RGB. The monitor rounds out with a central 5‑way joystick, integrated KVM switch, remote‑control support via the MSI apps, and a design built for high‑end, latency‑critical PC gaming.


SPECIFICATIONS AND FEATURES


PACKAGING AND CONTENTS


The company logo, main features, screen size and a picture of the monitor’s front are all placed at the front of the box.


A sticker with the main product specifications is placed on the left side while on the right side we find the energy certification stickers for both the EU and UK.


The rear is identical to the front, this time however we see a picture of the monitor’s rear.


Typically, the monitor is wrapped inside a synthetic cover and placed between two thick pieces of cardboard.


Along with the MPG 271QR X50 and its two-piece stand inside the box you’ll also find two power cords (EU/UK), wall mount screws, cleaning cloth, monitor test report, two energy certification stickers (EU/UK), HDMI cable, DP cable, USB host cable, EU regulatory notes paper and the quick start guide.


THE MPG 271QR QD-OLED X50


The MPG 271QR QD-OLED X50 monitor features a diagonal size of 67.31cm (26.5-inches).


The rear features the company logo and is largely perforated on the sides and the top/bottom.


At the rear we also find the usual clip-on design for the stand and the VESA 100x100mm mounting area.


To attach the stand, you just need to place it here and push it downwards (this is something you need to do when you take the screen out of the box - safety concerns - but since I take pictures of everything this is the way for me).


After that just attach the base and use the thumbscrew to secure it onto the stand.


27-inch gaming monitors are very popular among gamers and I expect the same to be the case for the MPG 271QR QD-OLED X50.


The stand is height adjustable and so at its lowest it keeps the monitor roughly 57mm from the desk while at its highest that number climbs to around 174mm.


At the front we also find the AI Care Sensor that detects user absence and automatically turns off the screen to initiate panel refresh and the power LED.


The bezels of the MPG 271QR QD-OLED X50 are thin and more specifically 5mm for the top and almost 7mm for the left and right ones (17mm for the bottom one).


Turning the screen around we find the company logo on the left side, RGB LED bar on top, stand with cable routing holes on it, 5-way joystick (navi key), macro button (activates the MSI gaming intelligence application) and the power on/off button.


We also find the power port, two HDMI v2.1 outputs, DP v2.1a output, USB-C PD 98W port, USB-B host port, two USB-A 3.2 ports and a 3.5mm port.
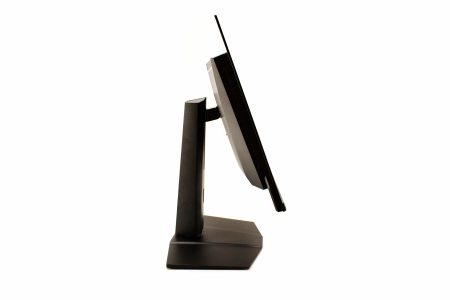


Ergonomic stands are not something we see a lot with gaming models so I was glad to see that the MPG 271QR QD-OLED X50 can tilt (5 degrees forward, 20 degrees backwards), pivot (90 degrees on either side) and swivel (30 degrees on either side).


OSD MENUS
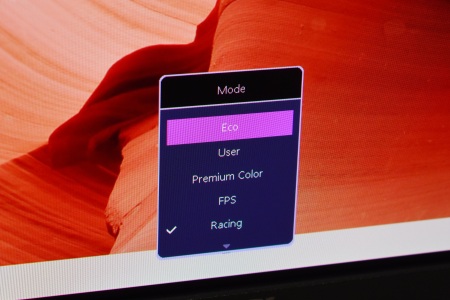


From the Mode menu, the user can switch between different picture presets such as Eco, User, Premium Color, FPS, Racing, RTS, RPG, Black‑White, sRGB, Adobe RGB, and Display P3. Each preset adjusts color tuning, contrast behavior, and gamma to match gaming, productivity, or color‑accurate workflows. The user simply selects the mode that best fits the current task.
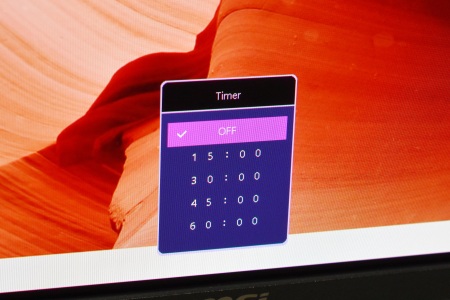


This timer menu allows the user to enable an on‑screen countdown timer. The timer appears on the screen as a visual reminder during gaming sessions or productivity tasks.
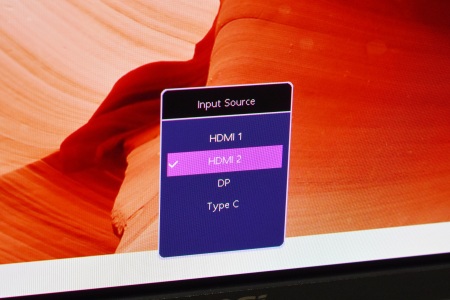


From the input source menu the user can switch the active video input between HDMI 1, HDMI 2, DisplayPort, and Type‑C.


The AI crosshair section lets the user enable an on‑screen crosshair overlay, this is intended for games that lack built‑in crosshairs or for players who want a consistent aiming reference.


From this menu, the user can access all AI‑assisted features: AI Crosshair, AI Vision, AI Care Sensor, AI Brightness, and AI Light Sensor.


This section provides quick access to gaming‑oriented toggles. The user can enable or adjust KVM, MPRT, Optix Scope zoom levels, DisplayHDR modes, DSC, HDMI 2.1 behavior, Adaptive‑Sync, the on‑screen timer, refresh‑rate display, and screen‑size emulation.
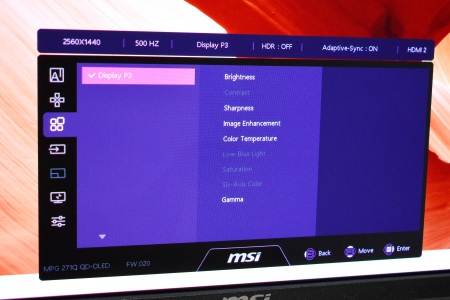


In this section, the user can fine‑tune all image parameters of the selected color mode. Controls include brightness, contrast, sharpness, image enhancement, color temperature, low‑blue‑light mode, saturation, six‑axis color tuning, and gamma.
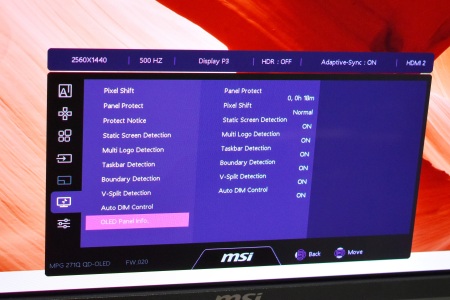


This menu provides all OLED maintenance and burn‑in prevention tools. The user can check panel‑protect runtime, enable pixel shift, and toggle protections such as static‑screen detection, multi‑logo detection, taskbar dimming, boundary detection, V‑split detection, and auto‑dim control. It also displays OLED panel information.
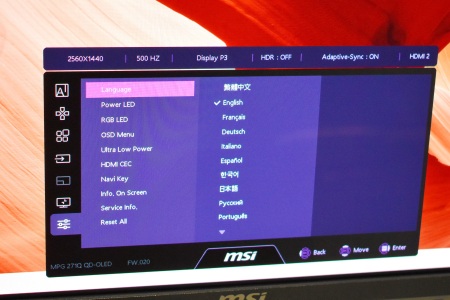
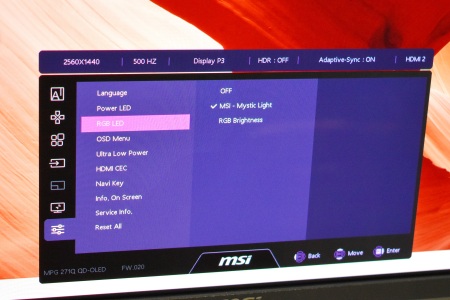


This section contains all general monitor settings. The user can change the OSD language, toggle the power LED, adjust RGB LED behavior, configure OSD rotation and transparency, enable ultra‑low‑power mode, toggle HDMI‑CEC, customize Navi Key shortcuts, show on‑screen info, view service details like firmware and serial number, and reset all settings to default.


MSI GAMING INTELLIGENCE


The MSI Gaming Intelligence software offers everything the OSD menus do and more. From the full Monitor Control section, the user can adjust all core display and system behaviors of the monitor. This includes setting an on‑screen alarm timer and choosing its position, enabling a refresh‑rate overlay, switching between picture modes, and fine‑tuning image parameters such as brightness, contrast, sharpness, saturation, and six‑axis color. The user can also configure KVM input routing, select the active video input, and manage PIP/PBP layouts including sub‑window size, ratio, audio source, and location. Additional system controls include pixel‑shift and panel‑protection tools, OSD rotation and positioning, transparency, timeout, RGB LED brightness, and toggles for HDMI‑CEC, power LED, ultra‑low‑power mode, and on‑screen information. The OLED Care panel provides burn‑in protection features like static‑screen detection, logo reduction, boundary detection, taskbar dimming, V‑split detection, and auto‑dim behavior.


From this tab, the user can control the monitor’s RGB lighting effects. They can choose between static, breathing, rainbow, meteor, color‑cycle, flashing, and other animations, or disable lighting entirely.


msi mpg 271qr qd oled x50 review 32t

One thing I feel I need to point out is that to change effects for the rear RGB LED bar I had to choose them from the app and then remove the USB cable from my computer (probably a bug).


msi gaming intelligence 7t

This section lets the user assign a specific action to the monitor’s physical G‑key. They can bind it to launch the Gaming Intelligence app, switch display modes, activate features, or trigger simple macros, giving quick access without opening menus.


Here the user can access system‑level tools such as mouse speed adjustments, magnifier controls, display projection modes, power and sleep settings, app shortcuts, the on‑screen keyboard, wireless display connection, and an auto‑launch toggle. It also includes window‑splitting layouts for productivity.


msi gaming intelligence 9t

This tab provides the user with the ability to update the monitor’s firmware. It includes instructions for proper cable setup, power‑sleep configuration, and update safety. The firmware update covers scaler, MCU, and other internal components to improve stability and add new features.


From this tab, the user can change the visual theme of the Gaming Intelligence interface. They can switch between GI, MAG, MPG, and MEG themes depending on preference or monitor series, customizing the software’s appearance.
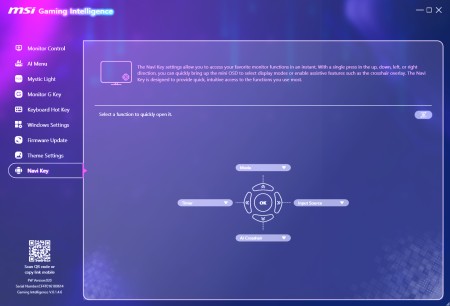


This section allows the user to assign quick‑access functions to the monitor’s joystick directions. Up, down, left, and right can be mapped to features like Mode, Timer, Input Source, or AI Crosshair, enabling fast navigation through the mini‑OSD.


VIEWING ANGLES / PICTURE QUALITY



msi 271qr x50 iq 1t

Image quality is surprisingly good, picture is sharp with vibrant colors and excellent blacks. The anti-reflecting coating does produce some grain with very crisp pictures but it’s noticeable only when you are very close to the screen.
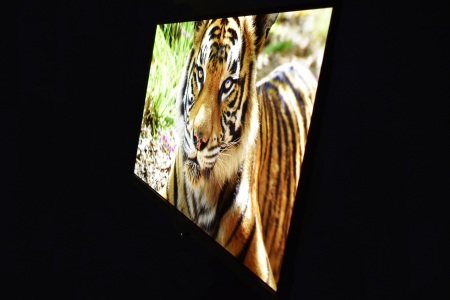
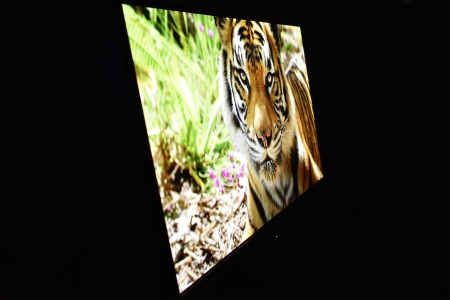
 

 msi 271qr x50 iq 7t

Viewing angles are not an issue with QD-OLED screens and of course the same applies for the MPG 271QR X50 model by MSI.
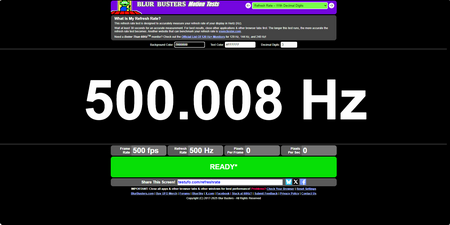


ufo hzt

Since this is the 1st 500Hz monitor to arrive in the lab I used the testufo website to see what their tester would report (and it all checks out).


TEST RESULTS


DATACOLOR SPYDER PRO MEASUREMENTS
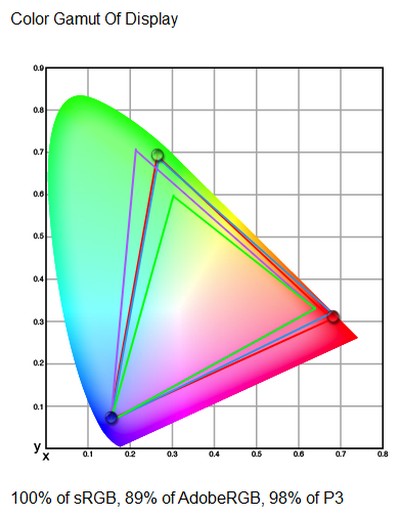
gamut

By using the Spyder Pro (2024) Colorimeter by Datacolor I measure both the color gamut (SRGB, AdobeRGB & P3) and the brightness levels of the monitor at hand.



Here you can see results for Color and Luminance Screen Uniformity (instead of just listing results at 100% brightness I’m listing all of them - 50/67/83/100%).
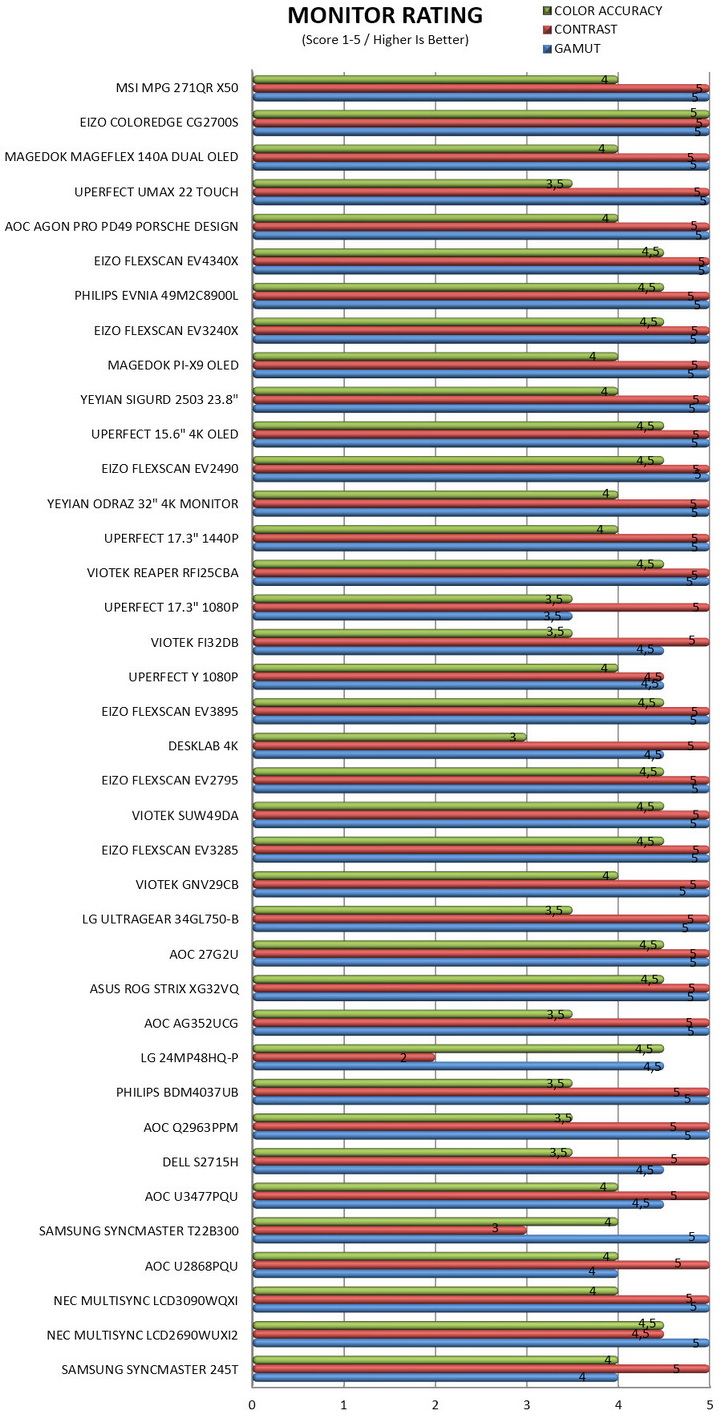


Datacolor rates monitors based on their overall results, so it was decided to include this chart as well.


POWER CONSUMPTION
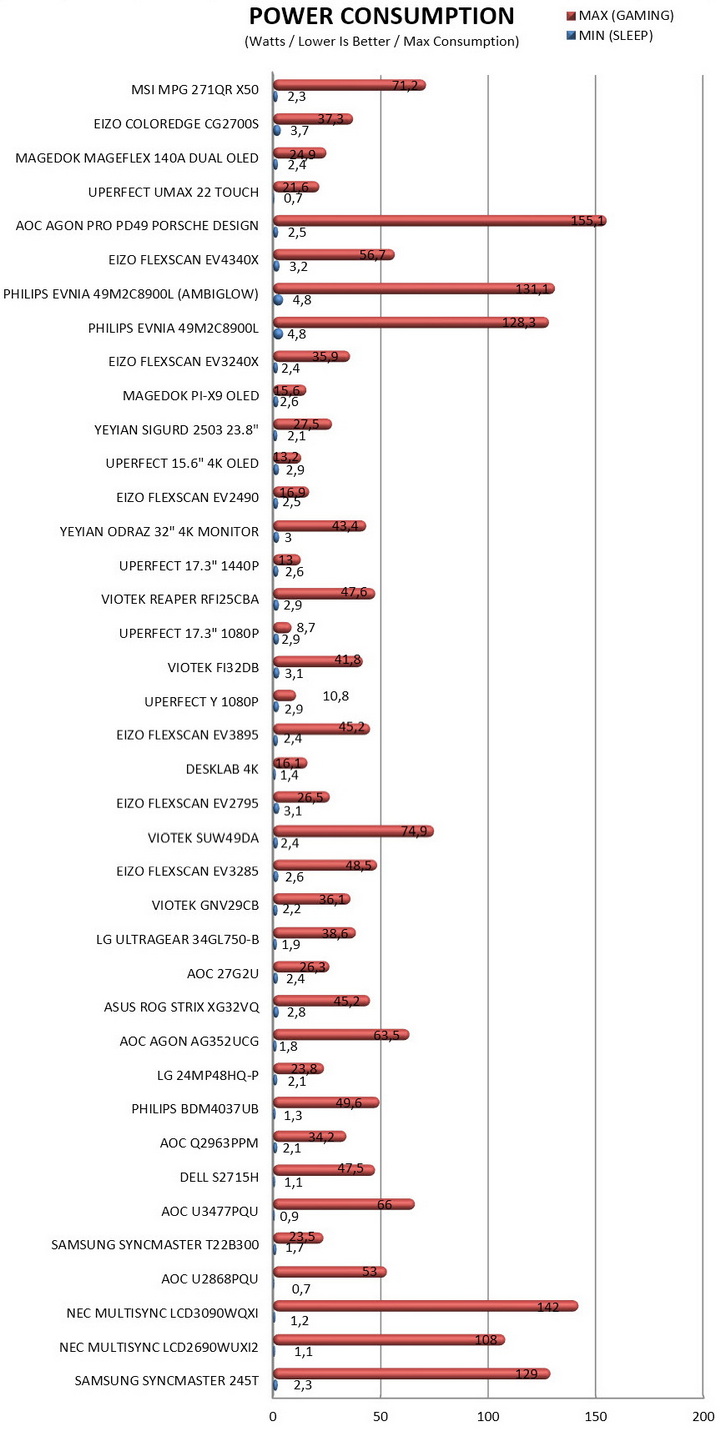
Power consumption may not be what most people look for when out to get a brand-new monitor but at the end of the day it's still an important factor, so I do hope this is of interest to some of you.


CONCLUSION


msi mpg 271qr qd oled x50 review b


    Despite its compact 27‑inch footprint, the MPG 271QR QD‑OLED X50 by MSI lands as one of the most complete gaming displays available today, combining excellent gamut accuracy, clean grayscale handling, and the inherently rich image quality of Samsung’s third‑generation QD‑OLED panel. Brightness performance lands at roughly 396 nits in real‑world full‑screen measurements, which is among the best results for this panel class (advertised 1000‑nit‑plus HDR peaks apply only to extremely small highlights - around a 1% window - where the panel can momentarily concentrate its luminance without triggering ABL or thermal limits). Motion performance is in a league of its own thanks to the 500Hz refresh rate and near‑instantaneous pixel transitions, and the extensive suite of panel‑safety mechanisms, including MSI’s OLED Care 3.0 and the graphene‑enhanced cooling system, adds welcome peace of mind for long‑term use. Practical touches like the fully adjustable stand, integrated KVM switch, and a USB‑C port capable of delivering nearly 99W of power make it a genuinely versatile desktop monitor rather than a single‑purpose gaming display. Its shortcomings are relatively minor, there are no built‑in speakers (not a serious issue but they could come in handy), power consumption is higher than expected for a 27‑inch screen, and the aggressive anti‑reflective coating can introduce a subtle graininess on bright backgrounds. Even so, the overall package stands out, exceptional motion clarity, strong HDR impact within the limits of QD‑OLED physics, accurate color, and thoughtful ergonomics combine to make the MPG 271QR QD‑OLED X50 one of the most polished executions of a modern high‑refresh QD‑OLED monitor.


    Right now, and after a recent price slash by MSI the MPG 271QR QD-OLED X50 Gaming Monitor retails for USD699.99 inside the USA (Amazon.com) and for 884.68Euros (Amazon.de) so it’s priced more or less what one would expect. At the end of the day given the MPG 271QR X50 QD‑OLED’s target audience, the real value of its 500Hz mode sits squarely in competitive esports. Even with the top GPUs currently available only competitive titles like CS2, Valorant, and Overwatch 2 can sustain 300–400 FPS, letting the panel’s extreme scanout speed cut latency, scanout time, and sample‑and‑hold blur beyond what 240-360Hz can deliver. The gain however isn’t about hitting 500 FPS, it’s about tighter input granularity and more stable frametime behavior in high‑speed aim scenarios where milliseconds actually matter. That’s where the MPG 271QR QD-OLED X50 extreme refresh headroom actually translates into measurable competitive value and that along with its image quality and features are more than enough for the Golden Award.

gold

PROS


- Build Quality
- 2560x1440p WQHD Resolution
- 500Hz Refresh Rate
- QD OLED Panel (3rd Gen Samsung)
- Very Good Image Quality
- Features (GSYNC, FreeSync Premium Pro, True Black 500, EOTF Boost, AI Sensor, PIP, PBP)
- Rear RGB LED Bar
- 0.03ms GTG Response Time
- Stand Features (Tilt / Swivel / Pivot / Height Adjustment)
- Built In KVM / USB Hub
- Available Connectors (2xHDMI v2.1 / DisplayPort v2.1a / USBC PD 90W / 3.5mm Mini Jack)
- 3 Year Limited Warranty (Burn In Included)


CONS


- No Built In Speakers
- Power Consumption (For The Size)
- Price (For Some)


Formula V Line FV-1200PM ATX 3.1 Power Supply Unit Review

INTRODUCTION


formula v line fv 1200 pm review a


    Modern high‑performance systems place unprecedented demands on their power supplies, especially as GPUs and CPUs continue to push higher transient loads and sharper power excursions. This has shifted the PSU from a background component to a critical part of system stability, where electrical behavior under dynamic conditions matters just as much as raw wattage. ATX 3.1 and PCIe 5.1 have become the new baseline for next‑generation builds, defining stricter transient‑response requirements and introducing the 12V‑2x6 connector for safer, higher‑capacity GPU power delivery. The FV‑1200PM represents Formula V Line’s entry into the Platinum‑class ATX 3.1 and PCIe 5.1 space and that's obviously also what today's review is all about.


    Formula V Line is a Taiwanese company founded by a group of professionals in 2012. Our main product lines include various computer cases, power supplies and air-cooling systems for computers. Our research and development team can bring your best ideas to life. Formula V Line's mission is to create reliable products with the best price-quality ratio. For more information, visit http://formulav-line.com/

    The FV PM line of power supply units currently includes three output variants (850/1000/1200W) available in both black and white colors. The 1200W output model which I have here with me today is ATX 3.1 & PCIe 5.1 compliant and 80 PLUS Platinum certified (up to 92% efficiency) and features a single 12V-2x6 power connector, four 6+2 pin PCIe power connectors, single +12V rail (100A) capable of delivering 100% of the units’ power output (1200W) and has a total power output of no less than 1348W (peak should be up to 2700W for up to 100ms - once again however this is not something I can test). The FV-1200PM also features a half-bridge & LLC Resonant Converter with DC to DC design, active PFC, zero fan mode for its 120mm fan (starts spinning after 40% load), high-quality Japanese capacitors certified for use up to 105 degrees Celsius and a full array of electrical protections including over-current (OCP), over-voltage (OVP), under-voltage (UVP), short-circuit (SCP), over-temperature (OTP), surge and in-rush (SIP), no-load operation (NLO) and over-power (OPP). As for warranty Formula V Line covers the entire FV PM line of PSUs with a 10-year limited one.


SPECIFICATIONS AND FEATURES


PACKAGING AND CONTENTS


formula v line fv 1200 pm review 1t

A partial product picture is placed at the front of the box along with the company logo and the main product features.


The electrical tables of all three available models are printed at the rear.


Typically, the unit is wrapped inside a synthetic cover and placed between two pieces of foam.


Along with the FV-1200PM, its power cord and modular cables inside the box you'll also find 4 zip ties, 4 mounting screws and the user manual.


THE FV-1200PM EXTERIOR


All modular cables feature individually sleeved cables, including the 12V-2x6 cable.


Measuring just 140mm in width, 150mm in length and 86mm in height the FV-1200PM is a compact model.


Formula V Line has chosen to use an 120mm fan with this model.


The company logo is printed on both sides.


As usual the electrical table is printed on a sticker located at the base of the enclosure.


All 12 modular power ports are tagged.


At the rear of the unit, we find the on/off and hybrid fan switches and the power port.


THE FV-1200PM INTERIOR


Formula V Line has removed the name of the fan manufacturer so I don't know its specifications.


The OEM behind the FV-1200PM is Dongguan Sanren (SANR).


Primary capacitors are manufactured by Rubycon and are certified for use up to 105 degrees Celsius.


Secondary capacitors are manufactured by Nippon Chemi-Con and Rubycon and are again certified for use up to 105 degrees Celsius.


TEST BED


xeon x5660


TESTING METHODOLOGY


     Using a dedicated measurement instrument such as a Chroma or a SunMoon to test power supply units is without doubt the most ideal and accurate way (not to mention the fastest) to do that currently. However, it's certainly not the only way there is and so pretty much anyone can test a power supply unit just by using a test rig. Certainly, limitations do apply and so you can't really push a 1000W power supply to its limits if your system only uses 500W at peak loads and that's why over the years we saved certain hardware components for the purpose of building a dedicated PSU test rig. True it may not be as accurate as the above-mentioned solutions, but it comes really close and is in fact much closer to real world usage. So as always, we ran several games with maximum graphic options enabled at a resolution of 2560x1600 in order to stress every hardware component and increase the overall power demands of the system. The Passmark BurnIn Test was also used to overstress the components in an effort to provide the most accurate results possible. As a final test we also used the latest OCCT software and its dedicated PSU testing suite since it can really bring a power supply to its knees after inside a few minutes.


   Rail stability was checked/measured with the CPUID Hardware monitor and a Metex multimeter which also recorded the system load in idle and in load. As always try to remember that the power consumption numbers listed in the graph are the highest (Peak) ones recorded during the entire duration of the tests and not the average ones. Noise levels coming from the fan were recorded using the high precision HD600 ExTech Sound dBA Meter from the rear of the unit and at a range of no more than 5-10cm. Readings under load are recorded the exact moment we manually switch the fans of all graphics cards from full speed to almost zero, that way the fan of the power supply does not have enough time to slow its RPM and so by doing this we get very accurate noise level readings. Needless to say, in order to get 100% accurate readings, you need to have a noise isolated room for that exact purpose, something which is quite impossible unless you are working inside a real lab (some people use very small noise insulated boxes but due to their size both heat and noise exceed normal levels and so the results can't really be considered to be 100% accurate, nor realistic for that matter). Also do take into account that since all noise measurements take place from just 5-10cm away the final noise levels to reach your ears will be considerably less.


* After well over 10 years of testing PSUs the Intel Core i7-920 CPU of this rig failed and so we replaced it with a Xeon X5660 (we also swapped the GA-X58A-UD7 for the G1. Assassin).


TEST RESULTS


CONCLUSION


formula v line fv 1200 pm review b


    As the review comes to a close, the Formula V Line FV‑1200PM proves itself to be a well‑rounded Platinum‑class option with clear strengths. It delivers very good rail stability, relatively low noise levels, and a compact footprint that makes installation easier than many competing 1200W units. Its 80 PLUS Platinum efficiency keeps thermals and power waste low, reinforcing the PSU’s overall refinement. The drawbacks are modest but worth noting, SANR isn’t the most established OEM (somewhat popular lately however), the single 12V‑2x6 connector limits flexibility for future GPU configurations, and the model’s very low availability makes it harder to source. Even so, the FV‑1200PM stands as a capable, efficient, and quiet ATX 3.1 & PCIe 5.1 unit.


    Even though like many other models by Formula V Line the FV-1200PM 80 PLUS Platinum power supply unit is not widely available it does retail around the world for around USD160/160Euros and so it’s priced well, more or less. Availability and cost aside the FV-1200PM performs very well, does so without its 120mm fan becoming annoying and is covered by a 10-year limited warranty so the Golden Award is in order.

PROS


- Build Quality (100% Japanese Capacitors)
- Good Rail Stability
- ATX 3.1 & PCIe 5.1 Compliant
- 80 PLUS Platinum Certified
- 1200W Output
- Electrical Protections (OCP/OVP/SSP/OPP/UVP/SPD/OTP/SIP/NLO)
- Available In Black And White Colors

- 10 Year Limited Warranty


CONS


- Availability (Current)
- OEM Manufacturer (For Some)


SteelSeries Arctis Nova Pro Omni Hi-Res Wireless Gaming Headset Review

INTRODUCTION


steelseries arctis nova pro omni review a


    Across the landscape of gaming headsets, from the dependable clarity of wired models to the untethered freedom of wireless designs, the conversation always circles back to precision, comfort, and long‑session endurance. Wired options still appeal to purists who want zero latency and a connection that never wavers, while wireless headsets have evolved into low‑latency, multi‑device tools that keep your setup clean and your movement unrestricted. At the high end, the best models blend both worlds, audiophile‑grade drivers, premium build quality, and connectivity that adapts to whatever the game, or the day demands. It’s exactly in this refined tier that the Arctis Nova Pro Omni Hi-Res Wireless Gaming Headset by SteelSeries steps in, aiming to deliver a flagship experience for players who want everything without compromise.


    SteelSeries is the original esports brand that fuses gaming & culture, leading the way in defining a gaming lifestyle, and we have the power to help gamers through our brand, our vision, and our products. The role that gaming plays in moving culture forward is essential, and our worldwide brand creates industry-defining gaming and lifestyle peripherals with a focus on premium quality, innovation, and functionality. SteelSeries is obsessed with helping make a difference by enhancing performance through first-to-market innovations and technologies that empower gamers and fans to push boundaries. Founded in 2001, SteelSeries was the pioneering supporter of esports and competitive gaming tournaments and continues to connect gamers and foster a sense of community and purpose. The SteelSeries family of professional and gaming enthusiasts, entertainers, and athletes is the driving force behind the company and helps influence the design, craftsmanship, and engineering in every piece of gear we create, as well as the brand’s software ecosystem (SteelSeries GG, Moments video clip service, and the Sonar Audio Software Suite). The SteelSeries family of brands includes KontrolFreek, the industry leader in high-performance controller accessories, and Nahimic, the leader in 3D sound solutions for gaming. In 2022, SteelSeries joined the GN family, a global leader in innovative and intelligent audio and video communications solutions sold in approximately 100 countries around the globe.


    SteelSeries packs the Arctis Nova Pro Omni with a stack of high‑end tech. Its Nova Acoustic System combines 40mm neodymium custom high‑fidelity drivers with a 96kHz/24‑bit capable signal path (10Hz-40kHz frequency response), pushing clarity, spatial accuracy, and low‑noise reproduction far beyond typical gaming headsets. The OmniPlay multi‑system architecture expands that foundation across PC, PlayStation, Xbox, Switch, and mobile, using a unified control ecosystem (3.5mm, USB-C, 2.4GHz and Bluetooth v5.3) so you can move between devices without re‑pairing or losing settings. Communication is handled by the ClearCast Gen 2 microphone, a retractable omni-directional boom model (32kHz/16bit, 50Hz-16kHz frequency response) with AI‑powered noise filtering that isolates your voice while suppressing keystrokes, fans, and room noise. For environmental control, the headset integrates hybrid Active Noise Cancellation with outward and inward facing microphones, plus a Transparency Mode that lets you monitor surroundings without removing the headset. Power is effectively continuous thanks to the Infinite Power System, which uses two hot‑swappable batteries and a base station charger so you can run indefinitely. SteelSeries GG software suite ties everything together, Sonar provides parametric EQ, spatial audio tuning, mic shaping, and cross‑device profiles, while the mobile app gives you on‑the‑fly control of EQ, ANC, and device switching. Add in the premium build steel headband, adjustable ComfortMAX fit system, soft‑touch ear cushions, and a design meant for marathon sessions and the Nova Pro Omni reads less like a gaming headset and more like a fully integrated audio command center.


SPECIFICATIONS AND FEATURES


PACKAGING AND CONTENTS


Typically, at the front of the box, we find a large product picture, company logo and the main product features.


The product features and specifications along with the contents of the bundle are printed on the left side.


4 pictures are used to showcase the main product features at the rear of the box.


The headset is wrapped inside a cloth storage pouch and placed in a formed piece of plastic.


Aside the Arctic Nova Pro Omni inside the box you'll also find the gamehub, extra 670mAh lithium-ion battery, microphone pop filter, two 1.5-meter-long USB-C to USB-A cables and the product information guide.


THE ARCTIS NOVA PRO OMNI


The Arctis Nova Pro Omni weigh 339g and are made of aluminum, plastic, foam and leatherette.


This is a medium sized gaming headset.


SteelSeries has placed their logo on the exterior of both earcups.


These plastic discs are magnetically attached to the exterior of the earcups and can be removed (in the case of the left earcup it covers the USB-C charging port).


Each earcup has ANC microphones on top as seen above.


The retractable boom microphone is flexible and has a activity LED at the front.


On the exterior of the left earcup we find the 3.5mm port, volume control roller, microphone mute button, on/off button and an activity LED.


The magnetically attached plastic disc on the exterior of the right earcup protects the lithium-ion battery compartment.


The power button is also located at the rear of the right earcup.


Thanks to the design of the joints the Arctis Nova Pro Omni earcups can swivel up to 90 degrees.


The earpads are medium sized so I expect that they will not be able to accommodate all ear sizes.


Once again SteelSeries uses the suspension (in part) design they were the ones to introduce many years ago.


Even though the suspension design helps achieve high comfort levels the Arctis Nova Pro Omni also extend up to 35mm on either side.


The gamehub device is similar to what SteelSeries has used in the past so again at the front we find an OLED screen and a control knob.


A charging bay for the lithium-ion batteries is located on the right side (use one with the headset while charging the other).


The 3.5mm and three USB-C ports are located at the rear of the gamehub.


Info on the gamehub is printed on a sticker located on its base.


THE GAMEHUB


Initial tab showcases the 48kHz/24bit audio output, ChatMix wheel (shows how game and chat audio are balanced - can adjust via the wheel) and the current battery charge.


You can also switch between inputs, and access audio options like the equalizer (lets the end user choose or tweak a sound profile), gain (output strength), noise control (adjusts how much background noise gets filtered), microphone, connectivity, line out and audio output.


From inside the system settings area, you can adjust the display (brightness/behavior), mic LED intensity, Sounds (controls UI beeps), auto off (defines when the unit powers down) and power saving (toggles energy‑saving behavior).


Finally, we have the about (shows firmware and device info), tutorial and reset tabs.


GG SOFTWARE


There are three ways to "control" the Arctis Nova Pro Omni, either via the Gamehub, GG PC software or the smartphone app for when used with consoles.

Once again, this software detects connected devices by SteelSeries and informs you of available firmware updates (there were for both the Arctis Nova Pro Omni and the GameHub).


From the initial tab you can tweak the equalizer, load one of the many available presets, switch between 2.4GHz and Bluetooth, adjust the microphone volume and noise control and even enable/disable a volume limiter.


Of course from the microphone tab you can also adjust its equalizer, volume, sidetone, noise control and mute LED brightness.


You can also adjust the inactivity turn off timer, set the OLED screen brightness, adjust the OLED screen display mode, enable the screensaver feature, set the prefered Bluetooth call function, and perform a factory reset.


The sonar audio optimization is an important feature and as with pas headsets by SteelSeries there are 4 main tabs inside the Sonar tab the first of which is mixer which controls the volume across all of them.


Then we have game which allows you to set the equalizer (can make your own or choose one of the almost 300 presets), enable/disable spatial audio and the volume boost and smart volume modes.


Under the chat tab we find everything related to chat including equalizer, clearcast AI noise cancellation, noise reduction, compressor and noise gate.


The mic tab is almost identical to the chat one so again from here you can access the equalizer function, clearcast AI noise cancellation, noise reduction, compressor, and noise gate.


CONCLUSION


steelseries arctis nova pro omni review b


    Stepping back from the feature list and looking at the Nova Pro Omni as a complete package, what stands out to me is how confidently it delivers on the fundamentals that matter in a flagship headset. The Hi‑Res audio chain gives it a level of clarity and spatial precision that feels immediately more refined than typical gaming‑tuned sound, and the build quality reinforces that impression with its steel frame, clean adjustments, and long‑session comfort. The multi‑device compatibility is another major strength in my experience; it behaves less like a single headset and more like a central audio hub that adapts to whatever you’re using at the moment. And the dual‑battery Infinite Power system remains one of the smartest design choices here—being able to swap batteries without ever powering down makes the headset feel genuinely uninterrupted in day‑to‑day use (battery life can last anywhere between 15 and 22 hours, depending on usage). The trade‑offs on the other hand are real, but they don’t overshadow the overall experience. The volume behavior, especially at the upper end, doesn’t always scale the way I’d like, and the premium price puts it firmly in enthusiast territory. But even with those limitations, the broader picture doesn’t change, the SteelSeries Nova Pro Omni succeeds because its strongest qualities like audio fidelity, construction, platform flexibility, and battery design are executed with a level of consistency that justifies its ambitions.


    SteelSeries released the Arctis Nova Pro Omni just over a month ago and currently it retails for USD399.99 inside the USA (Amazon.com) and for 416.80Euros inside the EU (Amazon.de). This means that just like their previous Arctis Nova Pro models this is a wireless gaming headset with a specific target audience. Price aside however the Arctis Nova Pro Omni delivers as advertised and even though I do think it could be better (perhaps that’s exactly what the Elite model is – will try to get it in the lab next) it’s still more than enough for the Golden Award.

PROS


- Good Build Quality
- HiRes Audio Quality (96kHz/24bit)
- OLED GameHub (Up To 4 Audio Sources)
- 2 Lithium Ion Rechargeable Batteries (Up To 30 Hours Each)
- Very Comfortable
- Positioning Audio Via Sonar 7.1
- Universal Compatibility
- SteelSeries GG Software
- Available In 3 Colors (Black, White & Midnight Blue)


CONS


- Price (For Some)
- Volume Levels
- Sonar Software Feature (PC Only)


NVIDIA GeForce RTX 5070 Founders Edition Graphics Card Review

INTRODUCTION


geforce rtx 5070 founders review a


    A new GPU generation always arrives with a mix of expectation and skepticism, especially in an era where ray tracing, AI‑assisted rendering, and increasingly complex game engines push hardware harder than ever. NVIDIA’s GeForce 50‑series marked a clear architectural pivot toward neural‑assisted graphics, blending traditional raster performance with machine‑learning‑driven techniques that reshape how frames are built. And after a long wait - nearly 18 months since its original launch window - NVIDIA finally sent over the GeForce RTX 5070 Founders Edition, a card positioned to show what Blackwell’s mid‑range silicon can really do.


    NVIDIA (NASDAQ: NVDA) is the world leader in AI and accelerated computing. The pioneer of GPU-accelerated computing, NVIDIA specializes in products and platforms for the large, growing markets of gaming, professional visualization, data center, and automotive.


    The GeForce RTX 5070 is built on the GB205 silicon with 48 SMs (streaming multiprocessors), delivering 6144 CUDA cores, 192 Tensor cores, 48 RT cores, 192 TMUs, and 80 ROPs, backed by 48MB L2 cache. It features 12GB GDDR7 on a 192‑bit bus running at 28Gbps, yielding 672GB/s bandwidth. GPU boost clocks reach 2512MHz, and the card implements PCIe 5.0x16. The GB205 die includes 5 GPCs, plus one each of the latest NVENC and NVDEC engines, all fabricated on NVIDIA’s 4N process. It also introduces Neural Rendering powered by Blackwell’s AI‑driven graphics pipeline, combining neural objects with traditional rasterization through the new AI Management Processor. It adds concurrent FP32+INT32 execution on every CUDA core, 4th‑gen RT cores prepared for Mega Geometry, and 5th‑gen Tensor cores with FP4 support. The Founders Edition uses a compact Dual Flow‑Through cooler within SFF‑Ready dimensions and targets higher sustained clocks with a 250W TGP. PCIe 5.0, next‑gen NVENC/NVDEC, and architectural IPC gains round out the generational uplift.


SPECIFICATIONS AND FEATURES


PACKAGING AND CONTENTS


NVIDIA uses a simple cardboard box (probably from recycled paper) to ship the GeForce RTX 5070 FE.


The card itself is actually placed inside a secondary box (probably also made by recycled materials).


Along with the GeForce RTX 5070 Founders Edition card NVIDIA has placed just a two 8-pin PCIe to 12V-2x6 power adapter and a quick start guide.


THE GEFORCE RTX 5070 FE


Just like with past Founders Edition models the GeForce RTX 5070 FE carries the same industrial design language NVIDIA has refined over the last few generations, a dense, sculpted block of aluminum with a minimalist, almost architectural presence.


The matte metal frame wraps around the card in a seamless loop, interrupted only by the signature X‑shaped brace that gives the cooler its rigid, engineered look.


On the front, the dual‑axial fans dominate the design, large, quiet, and framed with precision, giving the card a sense of purpose rather than decoration.


The top has two long openings and the 12V-2x6 power connector.


The rear exhaust cutout and the clean row of display outputs (3xDP v2.1b / 1xHDMI v2.1b) reinforce that functional aesthetic.


Yes, for some people the lack of RGB/ARGB lighting may push them towards models by NVIDIA partners but I think it looks great.


TEST BED


gpu bench


TESTING METHODOLOGY


    Since I changed my graphics card test rig i decided to tweak things a bit and so the entire testing methodology has changed. So, for the foreseeable future for tests, I’ll be using the EV3285 monitor by EIZO (later on I may also add tri-monitor results since I do have 2 cockpits here in the lab) for 2160p UHD (3840x2160p), 1440p (2560x1440p) and 1080p Full HD (1920x1080p) tests. Needless to say, since most of you voted for it, I’ll also be using the Intel Core I9-13900K (5.8GHz P/4.7GHz E/4.9GHz RING), EVGA Z790 DARK test rig which I’ve completed with the Kingston FURY RENEGADE LIMITED EDITION 48GB DDR5 8000MHz CL36 dual-channel kit.


    Most games have also been changed so instead of manually testing every single one (and always allowing a small percentage of error) i chose all the latest ones to feature a built-in benchmark. In certain cases, built-in benchmarks may perform better than in-game, but my purpose is comparison and not what one can expect in terms of in-game performance. So, this list includes Chernobylite, Cyberpunk 2077, F1 2022, Far Cry 6, Forza Horizon 5, Guardians Of The Galaxy, Horizon Zero Dawn CE, Metro Exodus Enhanced Edition, Red Dead Redemption 2 and Returnal. Also, since some of you have asked for Synthetic benchmarks in the past, I’ll also be using Speed Way and Port Royal from 3D Mark.


    As with the past options like power saving, sharpness, overlays and even zero fan mode are all disabled in the cards we’re testing (to achieve the purest and maximum performance) and all tests are repeated a total of 3 times in a fresh Windows 11 Pro installation with all updates installed until the day of our review (same as all the games used). Room temperature is as usual controlled and steady at 23 degrees Celsius for all tests and to record the temperatures of the cards we used AIDA64, and GPU-Z. Recording noise levels is done with an ExTech HD600 dBA meter from a distance of just 15cm away while power consumption is measured again using GPU-Z.


TEST RESULTS – SPEED WAY


3DMark Speed Way’s engine is assembled to demonstrate what the latest DirectX API (12 Ultimate) brings to ray traced gaming, using DirectX Raytracing tier 1.1 for real-time global illumination and real-time raytraced reflections, coupled with new performance optimizations like Mesh Shaders.


TEST RESULTS – PORT ROYAL


3DMark Port Royal is the world’s first real-time ray tracing benchmark for gamers. It shows you how well your PC handles ray tracing effects in real-time.


TEST RESULTS – CHERNOBYLITE


Chernobylite is a 1st person RPG set in the hyper-realistic, 3D-scanned wasteland of Chernobyl's Exclusion Zone. It's based on Unreal Engine 4 and will be used at Ultra graphics (RT Ultra/Off).


TEST RESULTS – CYBERPUNK 2077


Cyberpunk 2077 is the latest game by CD Project and is based on their REDEngine 4. Graphics are set at Ultra/Psycho (RT Psycho/Off).


TEST RESULTS – F1 2022


F1 2022 is built on Codemasters' in-house engine, EGO, which has been upgraded to include DX12 and Raytracing. Graphics are set to Ultra High (RT is enabled in all tests).


TEST RESULTS – FAR CRY 6


Far Cry 6 is based on the Dunia engine. Graphics are set to Ultra with DXR enabled.


TEST RESULTS – FORZA HORIZON 5


Forza Horizon 5 uses ForzaTech, a proprietary engine built by Turn 10. Graphics are set to Extreme (RT is always enabled at high).


TEST RESULTS - GUARDIANS OF THE GALAXY


Guardians Of The Galaxy is based on the Dawn Engine by EIDOS. Graphics are set to maximum (RT Ultra/Off).


TEST RESULTS - HORIZON ZERO DAWN CE


Horizon Zero Dawn CE (Complete Edition) is based on Guerrilla Games' Decima engine. Graphics are set to Ultimate Quality.


TEST RESULTS - METRO EXODUS ENHANCED EDITION


Metro Exodus Enhanced Edition is based on the 4A Engine and contains huge graphical upgrades compared to the normal version, including Ray Traced Emissive Lighting. Graphics are set at Extreme quality.


TEST RESULTS – RED DEAD REDEMPTION 2


For Red Dead Redemption 2 Rockstar has used their RAGE engine (Rockstar Advanced Game Engine). Graphics preset level slider is set to favor quality.


TEST RESULTS – RETURNAL


returnal

Returnal is also based on Unreal Engine 4. Graphics are set to EPIC (RT EPIC/Off).


TEST RESULTS – MULTI FRAME GENERATION / BLACK MYTH WUKONG / F1 2025 / CYBERPUNK 2077 PHANTOM LIBERTY


blackmyth2160pdlss

cyber2160pdlssframe


TEST RESULTS - OVERCLOCKING


gpuzoc

Using 406MHz extra on the core and 350MHz on the VRAM (strangely enough GPUZ didn’t show the jump in RAM speed) resulted in a very good boost in performance (going higher would result in games crashing to desktop). I also recommend tweaking voltage curves since undervolting this card is quite easy (recommend MSI Afterburner for anything OC).

forza1080poc


TEST RESULTS - POWER CONSUMPTION / TEMPERATURES / NOISE LEVELS


CONCLUSION


geforce rtx 5070 founders review b


    NVIDIA taking so long to send over a GeForce RTX 5070 FE sample ended up being both a blessing and a drawback. On the positive side, over a year's worth of driver updates have noticeably improved the card’s performance compared to launch. On the negative side, eighteen months is a long wait in this industry. NVIDIA also put extra emphasis on DLSS 4.5 and Multi‑Frame Generation with the GeForce RTX 5xxx series, so I evaluated those gains by adding DLSS tests across several titles and using Black Myth Wukong, Cyberpunk 2077 Phantom Liberty, and F1 2025 to measure MFG performance (DLSS Quality mode, 2x/4x MFG). So, from my time with the GeForce RTX 5070 Founders Edition, it’s clear that DLSS 4.5 and Multi‑Frame Generation aren’t optional extras, they’re the backbone of the experience. Raw performance alone puts the card in familiar 70‑series territory (Raster performance alone is a small improvement over the RTX 4070, and even ray‑traced workloads don’t dramatically shift the hierarchy), but once you flip on DLSS 4.5, the GPU suddenly feels a tier higher. The updated transformer model cleans up motion stability, and Dynamic MFG although not quite perfect yet does a very good job of pushing frame rates right up to your panel’s refresh ceiling without the jitter or input‑lag spikes older FG versions struggled with. Even 4x and 6x MFG modes feel surprisingly natural, delivering a level of fluidity that belies the card’s mid‑range positioning. Yes, you can still spot the occasional artifact in chaotic scenes (in my case I encountered instant white screens a few times), but the trade‑off is overwhelmingly worth it, DLSS 4.5 is what transforms the RTX 5070 from “solid” to “genuinely exciting” in modern AAA workloads. Power consumption is another quiet win since in most cases during real gaming the GeForce RTX 5070 hardly ever surpasses 200W (although during all my benchmarks it did break the 250W barrier), making it both cooler and more efficient than you’d expect for this class. Unfortunately, even though the cooling system is sufficient in order for NVIDIA to keep noise levels at low levels they had to compromise.


    NVIDIA’s GeForce RTX 5070 Founders Edition has quietly slipped out of the retail ecosystem, no store lists it, no distributor expects it, and NVIDIA hasn’t pushed any new batches. With the FE effectively gone, the only remaining path is to pick from the various AIC partner designs, which currently start at around USD549–579 in the USA and roughly 620–670Euros in the EU for brand‑new cards. In terms of price‑to‑performance, the GeForce RTX 5070 lands in a strong position, it outpaces the previous‑gen RTX 4070 while launching at a lower street price, and on the AMD side, the only real modern counter is the RX 9070 GRE, a card that trades blows in pure raster but still falls behind once ray‑tracing and mixed workloads enter the picture, leaving the GeForce RTX 5070 as the more balanced option at roughly the same money. Overall, the GeForce RTX 5070 FE delivers where it matters and even though it’s not quite perfect the Golden Award is in order.

PROS


- Build Quality
- Design
- Excellent 1440p Performance
- Supported Technologies (DLSS 4.5 / MFG / Reflex / GSync)
- Size (242x112x39mm, 2 Slot Card)
- Good Overclocking Headroom
- Power Consumption, Noise Levels


CONS


- 12GB (For Some)
- Temperatures
- Availability


Fanttik C8 Nano, NEX K2 Ultra & F2 Pro Cordless Tools Review

INTRODUCTION


fanttik c8 nano k2 ultra f2 pro electric tools review a


    Today’s DIY users expect more than simple convenience, they want tools engineered for accuracy, torque consistency, and reliability across a wide range of materials and tasks. Compact electric drivers and precision tools have become essential for anyone who repairs electronics, builds small projects, or maintains equipment at home. This shift toward high‑efficiency compact drivers has pushed manufacturers to deliver smaller housings, smarter control systems, and stronger motors without sacrificing ergonomics. Fanttik’s latest trio—the C8 Nano, NEX K2 Ultra, and F2 Pro fits squarely into that evolution, offering three distinct form factors built for different levels of precision and power.


    Fanttik is a premier provider of innovative power tools. The brand is the Official Partner of the Houston Rockets for the 2025-26 NBA season, and served as an Official Partner of UFC in 2025. Since 2022, Fanttik has been a primary partner for multiple NASCAR drivers such as Noah Gragson. The brand’s compelling digital content has amassed over 1.1 billion video views on TikTok, and its products are available in major retail channels including Walmart, Lowe’s, Sam’s Club, and Costco. Guided by its brand slogan “Ideas for a Fantastic Life,” Fanttik continues to empower users to build their ideas simply.


    Fanttik’s trio of compact tools the F2 Pro, NEX K2 Ultra, and C8 Nano cover an unusually wide range of DIY and craft work without stepping on each other’s toes. The F2 Pro is the precision piece of the lineup, a cordless rotary tool built around a 5‑speed, 5000–25000 RPM motor, paired with a 3000mAh lithium-ion battery and a pressure‑sensitive control switch that gives you fine control over engraving, polishing, sanding, and light cutting. Its accessory system is unusually polished, with the RevoStor magnetic hub and a pop‑up aluminum case that keeps all 55 included bits organized instead of scattered. The NEX K2 Ultra shifts into everyday utility with a compact brushless drill/driver that delivers up to 30Nm of torque and 1250RPM, wrapped in a short, maneuverable body that’s easier to use in tight spaces than a traditional drill. Its dual‑screen interface shows torque, direction, and mode at a glance, and the TapSwitch electronic gear shifting makes it feel more modern than most compact drivers. With a 2500mAh lithium-ion battery and a full set of screwdriver and drill bits inside a versatile base, it’s a genuinely versatile tool for assembly, repairs, and light drilling. The C8 Nano rounds things out with a purpose‑built electric scissor system that handles cardboard, carpet, leather, and fabric far more comfortably than manual cutters. Its three‑speed motor (230RPM no load speed), quick‑swap blade mechanism, LED display, 2000mAh lithium-ion battery pack and built‑in work lights make it ideal for long cutting sessions or craft work where precision and ergonomics matter. Together, these three tools form a compact, well‑balanced kit that covers fine detail work, general DIY tasks, and material cutting with a level of refinement that feels consistent across the lineup.


SPECIFICATIONS AND FEATURES


PACKAGING AND CONTENTS


fanttik c8 nano k2 ultra f2 pro electric tools review 1t

Fanttik uses black and yellow boxes for their products all of which have their logo at the front along with a product picture and the main features (at least in the case of the NEX K2 Ultra and F2 Pro).


The product specifications are printed at the rear along with contact information for Fanttik.


Packing in the case of the C8 Nano and the NEX K2 Ultra is very good with both devices placed inside pieces of foam (the F2 Pro just comes in its case).


All three tools come with rich bundles, the C8 Nano with an extra blade, metal plate, USB-C charging cable, storage bag, warning paper and its user manual, the NEX K2 Ultra with its 2-piece base, push-open bit storage compartment (includes 10 screwdriver bits, 5 wood drill bits and 5 metal drill bits), USB-C charging cable, storage bag, quick start guide and its user manual and the F2 Pro with its aluminum case (includes a magnetic rotating box with 55 accessories), accessory box, USB-C cable, paper showcasing all accessories and the user manual.


THE C8 NANO


As with all three electric tools in this review the C8 Nano body is made out of plastic.


In order to use this tool, you need to press both the side button and trigger (safety).


Speed can be controlled from the rear end of the C8 Nano (3 speed modes).


The tool also has a LED torch at the front so you can better see what you cut.


The rear LCD screen allows the end user to monitor remaining battery life as seen above.


To replace the blade, you only need to unscrew the center piece with the bundled metal plate.


As expected, a USB-C charging port is located at the base of the C8 Nano.


THE NEX K2 ULTRA


fanttik c8 nano k2 ultra f2 pro electric tools review 13tThe NEX K2 Ultra features a two-piece base (lower made of plastic, top made of aluminum and plastic) which you can use to place the cordless drill on.


Just like the C8 Nano at the rear we find an LCD screen where you can see remaining battery life, RPM (drill mode), Nm (driver mode) and a button from where you can change modes (RPM/Nm can be changed by the rear as with the C8 Nano).


On the side we find yet another small display and a button next to it used to change direction.


The NEX K2 Ultra has a LED ring at the front.


Once again, the USB-C charging port is located at the base of the tool.


The front button/trigger is pressure sensitive (variable speed) as with several drills in the market.


Worth pointing out is that inside the lower base piece you’ll find 10 screwdriver bits, 5 wood drill bits and 5 metal drill bits (rather basic in quality however).


THE F2 PRO


Almost the entire F2 Pro bundle is placed in a convenient metal case.


To release the F2 Pro rotary tool you just need to push it inwards.


The same more or less applies for the interior which is also how you get to access the dozens of rotary accessories.


Thanks to the touch button on the lower end of the F2 Pro you can also control its speed (indicated by the green LEDs just next to it).


To turn the tool on/off you just need to rotate its base as seen above.


Just like every other similar rotary tool I’ve seen the secure button is located at the front.


Just like with the other two electric tools the USB-C port is located at the rear (short clip showcasing all 3 cordless tools is available on TikTok and YouTube).


CONCLUSION


fanttik c8 nano k2 ultra f2 pro electric tools review b


    Despite targeting casual DIY users rather than professionals, all three Fanttik tools manage to deliver a genuinely solid value proposition. Their compact size and strong price/performance ratio make them easy picks for light home projects, while the overall build quality and battery life hold up well in everyday use. The color options (grey and red/pink depending on region) available for the C8 Nano and F2 Pro add a bit of personality too, something which is quite rare in this category. Their limitations are clear, though, none of them are built for heavy, prolonged workloads (always compared to professional tools like for example my DeWalt cordless drill and Dremel rotary tool), and the lack of hard storage or carrying cases for the C8 Nano and NEX K2 Ultra makes organization and transport less convenient than it should be (also extra cost to get one). Still, for hobbyists and home users, the balance of capability, portability, and cost lands in a very comfortable place (once again a short clip showcasing all 3 models is available in TikTok and YouTube).


    Right now, the C8 Nano cordless electric scissors retail for USD59.99 inside the USA (Amazon.com) and for 50.01Euros inside the EU (Amazon.de), the NEX K2 Ultra brushless cordless drill retails for USD95.99 inside the USA (Amazon.com) and for 83.35Euros inside the EU (Amazon.de) and finally the F2 Pro cordless rotary tool retails for USD89.99 inside the USA (Amazon.com) and for 89.99Euros inside the EU (Amazon.de). Overall, I can’t complain about cost since it’s more or less what we see by similar models from other companies. Bottom line if you’re a DIY person like I am and you’re not looking for professional-grade cordless electric tools these will get the job done and since they do deliver as advertised the Golden Award is in order.

PROS


- Compact Size
- Design
- Features
- Battery Life
- Available Colors (C8 Nano & F2 Pro)
- Price (For Some)


CONS


- Power (DIY Home Tools)
- Lack Of Storage Cases (C8 Nano & NEX K2 Ultra)


be quiet! Dark Rock 6 & Dark Rock Pro 6 CPU Coolers Review

INTRODUCTION


dark rock 6 dark rock pro 6 review a


    CPU air coolers remain the most reliable and maintenance‑free way to keep modern processors under control, especially as power limits continue to climb and boost algorithms push thermals harder than ever. A well‑designed tower cooler still offers an ideal balance of acoustic comfort, thermal consistency, and long‑term durability, without the pump noise, potential leaks, or lifespan concerns that sometimes accompany liquid AIOs. Within this space, high‑end dual‑tower and large single‑tower designs have become the go‑to choice for users running powerful CPUs or chasing near‑silent operation. These coolers rely on dense fin stacks, high‑pressure fans, and carefully engineered heatpipe layouts to deliver performance that rivals mid‑range AIOs while keeping noise levels impressively low. That’s exactly where be quiet!’s new Dark Rock 6 and Dark Rock Pro 6 enter the picture.


        We are the German premium brand manufacturer of quiet hardware components for gaming, workstations and desktop PCs. Since our foundation in 2001, we are proud to have more than 20 years of experience in the industry. Our goal from the very beginning has been to develop products of the highest quality that are not only quiet, but also extremely powerful. With a wide range of power supplies, PC cases, water and air coolers and fans, we have established ourselves as a leading manufacturer in this field.


    As successors to two of the most respected CPU air coolers on the market, the new Dark Rock 6 and Dark Rock Pro 6 aim to refine the formula with stronger thermal performance, updated fan technology, and the same signature stealth aesthetic. Both coolers follow be quiet!’s familiar formula of thick aluminum fin stacks, precision‑machined copper heatpipes, and tightly controlled fan acoustics, the scale however differs significantly between the two. The Dark Rock 6 features a TDP of 220W and uses six, 6mm thick copper heatpipes routed through a tall single‑tower fin array, with the fins spaced closely enough to favor static‑pressure‑optimized airflow. Cooling is handled by a 135mm Silent Wings PWM fan mounted on removable rails, making RAM clearance and installation easier. The fan tops out at 31.1dBA and features a Performance/Quiet switch, which adjusts the PWM curve. The Dark Rock Pro 6 on the other hand features a TDP of 300W and scales this up with seven 6mm thick heatpipes and a dual‑tower structure, giving it a much larger thermal mass and more surface area for sustained high‑load cooling. Airflow comes from a 135mm center fan and a 120mm front fan, both Silent Wings models with FDB bearings and high‑pressure blade geometry. Like the single‑tower model, the Dark Rock Pro 6 includes removable fan brackets and the same Performance/Quiet switch (located on the center fan module).


SPECIFICATIONS AND FEATURES


PACKAGING AND CONTENTS


dark rock 6 dark rock pro 6 review 1t

be quiet! once again uses their all-black boxes the front of which (to be precise it's the top of the Dark Rock 6 box) is taken by a product picture, their logo and the model name.


The specifications table is on the right side (the Dark Rock 6 box also has two product pictures showcasing its main features).


A few words about be quiet! are printed on the left side.


At the rear of the Dark Rock Pro 6 box we find two product pictures used to showcase its main features while at the rear of the Dark Rock 6 box we just find its name and TDP (thermal design power).


Both coolers are placed between two thick pieces of cardboard.


Along with the Dark Rock 6 and Dark Rock Pro 6 be quiet! has bundled a Philips screwdriver, Thermal paste tube, backplate and all the pieces required to mount the coolers onto Intel LGA 1150/1151/1155/1200/1700/1851 and AMD AM4/AM5 motherboards.


THE DARK ROCK 6 & DARK ROCK PRO 6


When placed side by side it's easy to see that the 162mm tall, 139mm wide and 102mm long Dark Rock 6 is dwarfed by the 169mm tall, 140mm wide and 147mm long Dark Rock Pro 6.


Since both models feature removable fans, they have fixed rail Systems on the sides.


The top of the Dark Rock 6 is magnetically attached to the heatsink while the top of the Dark Rock Pro 6 has the center 135mm attached to it.


Needless to say, the front fans are also removable (and height adjustable).


Both the front fan of the Dark Rock 6 and the center fan of the Dark Rock Pro 6 feature a performance/quiet switch (the front 120mm fan of the Dark Rock Pro 6 connects to the center one).


It may not be very easy to distinguish from the above picture but the Dark Rock Pro 6 comes with a total of 51 aluminum fins while the Dark Rock Pro 6 a total of 90 (45x2).


Both coolers feature 6mm thick all-copper heatpipes, difference is that the Dark Rock Pro 6 has one more.


When it comes to base both the Dark Rock 6 and Dark Rock Pro 6 have all-copper nickel-plated ones.


INSTALLATION


Mounting the new CPU air coolers by be quiet! is very easy, first you will need to use the backplate (for Intel systems).

Next you will need to attach the spacers onto the backplate (almost the same if you use an AMD system with the stock backplate).


The brackets come next and here things change a bit since for the Dark Rock Pro 6 you will need to mount them up and down whereas for the Dark Rock 6 you will need to mount them left and right.


Here you can see the difference in size between both coolers (and that the Dark Rock Pro 6 is almost as large as the NH-D15 G2 cooler by Noctua).


TEST BED


285k


TESTING METHODOLOGY


    I always take things quite seriously when it comes to work so just like with the previous LGA1366 and LGA2011 databases every single CPU Cooler in the charts will be tested under the same exact conditions. Testing a CPU Cooler automatically means that you need to know where it stands against the immediate competition and to accomplish that I’ve spent both money and time through the years, something that I honestly plan to continue to do so in order to get the most accurate results for the end consumers who read these lines. Every CPU cooler in this database is tested with the bundled 140mm/120mm/92mm/80mm fans while working at both idle speed and 100% of their speeds for all the temperature tests. CPU Coolers that do not come bundled with a fan/s are measured using a Noctua fan (size dependent on the model) to test for the temperature tests but due to the lack of a stock fan dBA level tests are obviously skipped. Single (120/140mm) watercooling solutions are tested with the radiator mounted at the rear of our test rig while dual/triple/quad (240/260/280/360/420/480/560mm) solutions with the radiator mounted at the top. For the dBA tests every cooler in the database was measured both while on idle mode or with the fan controller in the minimum setting and while on extreme load or with the fan controller all the way to the highest possible setting (PWM fans do that on their own without our intervention). Every single test takes place in a temperature controlled room of 23 degrees Celsius Ambient Temp with the help of two AC units placed diagonally inside the room. The Noctua NT-H2 thermal paste is used with every CPU Cooler. Finally, it's very important to point out that just because a CPU Cooler is better than another when tested with a specific system that does not necessarily mean that the same performance differences will apply 100% for other CPU models and in other situations (such as different ambient temps and system configurations).


    To successfully record the load temperatures, we use the latest OCCT application for around 6-10 minutes to push the processor to its limits and after that is done and the temperatures are recorded, we wait for about 10-20 minutes for the CPU to cool down and record the idle temperatures. This is done to allow time for the thermal conductive material to achieve the optimal performance level. Same procedure is then repeated with the Passmark BurnIn Test as a failsafe just in case the OCCT results are wrong. This procedure is more time consuming than the usual peltier/thermometer tests but this way not only can readers get results based on real CPUs but those results can also be triple checked by using a variety of programs. Last but not least the temperatures were recorded using the latest versions of AIDA64, HWiNFO and HWMonitor while the noise level tests are performed using a high precision ExTech HD600 Decibel Meter placed about 10-15cm above the CPU Cooler. Still although the same testing procedure applies to all units do take into consideration that unlike the official numbers which are measured in special noise isolated labs with just the fans here, we also have both the rest of the cooler and the rest of the system (although all system fans are turned off when recording noise levels).


* As of November 2024, the Core Ultra 9 285K is used for CPU cooler tests.


TEST RESULTS


temperatures


CONCLUSION


dark rock 6 dark rock pro 6 review b


    Both the Dark Rock 6 and Dark Rock Pro 6 reinforce why be quiet! remains one of the most consistent names in high‑end air cooling. Their strong thermal performance, excellent build quality, and the addition of the Performance/Quiet switch make them easy to tune for either silent operation or sustained boost workloads. The removable fan brackets and the fully black, stealth‑matte finish also give them a clean, premium look that many builders will prefer over flashier designs. That said, the Dark Rock Pro 6’s sheer size will limit compatibility in tighter cases, and both coolers can get quite audible when pushed in Performance mode. And while the all‑black aesthetic is a plus for some, the lack of RGB lighting may be a deal‑breaker for users building around a more expressive or color‑coordinated setup. Still, if your priority is reliable, efficient, and quietly capable air cooling, both models deliver exactly what they promise.


    At the time of my review the Dark Rock 6 & Dark Rock Pro 6 CPU coolers by be quiet! retail for 81.63Euros/97.56Euros inside the EU (Amazon.de) and so they aren’t for everyone. Overall, both the Dark Rock 6 and Dark Rock Pro 6 CPU coolers by be quiet! may not be perfect but they do deliver as advertised and for that they deserve the Golden Award.

PROS


- Build Quality
- Stealth Design (Black Coating)
- Excellent Cooling Efficiency
- Fan Speed Switch (Quiet / Performance)
- Dual Fan Solution (Dark Rock Pro 6)
- Adjustable Height Front Fan
- Noise Levels (Quiet Mode)


CONS


- Price (For Some)
- Size (Dark Rock Pro 6)
- Lack Of RGB Lighting (For Some)
- Current Availability (USA)


ENERMAX Revolution III S 1000W ATX 3.1 Power Supply Unit Review

INTRODUCTION


enermax revolution iii s 1000w review a


    As PC hardware continues to scale in complexity, the role of the power supply has expanded from a passive provider to an active guardian of system health. Clean rails, fast transient handling, and efficient conversion are now essential traits rather than luxuries. Builders looking for a PSU that can keep pace with today’s power‑hungry components will likely turn their attention to the Revolution III S 1000W by ENERMAX, a model crafted to meet these modern expectations.


   ENERMAX was founded in Taiwan in 1990 and is a world-renowned PC Power Supply manufacturer and maker of award-winning PC components such as chassis, coolers, fans, and peripherals, with recognition from consumers around the world. Our farsighted R&D capability is our key strength, and we stick to our spirit of “Technical Innovation” and “Quality First” to create products that unleash the full potential of the system for every PC enthusiast. For more information, please visit us at www.ENERMAX.com


    The Revolution III S line of power supply units currently includes only a 1000W output variant available in both black and white colors. This is an ATX 3.1 & PCIe 5.1 compliant and 80 PLUS Platinum certified (up to 92% efficiency) model that features a single 12V-2x6 power connector, four 6+2 pin PCIe power connectors, single +12V rail (83.3A) capable of delivering 99.9% of the units’ power output (999.6W) and has a total power output of no less than 1119W (peak should be up to 2240W for up to 100ms - once again however this is not something I can test). Other features and specifications include Full-Bridge & LLC Resonant Converter paired with synchronous rectification and DC‑to‑DC regulation (thus allowing the unit to sustain stable voltage output even under rapid load shifts), active PFC, smart semi-fanless mode for the 120mm fan (starts spinning after a specific load), and a full array of electrical protections including over-current (OCP), over-voltage (OVP), under-voltage (UVP), short-circuit (SCP), over-temperature (OTP), and over-power (OPP). Just like with their other premium Lines ENERMAX covers the Revolution III S 1000W with a very generous 13-year limited warranty.


SPECIFICATIONS AND FEATURES


PACKAGING AND CONTENTS


enermax revolution iii s 1000w review 1t

The Revolution III S is packed inside a brown and black box that has a drawing of the product at the front along with its output and main features.


The color selection is located on the left side of the box.


At the rear of the box ENERMAX has placed the features table, electrical table and the cables and connectors table.


Typically, the unit is placed between two pieces of foam.


Along with the Revolution III S 1000W and its power cord inside the box you'll find the modular cables, 4 cable ties, 4 mounting screws and the user manual.


THE REVOLUTION III S 1000W EXTERIOR


All of the cables are individually braided, including the 12V-2X6 600W connector.


Just like many other compact PSUs currently the Revolution III S 1000W measures only 150mm in width, 140mm in length and 86mm in height.


The 120mm FDB fan sits beneath a grille with the company logo at its center.


Printed on both sides is the company logo, model name and output.


The electrical table is located on a sticker placed on the belly of the enclosure.


All 10 modular ports at the front of the unit are tagged.


Moving at the rear we just find the power port and the on/off switch.


THE REVOLUTION III S 1000W INTERIOR


The 120mm fluid dynamic bearing fan is made by GLOBE FAN.


The OEM behind the Revolution III S 1000W is Shenzhen RSY (we keep seeing a lot platforms by them lately).


Primary capacitor is manufactured by the Japanese Rubycon and is rated for use up to 105 degrees Celsius.


Secondary capacitors are also manufactured by Rubycon and are also rated for use 105 degrees Celsius.


TEST BED


xeon x5660


TESTING METHODOLOGY


     Using a dedicated measurement instrument such as a Chroma or a SunMoon to test power supply units is without doubt the most ideal and accurate way (not to mention the fastest) to do that currently. However, it's certainly not the only way there is and so pretty much anyone can test a power supply unit just by using a test rig. Certainly, limitations do apply and so you can't really push a 1000W power supply to its limits if your system only uses 500W at peak loads and that's why over the years we saved certain hardware components for the purpose of building a dedicated PSU test rig. True it may not be as accurate as the above-mentioned solutions, but it comes really close and is in fact much closer to real world usage. So as always, we ran several games with maximum graphic options enabled at a resolution of 2560x1600 in order to stress every hardware component and increase the overall power demands of the system. The Passmark BurnIn Test was also used to overstress the components in an effort to provide the most accurate results possible. As a final test we also used the latest OCCT software and its dedicated PSU testing suite since it can really bring a power supply to its knees after inside a few minutes.


   Rail stability was checked/measured with the CPUID Hardware monitor and a Metex multimeter which also recorded the system load in idle and in load. As always try to remember that the power consumption numbers listed in the graph are the highest (Peak) ones recorded during the entire duration of the tests and not the average ones. Noise levels coming from the fan were recorded using the high precision HD600 ExTech Sound dBA Meter from the rear of the unit and at a range of no more than 5-10cm. Readings under load are recorded the exact moment we manually switch the fans of all graphics cards from full speed to almost zero, that way the fan of the power supply does not have enough time to slow its RPM and so by doing this we get very accurate noise level readings. Needless to say, in order to get 100% accurate readings, you need to have a noise isolated room for that exact purpose, something which is quite impossible unless you are working inside a real lab (some people use very small noise insulated boxes but due to their size both heat and noise exceed normal levels and so the results can't really be considered to be 100% accurate, nor realistic for that matter). Also do take into account that since all noise measurements take place from just 5-10cm away the final noise levels to reach your ears will be considerably less.


* After well over 10 years of testing PSUs the Intel Core i7-920 CPU of this rig failed and so we replaced it with a Xeon X5660 (we also swapped the GA-X58A-UD7 for the G1. Assassin).


TEST RESULTS


CONCLUSION


enermax revolution iii s 1000w review b


    The Enermax Revolution III S 1000W brings a few meaningful strengths to the table, starting with its 80 PLUS Platinum certification. The high efficiency rating helps reduce wasted energy and keeps thermal output under control, which is especially useful in systems that spend long hours under mixed workloads. Its rail stability is also generally very good, providing clean power during gaming, rendering, and everyday use. Add the full ATX 3.1 and PCIe 5.1 support, and the unit is well‑equipped for modern GPUs that demand fast transient response and native high‑power connectors. There are, however, a few areas where the platform shows its limits. Noise levels rise faster than expected once the fan curve reaches the upper end, making the PSU noticeably louder during full‑load stress testing or synthetic benchmarks. And while Shenzhen RSY isn’t considered a top‑tier OEM, it’s worth noting that they’ve been producing a growing number of platforms lately, showing clear signs of refinement and broader industry presence. Their designs still sit a step below the most established manufacturers, but the trajectory is upward rather than stagnant, which softens the concern for users who simply want a capable, modern unit rather than absolute flagship pedigree. Taken together, the Revolution III S 1000W by ENERMAX offers solid efficiency, modern standards, and generally stable performance, but its acoustic profile and mid‑tier platform heritage keep it from competing with the very best options in the high‑end PSU space.


    Retailing for around USD179 inside the USA and for 148.53Euros inside the EU (Amazon.de) the ENERMAX Revolution III S 1000W is priced just right. Overall the Revolution III S 1000W may not be the best model in the current lineup by ENERMAX but it delivers where it counts and for that it gets the Golden Award.

PROS


- Overall Quality (Japanese Capacitors)
- Very Good Rail Stability
- 80 PLUS Platinum Certified (Up To 92% Electrical Efficiency)
- Electrical Protections (OCP, OVP, UVP, SCP, OTP, OPP)
- 12V-2x6 Connector (600W)
- Smart Semi Fanless Mode
- Available In Black & White

- 13 Year Limited Warranty


CONS


- Noise Levels
- Current Availability (USA)
- Shenzhen RSY OEM (For Some)


EDIFIER HECATE G2000 PRO 2.0 Gaming Speakers Review

INTRODUCTION


edifier hecate g2000 pro review a


    In today’s RGB heavy setups, desktop speakers have become part of the overall visual identity rather than just an audio add‑on. The category has matured into compact near‑field systems that aim for cleaner mids, tighter bass, and a footprint that blends naturally into a desk layout. From there, RGB gaming speakers push the idea further, pairing synchronized lighting with a more energetic tuning, stronger low‑end, livelier upper mids, and the kind of plug‑and‑play USB or Bluetooth connectivity that suits hybrid work‑and‑play environments. It’s in this intersection of everyday clarity and gaming‑centric flair that the G2000 PRO by EDIFIER's HECATE Gaming brand positions itself, offering a compact 2.0 design that aims to look at home in a lit‑up setup while still sounding like a proper desktop speaker.


    HECATE, EDIFIER's professional gaming brand, was launched as "EDIFIER Gaming Product Line" in 2013 and operated as an independent brand in 2018. HECATE injects 25 years of EDIFIER's acoustic technology into gaming equipment, opening the door to the gaming world for gamers. Since its inception, HECATE has always maintained an almost obsessive pursuit of "performance redundancy", and has repeatedly subverted the industry's imagination with a very futuristic design style. We believe that every boundary between gaming and life has a reason to be reshaped!


    The HECATE Gaming G2000 PRO uses a 270° panoramic transparent acoustic enclosure that blends lighting and acoustics into a single visual element. At its core is a 3‑inch (≈76 mm) full‑range internal‑magnet driver paired with a digital amplifier, delivering 16W + 16W RMS and up to 32W peak output, with a rated 75Hz–20kHz frequency response for deeper bass and a wider soundstage than smaller 2.0 sets. The system supports virtual 7.1 surround sound through an onboard DSP chip and the HECATE Gaming Center software, enabling more precise sound localization and a cinematic sense of scale in games and movies. Lighting is handled by TempoFlow dynamic RGB technology, featuring 7 built‑in lighting modes and up to 20 LED strips with 100 full‑color beads per speaker, all customizable through software for synchronized, sound‑reactive effects. Connectivity is broad for a compact set, offering Bluetooth v5.4, USB‑C, USB‑A, and 3.5mm AUX, making it compatible with phones, tablets, PCs, TVs, Switch, PS4, and PS5.  Additional acoustic design touches include an inverted bass tube for more powerful low‑end, a 10° golden tilt angle to reduce reflections and aim sound directly at the listener, and dual neodymium iron‑boron magnets for improved clarity across the frequency range.


SPECIFICATIONS AND FEATURES


PACKAGING AND CONTENTS


edifier hecate g2000 pro review 1t

A large product picture, company logo, main features and compatible devices are all printed at the front.


The available colors and the specifications and bundle contents in 5 languages are on the left side.


On the right side we find a product drawing used to showcase the various controls again in 5 languages.


Another product picture is located at the rear of the box and just over the main features.


Packaging is typical with the speakers wrapped inside plastic bags and placed between two pieces of cardboard.


Along with the G2000 PRO speakers and their power adapter and cord inside the box you'll also find a 3.5mm cable, USB-C to USB-A cable, USB-A to USB-C adapter, sticker, safety instructions, Bluetooth information paper and the quick start guide.


THE G2000 PRO


The G2000 PRO measure 116mm in width, 160mm in height and 139mm in depth.


Both speakers feature 3‑inch (≈76 mm) full‑range drivers which deliver a frequency response of 75Hz-20kHz and up to 32W peak power each.


All available media buttons are located on top of the right speaker (left to right we have the on/off/input mode button, volume down/up buttons and the sound effects button (music, gaming, movie).


The transparent enclosures look great even when the speakers are turned off.


Turning the right speaker around we find a perforated area on top, bass reflex port on the lower end and the aux 3.5mm output/headphones port, USB-C port, DC in and the 3.5mm aux port.


Each speaker sits on two rubber feet.


The RGB LEDs not only look great but also stand out a lot more compared to other similar 2.0 speaker sets (short clip is available both on YouTube and TikTok).


GAMING CENTER


The G2000 PRO are equipped with a USB 7.1 virtual surround soundcard that uses the Xear audio processing driver.

edifier hecate g2000 pro software 1t

It's a old looking yet very simple to use software (since we've been seeing similar designs for like over a decade now) that lets you adjust the master volume, sound mode (speakers and headphones) and the RGB lighting.


You can of course also change the language of the software and check information such as the driver and firmware versions.


CONCLUSION


edifier hecate g2000 pro review b


    What defines the G2000 PRO by EDIFIER's HECATE gaming brand is how effortlessly it fits into a desk setup, small enough to disappear, yet lively enough with its RGB accents and USB‑powered clarity to feel like a genuine upgrade over basic 2.0 speakers. The generous input options make it adaptable, and the 7.1 USB virtual surround sound card gives it a cleaner, more confident presentation than its size suggests.  Its shortcomings, like the dated software and the inevitable vocal limitations compared to larger 2/3‑way models, are noticeable but not deal‑breaking. It’s a speaker that delivers charm and convenience in equal measure.


    With a current price tag set at USD169.99 inside the USA (Amazon.com) and for 166.72Euros inside the EU (Amazon.de) the G2000 PRO 2.0 gaming speakers by EDIFIER’s HECATE brand are priced just a tad higher than expected. At the end of the day however it all comes down to what you’re after and if that’s a pair of compact speakers that look great and perform better than expected (always for their size) then the EDIFIER HECATE G2000 PRO are certainly worth checking out.


PROS


- Build Quality
- Compact Size
- Overall Audio Reproduction
- RGB Lighting (7 modes)
- 3 Audio Modes (Music, Gaming & Movie)
- Connectivity (3.5mm Aux, 3.5mm Headphones Out, USB)
- Available Colors (Black, White & Pink)


CONS


- 1 Way Speakers
- Software Looks Outdated
- Price (For Some)


QIDI Max 4 Combo 3D Printer Review

INTRODUCTION


qidi max 4 combo review a


    Over the past decade, 3D printing has evolved from a niche prototyping tool into a cornerstone of modern manufacturing. What began as slow, single‑material experimentation has matured into a field defined by precision, speed, and versatility. Today’s 3D printers can handle multiple filaments, complex geometries, and even color transitions with remarkable accuracy, a testament to how far additive technology has come. Standing at the forefront of this evolution is the brand new QIDI Max 4 Combo, a system built to merge industrial capability with desktop accessibility.


    Our story formed in 2014, QIDI Tech began with a small team of engineers with a big vision: we wanted to make 3D printing accessible to everyone. Crazy? A little bit. With our journey have consistently focused on more than just producing machinery; it's about enabling creators of all kinds to bring their ideas to life. Every day, we're doing more than just constructing printers. We are establishing an environment where seasoned designers and adventurous individuals can join forces, work together, realize ideas, and develop. QIDI Tech 3D printers are created to be intuitive and efficient, after all, delivering a hassle free printing process for all users from the beginning should be the top priority. Our extensive manufacturing plant and advanced research and development center embody our commitment to creativity, excellence, and teamwork.


    The Max 4 Combo by QIDI is built around a rigid CoreXY architecture designed for high‑speed stability, pairing FOC closed‑loop stepper motors with high‑hardness linear guides and 12mm steel shafts to maintain precision even at accelerations up to 30000mm/s² and print speeds reaching 800mm/s. Its 370°C high‑temperature hotend and 65°C actively heated chamber open the door to engineering materials like PA, PC, ASA, and carbon‑fiber composites, while the hands‑free load‑cell leveling system ensures consistent first‑layer accuracy across the large 390x390x340mm build volume. Cooling is handled through a multi‑stage system with PWM‑controlled fans and RPM feedback, and the Polar Cooler extruder cooler adds a dedicated high‑flow channel for long, heat‑intensive prints. With AI camera monitoring, input shaping, power‑loss recovery, and compatibility with the QIDI BOX for automated multi‑color printing, the Max 4 Combo positions itself as a high‑temp, high‑speed platform ready for demanding workflows.


SPECIFICATIONS AND FEATURES


PACKAGING AND CONTENTS


qidi max 4 combo review 1t

The Max 4 Combo arrived inside a very large box that just has the QIDI logo and the package measurements and size 57Kg.


Aside the handles we also see several warnings on both sides.


QIDI has used numerous pieces of foam, air bubble and compressed paper to secure the printer.


Almost the entire bundle is placed inside the printer.


Aside the Max 4 3D printer and the combo multi-color device inside the box you'll also find a 2-piece filament spool holder, 7mm spanner, power cable, RJ45 ethernet cable, USB 2.0 flash drive, scraper, two screwdrivers (flat head and Torq), replacement nozzle cutter, 5 Alen keys, 20g PLA rapido package, replacement fuse, pneumatic head, and the quick start guide in numerous languages.


THE QIDI MAX 4 COMBO


The 49.5kg heavy MAX 4 is a large 3D printer measuring 612mm in height, 558mm in depth and 578mm in width.


The 5-inch 800x480p touch screen located on the top left of the printer also features a tilt mechanism allowing the end user to slightly change its angle.


Unlike with previous models the door handle now comes pre-attached.


A USB-A port is located on top of the printer.


Turning the Max 4 3D printer around we see an intake fan, filament spool holder mount, RJ45 port, signal cable ports, and the filament exit.


Taking a look inside we see the Dual-Sided textured PEI plate (390x390x340mm print size), LED activity bar, AI 1080p camera, filament residue cleaner, air-purifier compartment and the heater.


The direct drive extruder features a built-in run out sensor and a cold air tube intake (to cool the extruder and filament) and as you can all see is very easy to take apart.


QIDI bundles their box with its power cable, multi-color spool hub, five PTFE tubes, two signal cables, two PTFE tube buckles and the quick start guide.


The QIDI box measures 357mm in width, 300mm in depth and 234mm in height.


Inside the QIDI box has 4 compartments and a 65°C drying heater.


The Polar Cooler arrived in its own box secured by several pieces of foam.


Contained inside the box is the Polar Cooler, power adapter with power cord, air intake pipe, and the user manual.


In terms of size the Polar Cooler weighs 2.5kg and measures 234mm in length, 92mm in width and 214mm in height.


The Polar Cooler has a cooling fan on the left side, two tubes going out from the front and a signal cable that expands/retracts on top.


ASSEMBLY


Even though the Max 4 Combo is a 3D printer bundle people will get for the multi-color box showing how the spool holder looks when mounted is a must.


To use the QIDI box you will need to attach the multi-color spool hub in the holder mount as seen above.


Then you will have to connect the spool hub to the QIDI box via 4 PTFE tubes as seen above.


This is how the Max 4 Combo looks with the PTFE and power cables attached (signal cables still not attached).


With the QIDI box and Polar Cooler attached to the Max 4 everything is ready to go.


DISPLAY MENUS


qidi max 4 combo menus 1t

Once you turn on the QIDI Max 4 Combo you will need to choose the language, region and follow instructions on how to remove the QIDI box and unlock the bed and print head.


Next stop is to allow the unit to perform a self-check and calibration.


Once the self-check and calibration procedure is complete, you'll get the above screen.


Turning on the QIDI box adds that graphic in the initial screen which typically shows the status of the printer.


From the 2nd tab you can move the extruder and the printing bed, adjust temperatures for the extruder, chamber and bed and adjust the cooling system.


Inside the filament tab you can select the brand and type of filament and temperatures and choose between the spooler and the QIDI box.


The settings tab includes the Wi-Fi, calibration, storage and general settings.


Finally, once you start printing you can choose what filament you want used.


TESTING METHODOLOGY


    Once again to test this printer by QIDI I used their latest print software (QIDI Studio v2.5.2.5.0) by manually entering the same settings I’ve used to date with all FDM printers (quality of 0.16mm, 20% infill density and cubic infill pattern).


    Nothing else has changed of course so again I’ll be using 2 different sized models (downloaded from Cults3D / member Eastman) to record completion time at 100% speed. Second thing to test are noise levels and so once again I’ll be using my ExTech HD600 decibel meter placed roughly 30cm away to record the maximum noise coming from the 3D printer while printing. As for the 3rd test with the help of an UPS and two power meters I decided to also record not only the lowest and highest but also the average instant power consumption of the 3D printer in my hands.


qidi max 4 combo review 39t

   I was a bit surprised to see that the Max 4 Combo produced the smoothest 3D prints I’ve encountered, at least to date and with the same settings across all printers (even prior to using the Polar Cooler).


Just like with the K2 Pro and other multi-color printers as you can see from the above picture, filament waste is still a thing also with the Max 4 Combo. I did get slightly less waste when printing the same two models as with other printers but hardly worth mentioning (still like 9 times more than the filament required to print them).


TEST RESULTS


time


CONCLUSION


qidi max 4 combo review b


    The QIDI MAX 4 COMBO lands as a genuinely capable high‑speed, high‑volume machine that delivers on its core promises. Its strengths are easy to appreciate, fast and smooth motion, consistently clean print surface quality, a large 390x390x340mm build area, and the practical benefits of the Polar Cooler, which keeps extrusion stable during long or high‑temperature jobs. Add the multi‑color capability via the QIDI box (although filament waste when printing multi-color models is still a thing) and the actively heated enclosure, and the Max 4 Combo becomes a flexible platform that handles everything from PLA to engineering‑grade materials with confidence. Still, it isn’t without friction points. Software bugs in relation to the slicer and firmware may occasionally interrupt an otherwise polished workflow (also the reason as to why I couldn’t use a timelapse for this review), the bottom handles aren’t the most ergonomic for moving a machine of this size and weight, and the need for separate power connections for both the box unit and the Polar Cooler adds a bit of cable clutter. Taken together, the Max 4 Combo stands out as a fast, spacious, and well‑engineered printer whose minor quirks are outweighed by its performance and versatility.


    Right now, the Max 4 Combo by QIDI retails for USD1199 inside the USA (us.qidi3d.com – plus a 5% discount when you subscribe to their newsletter) and for 1199Euros inside the EU (eu.qidi3d.com – 5% discount also available) and so it’s priced more or less the same as its direct competition (keep in mind that the Polar Cooler is sold extra for USD179.10/179.10Euros). Cost aside whether it’s speed, print quality, print size, enclosure features and multi-color prints the QIDI Max 4 Combo delivers as advertised and for that it gets the Golden Award.

PROS


- Good Build Quality
- Very Fast (Up To 800ms Speed / 30000ms Acceleration)
- Box Addon (4 Filaments Per Box / Up To 16 Filaments)
- Print Quality (Smoothest Output To Date)
- Large Heated & Flexible Dual Sided PEI Print Plate (390x390x340mm)
- Temperature Controlled Chamber (65°C)
- Polar Cooler Addon (Extra)
- High Speed Dual Gear Direct Drive Extruder
- Automatic Leveling
- 1080P AI Camera
- 5” Inch HD Color Touch Screen Display
- Air Purifier
- RFID Sensor
- 2.4GHz/5GHz WiFi, RJ45 Ethernet & USB Port


CONS


- Nozzle Cleaning Noise (For Some)
- Number Of Tubes & Wires (For Some)
- Software Glitches (Currently)
- Size & Weight (For Some)


Dune HD Q43R1 QLED TV Review

INTRODUCTION


dune hd whale tv q43r1 review a


    Smart TVs have become the default living‑room hub, not because they’re flashy (well, some are), but because they quietly centralize everything from streaming and casting to local playback and even light gaming. The real shift is that a TV is no longer just a panel, it’s an operating system with an opinion. Some platforms lean into aggressive recommendations, others into simplicity, others into codec support. That’s why the hardware underneath matters more than ever, and why the jump from basic LED sets to QLED panels has become the sweet spot for people who want better picture quality without paying OLED prices. QLED displays sit in that middle ground, quantum‑dot layers for richer color volume, higher peak brightness for daylight viewing, and generally better uniformity than budget LCDs. They’re not chasing the perfect black of OLED, they’re chasing consistency, punch, and longevity. For most households, that’s exactly the trade‑off that makes sense. And when you pair QLED hardware with a lightweight OS instead of a bloated one, you get a device that feels responsive instead of sluggish after a year. Dune HD recently released their very own TV line with the 43-inch Q43R1 model arriving in the lab a couple of months ago.


    Dune HD is recognized as a global leader in high-performance digital media players. We received more awards than any other company in the category for delivering the very best in networked digital media devices. Dune HD products support the widest number of digital media formats in use today.


    The Dune HD Whale TV Q43R1 is built around a 43‑inch 4K QLED VA panel that uses quantum dots to push richer color and stronger contrast (4000:1) than standard LCD sets, with typical and peak brightness levels set at 300 and 320 nits respectively. It supports HDR10, HDR10+ and HLG, running on a 60 Hz panel with ALLM to keep gaming input responsive. Audio comes from two 10W speakers with Dolby Atmos decoding, and as for connectivity the Q43R1 is equipped with eARC, SPDIF, 3.5mm jack, dual‑band Wi‑Fi 2x2 (b/g/n/ac), Bluetooth v5.0, RJ45 Ethernet, 2xHDMI 2.0 ports, 2xUSB 2.0, and a full DVB‑T/T2/S/S2/C tuner with PVR and TimeShift. Inside, a quad‑core ARM A55, Mali‑G31 MP2 GPU, 2GB RAM, and 16GB storage keep the system responsive. The real separation point is the software stack, a 3‑layer system built around Android 13, Whale OS, and the full Dune HD media center, which effectively turns the TV into a dedicated playback appliance. This isn’t the usual “supports MP4 and MKV” checkbox, the Dune HD media center handles an unusually broad range of video containers (MKV, TS, PS, M2TS, VOB, AVI, MOV, MP4, ISO, VIDEO_TS, BDMV), audio formats from everyday MP3/AAC to enthusiast‑grade FLAC, ALAC, APE, WavPack, and even SACD ISO/DSD stereo, plus playlist formats like M3U and PLS. Subtitle support is equally deep, covering SRT, SUB, SSA/ASS, VobSub, PGS, and online subtitle fetching when needed. On the codec side, it decodes AV1, H.264, H.265, VP9 Profile 2, AVS2, VC‑1, MPEG‑4, MPEG‑2, and more with full passthrough for Dolby Atmos, TrueHD, DTS‑HD MA, DTS:X, depending on the output path (SPDIF, ARC, or eARC). The media center also brings the familiar Dune features, SMB/NFS network browsing, ISO playback with full menus, advanced subtitle controls, and the “My Collection” system that automatically organizes local libraries into a proper catalog. So, let's see just how good the 1st step in the TV arena by Dune HD really is.


SPECIFICATIONS AND FEATURES


PACKAGING AND CONTENTS


Typically, the Q43R1 is shipped inside a long box that has a product picture on both sides along with the company logo, size, panel type, main features and media player specifications.


The product specifications and bundle contents are printed on the left side.


Along with the Q43R1 inside the box Dune HD has also placed 2 plastic feet, plastic bag with the screws required to mount the feet, remote control and the quick start guide.


THE Q43R1


Without the legs mounted the 6.2Kg heavy Q43R1 measures 957mm in length, 558mm in height and 68mm in thickness.


Even though the entire enclosure is made by plastic the lower bezel resembles brushed aluminum.


There are 4 mounting locations at the base of the TV (only the far right and far left are for the legs) along with the power LED.


With the legs attached the TV measures 957mm in length, 616mm in height and 214mm in thickness.


Dune HD has equipped the Q43R1 with standard legs which are still better than what I've seen by some of the competition lately.


The top and side bezels are roughly 1.5mm in thickness.


Turning the TV around we see that it has VESA 200 mounts.


The power button is placed on the rear right of the TV.


We also find all available ports here, the RJ45 LAN, optical SPDIF, AV in RCA, satellite and Antenna ones on the lower end and 3 HDMI ports (1xeARC), 2 USB 2.0 ports, 3.5mm headphone port and what seems like an extra card slot on the left side.


The bundled remote looks nice and has almost every button you’d need from both a TV and a media player.


MENUS


The main tab is more or less what we see with most smart TVs nowadays and so from here you can switch to WhaleTV, Netflix, YouTube, Prime Video, Disney and of course to the Dune HD media center.


If you press the settings button on the remote control, you'll get a left side quick choice panel (the 1st time I turned the TV on the OS really took its time to load and change pages/tabs).


Once you click on all settings, you'll see the entire tab which again doesn't have that many things to play around with.


dune hd whale tv q43r1 menus 8t

The Dune HD Media Center is a cut down version compared to what we've seen with the Dune HD media players through the years. Still, it doesn't need to have much, this is a budget-friendly option at the end of the day.


dunehdttclt

For any of you wondering since the TCL 43C655 is the closest TV to the Q43R1 (both 43-inch models and both QLED models - the TCL however belongs to a higher tier) above I have a picture of both TVs reproducing a very high bitrate MKV media file. The Q43R1 clearly produces better contrast and sharpness (top) whereas the TCL produces a brighter and smoother picture (bottom).


TESTING METHODOLOGY


    Each TV goes through a repeatable measurement cycle designed to capture both calibrated image performance and real‑world energy behavior. I begin with the SpyderPro by Datacolor, using it to establish a neutral baseline and then measure gamut coverage, peak and sustained brightness, and color accuracy across SDR and HDR modes under controlled lighting (TVs are connected to a laptop via HDMI v2.1). I also test screen uniformity across multiple brightness levels to identify luminance variance, color tinting, and edge‑to‑center deviations.
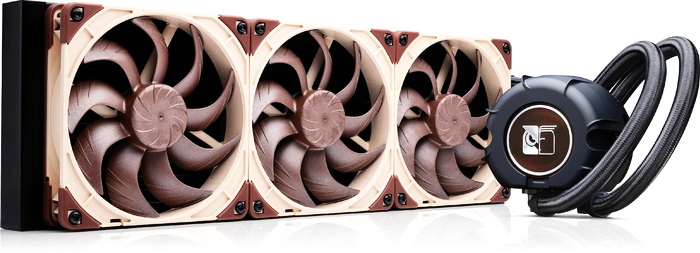

    Once the panel is dialed in, I shift to power analysis by connecting the TV is to the AVM FRITZ!Smart Energy 210, which logs average consumption, peak draw, and standby behavior during mixed‑content playback, stress tests, and long‑form viewing. To keep these readings clean, the entire setup runs through an APC BR1500G‑GR Back‑UPS Pro, ensuring stable voltage and eliminating grid fluctuations that could skew results. This workflow produces a consistent, comparable dataset across panels, letting me evaluate each TV’s actual performance rather than the quirks of the room or the power line.


TEST RESULTS - GAMUT / BRIGHTNESS


gamut

brightness


TEST RESULTS – SCREEN UNIFORMITY / RATING / POWER CONSUMPTION


CONCLUSION


dune hd whale tv q43r1 review b


    For a somewhat compact, low‑cost QLED, the Q43R1 by Dune HD delivers more than expected. The QLED VA panel delivers genuinely good picture quality for the price something which is backed by my SpyderPro measurements (stable color uniformity, respectable luminance consistency, and gamut coverage that sits comfortably in the “better than expected” bracket for a low cost QLED – take my Samsung QN65S95D results in the brightness chart with a grain of salt, still working on getting the maximum number reported by others). Pair that with the Dune HD media center, which remains one of the most capable local‑playback ecosystems available on any TV, and you get a device that handles formats and bitrates most mainstream platforms won’t even attempt. The value proposition is strong but not flawless. The absence of USB 3.0 port means that extremely high‑bitrate files can occasionally stutter (mostly during initial load), not because the decoder struggles, but because the port simply can’t feed data fast enough. The built‑in speakers are serviceable but flat, the remote’s directional pad has a tendency to mis‑register center presses as arrow inputs, and availability especially in the USA is limited enough that finding one can feel like a small quest. Still, if you can source it, the Dune HD Q43R1 offers a combination of picture quality, codec support, and price that’s hard to match.

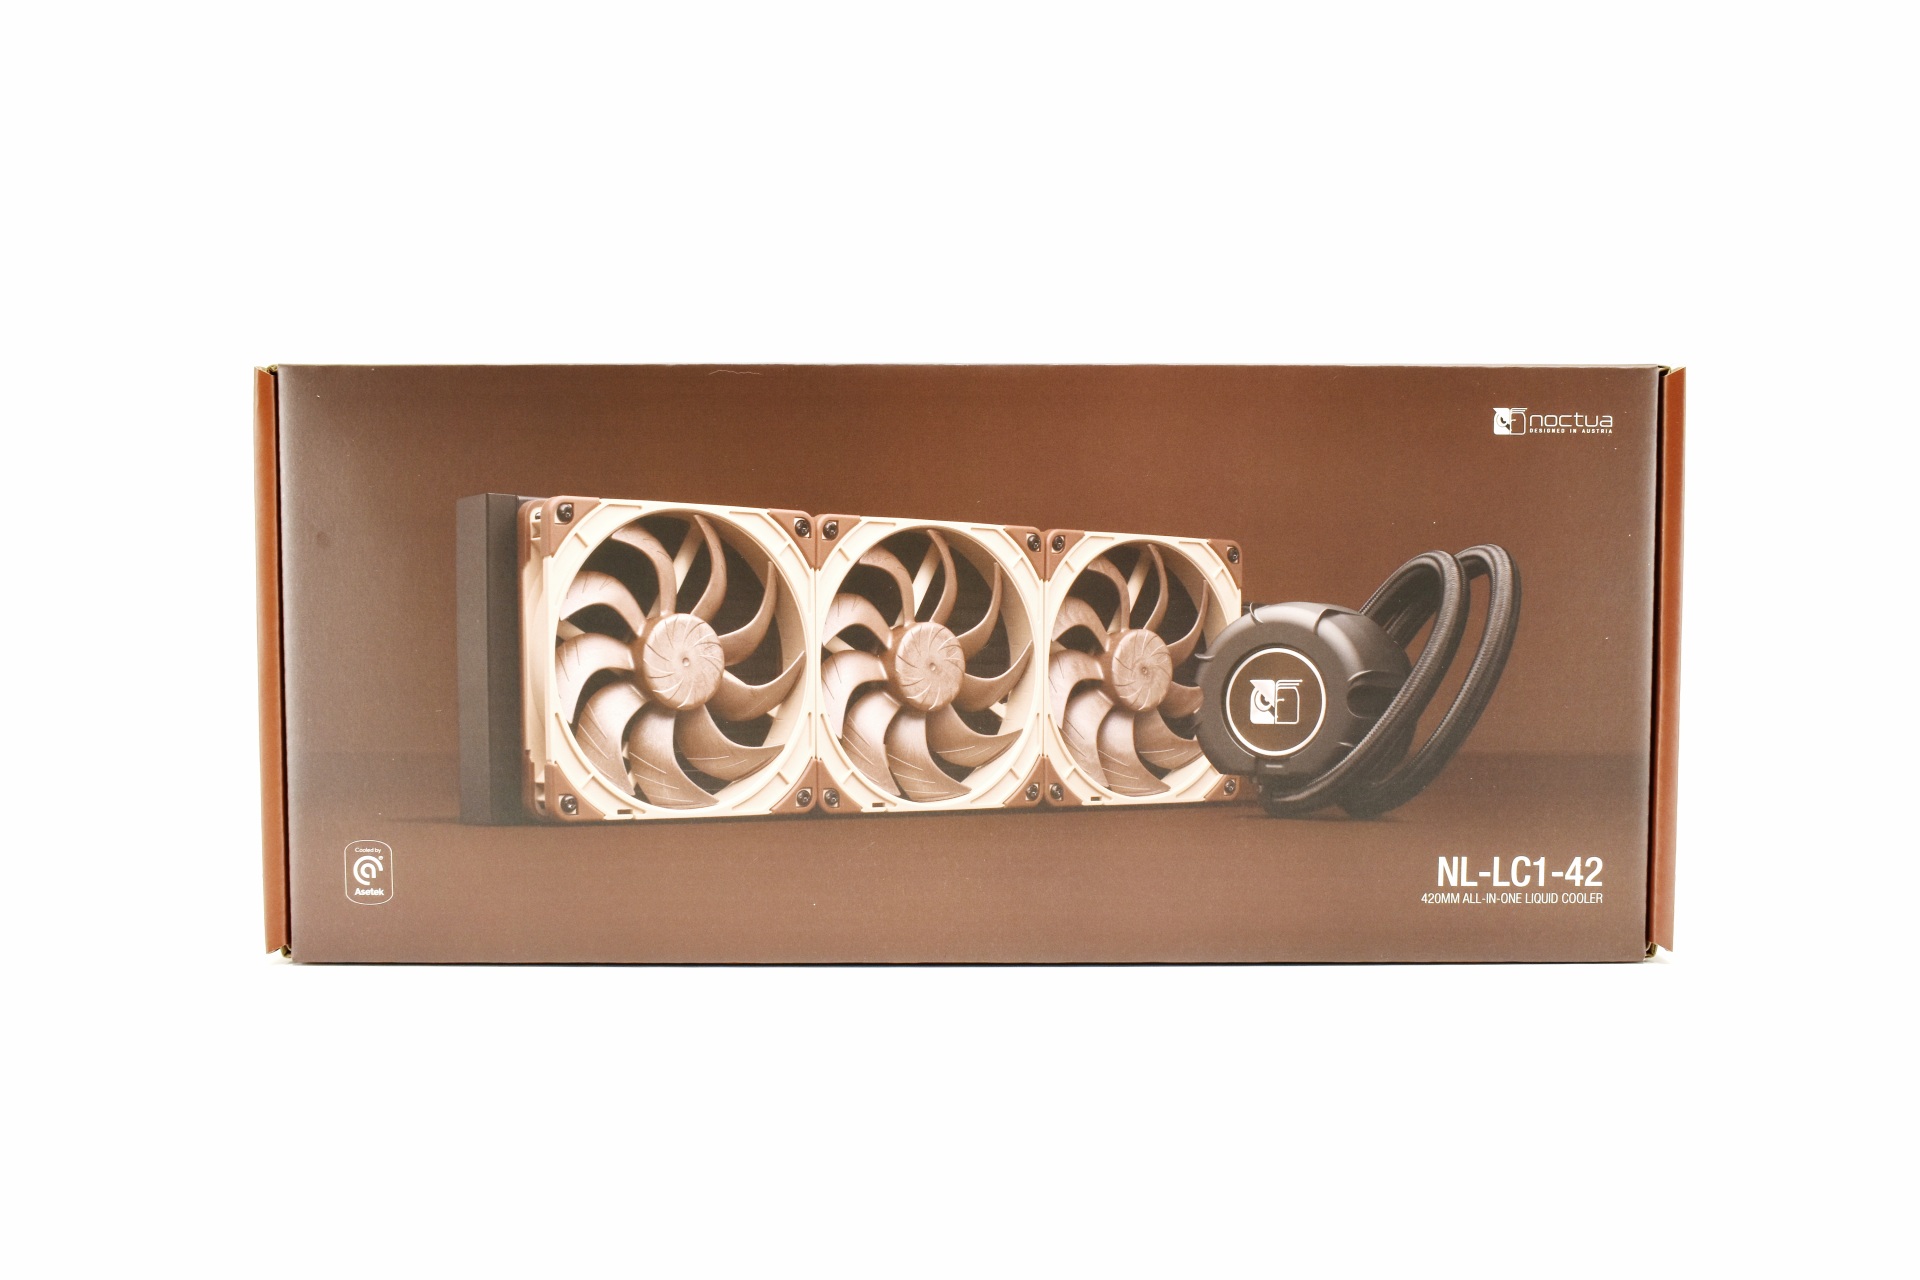
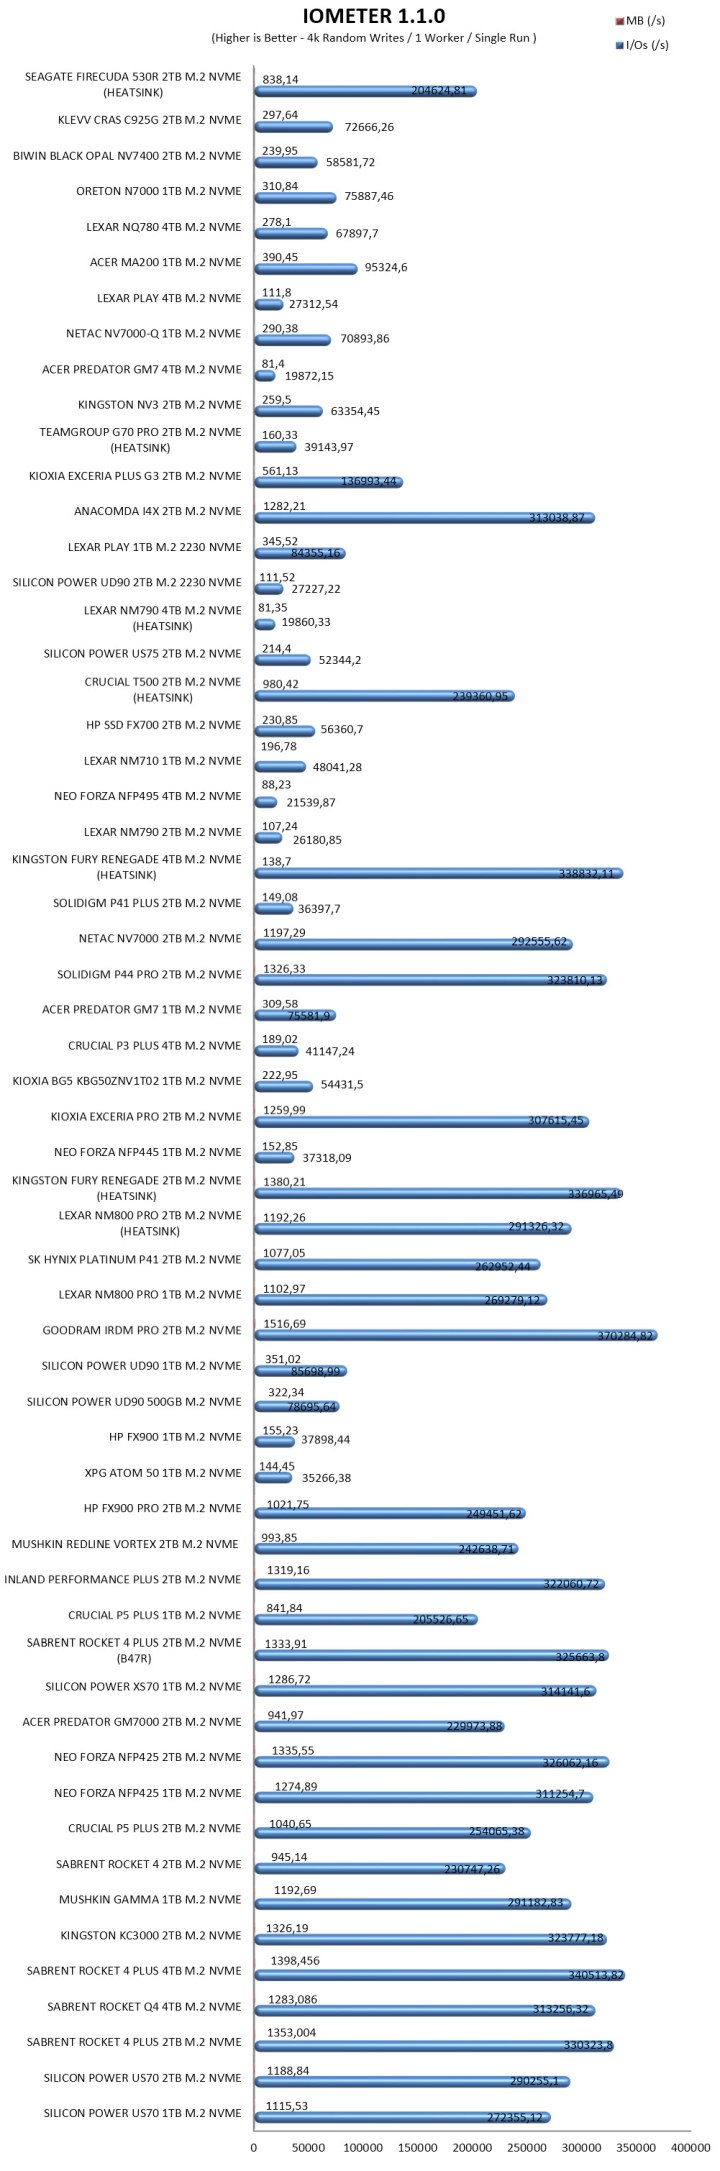
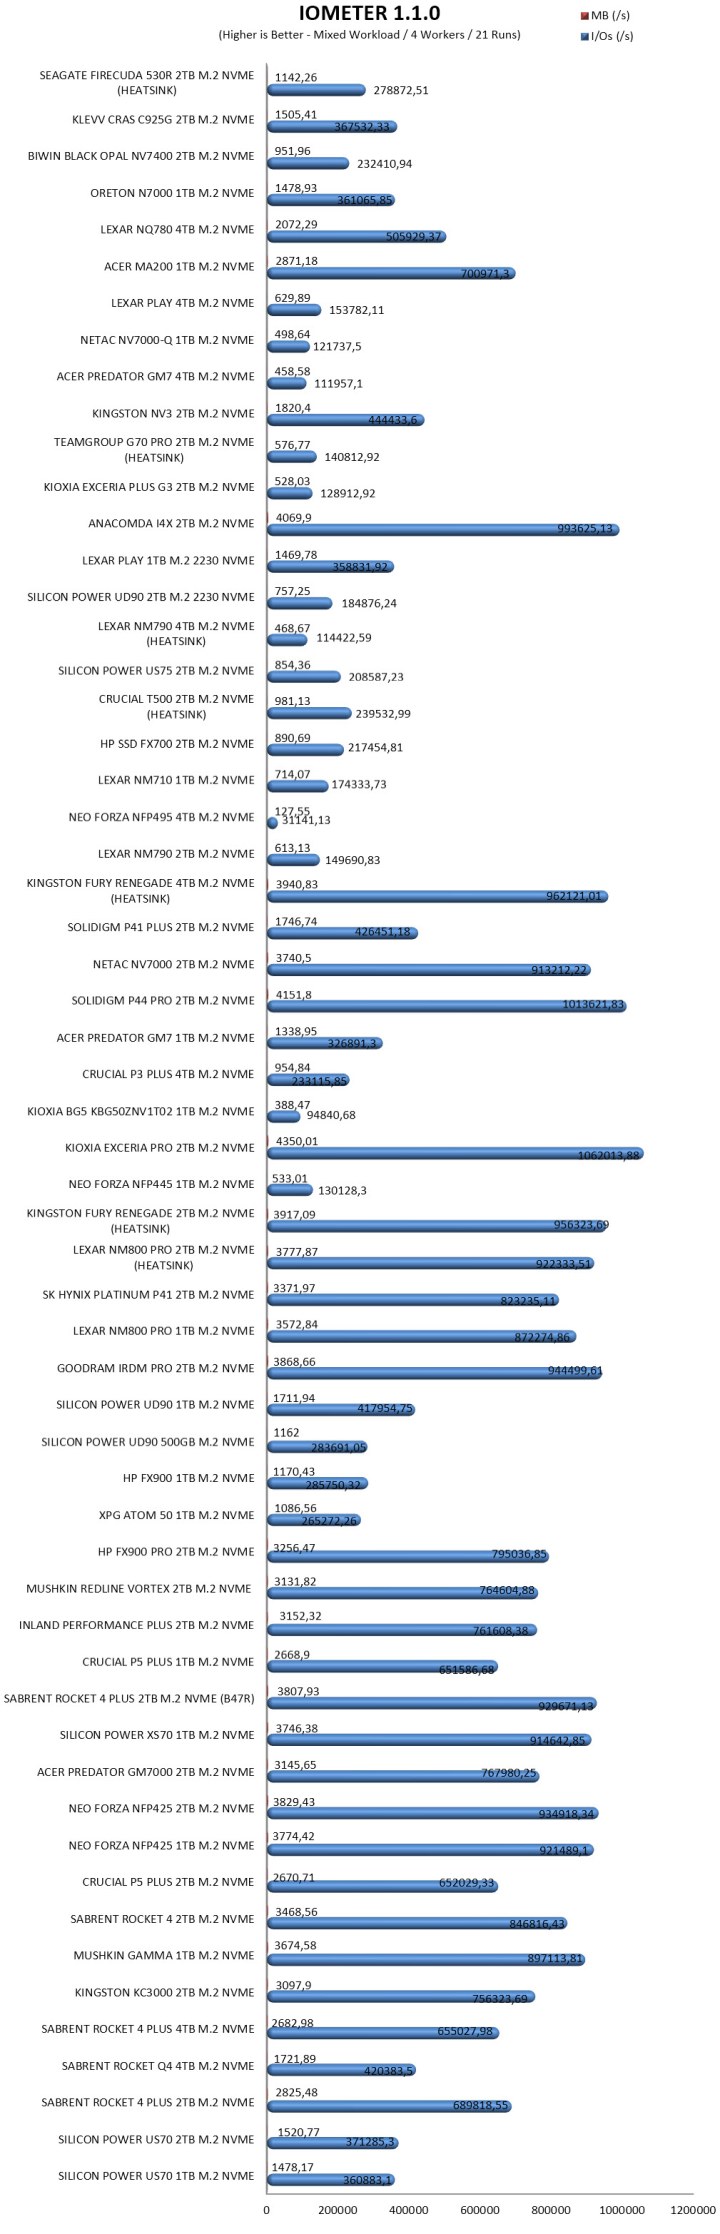
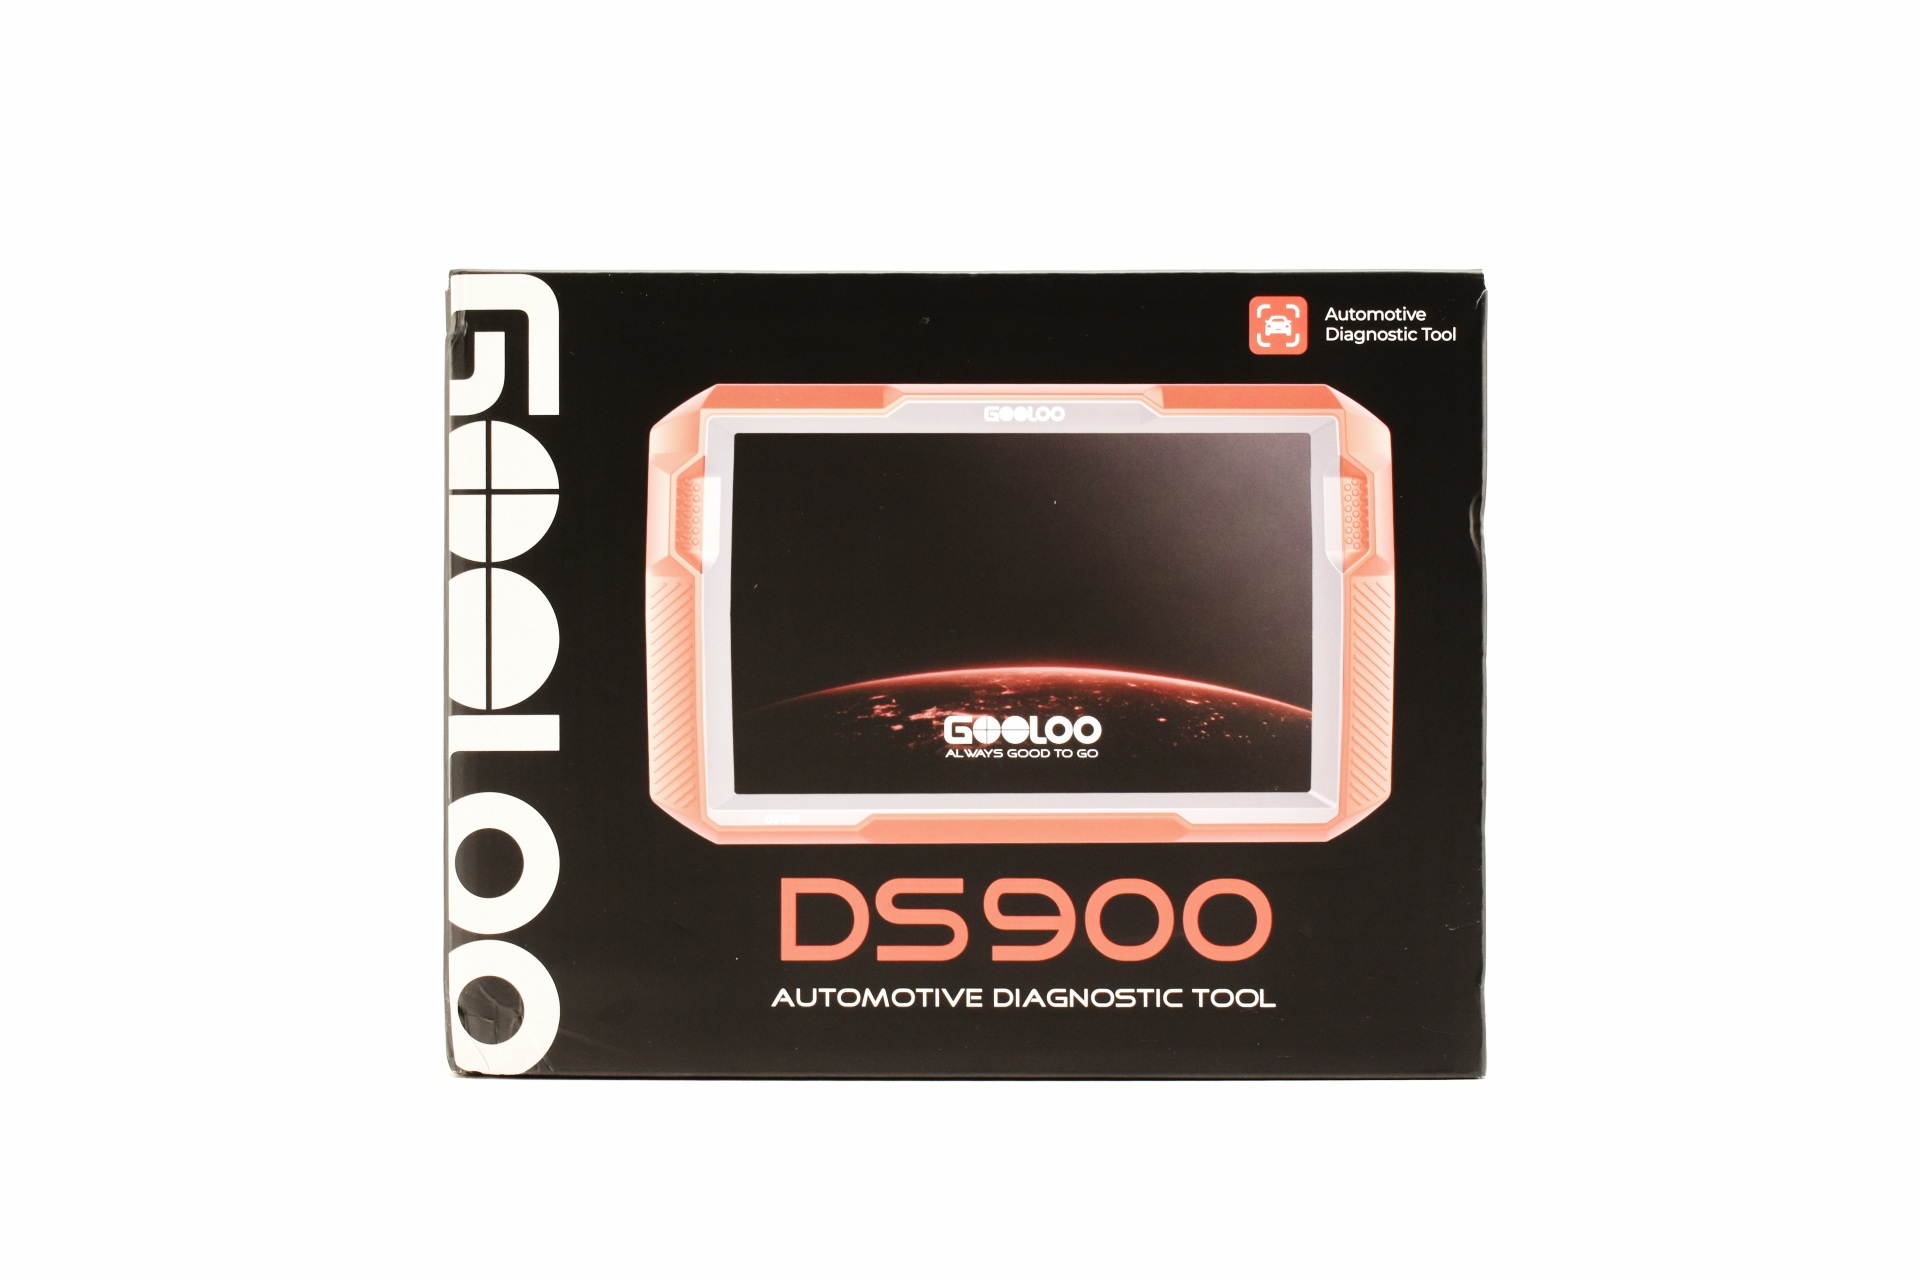
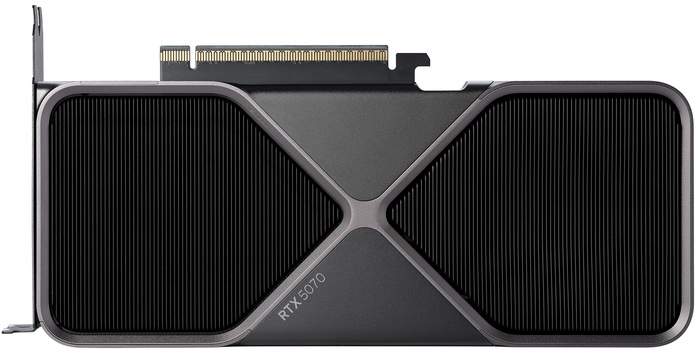
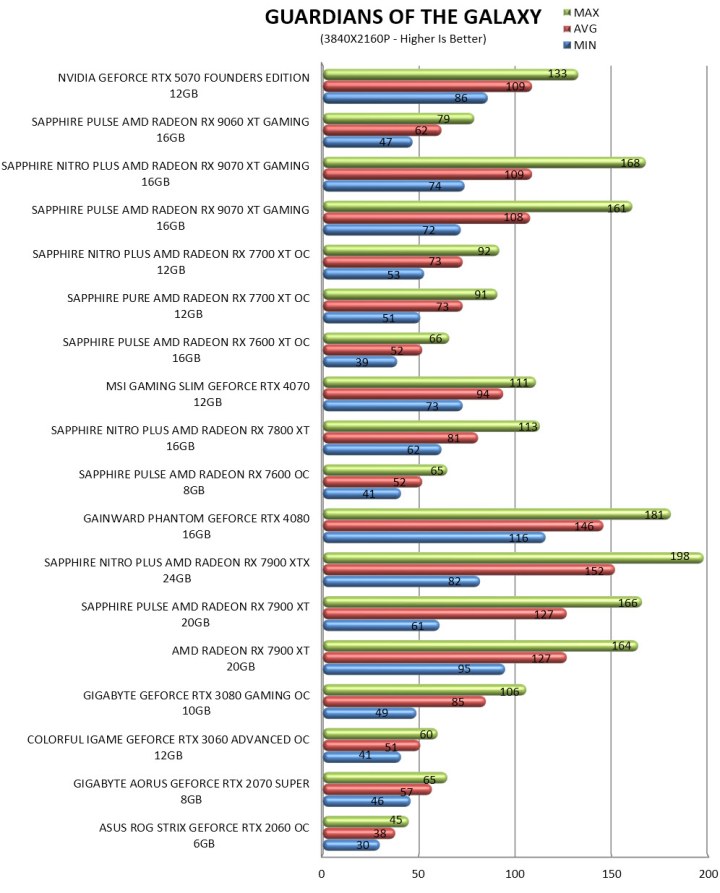

    Again, availability is the most important drawback of the Q43R1 by Dune HD since your best bet currently if you’re living in the USA is their official website (dune-hd.com – which has zero availability at this time) and if you’re living in the EU, their local online store (dune-shop.eu – with a price tag currently set at 299Euros). Honestly, I am somewhat conflicted when it comes to the Q43R1. On one hand Dune HD could had released something really unique (although I guess that at 43-inches it wouldn’t make much sense for that) but on the other hand it’s an affordable model that performs well and comes ready with their signature media center. Yes, it’s far from perfect but due to its overall performance I do suggest checking it out, it might just be what you’ve been looking for.


PROS


- Picture Quality
- Android, Whale OS & Dune HD Media Center
- Streaming Service Support
- Audio & Video Format Support
- Codec Support
- Low Power Consumption
- Price (For Some)


CONS


- Current Availability
- No USB 3.0 Port
- Audio Quality (Speakers)


❌